|
WARNING: The information on this page is for reference and historical purposes only. Do not attempt to perform these kind of repairs yourself.
|
|
|
|
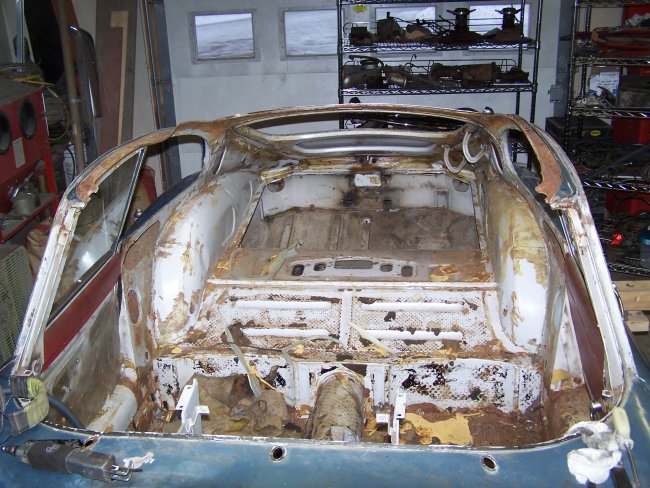
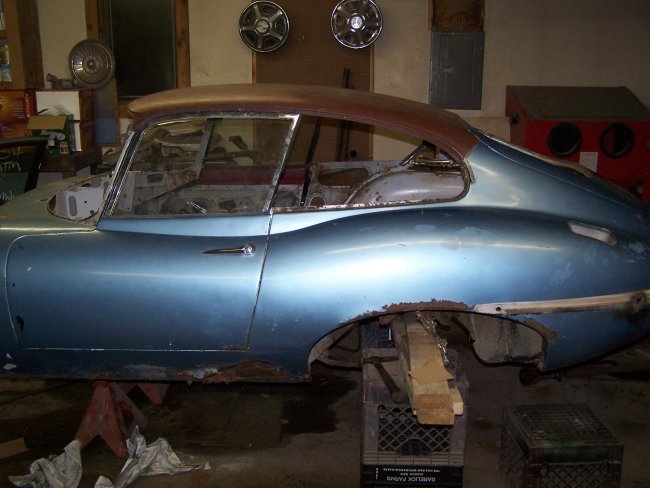
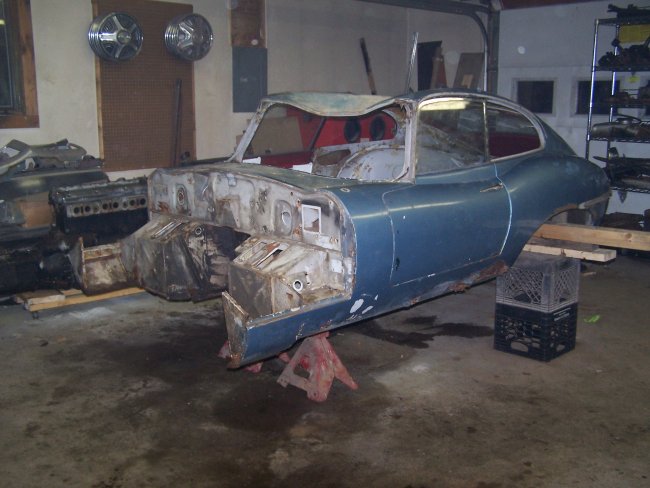
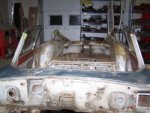
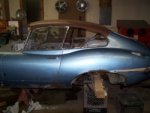
Here is the tub all stripped down except for the doors and the rear hatch. The doors and rear hatch need
to be installed so that the gaps can be properly maintained with the new roof clip. The side window weatherstrip
channel, which is rivetted in place, was removed and set aside. It is needed during the roof clip alignment stage.
|
|
|
|
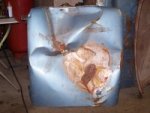
I started with cutting out the front center support and most of the roof skin. I don't have a hammer big enough to straighten that dent out !
|
|
 
|
|
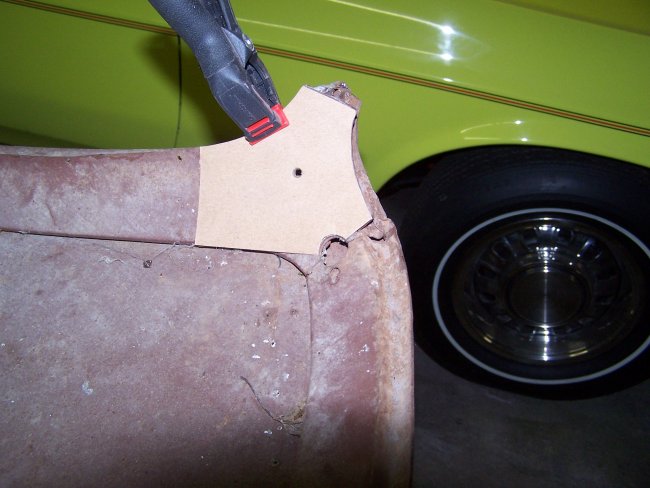
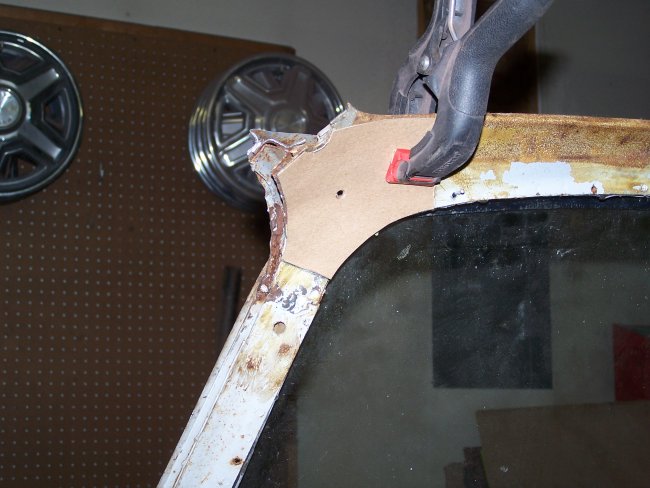
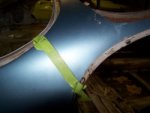
Now came the real fun. I started by making a template of the roof clip at right windshield post and trimmed the clip even with
the template. I then aligned the template to the original windshield post and cut the top in the same location as the roof clip.
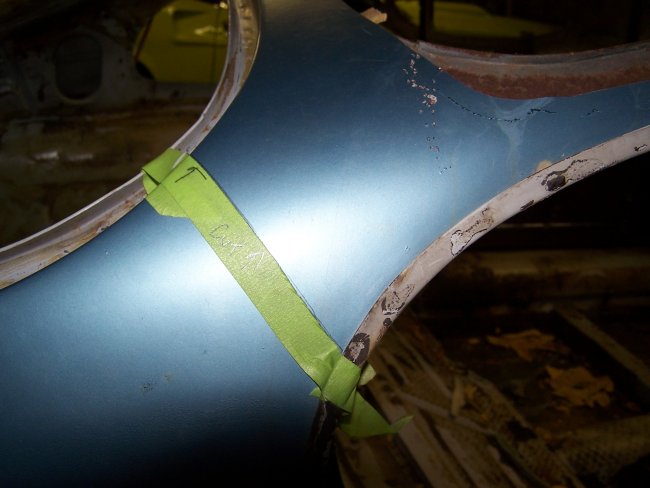
The process was repeated for the other windshield post and the rear roof pillars. Please note that the templates were fitted to the
clip and to the shell several times prior to making any cuts to the shell. In the third picture you can see the tape that I used as
a reference for my cut lines. The last picture was taken after the final cutting. Note: The shell was well supported so that it did not flex when the roof was cut off.
|
|

|
|
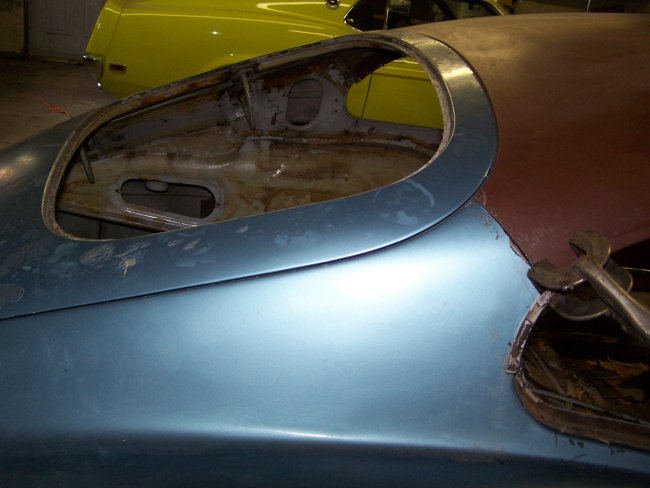
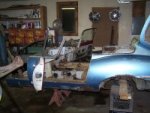
The doors and rear hatch were opened to trial fit the new roof. Maybe I should have made it a roadster, hmmmm
The second picture shows the roof just resting place. I had to do some trimming on the inner part of the windshield pillars, besides that it fit OK.
Once the roof received some fine adjustments it was then clamped in place. Gaps were checked against the doors, rear hatch and windshield.
The side window weatherstrip channel, which were removed earlier, where temporarily installed to ensure proper fit.
|
|
 
|
|
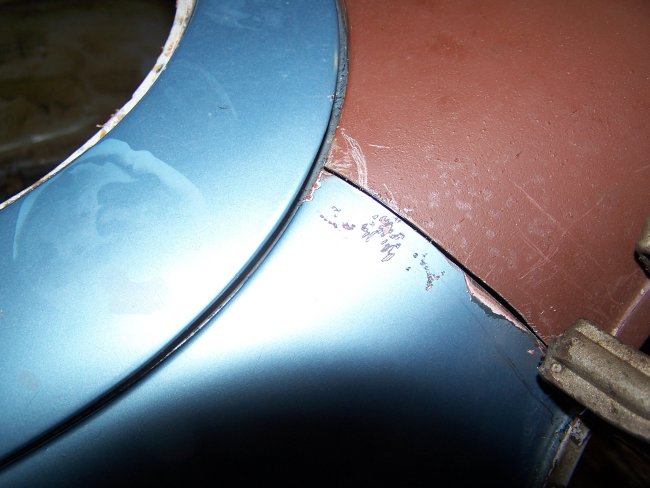
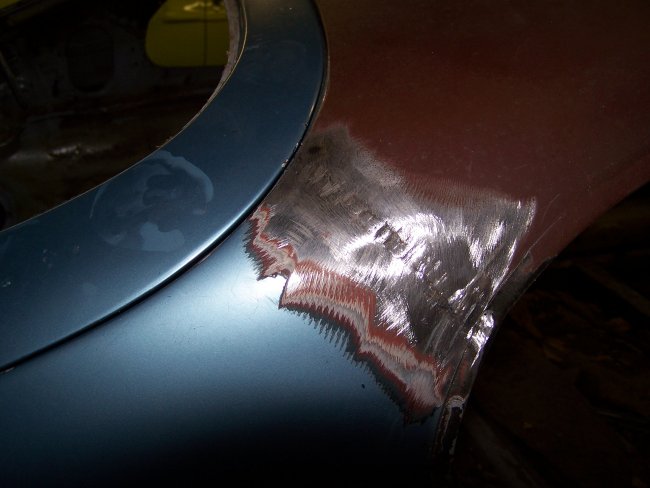
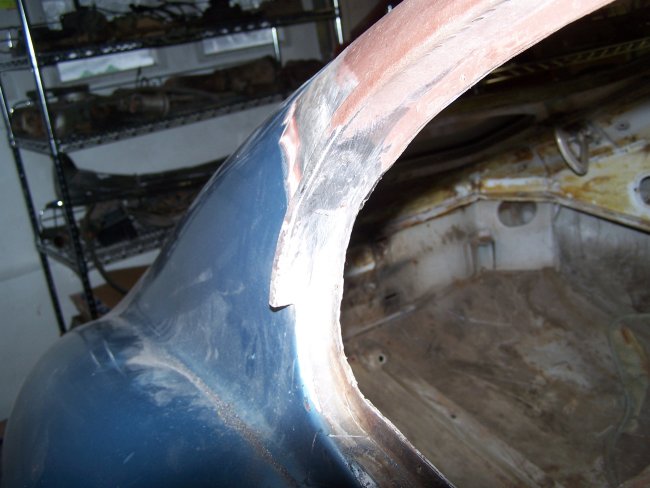
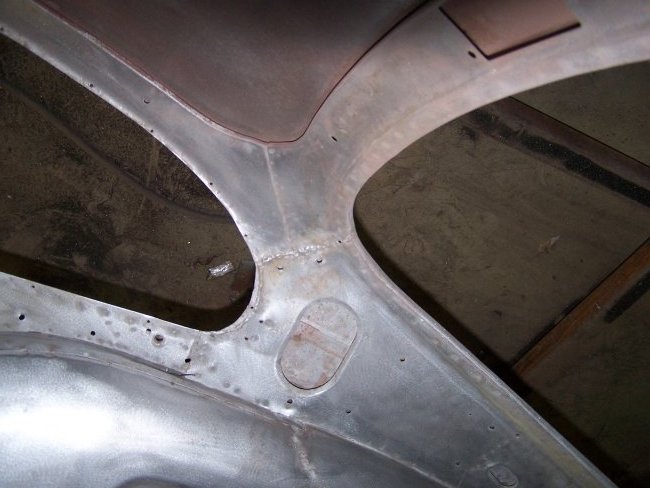
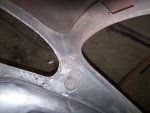
The next series of photos show a close-up of the right rear post at various stages of repair. You can't ask for gaps better then that illustrated in the first picture !
The roof was butt-welded in place. To prevent warping the gap was tack welded in 1 inch increments. A tack weld was then applied in-between each of the previous
welds. And then the remaining gaps were welded in 3-4 successive tack welds per gap. Note: Air was used to cool the weld in-between each tack weld. Finally the welds
were ground almost flush and will be lead-loaded at a future date. The inside was welded straight across with one continuous weld. This is identical to the way
the factory did it. In fact I internationally cut the roof right at the factory weld so the finished product would look factory correct.
|
|
|
WARNING: The information on this page is for reference and historical purposes only. Do not attempt to perform these kind of repairs yourself.
|
|