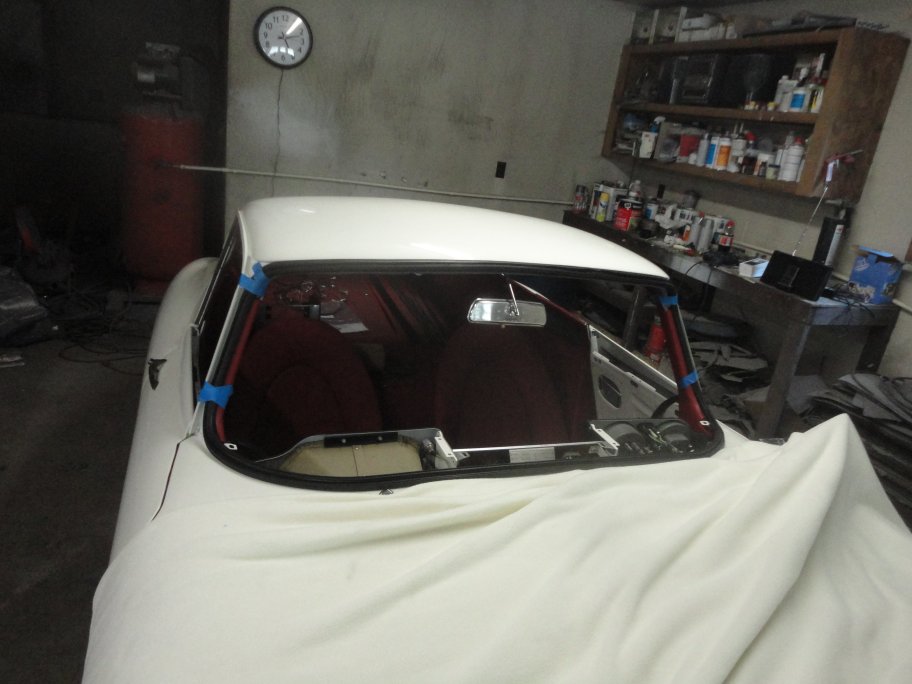
 89) Once the interior is installed the glass needs to go in as soon as possible in order to keep the interior as clean and new smelling as possible.
The windshield is said to be one of the most difficult things to install on an E-Type. For some time I agreed with that belief. At least
the weather seal went on easy......
89) Once the interior is installed the glass needs to go in as soon as possible in order to keep the interior as clean and new smelling as possible.
The windshield is said to be one of the most difficult things to install on an E-Type. For some time I agreed with that belief. At least
the weather seal went on easy...... |
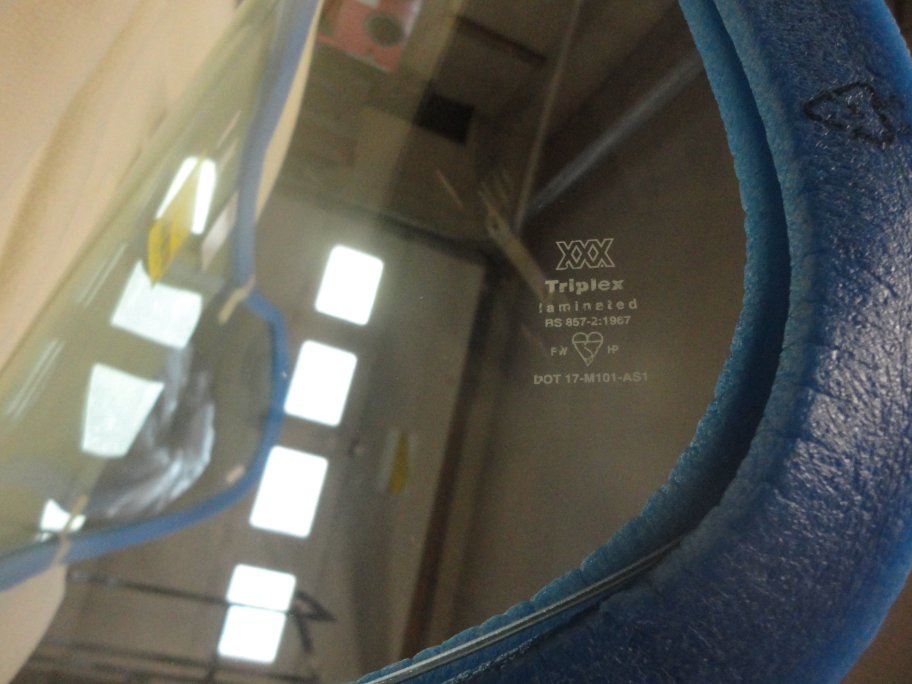 90) I did a lot of research on the forums and found that people had a hard time with installing windshields. Some people claimed that they had to keep
exchanging glass until they found one that fit. It seemed that the highly priced Triplex windshield was the least riskiest of my choices.
So, I purchased a new Triplex windshield from SNG Barratt for $570. It was the last one they had in stock and they had to ship it from the UK.
90) I did a lot of research on the forums and found that people had a hard time with installing windshields. Some people claimed that they had to keep
exchanging glass until they found one that fit. It seemed that the highly priced Triplex windshield was the least riskiest of my choices.
So, I purchased a new Triplex windshield from SNG Barratt for $570. It was the last one they had in stock and they had to ship it from the UK. |
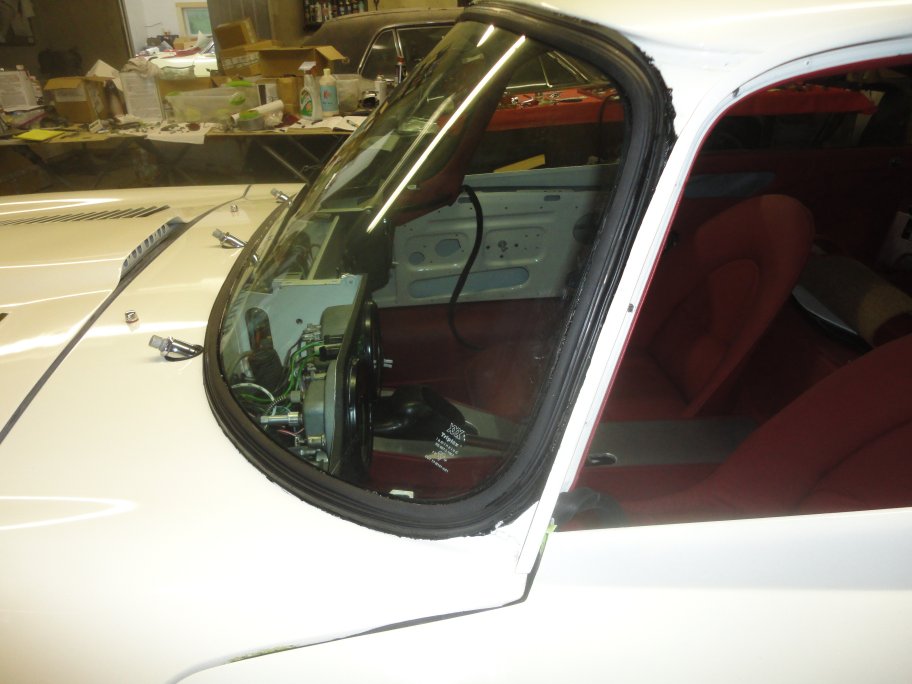 91) I had a very difficult time installing the windshield. I set it in the seal 5 different times and scratched the paint on my car. I kept finding that the
windshield would not set right at the top and I kept getting big gaps on the sides. Returning to the forums I only read horror stories. Except for the one
statement from Dan Mooney from Classic Jaguar, who claimed that they never had problems installing Triplex windhshields (due to the windhshield being shaped wrong).
91) I had a very difficult time installing the windshield. I set it in the seal 5 different times and scratched the paint on my car. I kept finding that the
windshield would not set right at the top and I kept getting big gaps on the sides. Returning to the forums I only read horror stories. Except for the one
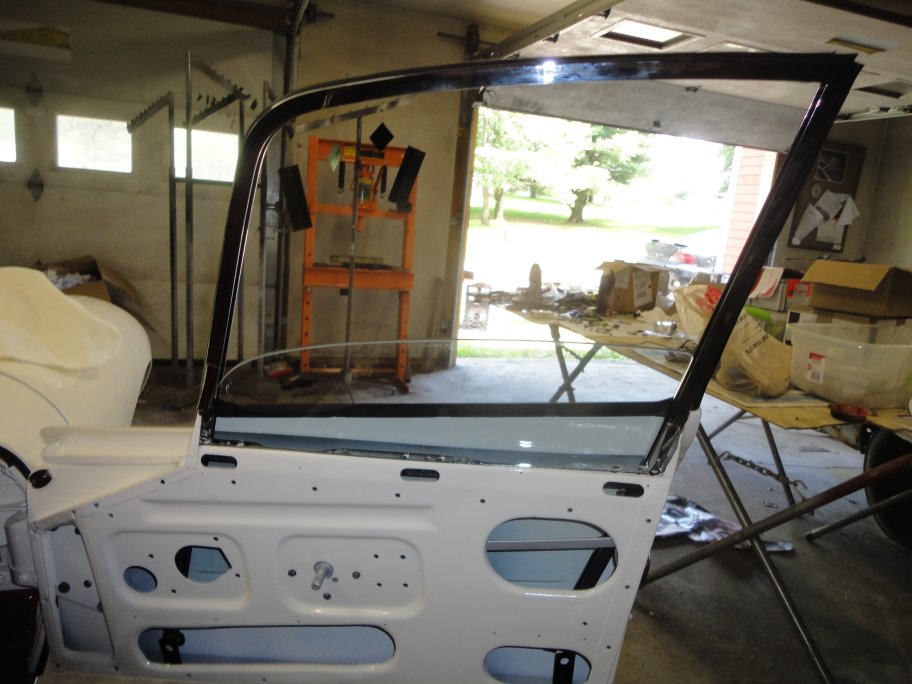
statement from Dan Mooney from Classic Jaguar, who claimed that they never had problems installing Triplex windhshields (due to the windhshield being shaped wrong). Allowing this to stew for a day, I went back and measured my windshield opening. It was perfect. At least I didn't install the roof clip wrong.... So I tried to intall the glass again. It didn't fit again.Grrrr. After a few days of mulling over my situation a thought occured to me while driving to work, that perhaps the upper windshield trim was preventing the windshield from setting in properly. So that night I unscrewed the review mirror and sunvisor brackets (the trim panel couldn't be fully removed since the ends are tucked underneath the cantrails). The windshield dropper right in place !! A near perfect fit. So the windshield trim was the problem all along. I looked in the service manuals and the windshield trim was never mentioned. So if you are reading this and you are having trouble installing your windshield, guess what youshould try??? With the windshield properly installed I filled the glass channel and the outer perimeter of the windshield seal with 3M Urethane Window Weld. Once cured I cleaned off the excess and install the rear view mirror and sunvisor brackets. |
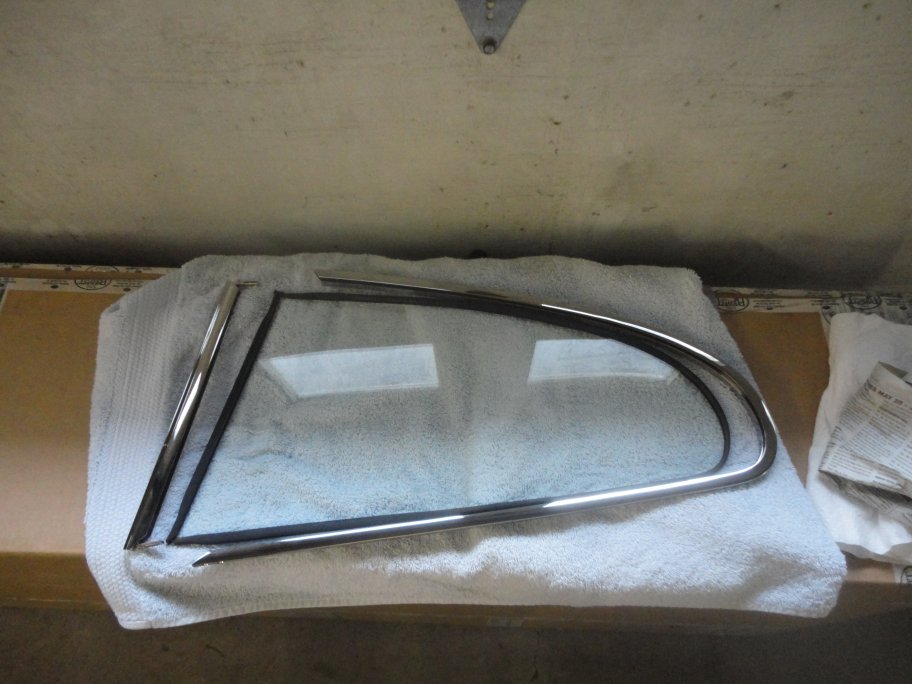
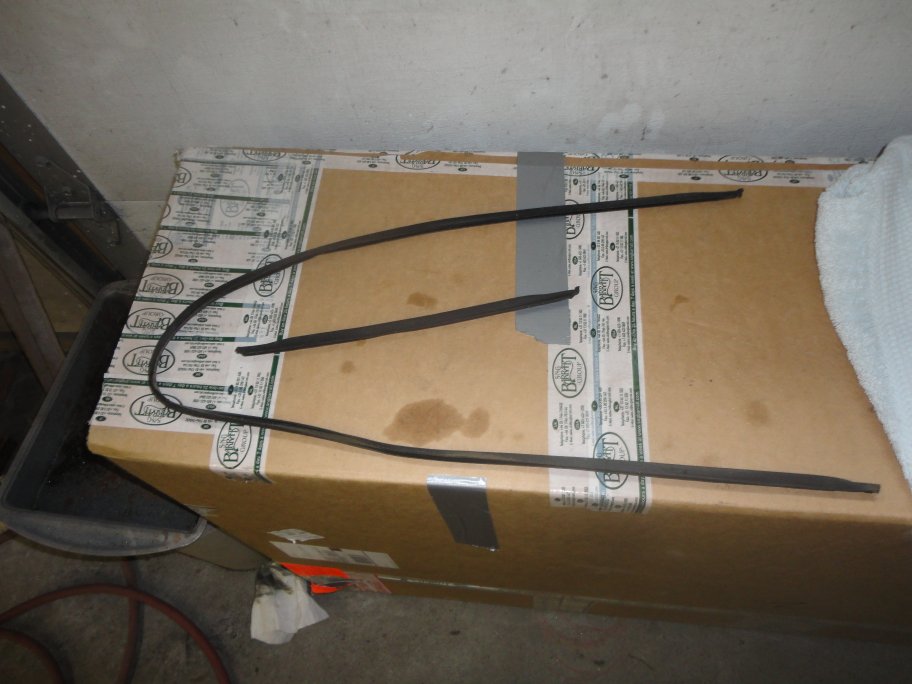 92) The quarter window glass goes in much easier. But first in my case the frames were rechromed and the windows needed to be assembled. The window rubbers are shown in this picture.
If they did not survive the taredown, new ones can be easily acquired at any auto glass shop.
92) The quarter window glass goes in much easier. But first in my case the frames were rechromed and the windows needed to be assembled. The window rubbers are shown in this picture.
If they did not survive the taredown, new ones can be easily acquired at any auto glass shop. |
 93) The seal is wrapped around the glass and then the frames are installed. I used a generous amount of wax&grease remover to get everything to pull together. A rubber mallet was used to
tap it all together.
93) The seal is wrapped around the glass and then the frames are installed. I used a generous amount of wax&grease remover to get everything to pull together. A rubber mallet was used to
tap it all together.Beware, too much force and the glass will explode into a thousand pieces. |
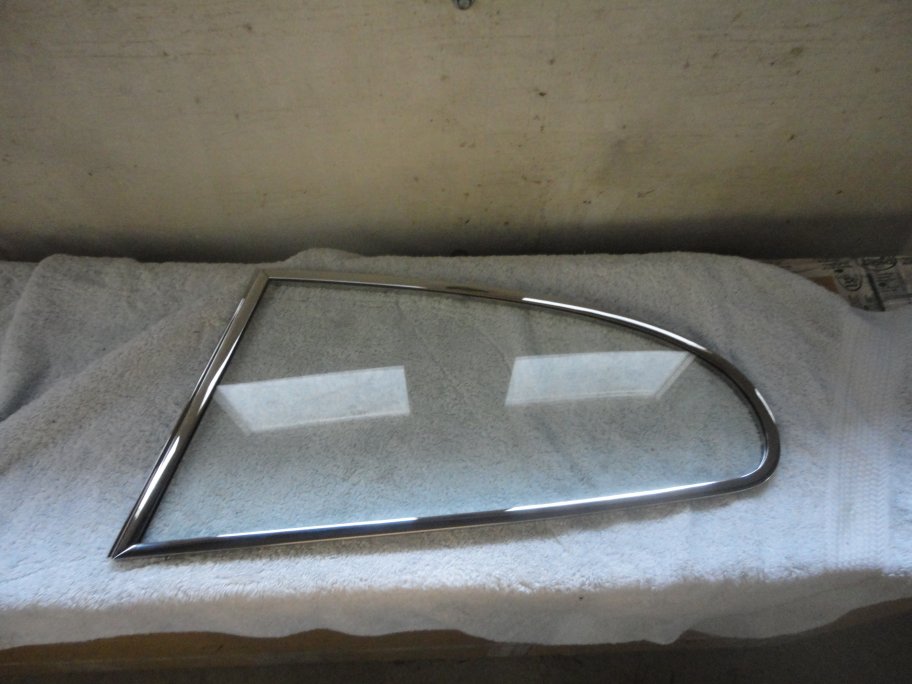 94) Here is a fully assembled quarter window. I will not kid you. It took a lot of force to put them back together.
 |
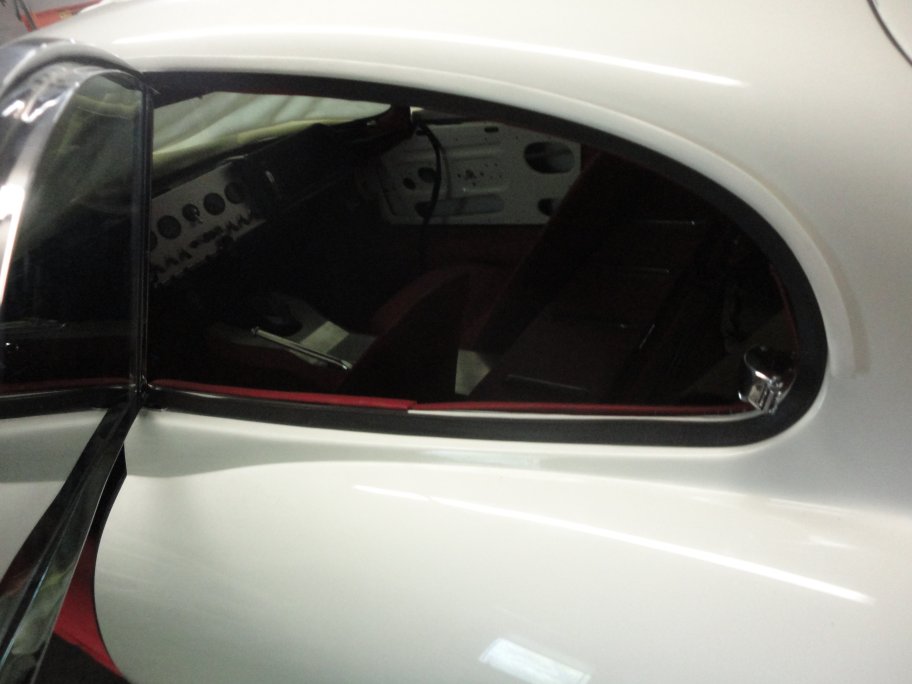
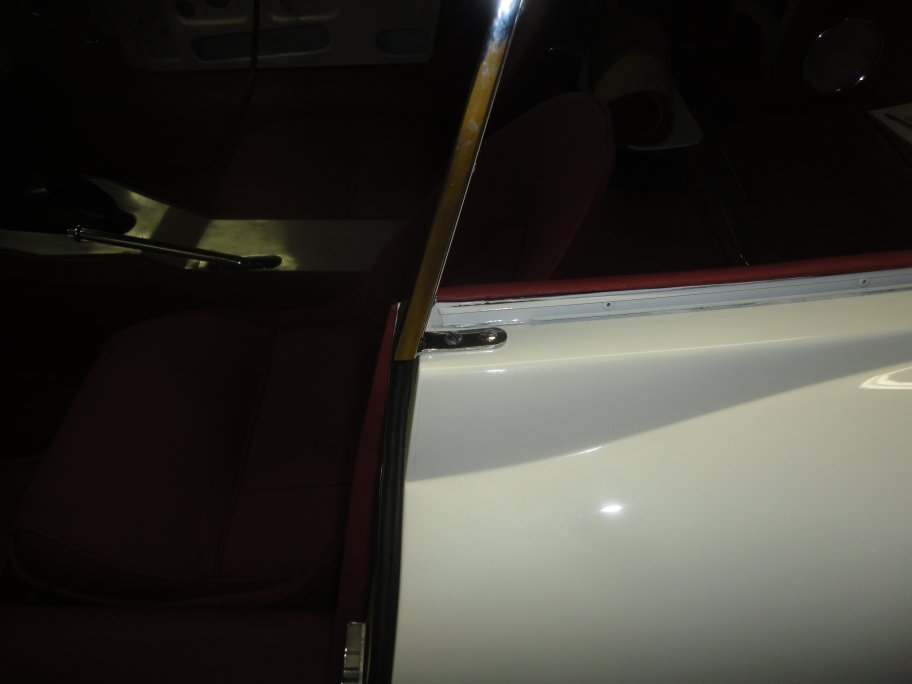 95) The quarter windows are attached to chrome posts that screw to the window opening. The bottom may or may not be required to be shimmed.
 |
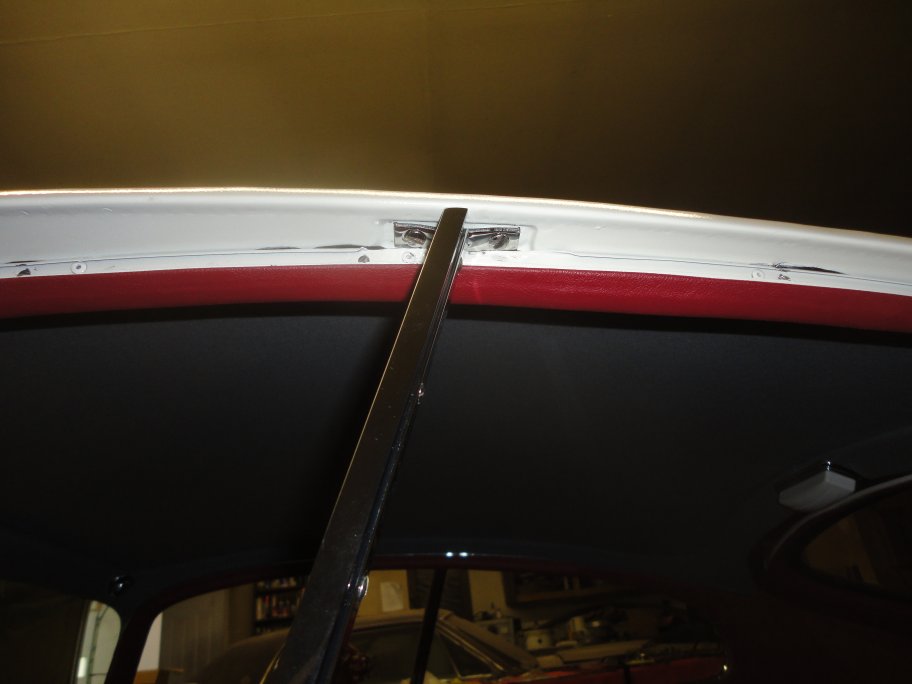 96) The top is screwed into a pocket in the roofrail. All of the screws (top and bottom) must be left a little loose until the glass is installed and
lined up.
96) The top is screwed into a pocket in the roofrail. All of the screws (top and bottom) must be left a little loose until the glass is installed and
lined up. |
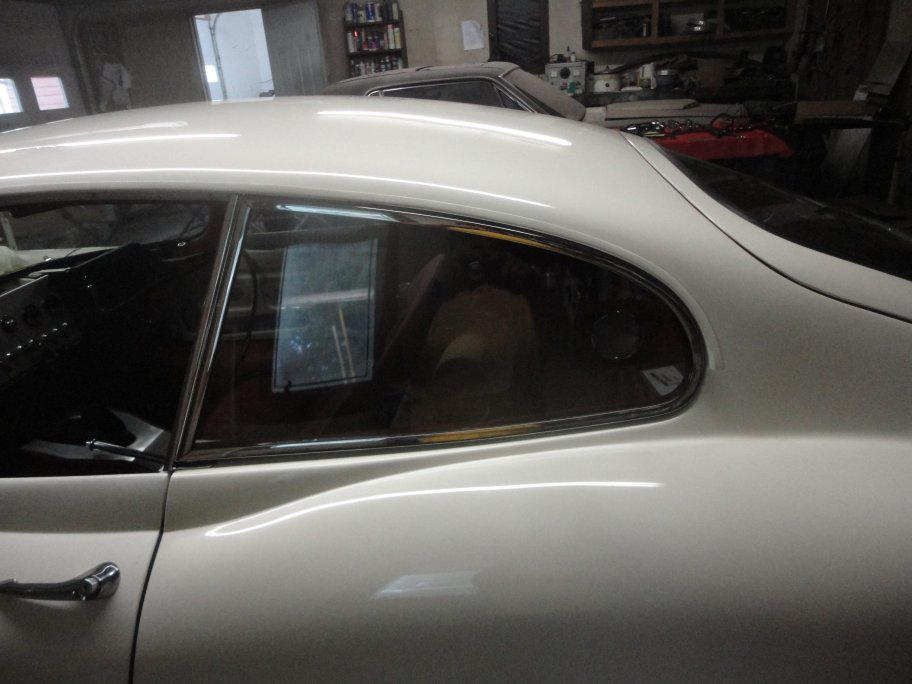 97) The glass should have an even gap all the way around.
 |
 99) With the glass aligned and the screws tighten, the weather seal can be installed and trimmed. The weathstrip is inserted in a channel that goes all the way
around the window. A bead of weathstrip adhesive may be used if you are worried that it won't stay.
99) With the glass aligned and the screws tighten, the weather seal can be installed and trimmed. The weathstrip is inserted in a channel that goes all the way
around the window. A bead of weathstrip adhesive may be used if you are worried that it won't stay. |
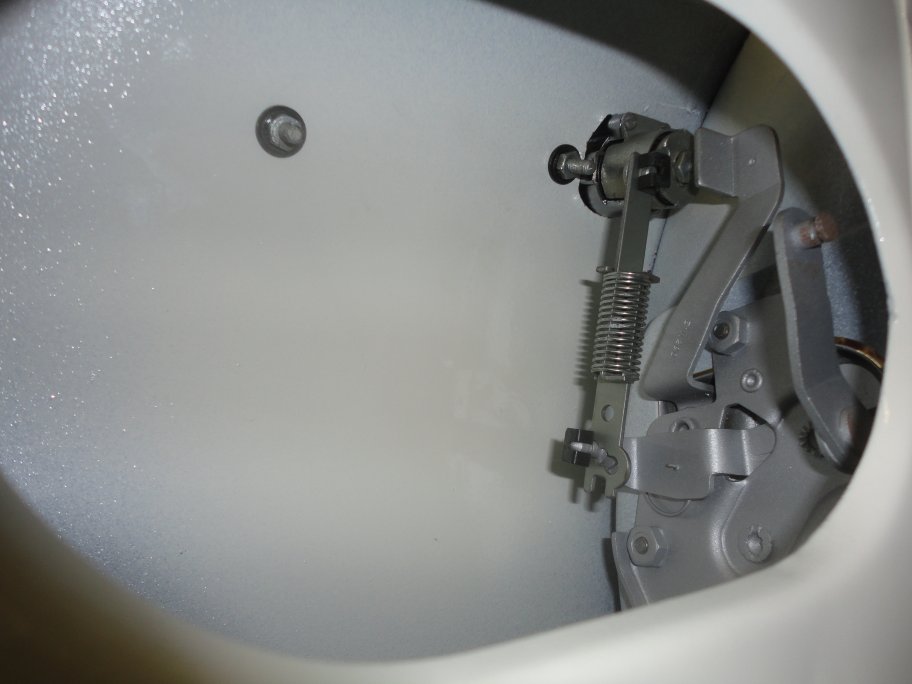
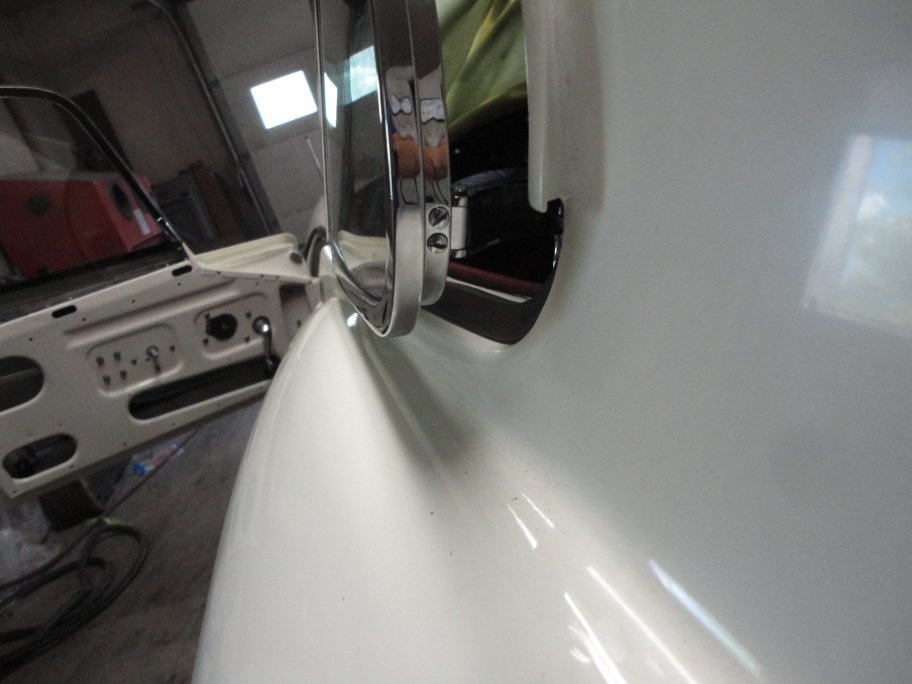 99) The last piece to go on is the window latch. The latch is attached loosely to the inside of the car and is then screwed to the inside edge of the window frame (shown here). The inside screws can be tightened
after the window is latched closed.
99) The last piece to go on is the window latch. The latch is attached loosely to the inside of the car and is then screwed to the inside edge of the window frame (shown here). The inside screws can be tightened
after the window is latched closed. |
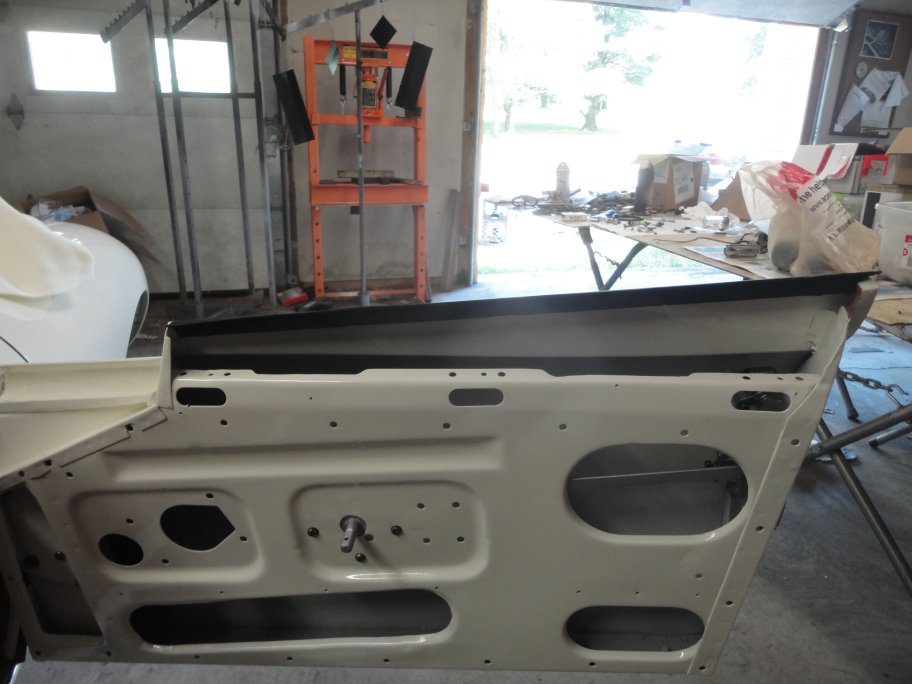
 100) With the quarter windows installed the doors can be assembled.The first thing to install is the door handles. The installation is pretty straight forward. The only things to note is
1) that the door lock lever (the thing with a springs) has the adjustment side down 2) the stop on the back of the door hand push button
100) With the quarter windows installed the doors can be assembled.The first thing to install is the door handles. The installation is pretty straight forward. The only things to note is
1) that the door lock lever (the thing with a springs) has the adjustment side down 2) the stop on the back of the door hand push button |
 101) The the outside window sweep (beltline molding) must be installed prior to the window. The window sweep is retainted using the U-shaped clips that are also used to retain the rubbers
on the bumpers and the dash pad. The clips are avialable from the usual suspects.
101) The the outside window sweep (beltline molding) must be installed prior to the window. The window sweep is retainted using the U-shaped clips that are also used to retain the rubbers
on the bumpers and the dash pad. The clips are avialable from the usual suspects. |
 102) The glass must be installed in the frames before the frames are installed. On early Series I cars the window channel felts were made from strips of felt. Later cars were molded for a better
fit. I opted for the later style.
102) The glass must be installed in the frames before the frames are installed. On early Series I cars the window channel felts were made from strips of felt. Later cars were molded for a better
fit. I opted for the later style.The frames insert into the doors pretty easily. The only point of concern is that the mounting stud on the front part of the frame which must be inserted first. Once the window frame is inserted into the door, it is aligned to the quarter window and the roof rail. Typically shims are used to get the frame to the correct height. |
 103) The window regular goes in next. It can only go in with the interior door handle release no installed. Note: It was installed when the previos picture was taken.
The best way to install the regulator is to first hook it to the window with the window up and with the regulator not bolted in place. Then bolt the regular in. The window guide can then be greased. It is OK if the regulator spring is not installed. It can be popped in later. |
 104) Once the window regulator is installed and working smoothly, the interior door handle release can be installed.
 |
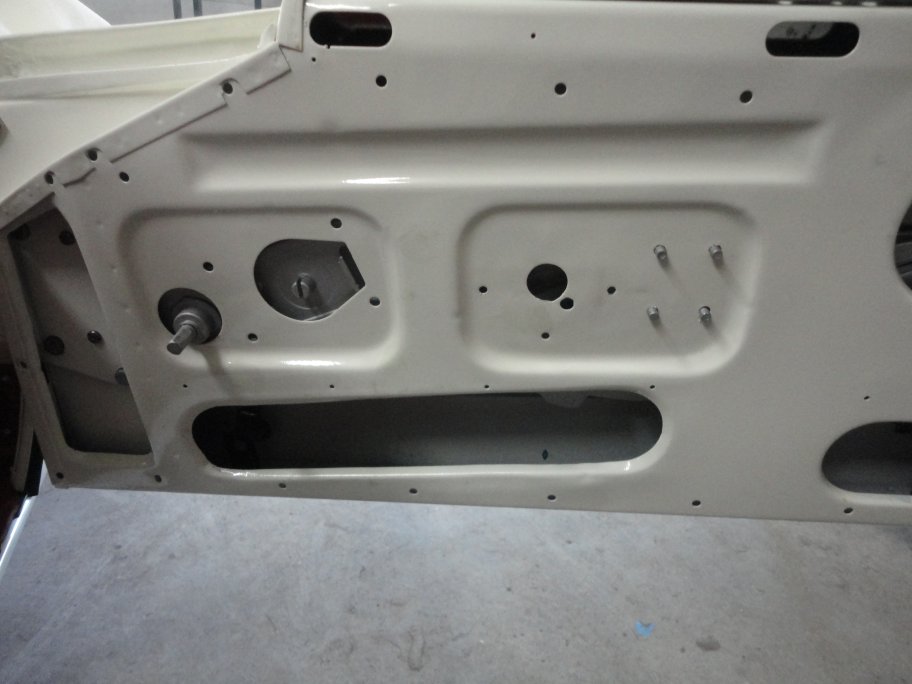
 105) Before buttoning up the door the mechanisms should be greased with spray lithium grease. For extra protection the inside bottom of the doors can be coated with
Wurth Body Wax. Though not installed in previous pictures, a sheet of Dynamat was used to insulate the inside of the door.
105) Before buttoning up the door the mechanisms should be greased with spray lithium grease. For extra protection the inside bottom of the doors can be coated with
Wurth Body Wax. Though not installed in previous pictures, a sheet of Dynamat was used to insulate the inside of the door. |
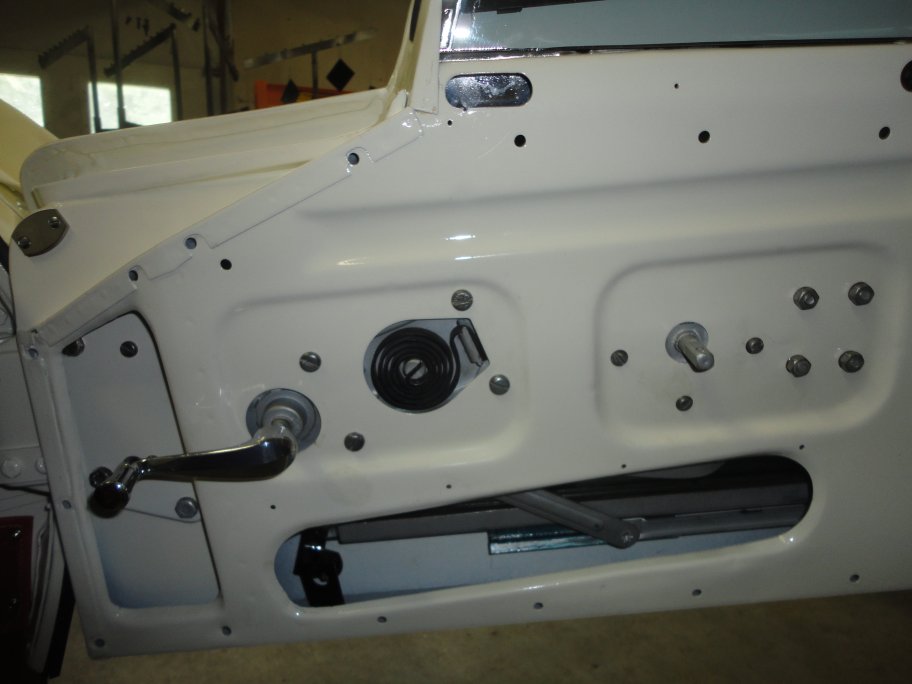
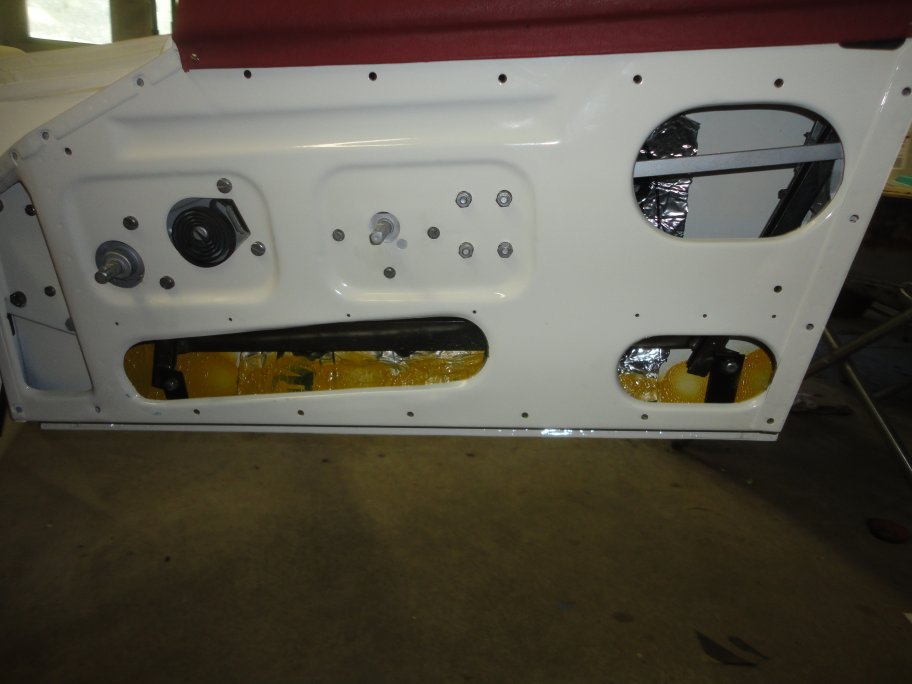
 106) Access covers are then pop-riveted to the doors (the black pieces). The upper door trim just hooks in place into hooks that are part of the window frame. 2 small screws are
used to hold the bottom down.
106) Access covers are then pop-riveted to the doors (the black pieces). The upper door trim just hooks in place into hooks that are part of the window frame. 2 small screws are
used to hold the bottom down. Before the door panel is installed, the original factor padding (the black square pieces) are installed over the window crank and door handle. Then a small sheet of plastic (not shown) is applied to act as a vapor barrier. |
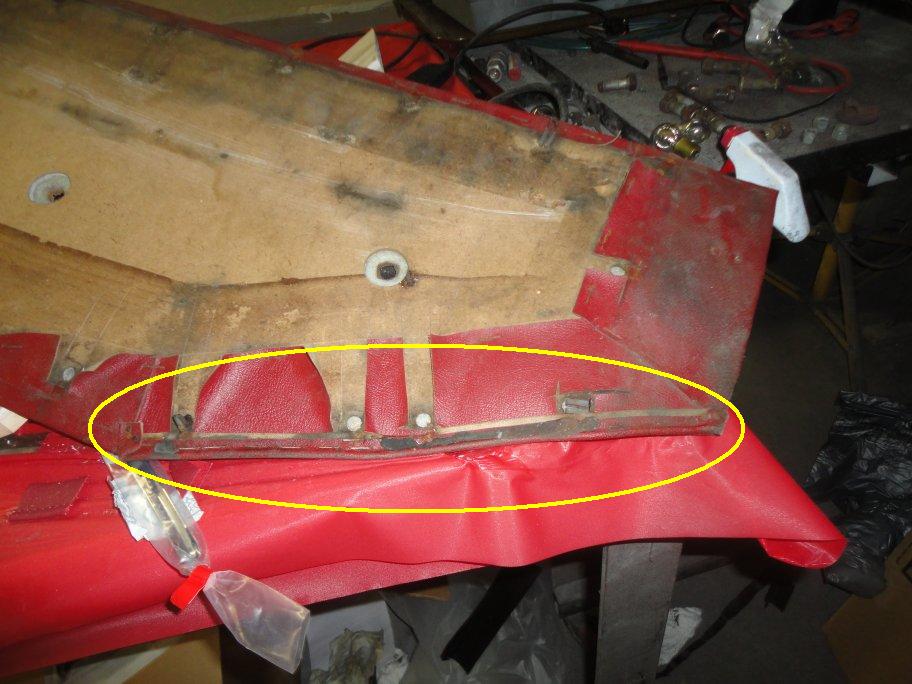 107) Door trim changed many times over the course of the Series I production. On early cars a short bead of vinyl was attached to the back side of the door panel that ran along the fron edge of the door
by the gutter. This was later place with a small panel that fitted below the door gutter.
107) Door trim changed many times over the course of the Series I production. On early cars a short bead of vinyl was attached to the back side of the door panel that ran along the fron edge of the door
by the gutter. This was later place with a small panel that fitted below the door gutter. |
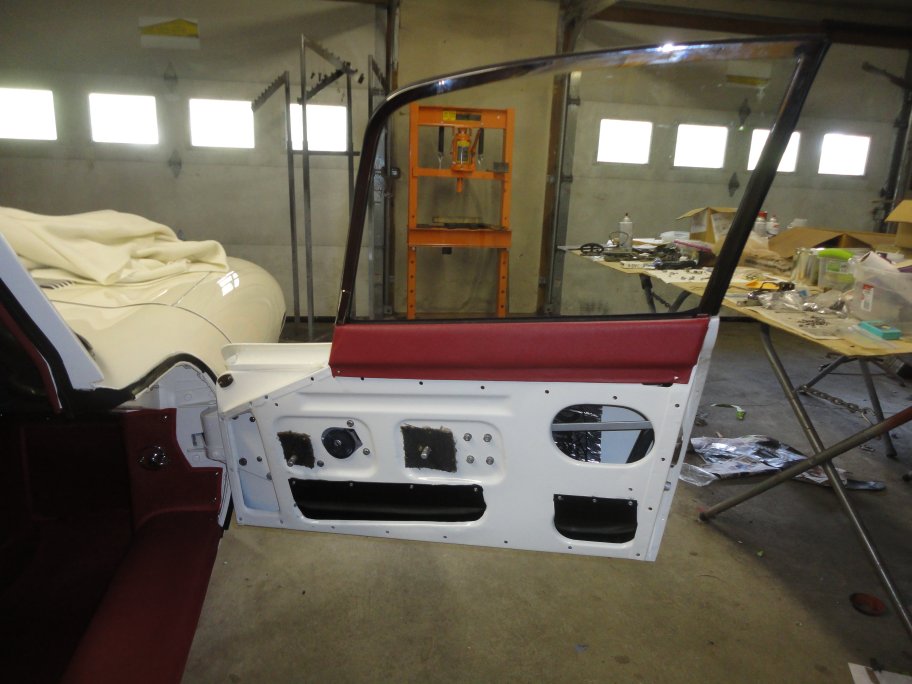
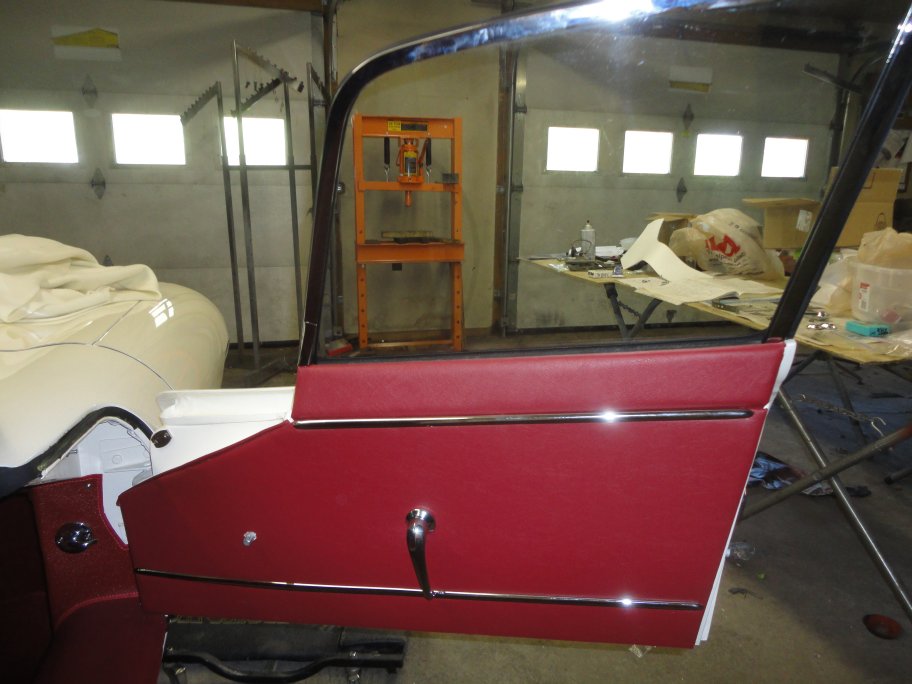
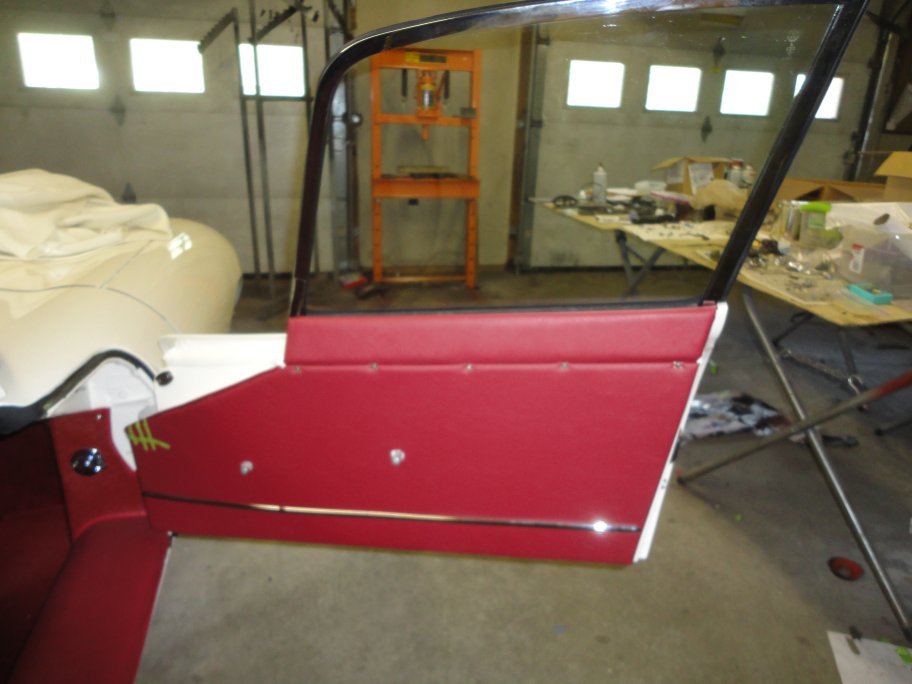 108) The door panel is held on with a bunch of clips that are mounted from the back side of the panel. At the top of the panel are a series of clips that must be fitted loosely.
they are used to retain a chrome molding that covers the seem between the door panel and upper trim. The chrome molding is tricky to install. The best way to do it is to
hook the molding into the bottom of the clips and pull it upwards while tapping the molding with with your palm.
108) The door panel is held on with a bunch of clips that are mounted from the back side of the panel. At the top of the panel are a series of clips that must be fitted loosely.
they are used to retain a chrome molding that covers the seem between the door panel and upper trim. The chrome molding is tricky to install. The best way to do it is to
hook the molding into the bottom of the clips and pull it upwards while tapping the molding with with your palm. |
 109) The door handles and window crank are retained using a pin that is inserted from the top. Behind the handles are a pair of apposing chrome pieces that are seperated with a spring. The outer piece
is pushed inwards to compress the spring while the pin is inserted.
109) The door handles and window crank are retained using a pin that is inserted from the top. Behind the handles are a pair of apposing chrome pieces that are seperated with a spring. The outer piece
is pushed inwards to compress the spring while the pin is inserted. |
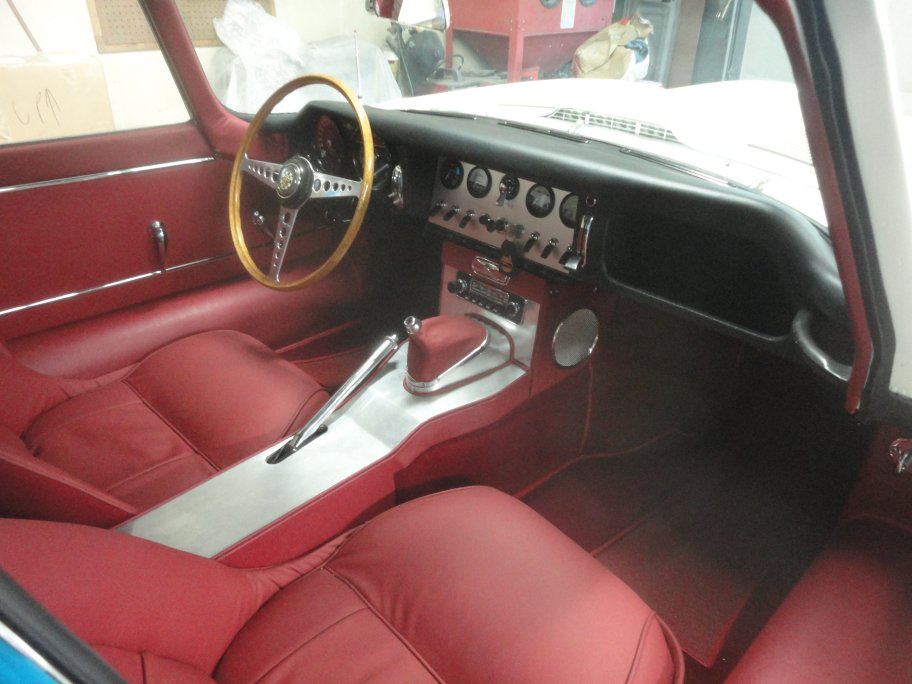 110) With the steering wheel bolted in along with the seats, the interior is just about wrapped-up.
 |