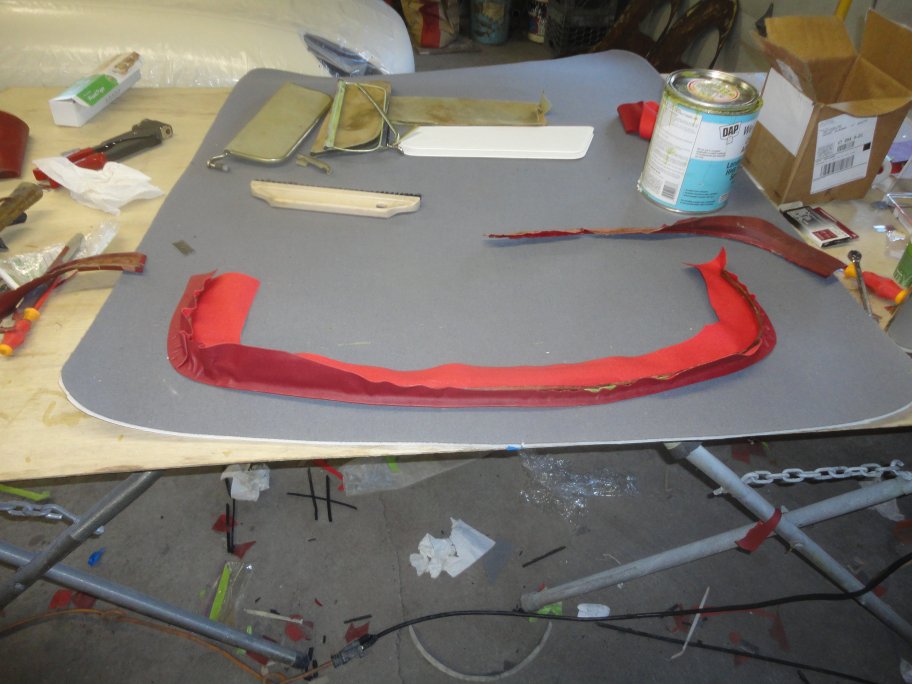
 73) The upper trim on the boot hatch (trunk lid) can be a little tricky. A vinyl wrapped piece of molded fiberboard (card board?) is glued to the
upper hatch. The vinyl also wraps around the window opening. The vinyl is
first glued to the fiberboard, which doesn't want to hold its shape.
73) The upper trim on the boot hatch (trunk lid) can be a little tricky. A vinyl wrapped piece of molded fiberboard (card board?) is glued to the
upper hatch. The vinyl also wraps around the window opening. The vinyl is
first glued to the fiberboard, which doesn't want to hold its shape. |
 74) The trim is then glued to to the hatch, but only on the inner face. Not around the inside edge (yet). In this picture masking tape
holds it in place while the contact cement dries overnight. This much tape is needed since the trim resists following the shape of the hatch.
74) The trim is then glued to to the hatch, but only on the inner face. Not around the inside edge (yet). In this picture masking tape
holds it in place while the contact cement dries overnight. This much tape is needed since the trim resists following the shape of the hatch. |
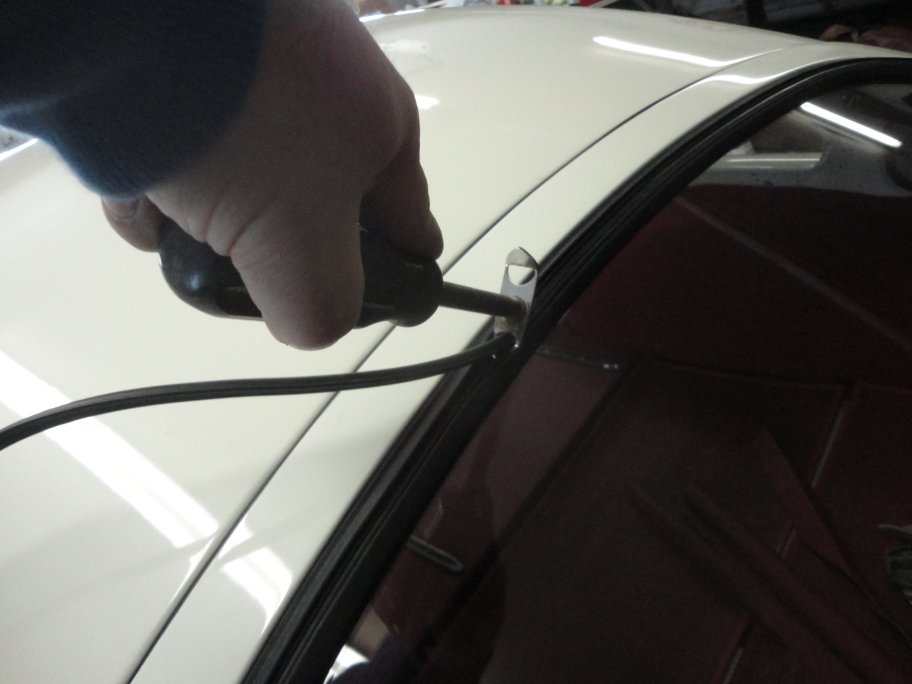
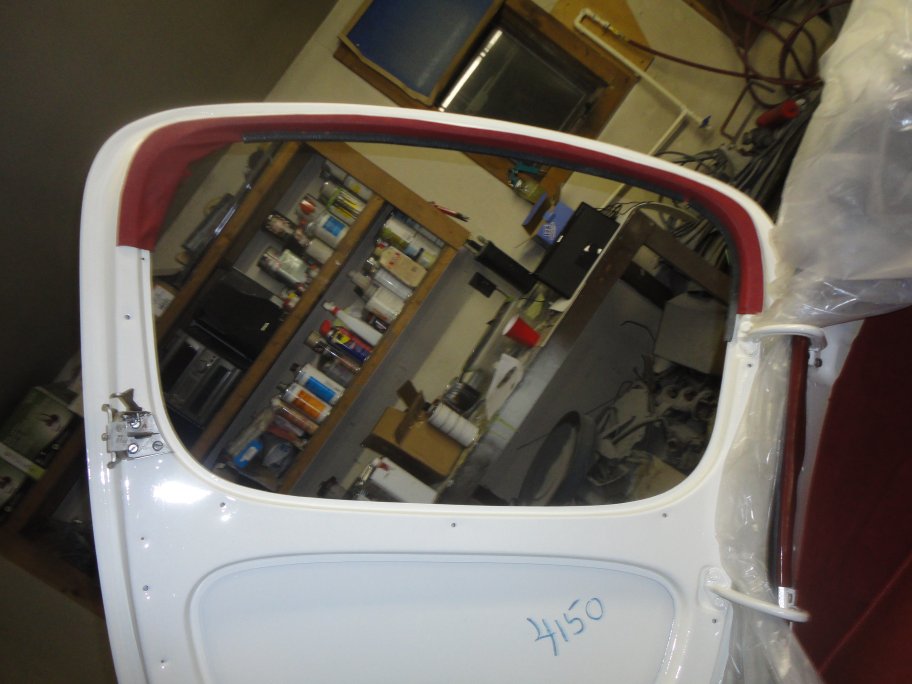 75) Once the contact cement is cured, the vinyl can be glued on the lip of the window opening, but not on the sloped face. I found that the best way to
hold the vinyl in place was with roofrail windlace that I had left over from a Mustang project. You just tap it in place along the parameter
of the window opening. The windlace is seen here in black.
75) Once the contact cement is cured, the vinyl can be glued on the lip of the window opening, but not on the sloped face. I found that the best way to
hold the vinyl in place was with roofrail windlace that I had left over from a Mustang project. You just tap it in place along the parameter
of the window opening. The windlace is seen here in black. Once the contact cement has cured the vinyl can be trimmed back on the outside of the window opening. The windlace also acts as a guide for the razor blade. NOTE: The body number 4150 is written in crayon on the inside of the hatch to reproduce the original marking. |
 76) The lower trim panel for the hatch is snapped in place with clips that attach from the rear. On Early series I cars there is also a short piece of trim
(about 6 inches) that is clipped in place where the latch is attached.
76) The lower trim panel for the hatch is snapped in place with clips that attach from the rear. On Early series I cars there is also a short piece of trim
(about 6 inches) that is clipped in place where the latch is attached. |
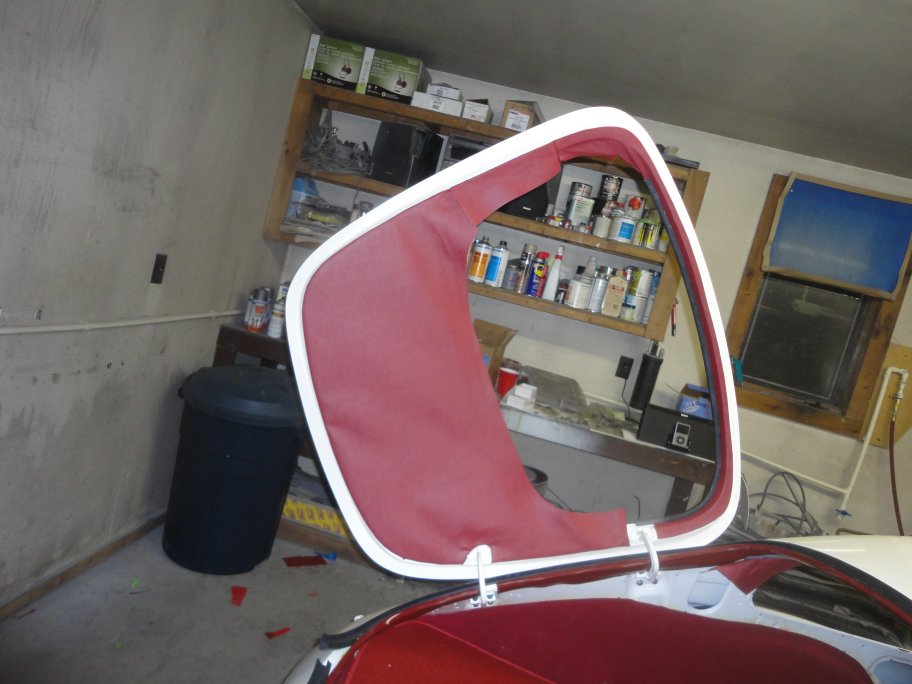
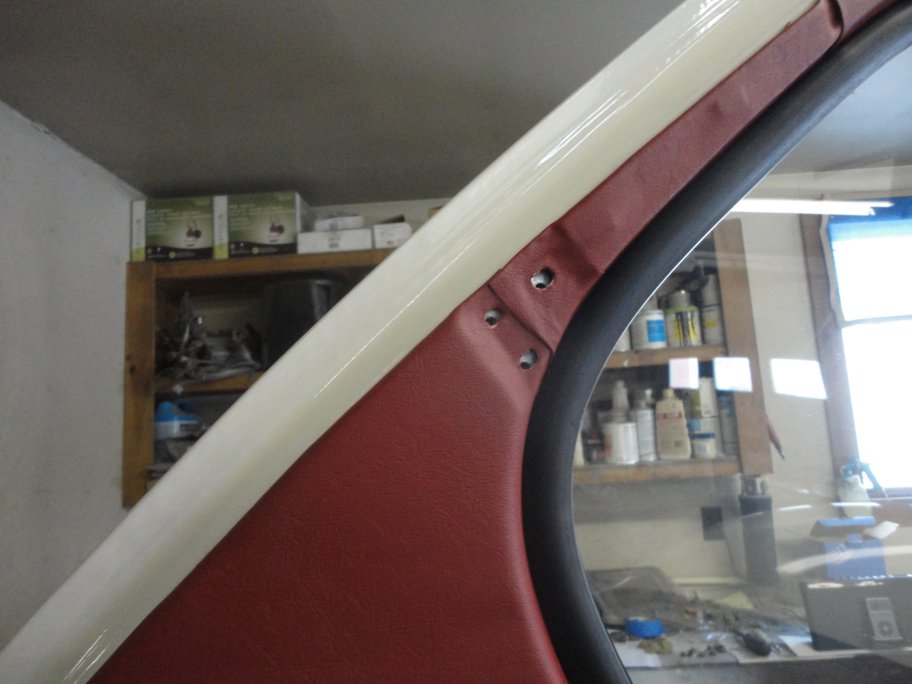
 77) Once snapped in place, the vinyl is pulled tight and is glued around the window opening. Again windlace is used as a clamp. Once the glue has cured the
excess vinyl is trimmed and the windlace is removed. Notice in this picture that the windlace has been removed from the upper section of the opening
and the vinyl has been properly trimmed.
77) Once snapped in place, the vinyl is pulled tight and is glued around the window opening. Again windlace is used as a clamp. Once the glue has cured the
excess vinyl is trimmed and the windlace is removed. Notice in this picture that the windlace has been removed from the upper section of the opening
and the vinyl has been properly trimmed. |
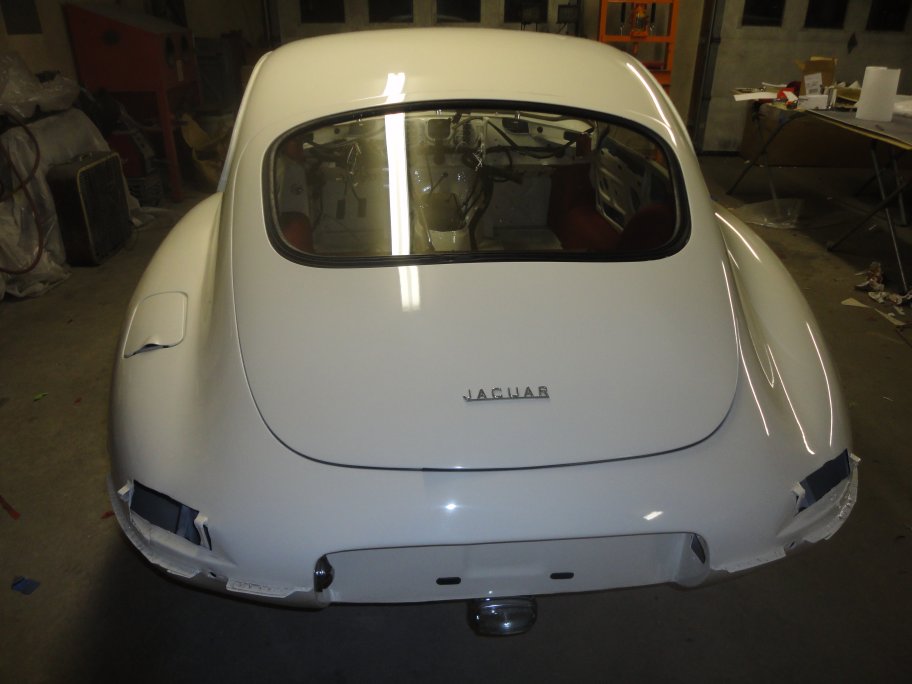
 78) The hatch glass must be installed to take the wrinkles out of the vinyl trim prior to attaching the hardware on the inside. The hatch glass is relativly easy
to install. First the seal is installed. It should be noted that the seal can be installed backwords. The seal has only one edge that has a square shape (step) to it. The step
goes along the outside. The other edges of the seal are rounded (no step).
78) The hatch glass must be installed to take the wrinkles out of the vinyl trim prior to attaching the hardware on the inside. The hatch glass is relativly easy
to install. First the seal is installed. It should be noted that the seal can be installed backwords. The seal has only one edge that has a square shape (step) to it. The step
goes along the outside. The other edges of the seal are rounded (no step). |
 79) The glass is fitted by sliding the bottom center into the seal and pulling the seal over the glass along the perimeter (This is easy at first). A specialty
tool or a small tool with a hook can be used to lift the seal lip over the glass.
79) The glass is fitted by sliding the bottom center into the seal and pulling the seal over the glass along the perimeter (This is easy at first). A specialty
tool or a small tool with a hook can be used to lift the seal lip over the glass. The seal should be filled with a sealer such as 3M Urethane Window Weld prior to installing the locking bead. The job can be a little messy, but the sealer comes of the glass and paint easly using Wax&Grease remover. Wax&Grease can not hurt paint so no worries. |
 80) A special tool is required to install the locking bead. The one shown here is from Snap-On, but cheaper versions are available through Harbor freight and other
tool vendors.
80) A special tool is required to install the locking bead. The one shown here is from Snap-On, but cheaper versions are available through Harbor freight and other
tool vendors. |
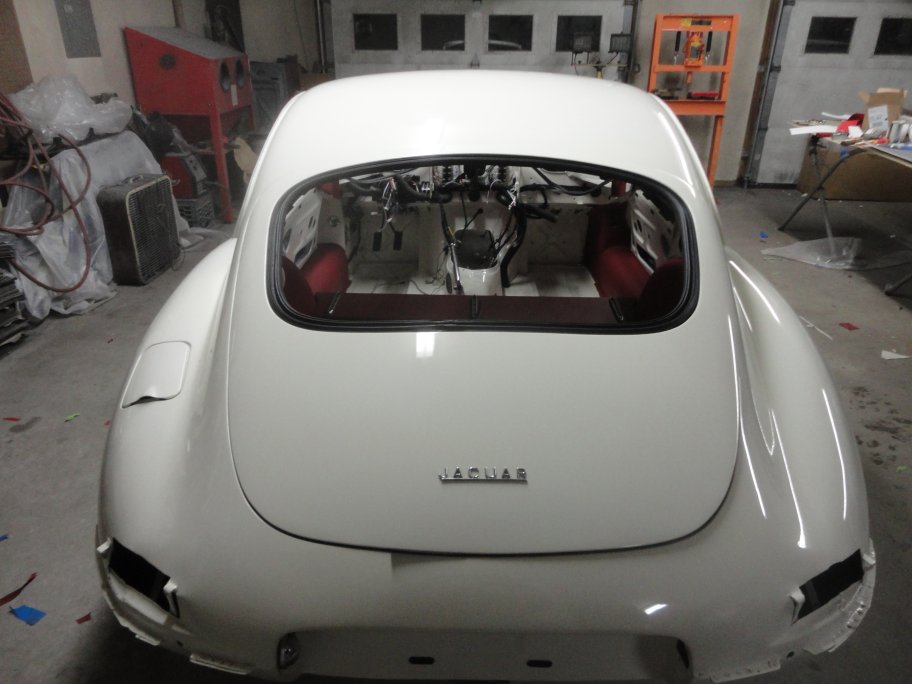
 81) The inside latch and the prop rod are the last pieces to go on to the boot hatch. In this picture the holes have been cut for the latch. The holes
are cut this way to prevent wrinkling of the vinyl when the latch is adjusted. Notice how nice and tight the vinyl is around the window opening. This
can only be achieved by installing the trim with the window removed.
81) The inside latch and the prop rod are the last pieces to go on to the boot hatch. In this picture the holes have been cut for the latch. The holes
are cut this way to prevent wrinkling of the vinyl when the latch is adjusted. Notice how nice and tight the vinyl is around the window opening. This
can only be achieved by installing the trim with the window removed. |
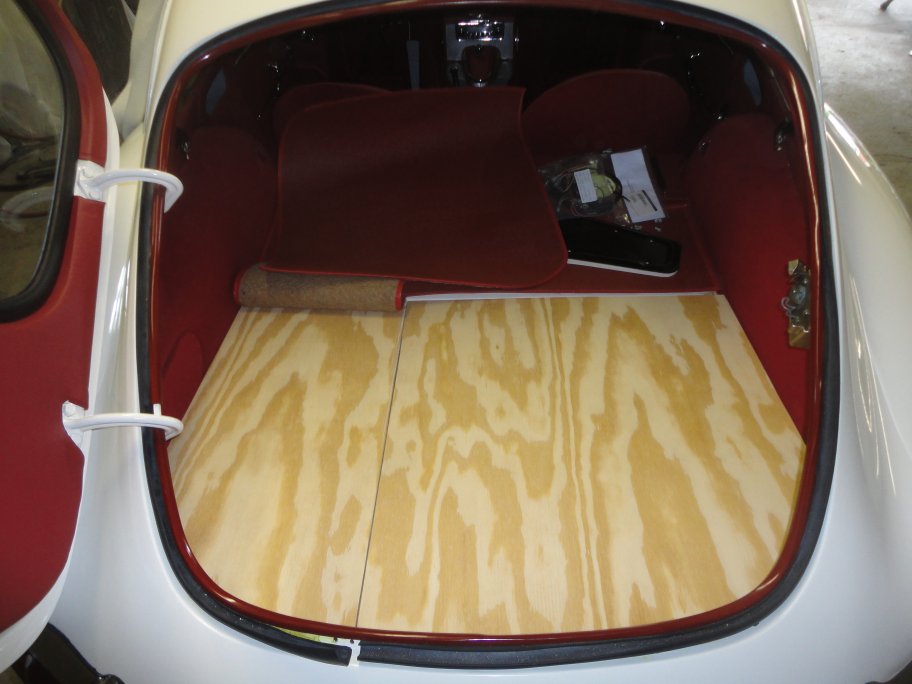 82) New boot boards had to be made for this project since the original ones were missing. The boards changed a lot through the production of E-Types so all that
I had to go on was a set of 1967 trunk boards (which were incorrect in many ways) and some photos of a early 1962 E-type's trunk boards that someone was kind enough to
send me from the Jag-Lovers Forum.
82) New boot boards had to be made for this project since the original ones were missing. The boards changed a lot through the production of E-Types so all that
I had to go on was a set of 1967 trunk boards (which were incorrect in many ways) and some photos of a early 1962 E-type's trunk boards that someone was kind enough to
send me from the Jag-Lovers Forum. The boards were made from 15/32" plywood that was purchased from Lowes. Since the 1967 trunk boards fit nicely in the boot, they were use for the overall dimensions of the new boards. Once the plywood was cut to size, the boot mats were used to determine where the plywood would be bisected. Note: The section that goes over the fuel tank is wider on earlier cars. Also earlier cars did not have the boot latch at the rear and therefore there isn't a cooresponding notch cut out of the trunk boards. |
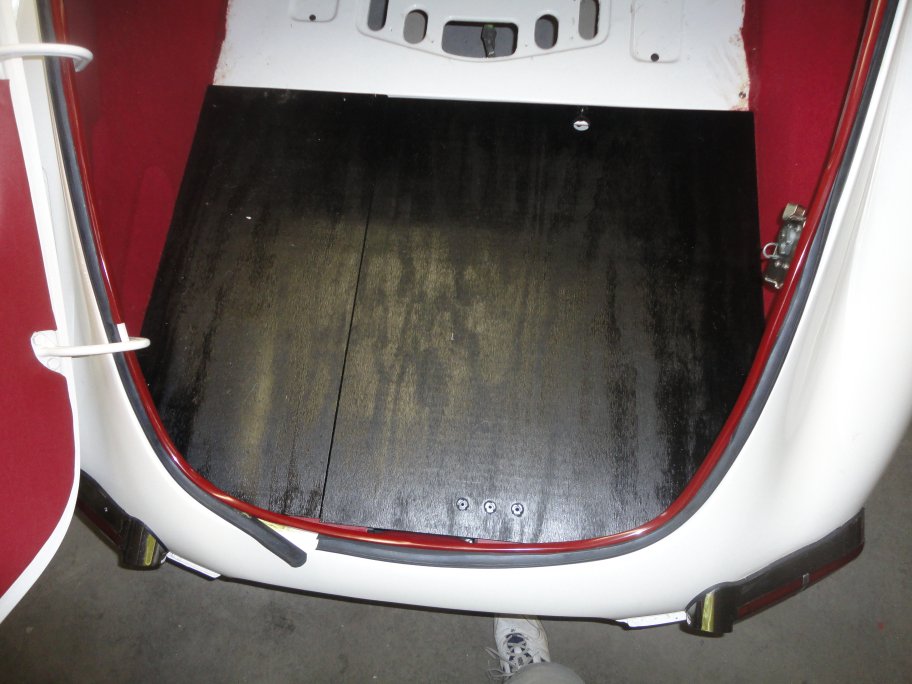 83) A finger pull hole (1 inch diameter) was drilled in the board that goes over the spare tire. Four counterbores (holes that don't go all the way through) were drilled so that
the 4 threaded inserts for the guide pin and rear spring clip would set flush with the surface of the trunk board.
83) A finger pull hole (1 inch diameter) was drilled in the board that goes over the spare tire. Four counterbores (holes that don't go all the way through) were drilled so that
the 4 threaded inserts for the guide pin and rear spring clip would set flush with the surface of the trunk board. Holes were also drilled through the gas tank board so that it could be screwed down like the factory intended. After verifying that the boards fit, they were painted satin black using Krylon spray paint. The hardware was then installed after the paint had dried. |
 84) The boot mats are installed using snaps. Holes pre-existed in the floor behind the seats so it was just a matter of pushing a punch through the holes to identify the locations
and installing the snaps using the punch and die set that came with the snaps.
84) The boot mats are installed using snaps. Holes pre-existed in the floor behind the seats so it was just a matter of pushing a punch through the holes to identify the locations
and installing the snaps using the punch and die set that came with the snaps.For the snaps that attach to the trunk boards, a simple method was employed. Pointed punches (nails would also work) were hammered through the mats into the floor boards(seen here). The female snaps were installed in the mat holes. The males snaps were just screwed in place in the holes in the plywood that were created with the punches. |
 85) The final product should look like this, though I think I might be missing a snap.
 |
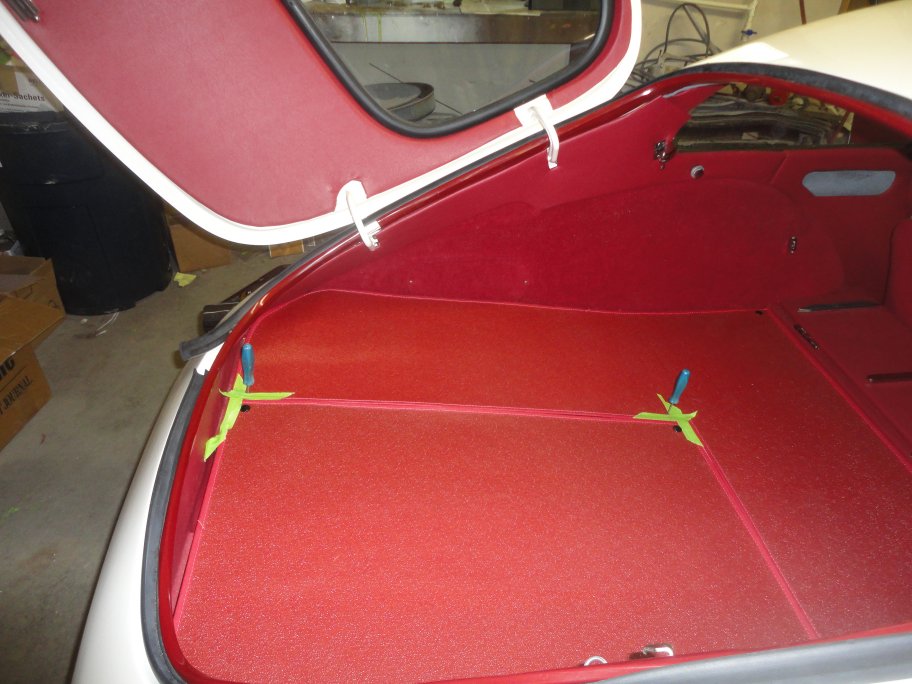
 86) The next thing to go in is the luggage runs. Luckily the original runs came with the car. A straight edge and tape were used to mark were the edge of the
runners needed to be. The runners (with the rubbers removed) were placed on the mat and a black Sharpie was used to mark the mounting holes on the mat.
86) The next thing to go in is the luggage runs. Luckily the original runs came with the car. A straight edge and tape were used to mark were the edge of the
runners needed to be. The runners (with the rubbers removed) were placed on the mat and a black Sharpie was used to mark the mounting holes on the mat. |
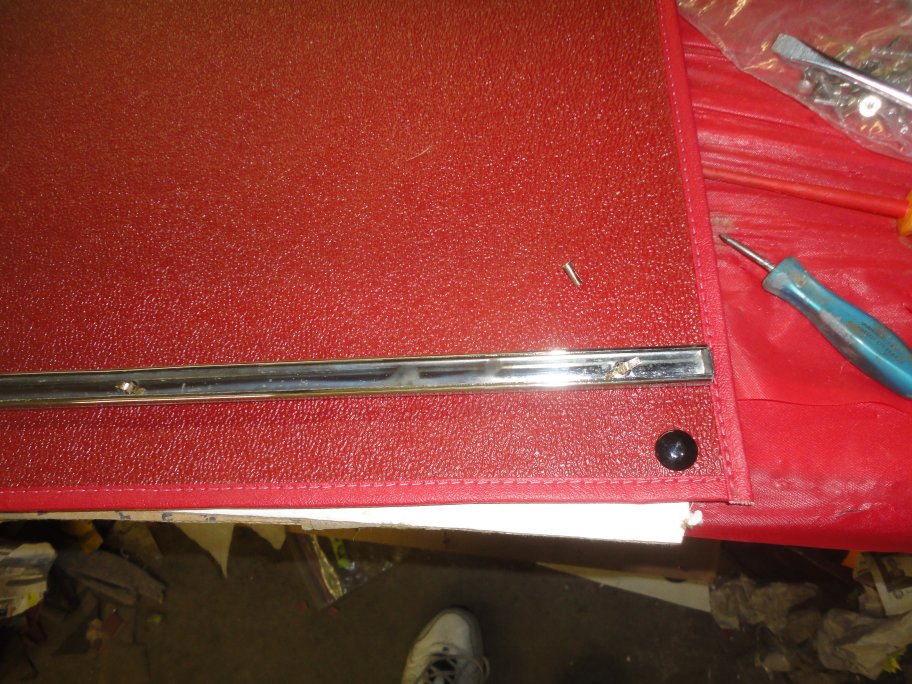 87) The runners were originally installed using special snaps, which are not available. Some restorers use poprivets and washers. I used nickle plated split rivets. The rivetrs are just
pushed in from the back and then the ears are split appart.
87) The runners were originally installed using special snaps, which are not available. Some restorers use poprivets and washers. I used nickle plated split rivets. The rivetrs are just
pushed in from the back and then the ears are split appart. |
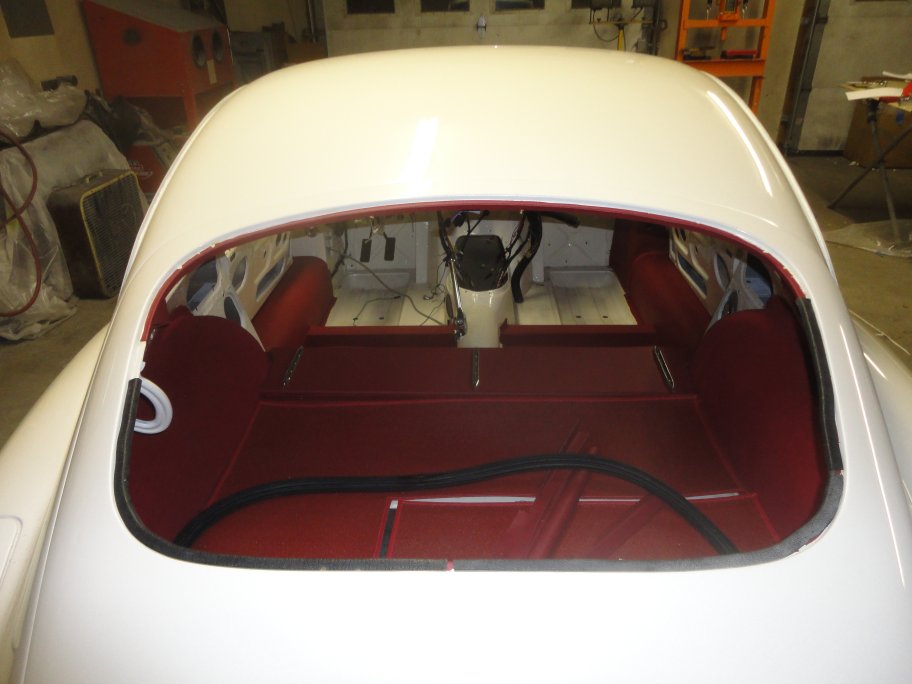
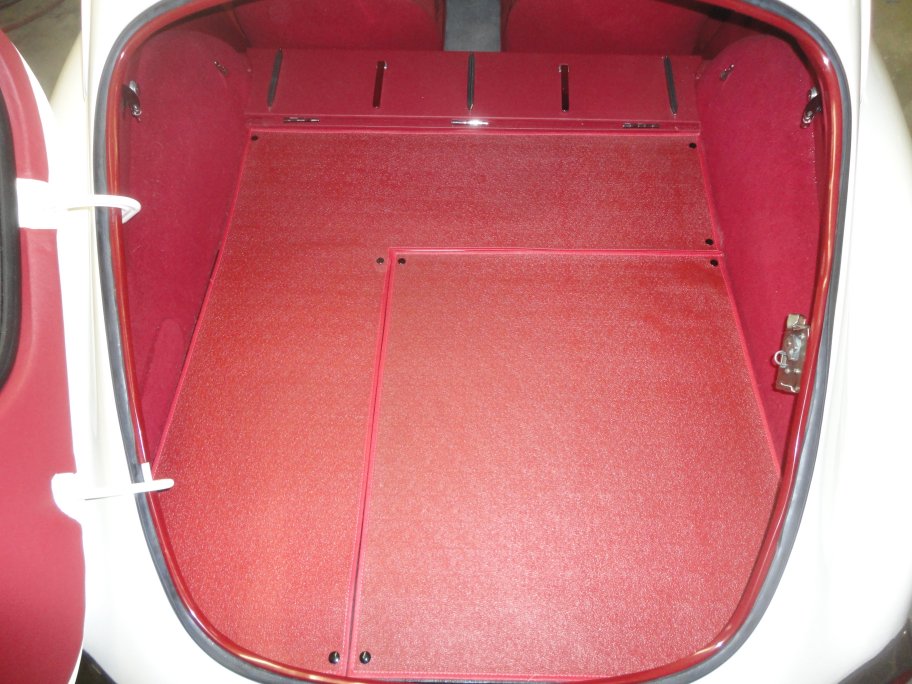
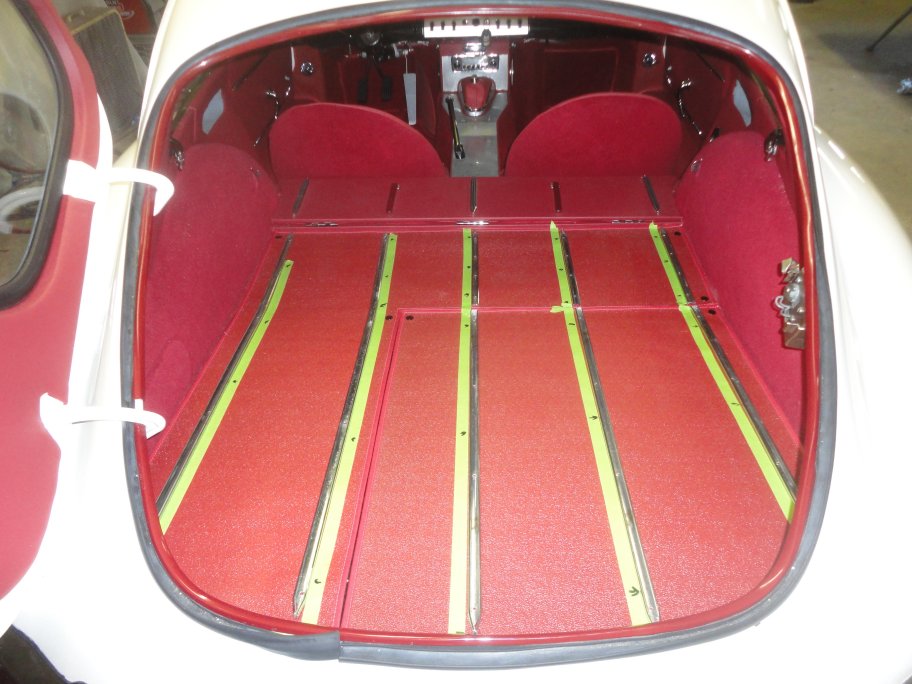
 88) Here is a final shot of the boot area with the trunk boards installed.
 |