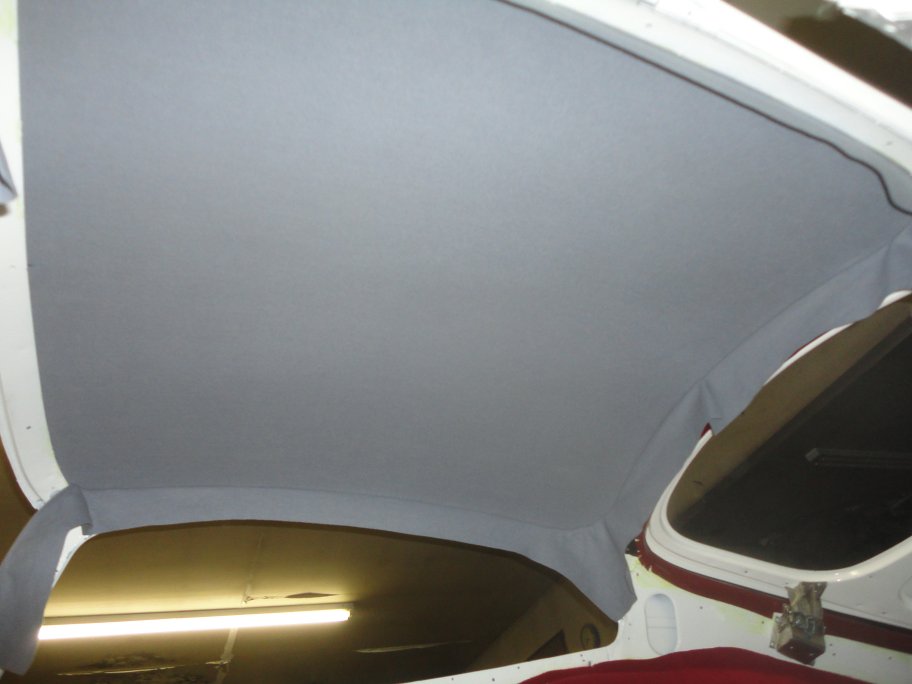
 10) The next step was to cover the roof reinforcements with fabric that matches the headliner material. The fabric has hollow tubing sewn into to it. The tubing
side was compressed and stuffed in-between the reinforment and the headliner. This I did with my trusty windshield setting tool. In this picture you can see
the cloth tucked in place. Two things to note are that A) the fabric is folded over at the middle by the dome light and B) the fabric must be tucked in
just past the bend in the roof reinforment at the front so the reinforment can not be seen when the upper windshield trim is installed.
10) The next step was to cover the roof reinforcements with fabric that matches the headliner material. The fabric has hollow tubing sewn into to it. The tubing
side was compressed and stuffed in-between the reinforment and the headliner. This I did with my trusty windshield setting tool. In this picture you can see
the cloth tucked in place. Two things to note are that A) the fabric is folded over at the middle by the dome light and B) the fabric must be tucked in
just past the bend in the roof reinforment at the front so the reinforment can not be seen when the upper windshield trim is installed. |
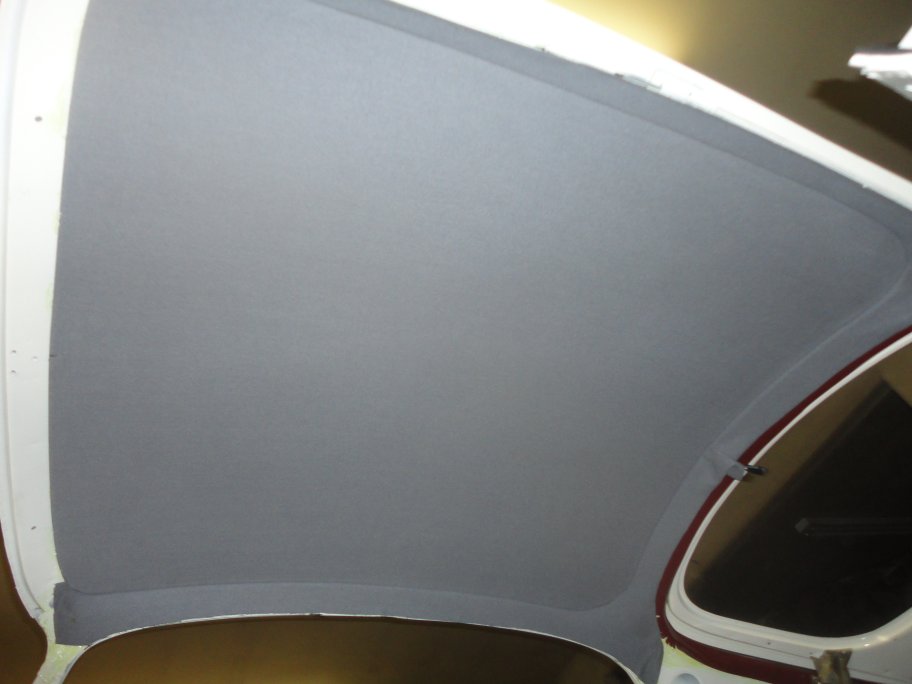 11) The fabric was then glued in place. It's was just a matter of tugging the fabric so there isn't any wrinkles and gluing it down. My interior kit came with foam
to go in-between the fabric and the roof reinforcement, but I did not install it since my car never came with any padding underneath. Perhaps later cars used
padding?
11) The fabric was then glued in place. It's was just a matter of tugging the fabric so there isn't any wrinkles and gluing it down. My interior kit came with foam
to go in-between the fabric and the roof reinforcement, but I did not install it since my car never came with any padding underneath. Perhaps later cars used
padding?At the rear of the car there are the aforementioned metal brackets with teeth screwed to the roof. The fabric just gets tucked under them. No glue was required. It was just a matter of prying the bracket down at the back and tucking the fabric underneath. |
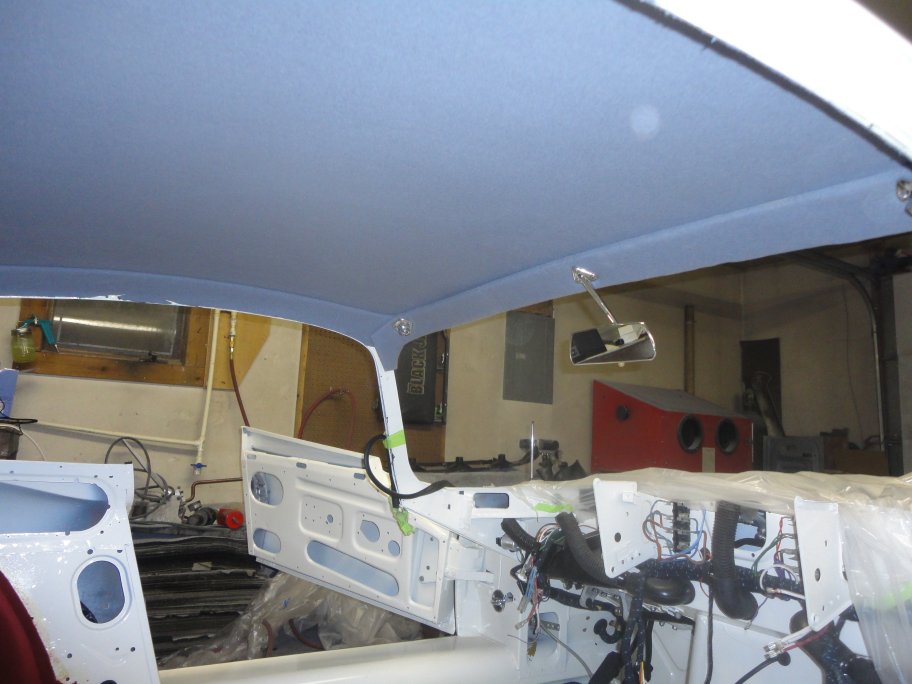 12) The upper windshield trim, which was previously recovered with the same fabric as the roof rail reinforcements, was easily installed.
It is only held in place by the rearview mirror and the sunvisors. I had not reupholstered the visors at this point so I only installed
the bases so that the upper windshield trim could be held in its proper location prior to installing the roof cantrials (upper roof rail trim).
12) The upper windshield trim, which was previously recovered with the same fabric as the roof rail reinforcements, was easily installed.
It is only held in place by the rearview mirror and the sunvisors. I had not reupholstered the visors at this point so I only installed
the bases so that the upper windshield trim could be held in its proper location prior to installing the roof cantrials (upper roof rail trim). |
 13) The next piece to go on was the rear filler panel. It is simply a piece of aluminum that is pop-riveted in place. The vinyl covering is just glued down on top
of it. The vinyl also glues to the lip across there rear. Masking tape was used to prevent the contact cement from going beyond where it was needed.
13) The next piece to go on was the rear filler panel. It is simply a piece of aluminum that is pop-riveted in place. The vinyl covering is just glued down on top
of it. The vinyl also glues to the lip across there rear. Masking tape was used to prevent the contact cement from going beyond where it was needed. |
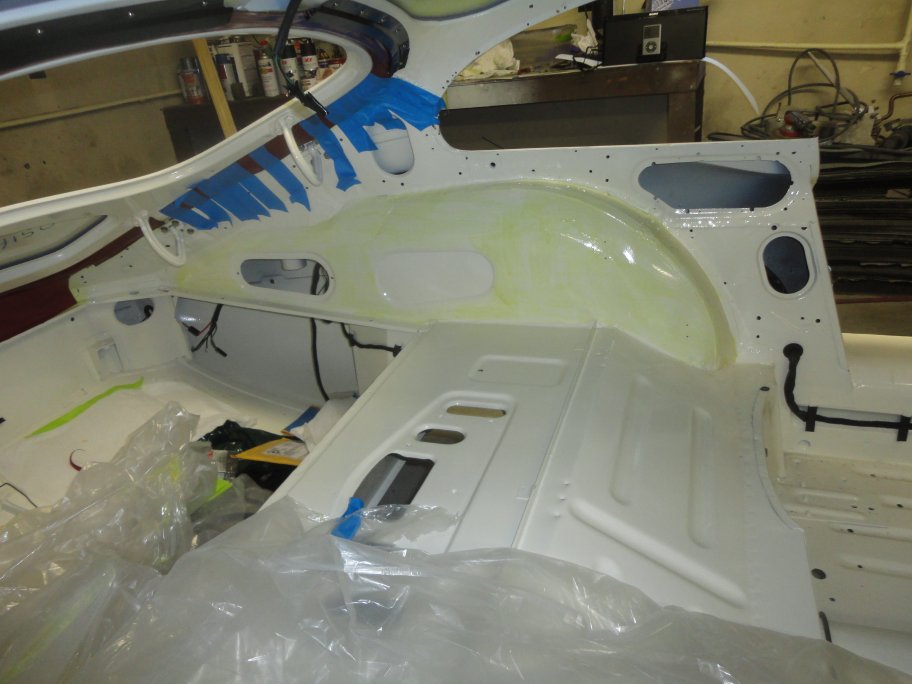
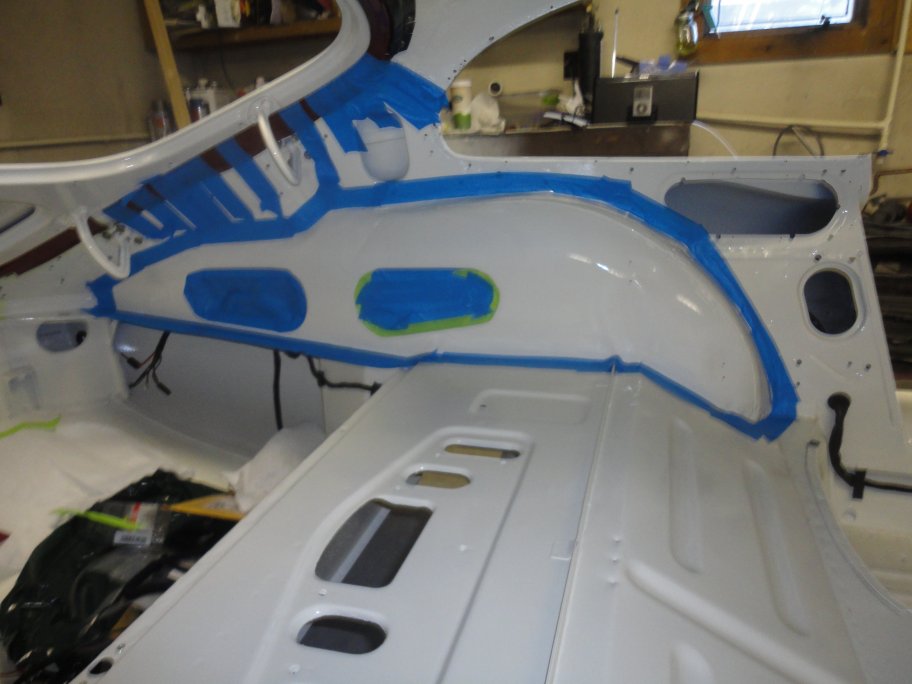 14) The next big part in the process was the covering of the wheel arches. The arches are first covered with foam. The perimeter was masked off. You will notice that there are two recessed <
areas that were masked off as well. This was done to prevent the foam from sticking down into the recesses and creating bumps in the mocquette covering.
14) The next big part in the process was the covering of the wheel arches. The arches are first covered with foam. The perimeter was masked off. You will notice that there are two recessed <
areas that were masked off as well. This was done to prevent the foam from sticking down into the recesses and creating bumps in the mocquette covering. |
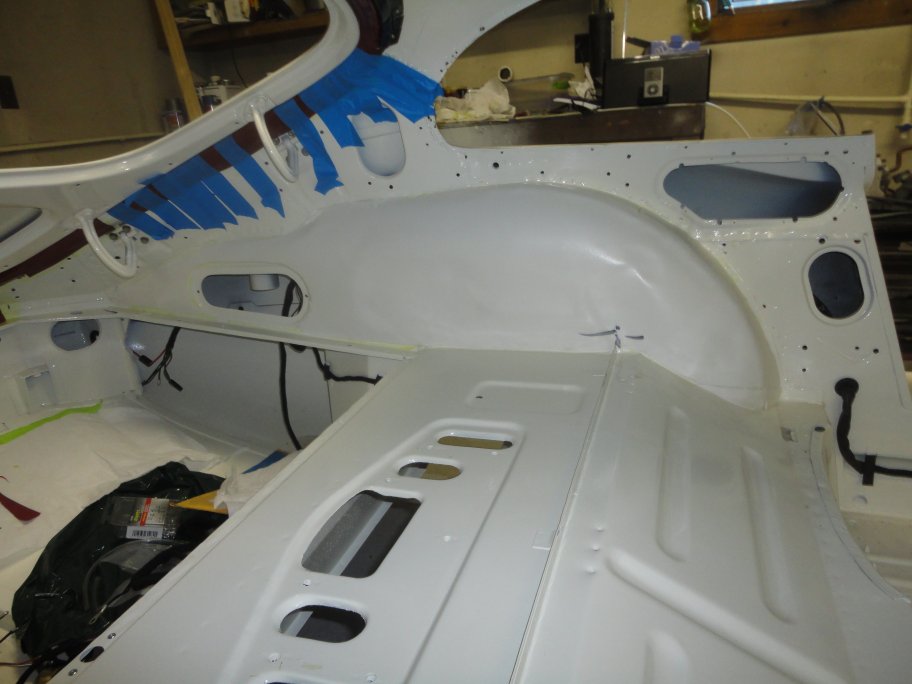
 15) In this picture, the contact cement has been applied and the tape has been removed.
|
 16) Alignment marks were applied to the foam and then contact cement was applied to the back side. Once tacky the foam was carefully set in place using the alignment marks
as guides. Several cuts had to be made and material had to be removed to get the foam to look like what you see pictured.
16) Alignment marks were applied to the foam and then contact cement was applied to the back side. Once tacky the foam was carefully set in place using the alignment marks
as guides. Several cuts had to be made and material had to be removed to get the foam to look like what you see pictured.
|
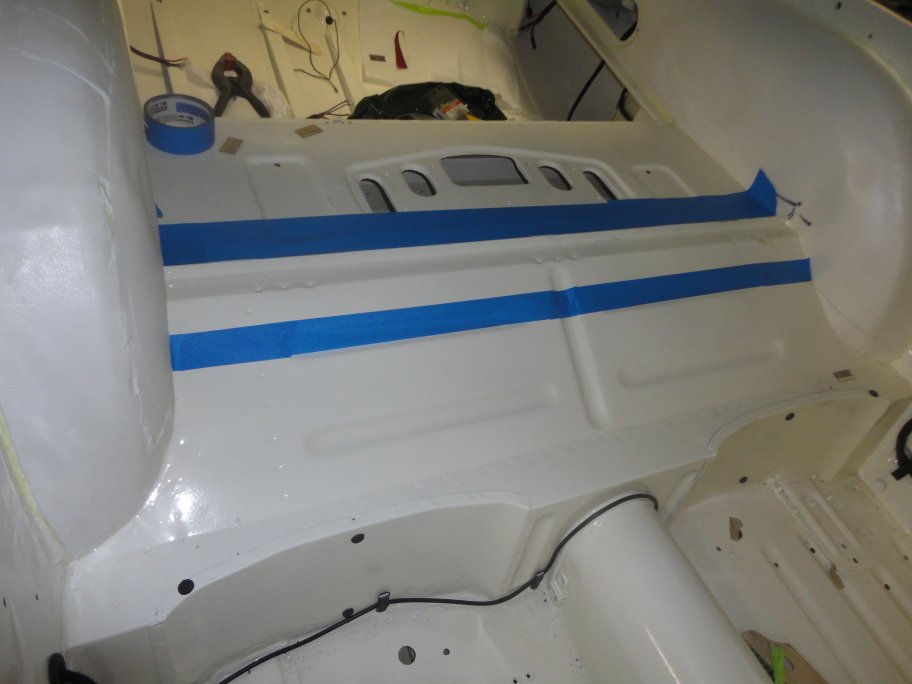 17) Before the wheel arches were covered, a strip of vinyl needed to be applied to the rib that goes between them. As a standard practice, the area beyond where the contact cement
is not required was masked off prior to applying the contact cement.
17) Before the wheel arches were covered, a strip of vinyl needed to be applied to the rib that goes between them. As a standard practice, the area beyond where the contact cement
is not required was masked off prior to applying the contact cement.
|
 18) Here the vinyl is applied and the wheel arches are ready to be covered.
|
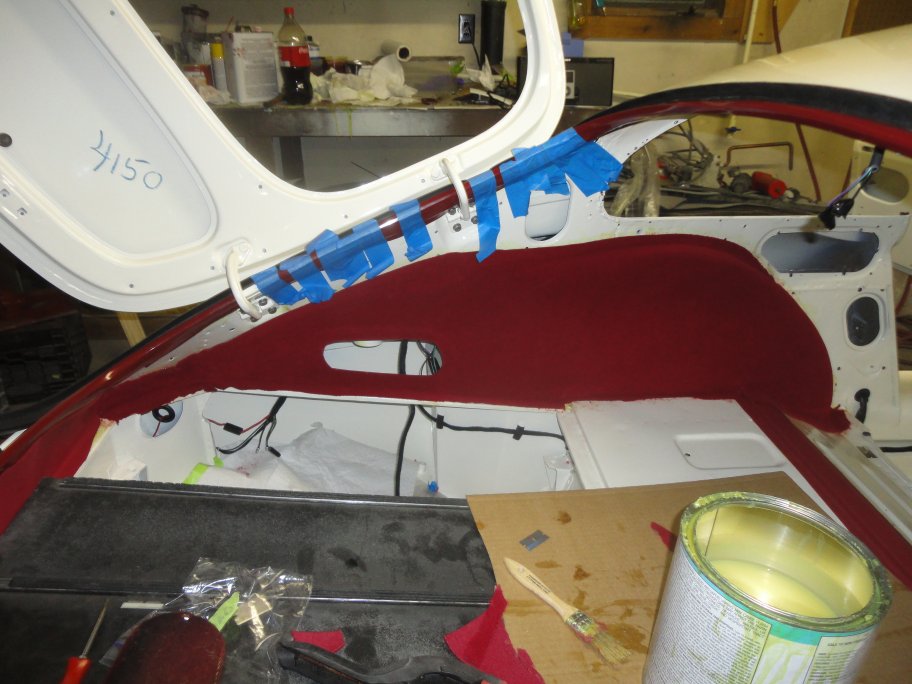
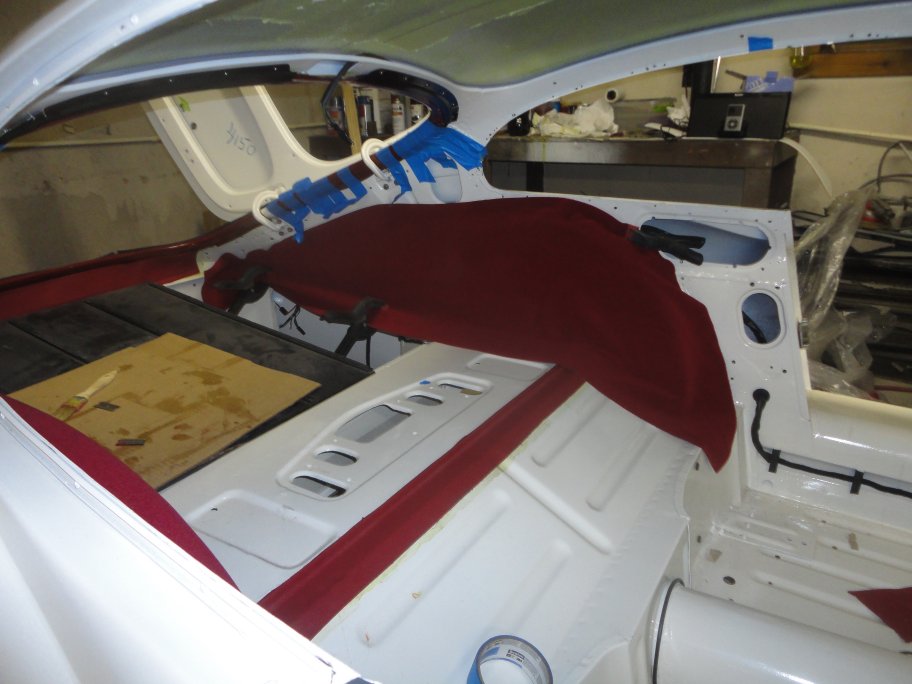 19) The wheel arches on Early E-Type Coupes where covered in a material called mocquette, which is a velvet like material. Contact cement was applied to just the perimeter
of the foam extending onto the area outside the foam (about an inch). The moquette was then clamped back in place as shown here. Mocquette is only glued in place only along
the edges. This prevents wrinkles from occuring.
19) The wheel arches on Early E-Type Coupes where covered in a material called mocquette, which is a velvet like material. Contact cement was applied to just the perimeter
of the foam extending onto the area outside the foam (about an inch). The moquette was then clamped back in place as shown here. Mocquette is only glued in place only along
the edges. This prevents wrinkles from occuring. |
 20) The glueing was done starting at the front of the arch at the top where it is curved the most.
Quick drying contact cement was applied to the back side at the mocquette. Once the contact cement was tacky, the mocquette was pressed in place. Contact cement
was then applied to a short section at the bottom edge of the mocquette. While pulling the mocquette tight downwards it was pressed in place at the bottom. The process was then repeated, working outward,
until the wheel arch was fully covered and there were no wrinkles. The excess material was trimmed off afterwords. It should be noted that the mocquette extends
all the way up to and barely overlaps the rear filler panel. The area where they overlap is not normally seen since it is covered by the side trim panels, which are installed last.
20) The glueing was done starting at the front of the arch at the top where it is curved the most.
Quick drying contact cement was applied to the back side at the mocquette. Once the contact cement was tacky, the mocquette was pressed in place. Contact cement
was then applied to a short section at the bottom edge of the mocquette. While pulling the mocquette tight downwards it was pressed in place at the bottom. The process was then repeated, working outward,
until the wheel arch was fully covered and there were no wrinkles. The excess material was trimmed off afterwords. It should be noted that the mocquette extends
all the way up to and barely overlaps the rear filler panel. The area where they overlap is not normally seen since it is covered by the side trim panels, which are installed last. It should be noted that the mocquette needs to cover the raised bump above the access cover opening. The right side does not have this bump. |