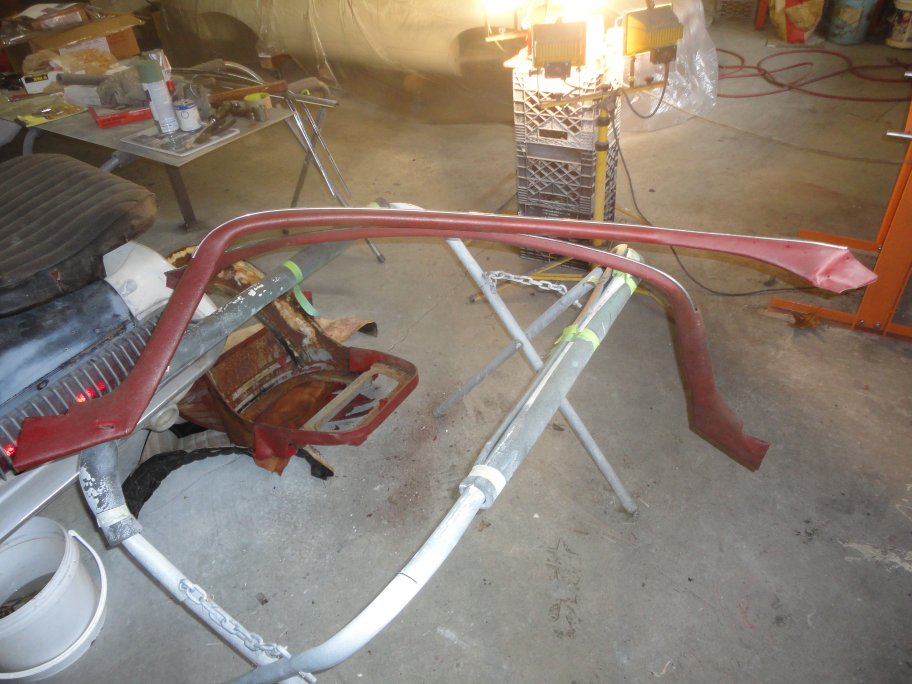
 1) The cantrails (roof rail trim) are tricky pieces to redo. They need to be installed after the headliner is installed, so its best to
get them done early.
1) The cantrails (roof rail trim) are tricky pieces to redo. They need to be installed after the headliner is installed, so its best to
get them done early.
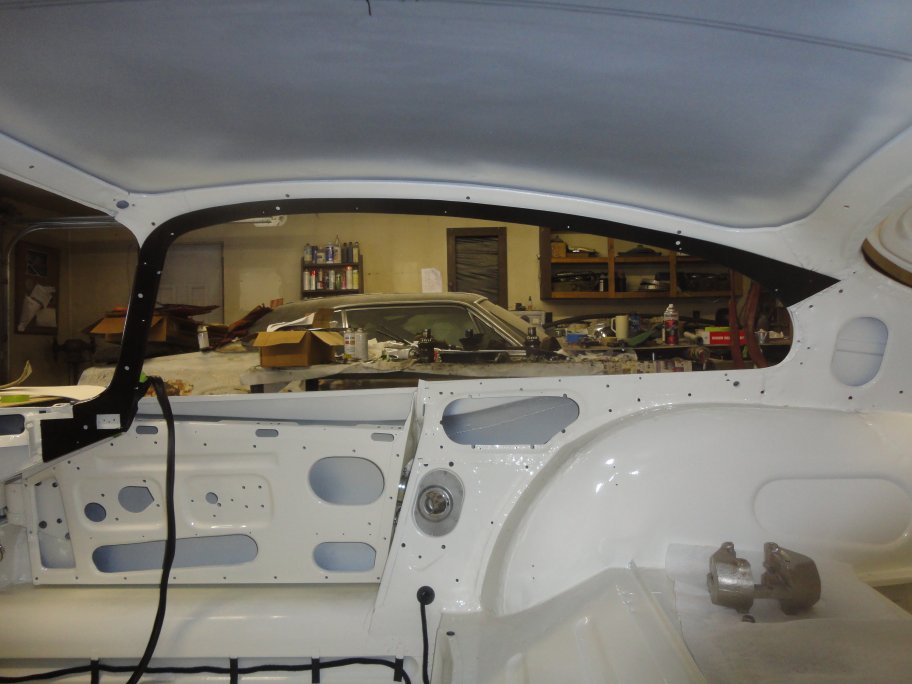
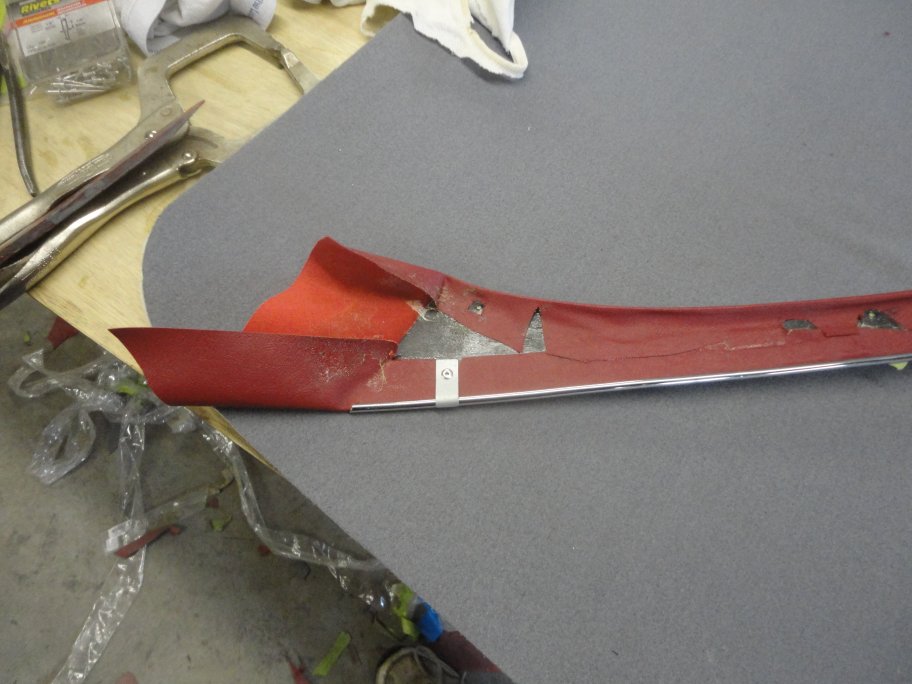
Early cars had a different grab handle set up then later series I cars. In this picture you can see a slit in the vinyl on the left side of the
right cantrial. A bracket for the grab handle is attached to the upper A-pillar and pokes out through the slit. Later cars have a different bracket
which bolt on top of the cantrail.
|
 2) The first step is to remove the chrome beading. The ends are held in place by two little sheetmetal clips that are riveted to the cantrails.
With the rivets drilled out, the chrome beading can be pried off. The bead will inevitably bend during this process. It's OK for it to bend a
little. Don't worry if you break them, they are actually made from bonnet beading.
2) The first step is to remove the chrome beading. The ends are held in place by two little sheetmetal clips that are riveted to the cantrails.
With the rivets drilled out, the chrome beading can be pried off. The bead will inevitably bend during this process. It's OK for it to bend a
little. Don't worry if you break them, they are actually made from bonnet beading.
|
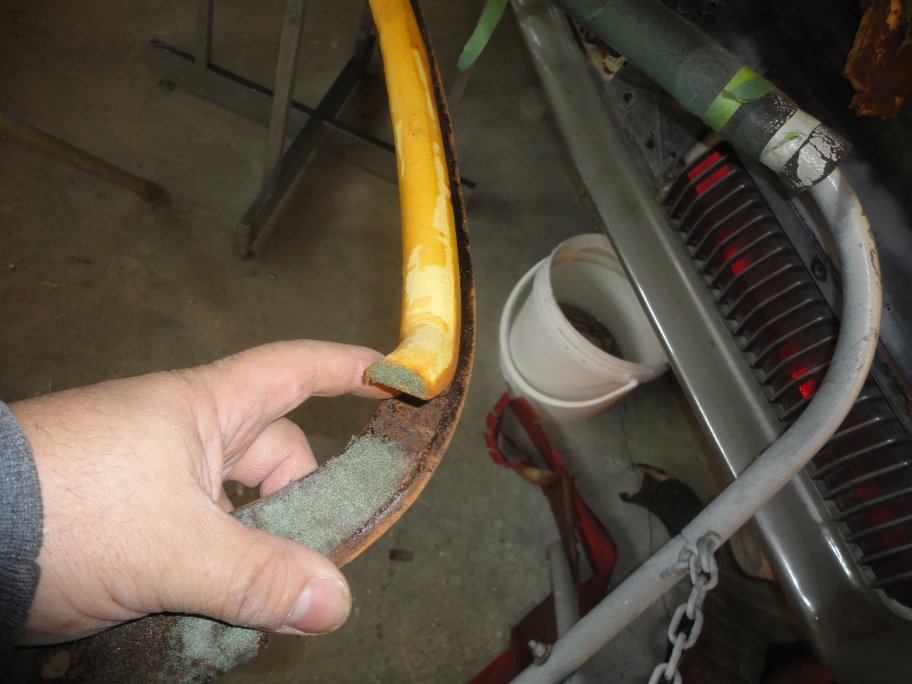
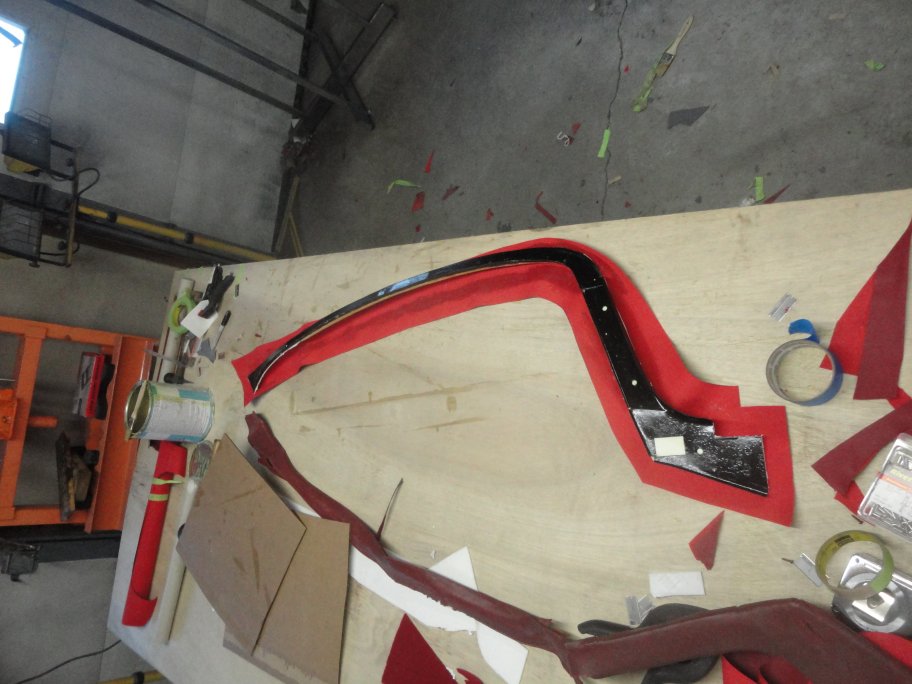
 3) After the vinyl has been removed, great care should be taken as to not damage the half-round foam that is glued to it.
|
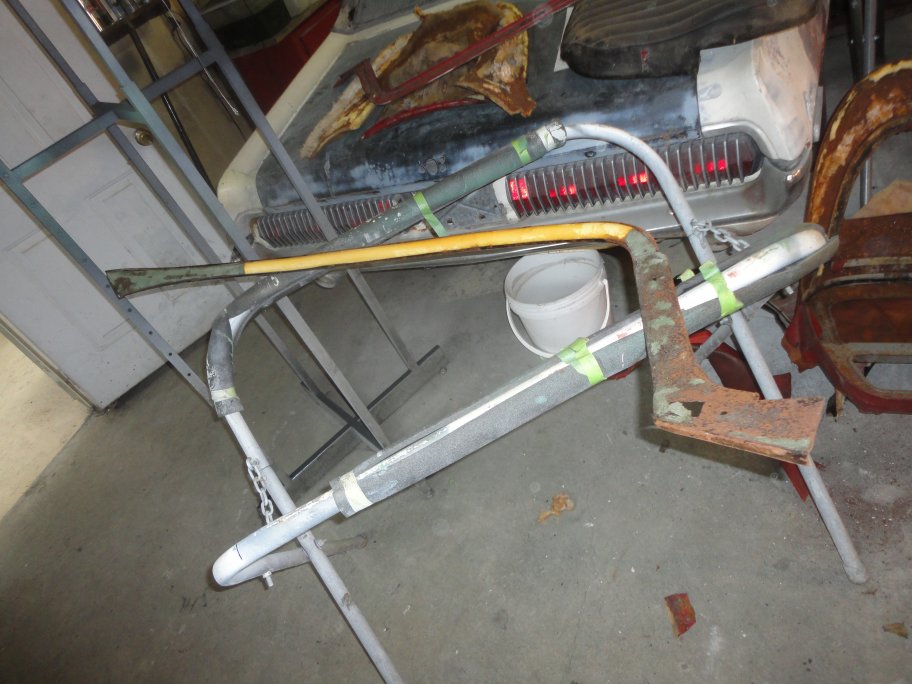
 4) Also it is important to pay attention to where the foam ends, so that it can be reinstalled in the correct location. There must be a small lip
no more than 1/4" at the top for the chrome bead. The foam has holes in its underside from where the cantrail mounting screws poked into it.
They make a great guide for lining the foam up when putting it back on.
4) Also it is important to pay attention to where the foam ends, so that it can be reinstalled in the correct location. There must be a small lip
no more than 1/4" at the top for the chrome bead. The foam has holes in its underside from where the cantrail mounting screws poked into it.
They make a great guide for lining the foam up when putting it back on.
|
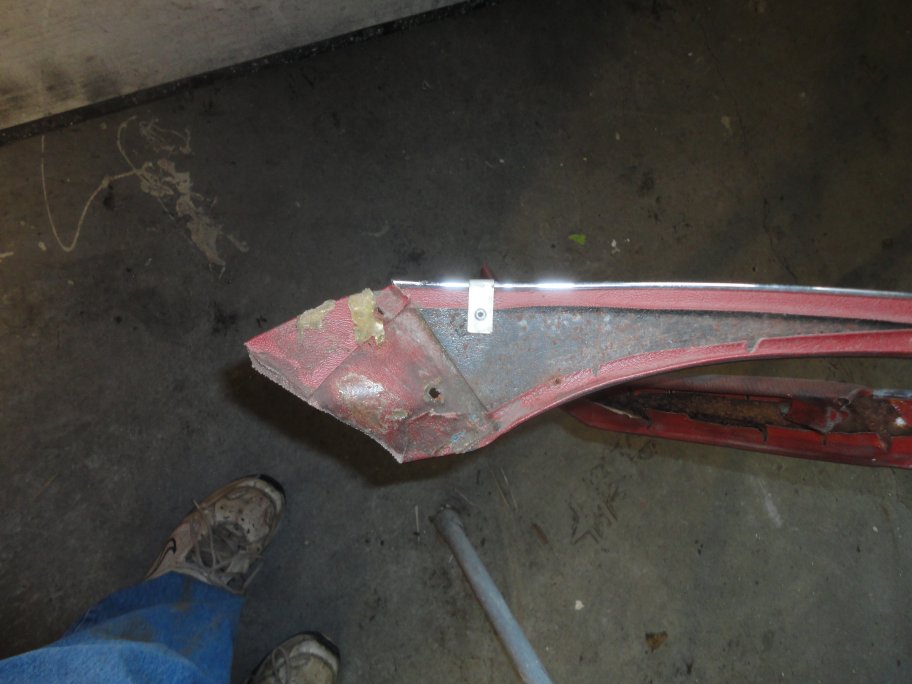
 5) I sandblasted and painted the metal piece so that the new glue would have a good purchase. Also in my case since I changed the roof, I trial fitted the
sheetmetal pieces and drilled out the mounting holes on the side of the roof rails. The cantrails are difficult to fit, so any bending should be done before
recovering them.
5) I sandblasted and painted the metal piece so that the new glue would have a good purchase. Also in my case since I changed the roof, I trial fitted the
sheetmetal pieces and drilled out the mounting holes on the side of the roof rails. The cantrails are difficult to fit, so any bending should be done before
recovering them.
|
|
|
|
 6) The half-round foam is glue down with contact cement. The rest of the cantrial face is coved with 1/8" foam. When installing the vinyl its important to know
that the vinyl is only glued along the perimeter. No glue is applied to the top of the foam. This prevents the vinyl from looking lumpy.
6) The half-round foam is glue down with contact cement. The rest of the cantrial face is coved with 1/8" foam. When installing the vinyl its important to know
that the vinyl is only glued along the perimeter. No glue is applied to the top of the foam. This prevents the vinyl from looking lumpy.
|
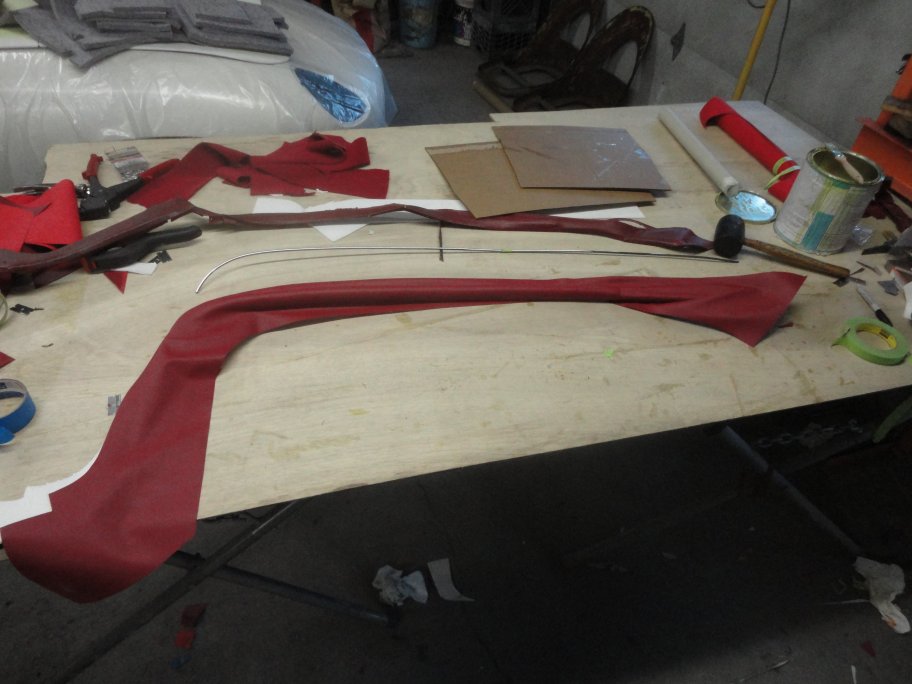 7) The first part to be glued is around the half-round foam as shown here.
|
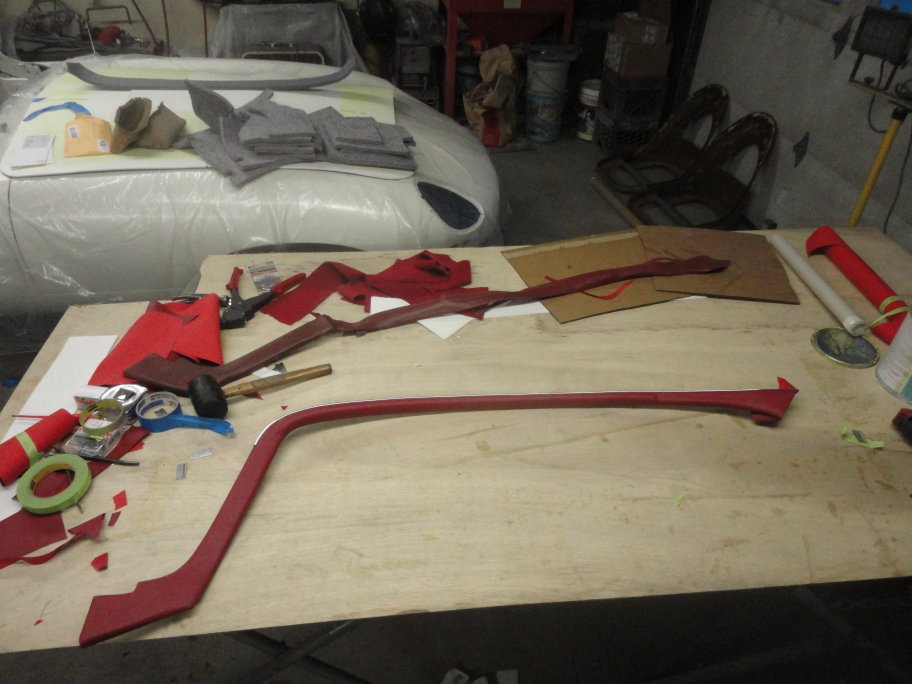 8) Here is a completed cantrial for the right side. The slit for the grab handle should not be cut at this time. It needs to be done when the cantrial is installed so that the
slit is cut in the correct location.
8) Here is a completed cantrial for the right side. The slit for the grab handle should not be cut at this time. It needs to be done when the cantrial is installed so that the
slit is cut in the correct location.
|
 9) This last picture shows one of the metal clips that are used to hold the chrome bead in place. It is important to get the bead bent really close to its final shape prior to installation
since it will keep pulling off if it is bent in situ.
9) This last picture shows one of the metal clips that are used to hold the chrome bead in place. It is important to get the bead bent really close to its final shape prior to installation
since it will keep pulling off if it is bent in situ.
|
|