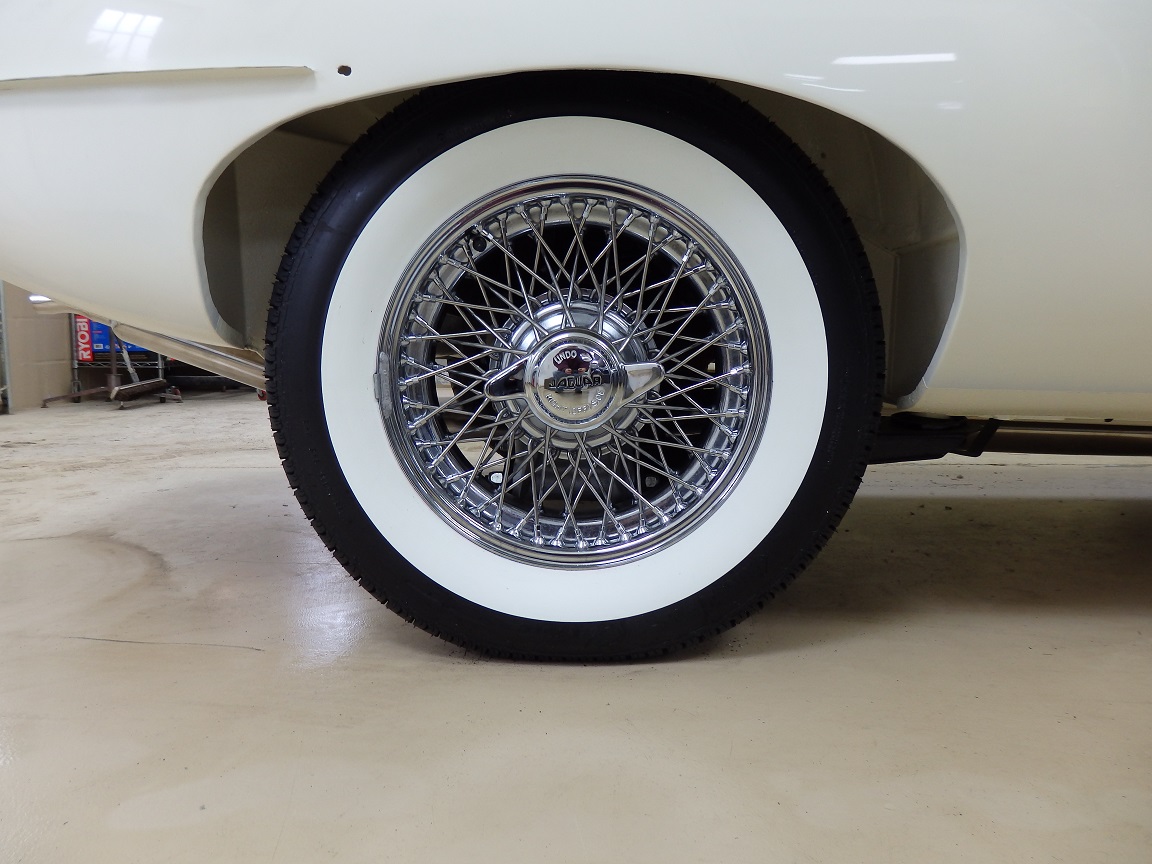
 1) The restoration continued with the tires and wheels. Originally the car would have come with Dunlop 6.40-15 RS5 bias ply tires, which would not be the most enjoyable tire to drive around with. In addition the tires may have been wide white walls like the ones shown in most of the ads at the time. I chose to loose points at the shows and buy American Classic 195/75R15 with 2 1/4" white walls from Coker Tire, which cost a whopping $231 each. The wheels I went with were Tubeless 15x5 Dayton Wire Wheels, which I purchased from SNG Barratt fro $361 each. Of course I had to buy 5 of each so that the spare matched the road wheels.
 |
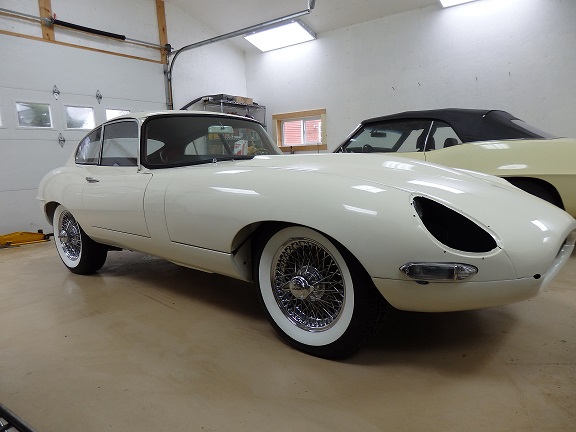 2) Here its is with the wheels and tires installed with new spinners. I think I made a good choice.
 |
|
The bumpers, bumperettes, windowshield trim and headlight bezels were sent out for rechroming on June 16, 2014 and didn't come back until Oct 2014. I decided to let the project rest until Spring 2015 when things were warmer and I could open the shop to get the engine going and drive it outside. As it turned out I was so busy on my 1970 Challenger Project that I didn't get back to working on it until July 2015. |
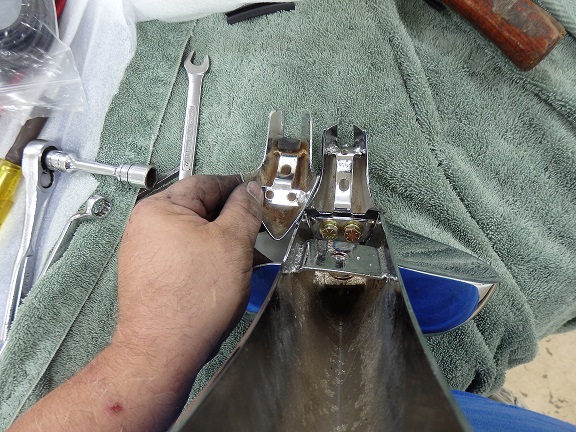
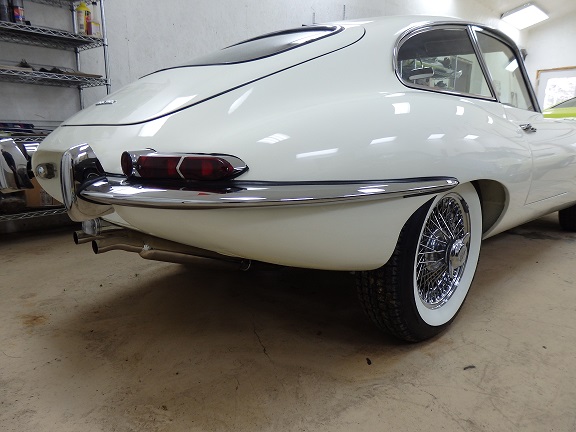 3) The restoration started up again with the assembly of the bumpers. The only real challenge with the bumpers is the fitting of the rubber seal. Prior to being sent out for rechroming the bumpers were "fitted" to the car. This basically means that they were shaped (ground down) to fit the contour of the body. When properly mounted there should be about a 0.120"- 0.160"gap between the body and the bumpers to accommodate the seal. The gap is established by using shim washers. The seal should be fitted to the bumpers prior to bolting them up to the car. Typically the seal is held in place with adhesive. I used 3M window weld to hold the seal in place.
Here the rear bumpers have been installed. |
 4) The front bumpers are more complicated than the rear. The overriders are mounted to the bumpers and the inner bumper ends are mounted to the overriders. The bumpers are then loosely fitted to the car so that the motif bar can be fitted. The overiders need to be adjusted in/out so that the spacing is correct for the motif bar to fit between the two front halves. Then it all comes appart to tighten the bumper hardware.
 |
 5) One thing I learned while assembling the front is that the motif bar and the inner bumper ends are different for the early series I's. On the early series I's such as this car, the motif bar is bolted directly to the inner bumper ends. While the later style uses a rubber mount. In this picture you can see both styles side by side. The later style has larger wings and the bracket for the rubber mount is recessed. Not shown is the motif bar. The mounting holes on the motif bar are smaller on the early series I's than it is for the later ones.
 |
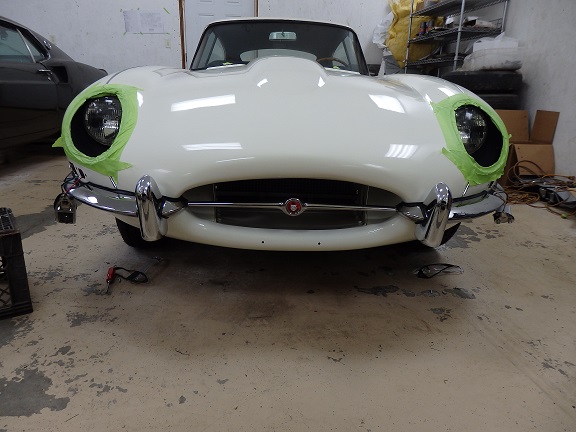
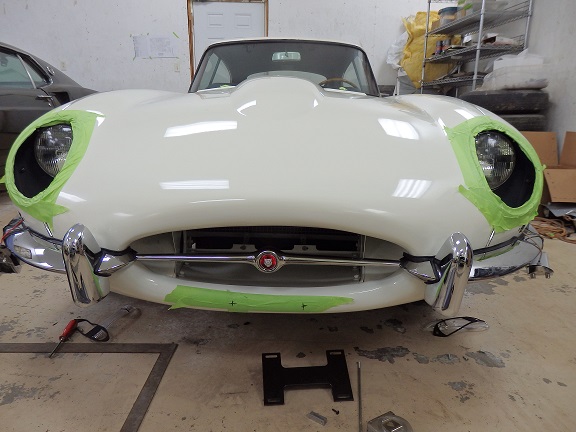 6) Here it is with the front bumpers and motif bar installed. Notice the rubber trim around the bumpers. The trim is supposed to follow the bumper all the way inside the "mouth" of the bonnet. I've seen quite a few of theses cars with the trim cut too short.
You may notice the tape with two marks on it below the motif bar. This car was originally equiped with a tilting license plate assembly. At some point earlier in it's life the bonnet had been changed, so the mounting holes were missing. Many restorers prefer to leave the tilting license plate assembly off for a cleaner look, but I am going for the most original look that I can go with. Besides Vermont requires a front license plate. |
 7) Here it is with the holes drilled out. There's no turning back now!
 |
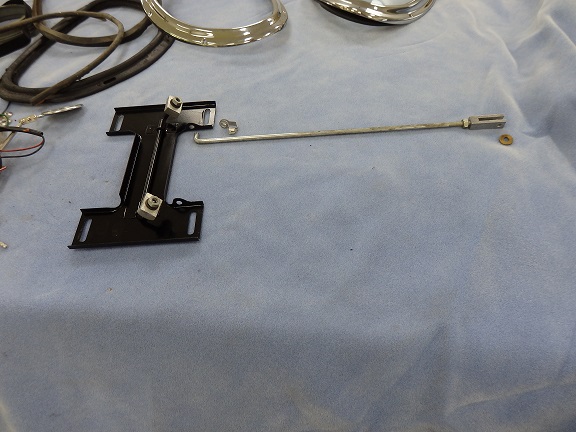 8) This is what the tilting license plate assembly looks like. I bought this one off ebay. Originally the dealer would have installed this when the car was brought to the US. In the case of this car, it was part of Jaguar's home export program, which allowed the new owner to pick up the car at the factory and take care of shipping it home themselves. This saved them a bundle on the final price of the car (more on this later). It is possible that the factory would have installed the tilting license plate assembly on this car simply because as part of the Home Export Program, the factory would register the car and put license plates on it.
 Installing the Tilting License Plate Asby is very easy when the headlight covers and scoops are not installed. It's very easy to reach inside and put the nuts on the license plate brackets. Otherwise the lower air dam would have had to be removed. |
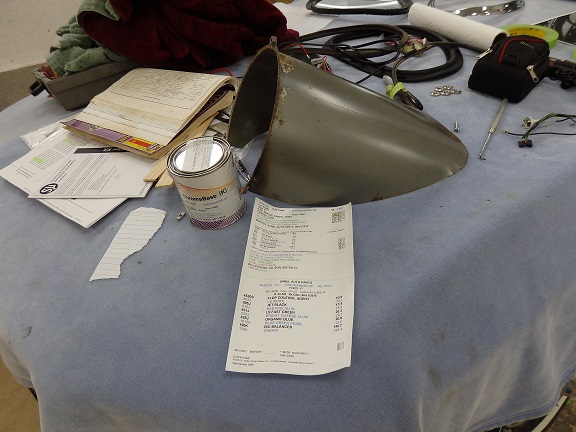 9) Next up was the headlight scoops. They are supposed to be painted a shade of charcoal gray. I tried a couple rattle can colors that were mentioned on the Jag forums, but they just weren't right. I ended up computer matching the color using the remaining original paint on the undeside of the scoops. In this picture you can see the mxing formula for the paint I bought. The stripe you see on the scoop was the "suggested" color from the jag forums, which was obviously the wrong color.
 |
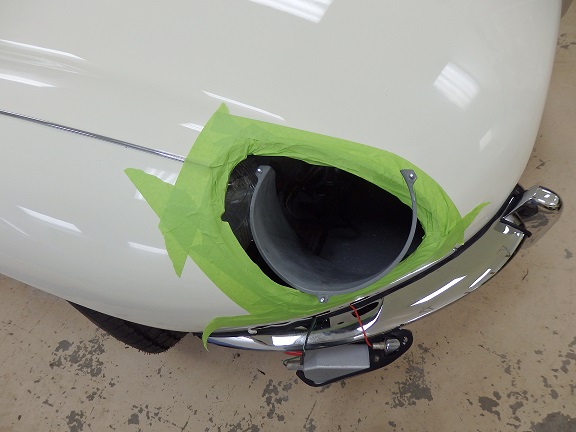 10) With the paint matched the scoops were sandbasted and primed with epoxy primer. Prior to painting I worked out how I was going to install the scoops without scratching the paint. Bolts screw into the scoops from the front and stick out into the wheel well. For proper fitting, spacers are installed between the scoops and the inned fender. As I understand it, each spacer can be different. It's just trial and error to get the scoops to fit correctly. It is best to figure out the spacers prior to painting the scoops and risking damaging the paint. In my case I actually used nuts as spacers so that they wouldn't fall off.
 The scoops themselves install rather easily if they are inserted as pictured. |
 11) Here is one of the scoops all painted. The color was a perfect match, which is sort of a greenish charcoal gray. I'm sure the shading would have varied from car to car throughout the e-type factory build.
The last touch prior to installation was to glue the tubing around the lip. I used yellow 3M trim adhesive. |
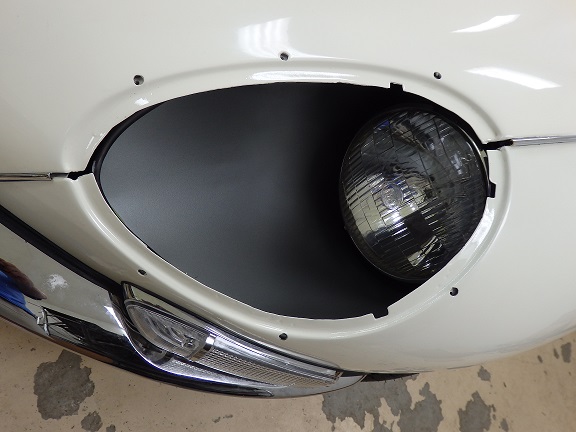 12) Here is the scoop after installation. You may notice that I installed the correct "Lucas" headlights bulbs. Besides being held in place with the bolts on the rear, there is a metal piece underneath the front of the scoop that gets bent up to hold the front of the scoop in the correct position. Also, the rubber seal is actually supposed to show after the glass covers have been installed.
 |
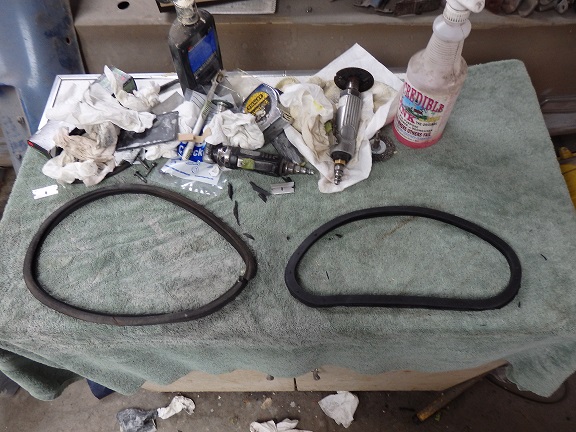
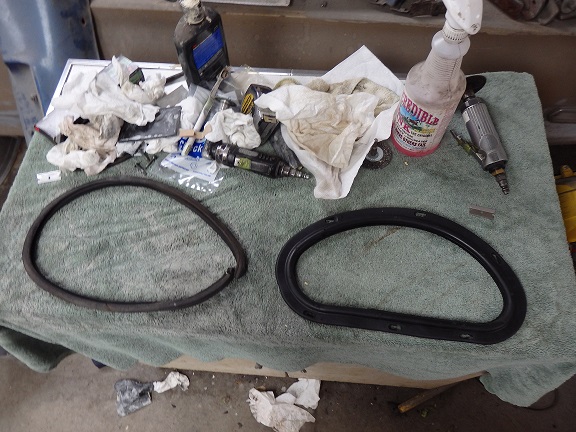 13) The next pieces to go on were the famous glass covers. In this picture you can see the orginal weatherseal (left) and the repos. I could not install the bezels to install with the repos as is.
 |
 14) I had to trim the extra material off from the weather seals, so that they resembled the originals to get the bezels to fit.
 |
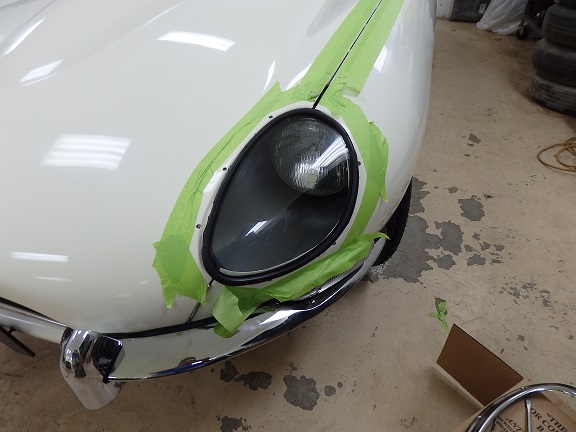 15) In this picture the weatherseal is installed on the original glass and placed in the hole. Prior to installing the bezel I filled the gap between the outer wing and the bonnet center section (at the end of the chrome beads) with 3M black weather strip caulk to keep it water tight. I also ran a tap through the threads of the captive nuts for the headlight bezels.
 |
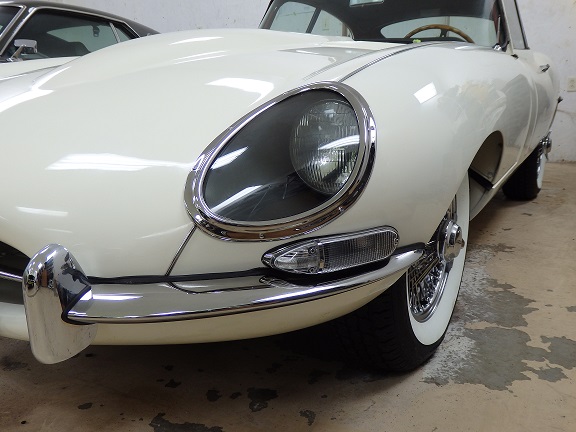 16) It still took a bunch of effort to twist the bezel and install the slotted screws. In this picture the bezel is finally installed. You may notice that the wrong screws were used for the side marker lights. Replacement lenses came from Lucas with posi-drive phillip screws. I used these screws until the correct slotted screws came in from RM & J Smith Ltd [rmj@rmjsmith.fsnet.co.uk].
 |
 17) The right side went together the same way as the left. In this picture you can see the correct slotted screws were installed on the side marker lights.
 |
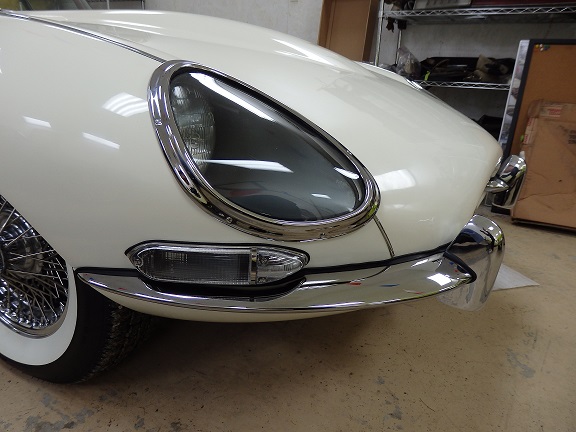
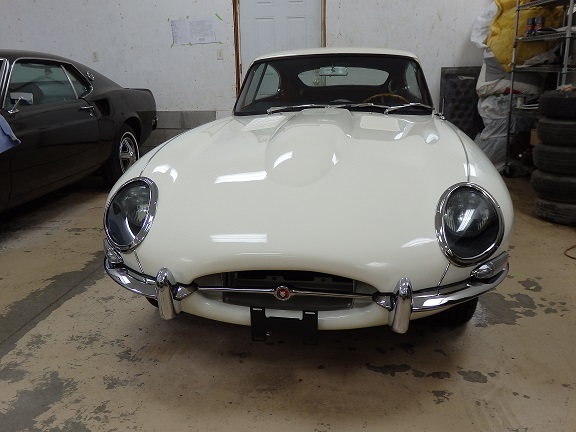 18) Here is the front completely finished. This car has not looked this good in decades.
 |