 1) As with all car interiors it seems that the interior installation is performed from the top down and with no glass installed on the vehicle. In the case
of early E-type Jaguars, (maybe later ones as well), it also means that the roof rail weatherstrips must not be installed either.
1) As with all car interiors it seems that the interior installation is performed from the top down and with no glass installed on the vehicle. In the case
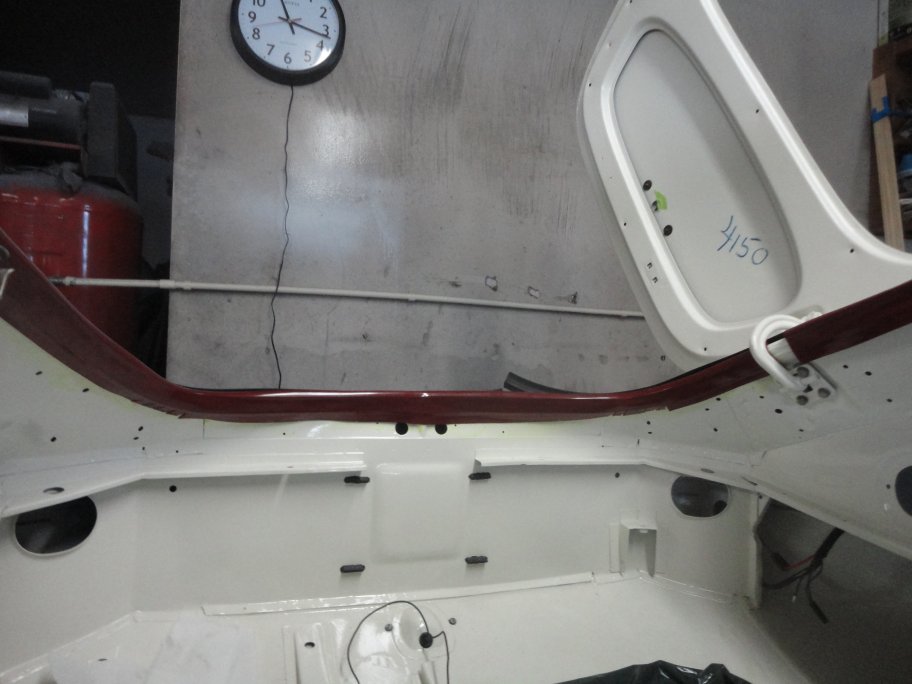
of early E-type Jaguars, (maybe later ones as well), it also means that the roof rail weatherstrips must not be installed either.Though it can be installed after the headliner, it's a good idea to start with the rear hatch trim piece. The one in the kit was black, which was not correct for my car. Though the interior kit supplier told me that the correct red one was no longer avialable, I was able to buy a red one from XKS Unlimited for $36. It was slightly different than the original though. The trim piece is glued in and needs to be heated with a heat gun to get it to fit the contour of the opening correctly. In my case I glued it and taped it down overnight. I've seen other restorers pop-rivet them in place. Though not pictured here (read further on to see what I am refering to) two metal brackets with metal teeth on the reverse side are screwed to the rear roof reinforment. The brackets help hold the trim in place and also are used for holding the roof reinforcement fabric in place. |
 2) The real process begins with the installation of the headliner. The process is simple, yet tricky. The first thing that is needed is a good adhesive and a means
for applying it. Generally, off the shelf adhesives do not stand up to the heat from the sun, which will cause the headliner to detach from the roof.
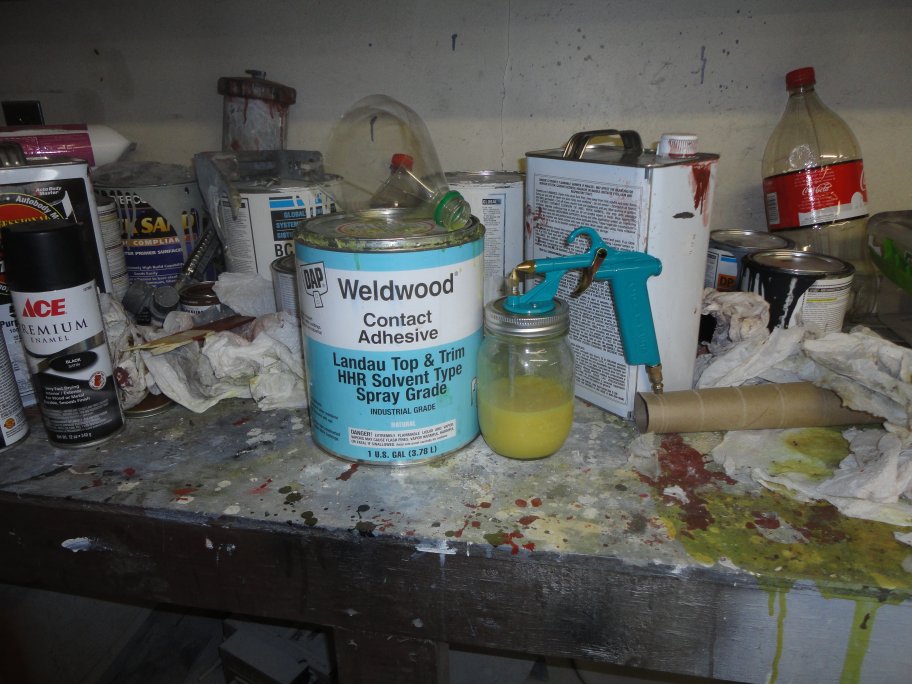
I took the advice from several members of the Jag-Lovers forum and bought a gallon of Weldwood Landau Top & Trim Adhesive. I used the Solvent type. As
a rule "if it is bad for the environment, it works better". To apply it I used a Critter Spray Gun that I got from Amazon for $35. I wouldn't paint with it
,but it works great for spraying adhesive.
2) The real process begins with the installation of the headliner. The process is simple, yet tricky. The first thing that is needed is a good adhesive and a means
for applying it. Generally, off the shelf adhesives do not stand up to the heat from the sun, which will cause the headliner to detach from the roof.
I took the advice from several members of the Jag-Lovers forum and bought a gallon of Weldwood Landau Top & Trim Adhesive. I used the Solvent type. As
a rule "if it is bad for the environment, it works better". To apply it I used a Critter Spray Gun that I got from Amazon for $35. I wouldn't paint with it
,but it works great for spraying adhesive. |
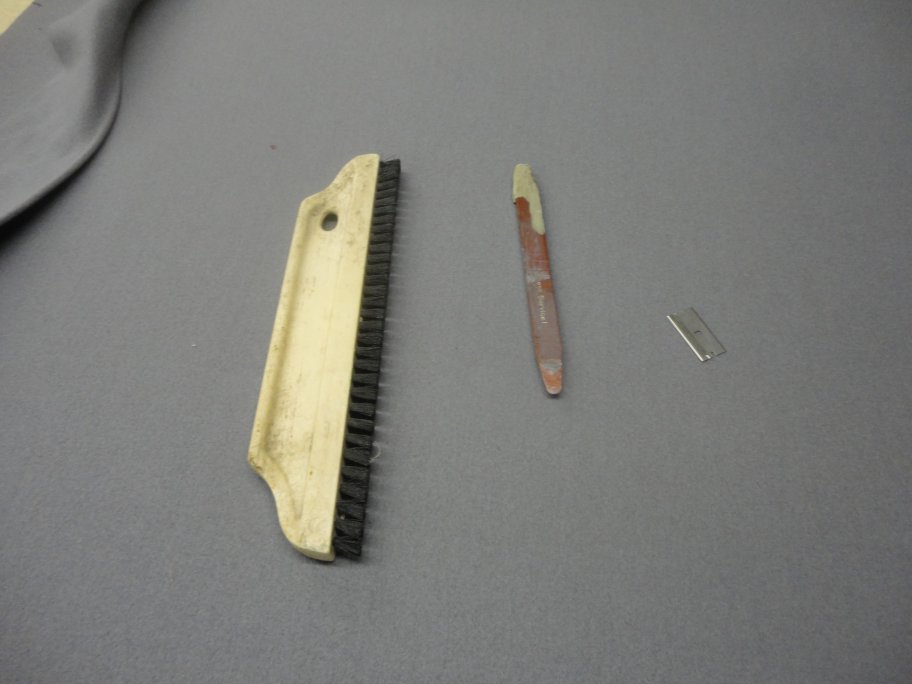 3) The only other special tools that were needed were a wallpaper brush for pressing the headliner in place, a razor blade (lots of these) for trimming the edges and a putty knife
or semi-stiff object for tucking the headliner edges in place. In my case I used a windshield setting tool, which had a nice tapper one the ends.
3) The only other special tools that were needed were a wallpaper brush for pressing the headliner in place, a razor blade (lots of these) for trimming the edges and a putty knife
or semi-stiff object for tucking the headliner edges in place. In my case I used a windshield setting tool, which had a nice tapper one the ends. |
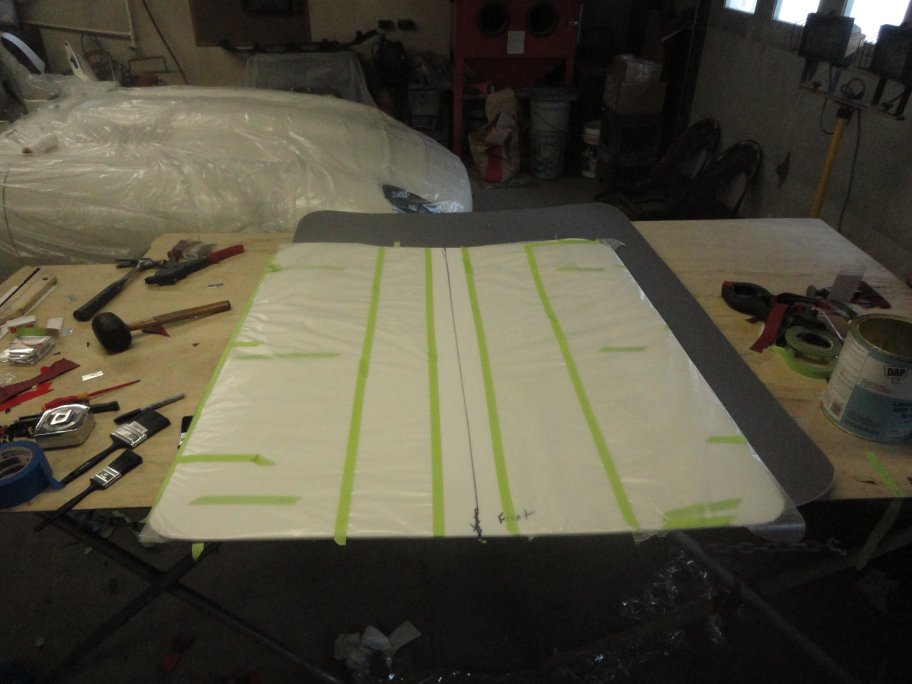
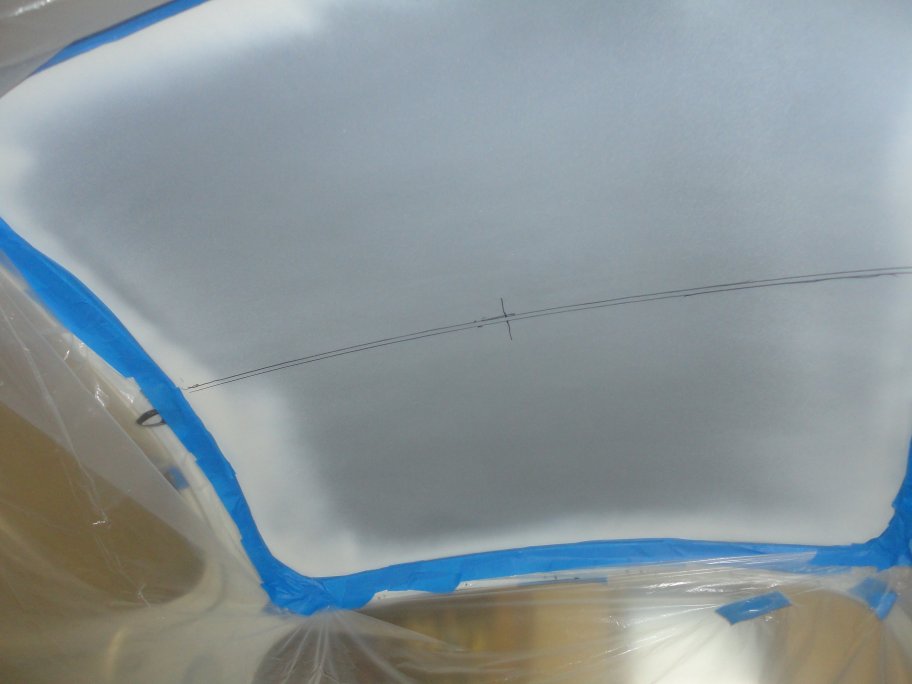 4) The first step is to mark the center line of the roof. The headliner I have was only 1 inch wider then the roof, so accurate placement was important.
 |
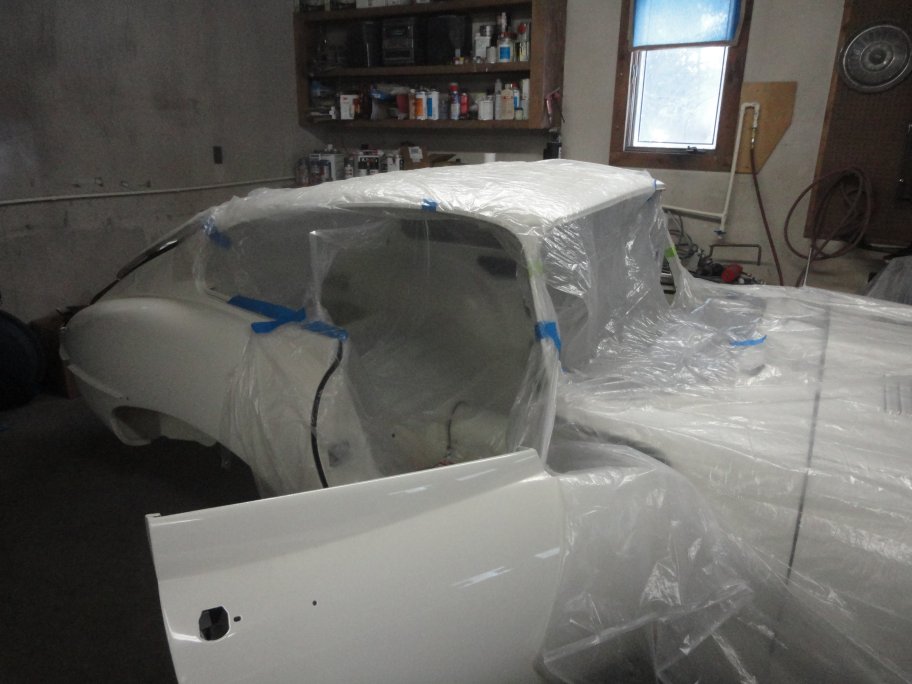 5) Of course I didn't want to get any glue on my beautiful car, so I masked off the car from the inside.
 |
 6) With a little bit of practice I was able to easily able to spray the adhesive to the underside of the roof. Warning: I used a chemical paint mask. The fumes should
not be inhaled and they are quite concentrated in the confined space of the interior of the car.
6) With a little bit of practice I was able to easily able to spray the adhesive to the underside of the roof. Warning: I used a chemical paint mask. The fumes should
not be inhaled and they are quite concentrated in the confined space of the interior of the car. |
 7) I actually ruined a headliner trying to install it. I had sprayed the entire back side of the headliner with adhesive. When I crawled into the car with it,
the headliner bumped the roof. Unfortuntaly once the two surfaces with adhesive make contact, they can not me moved. I destroyed the headliner trying to
peel it free. $370 later I had another headliner and a different approach.
7) I actually ruined a headliner trying to install it. I had sprayed the entire back side of the headliner with adhesive. When I crawled into the car with it,
the headliner bumped the roof. Unfortuntaly once the two surfaces with adhesive make contact, they can not me moved. I destroyed the headliner trying to
peel it free. $370 later I had another headliner and a different approach. I drew a centerline on the headliner and cut a couple V-notches at the ends. I covered the headliner with wax paper except for a strip running down the middle. I brushed adhesive onto the exposed strip. Once it set up, I covered the strip with five individual pieces of wax paper. |
 8) I ran a string down the centerline of the roof and hung the headliner over the string. The V-nutches held the headliner centered. (sorry no pics). I crawled into the
car and sat with my butt on the transmision tunnel. With the help of a lovely assistant (the assistant doesn't have to be lovely, but it helps!), the headliner was held
centered from left to right and front to back. I actually had to hold it in place with my feet, so no shoes!
8) I ran a string down the centerline of the roof and hung the headliner over the string. The V-nutches held the headliner centered. (sorry no pics). I crawled into the
car and sat with my butt on the transmision tunnel. With the help of a lovely assistant (the assistant doesn't have to be lovely, but it helps!), the headliner was held
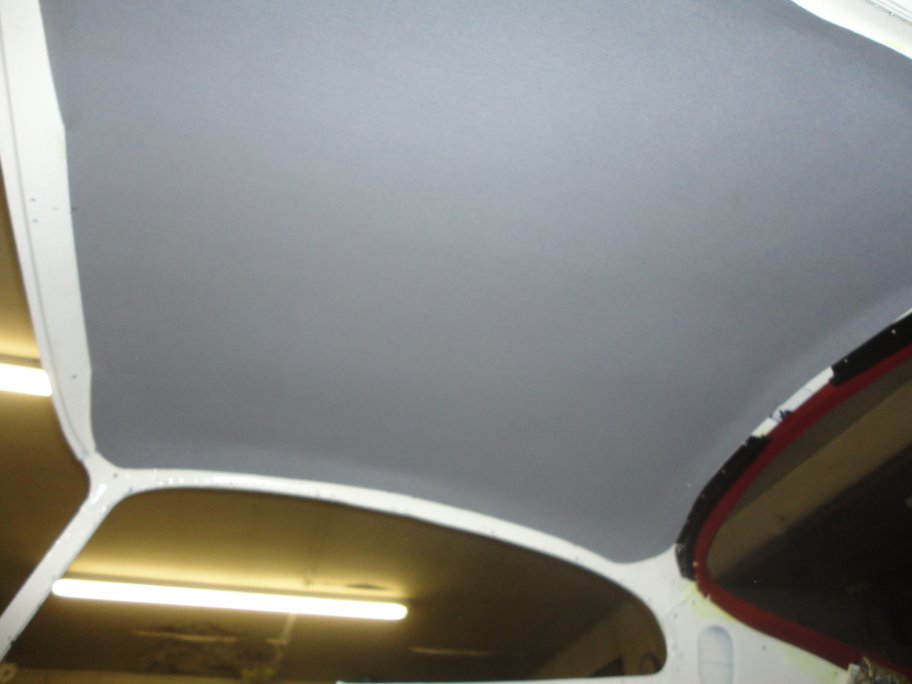
centered from left to right and front to back. I actually had to hold it in place with my feet, so no shoes! With the headliner firmly centered, the centermost piece of waxpaper was removed. The headliner was pressed against the roof using the wallpaper brush. Now the headliner couldn't be shifted the remaining 4 pieces of waxpaper were removed and the headliner was pressed in place using the wallpaper brush from the center out (center to front, center to rear). At this point I no longer needed the services on my assistance or the center line string. The headliner was free to safely hang from the roof. The next step was to simply remove the long strips of wax paper and brush adhesive on the headliner. Once the adhesive was tacky, I brushed the headliner in place from the center out (center to right, center to left). The result is pictured here. You may notice the the headliner sticks out beyond the inner roof rails. It has to, since the headliner must be tucked under the roof reinforcement. |
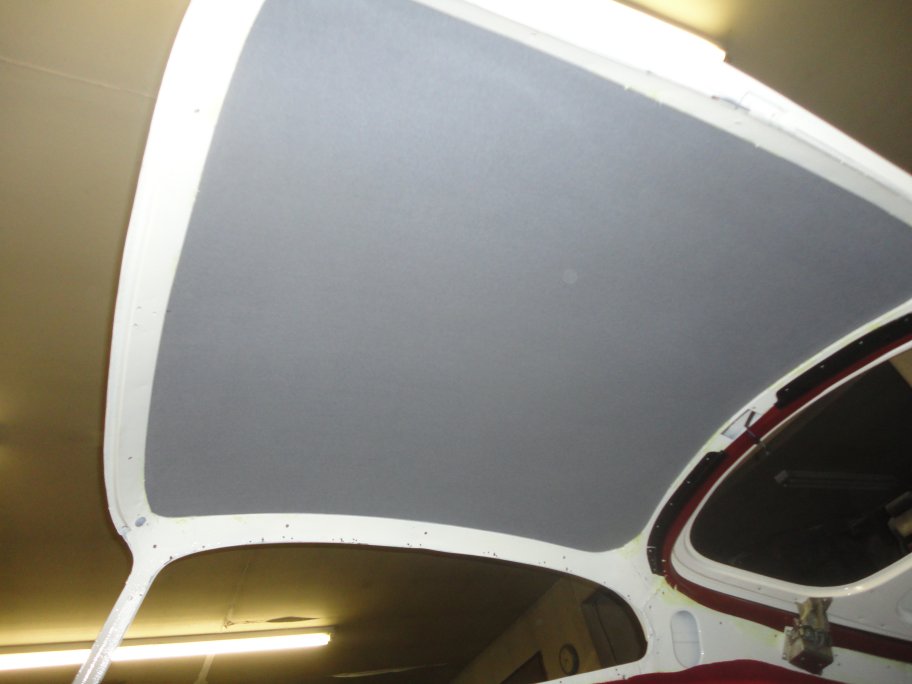 9) Carfully the headliner was trimmed and tucked under the roof reinforcement. I used my windshield setting tool to stuff the headliner edges in place. You want to use something
that won't tare into the headliner. A flexible putty knife or a paint paddle will work just fine.
9) Carfully the headliner was trimmed and tucked under the roof reinforcement. I used my windshield setting tool to stuff the headliner edges in place. You want to use something
that won't tare into the headliner. A flexible putty knife or a paint paddle will work just fine.NOTE: In this picture you can see the brackets that are screwed to the roof reinforcements.They should be installed by this point since they will be need to complete the next step in the process. |