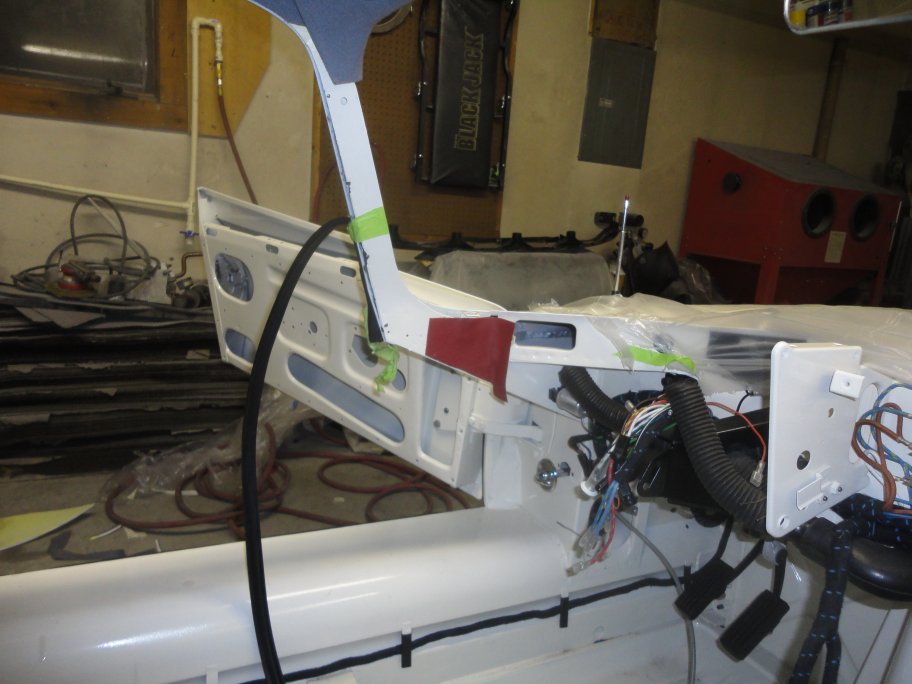
 41) The first peice to be fitted when installing the side panels depends on the when the car was built. Early Series I cars received these
small peices of vinyl which are glue to the botttom of the windshield pillars. They are installed prior to the dash panels and the cantrials.
41) The first peice to be fitted when installing the side panels depends on the when the car was built. Early Series I cars received these
small peices of vinyl which are glue to the botttom of the windshield pillars. They are installed prior to the dash panels and the cantrials.
|
 42) The cantrials or (cant rails) are screwed in place and require the roof rail weather seals to be not installed.
|
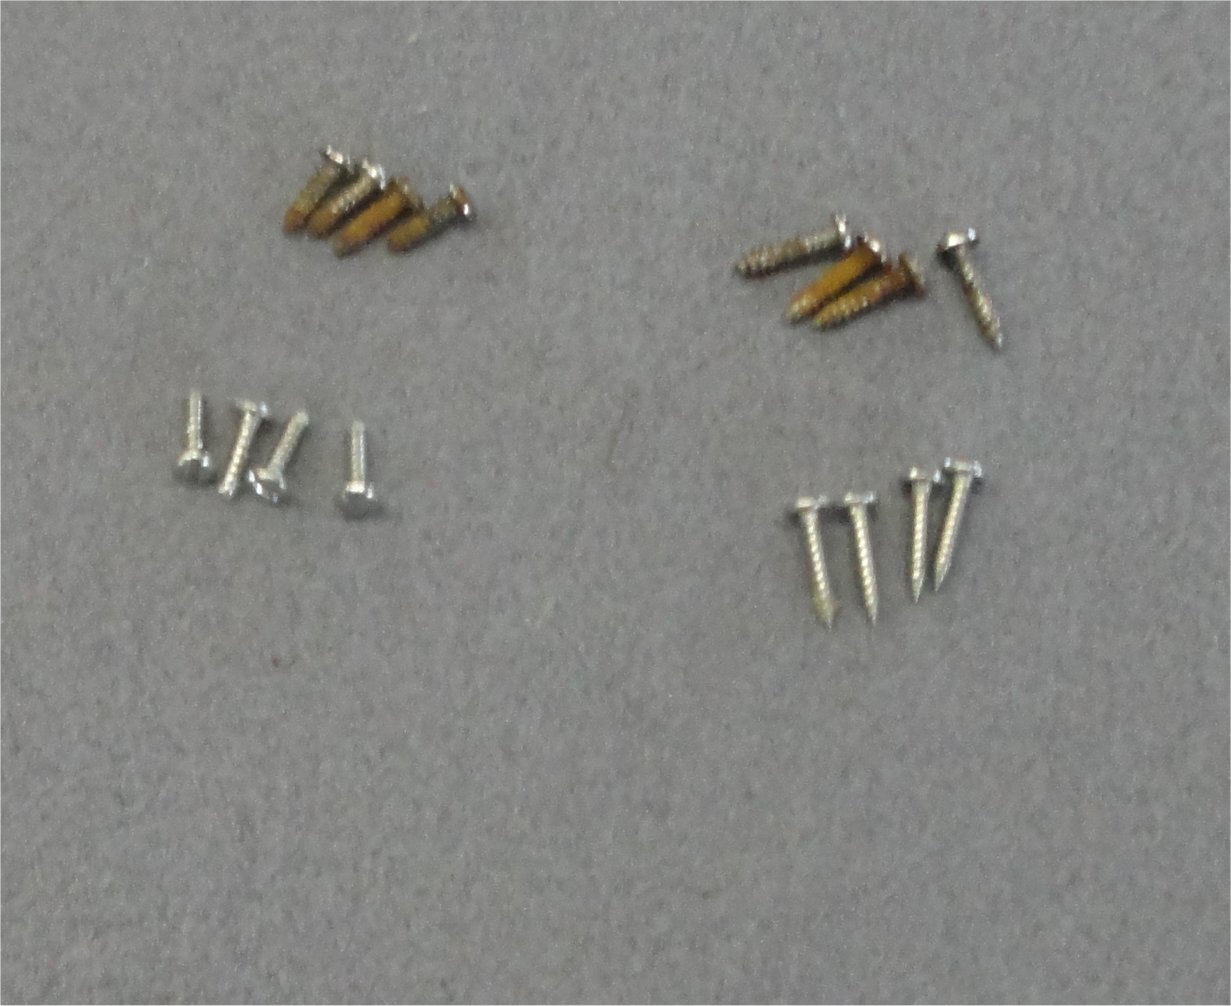 43) There are two different length screws that were used. The longer ones went into the section of the cantrial that has the half round foam glued to
it. Picking the wrong lenght screw will result in a screw hole in the vinyl.
43) There are two different length screws that were used. The longer ones went into the section of the cantrial that has the half round foam glued to
it. Picking the wrong lenght screw will result in a screw hole in the vinyl.
|
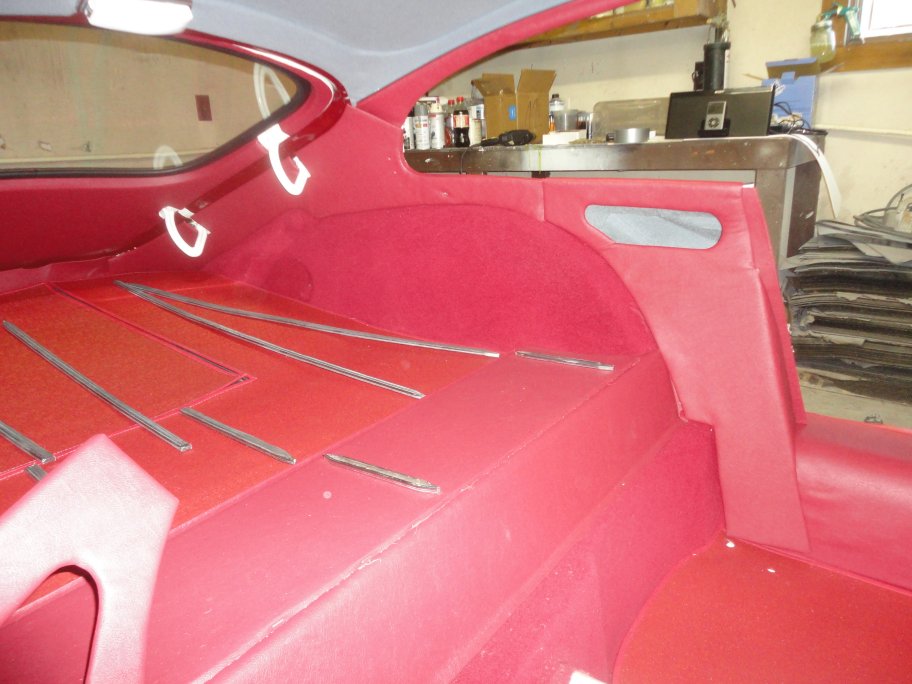
 44) The rear side trim goes in next. These panels have little clips that hook from the back side, like door panels. All one has to do is line up the clips with the
holes in the body and pound them in by hand. Since the suppier that I used did not do a very good job of making the panels, I had to take them apart and reglue them
so that there were no wrinkles. I took me several attemps to get it right. I also had to make the holes for the seat belt mounting bolt and the quarter window
latches.
44) The rear side trim goes in next. These panels have little clips that hook from the back side, like door panels. All one has to do is line up the clips with the
holes in the body and pound them in by hand. Since the suppier that I used did not do a very good job of making the panels, I had to take them apart and reglue them
so that there were no wrinkles. I took me several attemps to get it right. I also had to make the holes for the seat belt mounting bolt and the quarter window
latches.
|
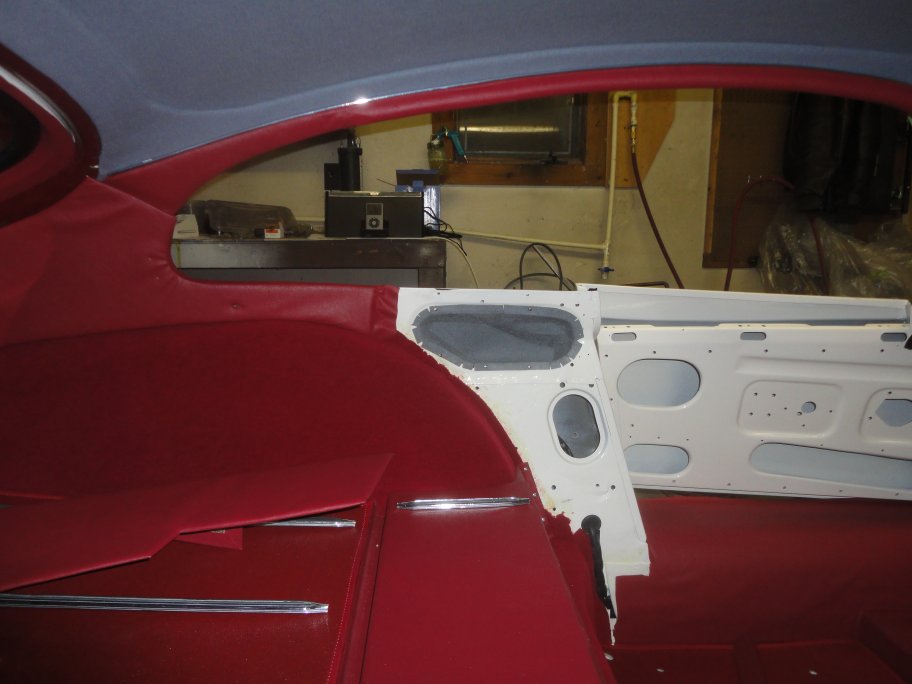
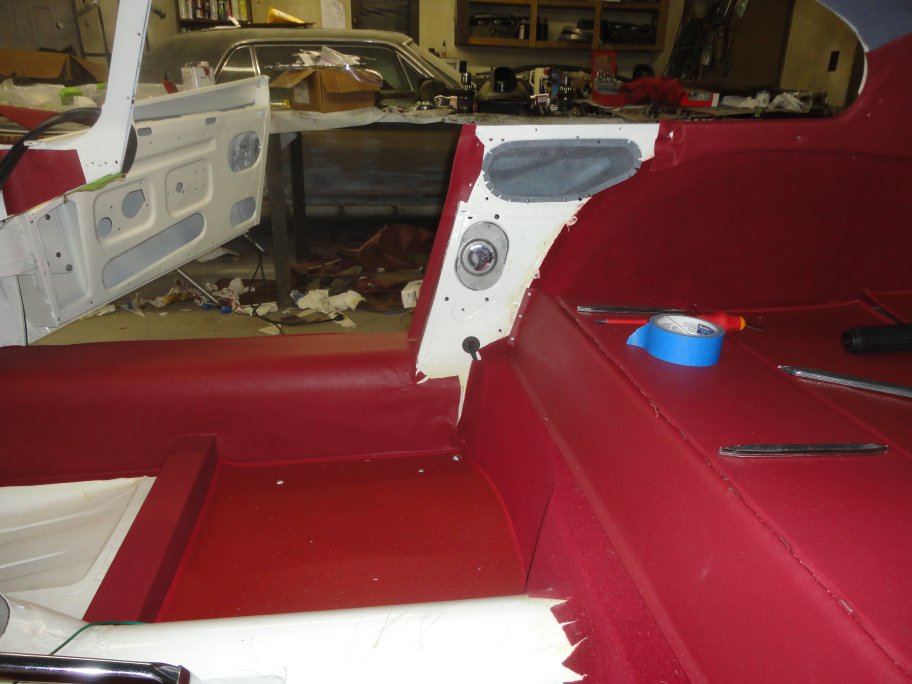
 45) The next pieces to go in were the side pockets and the B-pillar trim. The B-pillar trim is screwed in place. However, since the inner B-pillars were replaced,
new holes had to be drilled. To get it to line-up correctly the B-pillar trim was aligned with the front quarter trim with the door closed. There should be a gap slightly
wider than the door panel (because the door panels have yet to be installed), between the door and the B-pillar trim.
45) The next pieces to go in were the side pockets and the B-pillar trim. The B-pillar trim is screwed in place. However, since the inner B-pillars were replaced,
new holes had to be drilled. To get it to line-up correctly the B-pillar trim was aligned with the front quarter trim with the door closed. There should be a gap slightly
wider than the door panel (because the door panels have yet to be installed), between the door and the B-pillar trim.
|
|
|
|
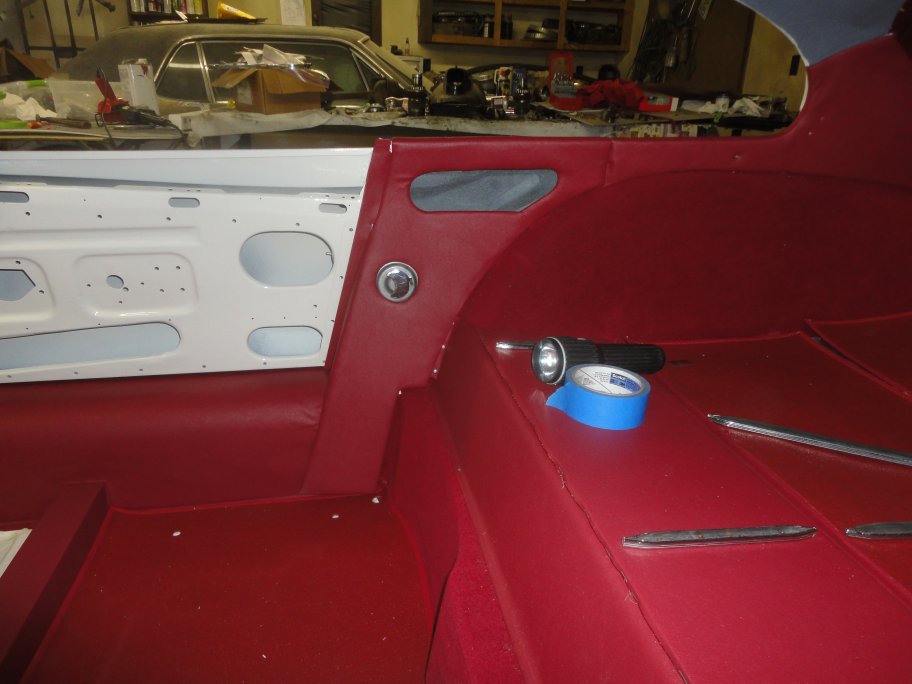
 46) The front quarter trim is mostly held in place with the same clips that hold the rear trim in place. However, there is a screw at the very bottom within the door jamb that
holds the panel tight to the B-pillar trim. The front quarter trim was originally vinyl covered cardboard, but my supplier produced them using sheetmetal. Though sheetmetal was
a good idea, I still installed the screw inside the door jamb to make it look correct.
46) The front quarter trim is mostly held in place with the same clips that hold the rear trim in place. However, there is a screw at the very bottom within the door jamb that
holds the panel tight to the B-pillar trim. The front quarter trim was originally vinyl covered cardboard, but my supplier produced them using sheetmetal. Though sheetmetal was
a good idea, I still installed the screw inside the door jamb to make it look correct.
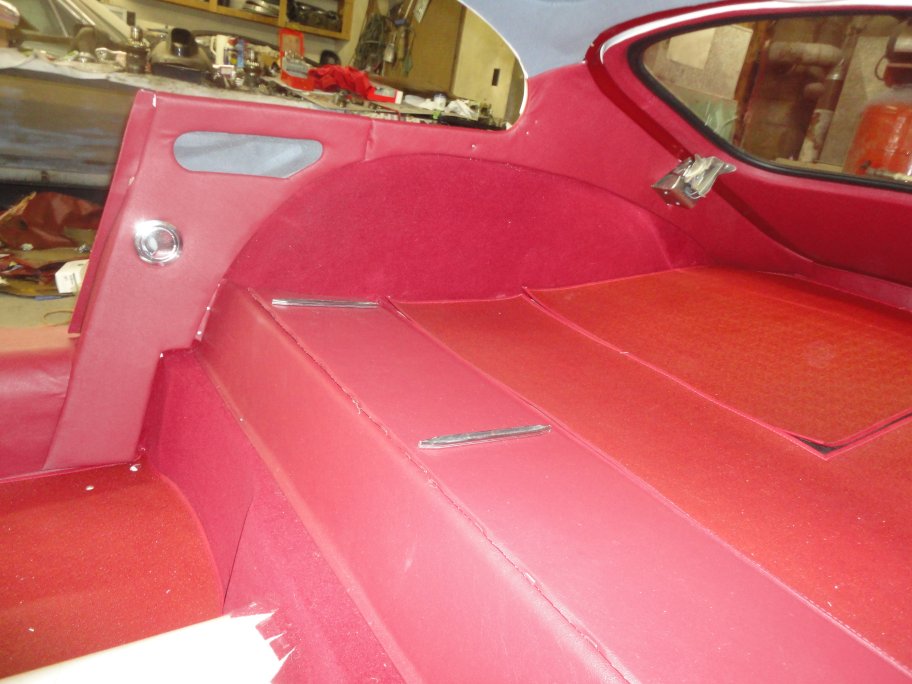
One flaw in the design of this car is that a main rear harness comes out of the lower inner sill at the bottom of the front quarter trim. This usually results in an unsightly
bulge at the bottom. Some people add extra screws at the bottom to pull the panel in on either side of the harness. In my case I just bent the sheetmetal based panel around it.
Do not take this as a great selling point and go seeking your interior kit from the same supplier that I did. I plan to never buy from that supplier again for a long list of reasons.
|
 47) The the right side trim goes in just like the left side. The only difference being that the right side has an opening for the hatch release.
|
 48) This is where my supplier messed up the worst. The hole did not line up with the handle. I had to remove all of the fabric from the panel, drill the hole out larger and cut back some of the foam padding. I
also had to rebend the metal.
48) This is where my supplier messed up the worst. The hole did not line up with the handle. I had to remove all of the fabric from the panel, drill the hole out larger and cut back some of the foam padding. I
also had to rebend the metal.
|
 49) Here it is after a couple hours of grief. Everything fit, but I still needed to take the wrinkles out. The right cantrail had yet to be installed since I was waiting for a piece of chrome for the passengers pull
handle.
49) Here it is after a couple hours of grief. Everything fit, but I still needed to take the wrinkles out. The right cantrail had yet to be installed since I was waiting for a piece of chrome for the passengers pull
handle.
|
|