 The rear seat area gets assembled starting with the sail panel trim brackets (6) and then the package tray reenforcement (assuming that you don't have a fold-down rear seat).
The hard ware should be kept slightly loose until all the parts have been fitted. Note: All of these parts are painted semi-flat black.
The rear seat area gets assembled starting with the sail panel trim brackets (6) and then the package tray reenforcement (assuming that you don't have a fold-down rear seat).
The hard ware should be kept slightly loose until all the parts have been fitted. Note: All of these parts are painted semi-flat black.
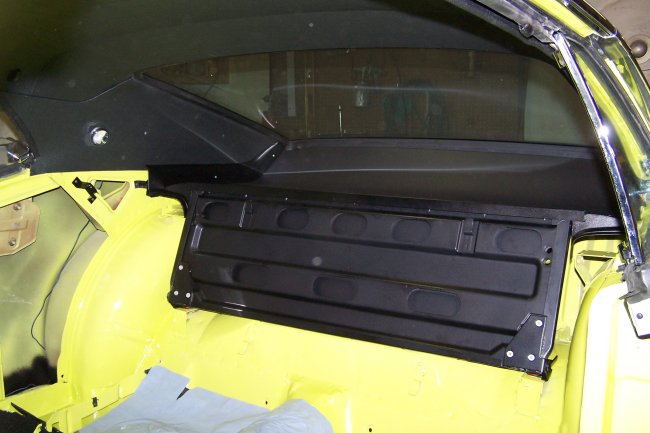
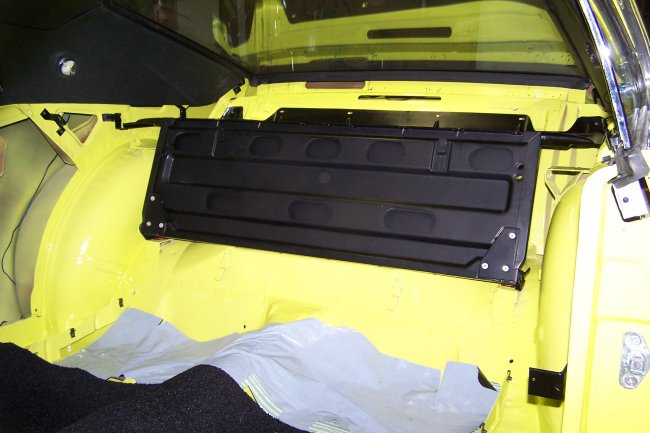 Next comes the read seat reenforcement (back). This part is actually the same part that is used on cars with a fold-down rear seat. The lower portion of the panel is actually hinged.
The hinge bolts need to be kept slightly loose, because the in-out and side-to-side adjustment must be made with the fiberglass rear trim panels installed. This is
especially important when installing fold-down rear seats, since they rest on top of the rear quarter trim panels. A missalignmnet can result in the fold-down seat digging into
the panel. Note: The read seat reenforcement is a painted charcoal grey metallic on all fixed rear seat cars.
Next comes the read seat reenforcement (back). This part is actually the same part that is used on cars with a fold-down rear seat. The lower portion of the panel is actually hinged.
The hinge bolts need to be kept slightly loose, because the in-out and side-to-side adjustment must be made with the fiberglass rear trim panels installed. This is
especially important when installing fold-down rear seats, since they rest on top of the rear quarter trim panels. A missalignmnet can result in the fold-down seat digging into
the panel. Note: The read seat reenforcement is a painted charcoal grey metallic on all fixed rear seat cars.
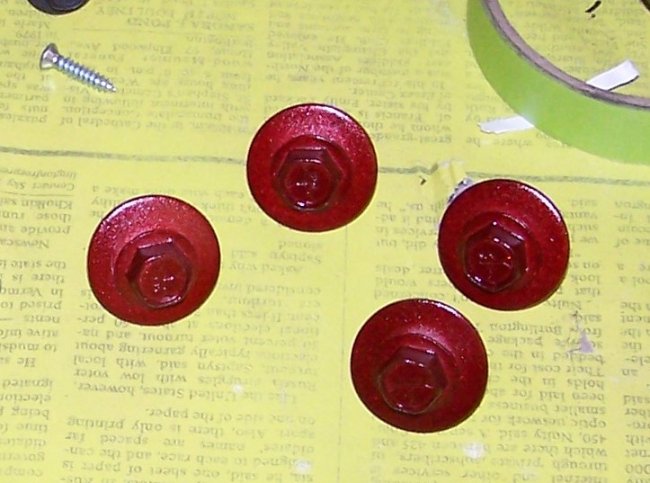 Here are the special bolts that hold the hinges to the floor. They were originally red cadmium plated. However, the repo kits do not come with the correct hardware at all.
I have yet to come across a vendor that would replate these for me in red, so I used a red chrome krylon paint to get the original look back.
Here are the special bolts that hold the hinges to the floor. They were originally red cadmium plated. However, the repo kits do not come with the correct hardware at all.
I have yet to come across a vendor that would replate these for me in red, so I used a red chrome krylon paint to get the original look back.
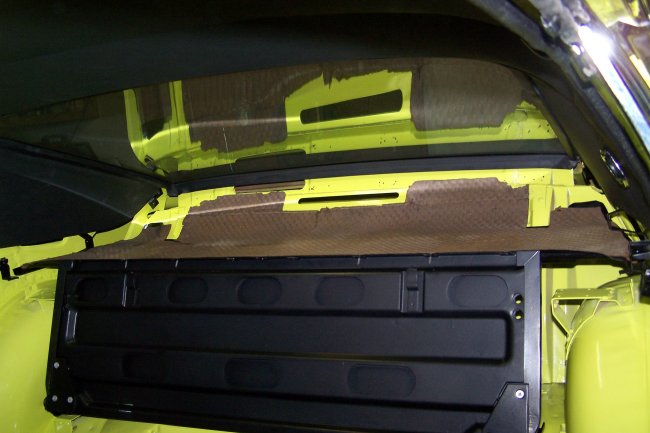 Next comes the rest of the package tray. As seen here, there is a special card board underlayment (was a wavey pattern to it) that goes inbetween the reenforcment and the
package tray. I was lucky with this car. Usually there are speaker holes cut into it like on my previous fastback project.
Next comes the rest of the package tray. As seen here, there is a special card board underlayment (was a wavey pattern to it) that goes inbetween the reenforcment and the
package tray. I was lucky with this car. Usually there are speaker holes cut into it like on my previous fastback project.
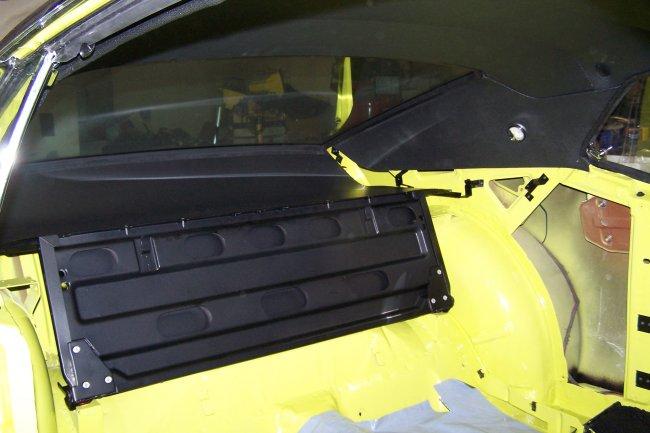 Next goes in the package tray board. As with many cars the original one was warped beyond use. Repos, like this one, are available. They still need to be trimmed and painted.
In this case it needed to be black. I used several light coats of Krylon 1613 to get the correct look back. It should be noted that when installing the package tray, it needs
to be tucked underneath the rear window seal.
Next goes in the package tray board. As with many cars the original one was warped beyond use. Repos, like this one, are available. They still need to be trimmed and painted.
In this case it needed to be black. I used several light coats of Krylon 1613 to get the correct look back. It should be noted that when installing the package tray, it needs
to be tucked underneath the rear window seal.
 The next things that get installed is the package tray trim and the rear seat reenforcement (seat back) caps. They wasy I do it is to install the side trim (hockeysticks) and push on the lower
rear seat reenforcement so that the trim (hockeysticks) makes proper contact with the package tray on both sides. Then I tighten the seat hinge bolts to hold it in place. Then I bolt the
rear seat reenforcement in place using the upper stop brackets. Once that is done, I put the rear seat trim caps on. Note: All of these trim parts are painted charcoal grey metallic on black
interior cars.
The next things that get installed is the package tray trim and the rear seat reenforcement (seat back) caps. They wasy I do it is to install the side trim (hockeysticks) and push on the lower
rear seat reenforcement so that the trim (hockeysticks) makes proper contact with the package tray on both sides. Then I tighten the seat hinge bolts to hold it in place. Then I bolt the
rear seat reenforcement in place using the upper stop brackets. Once that is done, I put the rear seat trim caps on. Note: All of these trim parts are painted charcoal grey metallic on black
interior cars.
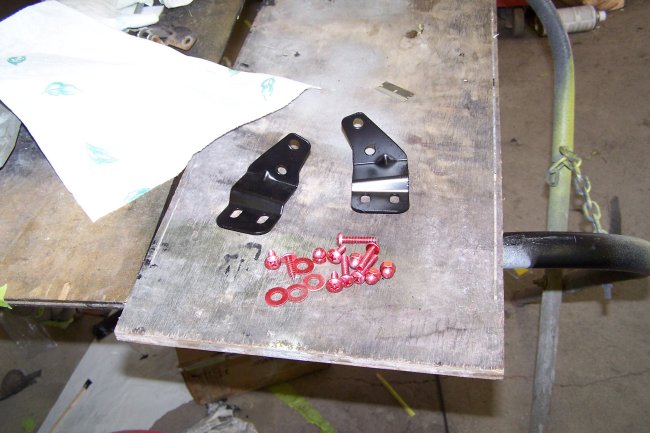 Here are the upper stop brackets and the attaching hardware that I bought from AMK products. Notice that the hardware is red cadmium plated and the bracket is painted charcoal grey metallic.
For the next part you HAVE TO HAVE THE REAR QUARTER WINDOWS INSTALLED AND ALIGNED TO THE DOOR GLASS (refer to Interior Assembly Part III - Doors). The lower quarter windows hardware can not be accessed once the rear quarter trim panels are installed.
 With that being said, the next thing that gets installed is the rear outer seat belts. They are installed with the belts perpendicular to the sides of the car and with the Ford factory labels facing down, as seen here.
Then the door post windlace is installed over the lip of the door opening. Originals were made out of a moulded plastic. Repos are made using vinyl bonded to roofrail windlace. The next thing to get install are the four
brackets (painted semi-flat black) that mount to the inside of the door post.
With that being said, the next thing that gets installed is the rear outer seat belts. They are installed with the belts perpendicular to the sides of the car and with the Ford factory labels facing down, as seen here.
Then the door post windlace is installed over the lip of the door opening. Originals were made out of a moulded plastic. Repos are made using vinyl bonded to roofrail windlace. The next thing to get install are the four
brackets (painted semi-flat black) that mount to the inside of the door post.
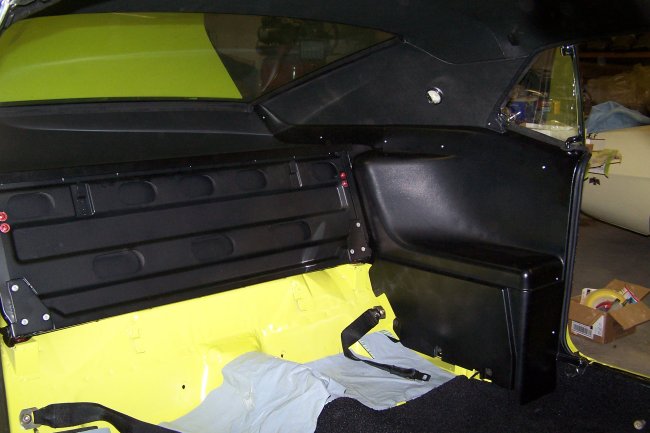 Then the rear interior fiberglass panels can be installed. It should be noted that when installing the panels, that the top portion slips underneath the roof rail weather strip at the bottom of the rear quarter window.
Also, there is a rubber boot at the base of the rear quarter window that slips into a notch in the interior fiberglass panels. Once the panels are installed a small plastic cap is installed at the rear of the quarter window where
the roof rail windlace meets the panel. I believe this was only done on 1969 Fastbacks. One thing that should be noted is that the panels are not bolted at the bottom rear bolt hole location inside the trunk
(this was verified using the factory assembly manuals). This was only done on cars with a fold-down rear seat.
Then the rear interior fiberglass panels can be installed. It should be noted that when installing the panels, that the top portion slips underneath the roof rail weather strip at the bottom of the rear quarter window.
Also, there is a rubber boot at the base of the rear quarter window that slips into a notch in the interior fiberglass panels. Once the panels are installed a small plastic cap is installed at the rear of the quarter window where
the roof rail windlace meets the panel. I believe this was only done on 1969 Fastbacks. One thing that should be noted is that the panels are not bolted at the bottom rear bolt hole location inside the trunk
(this was verified using the factory assembly manuals). This was only done on cars with a fold-down rear seat.
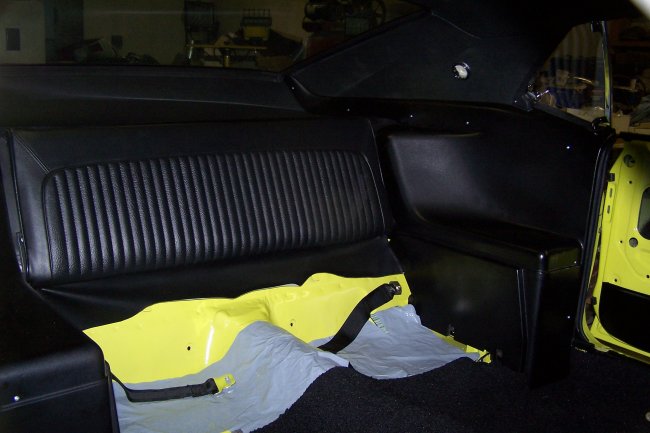 At this point the rear seat back is dropped in place and is bolted to the reenforcement from underneath with two phillips screws. Then the center two seat belts are bolted to the floor.
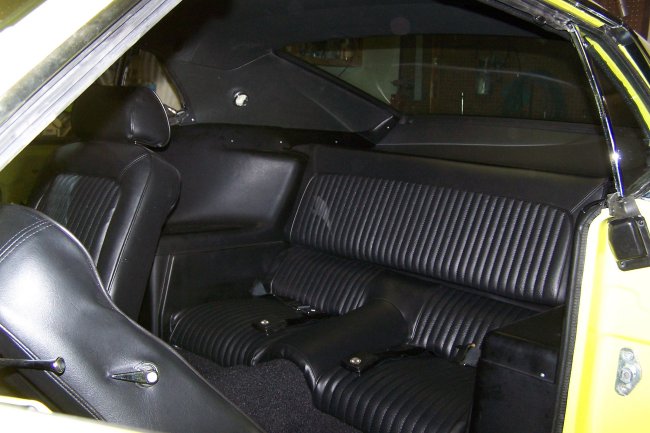 To put the seat bottom in you have to snake the seat belts through two holes in the seats. Then its just a matter of slipping the seat in place. Its kind of a down in front then up in the back motion. Becareful not to forget to pull
out the outer seat belts when installing the seat bottom or you will have to remove the seat to reach them. In this picture the interior in done. It looks and even smells new.
To put the seat bottom in you have to snake the seat belts through two holes in the seats. Then its just a matter of slipping the seat in place. Its kind of a down in front then up in the back motion. Becareful not to forget to pull
out the outer seat belts when installing the seat bottom or you will have to remove the seat to reach them. In this picture the interior in done. It looks and even smells new.