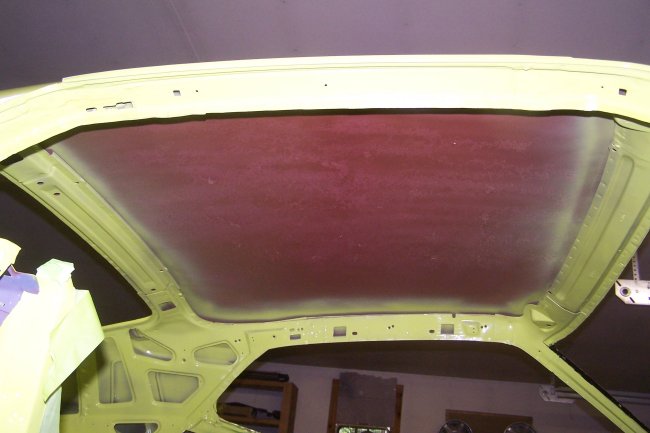
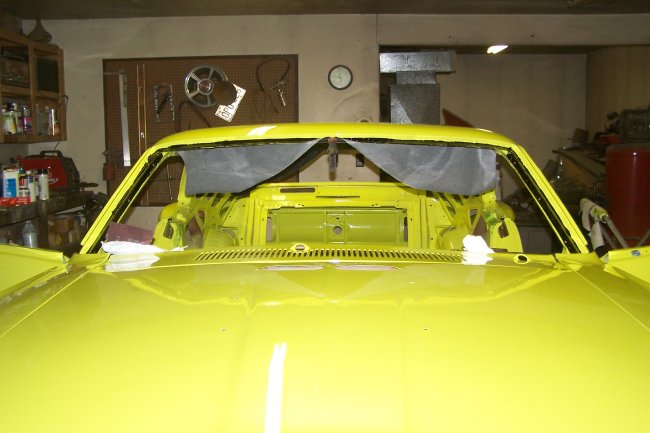
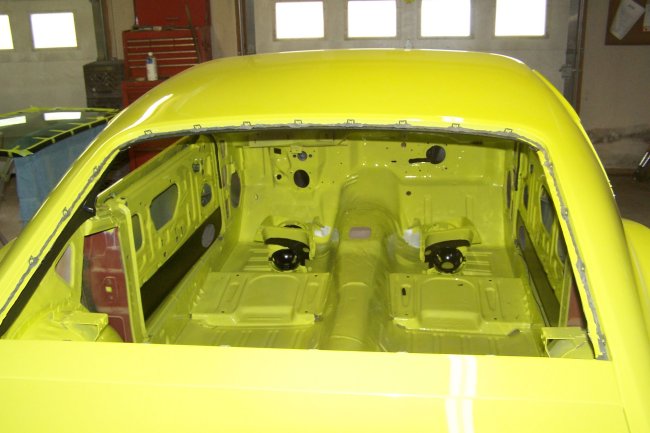
 Just like the factory did it, I started with the roof and worked my way down. The first thing that goes in is the roof insulation. The first step is to trial
fit the insulation and mark the center. Once marked I removed the insulation.
Just like the factory did it, I started with the roof and worked my way down. The first thing that goes in is the roof insulation. The first step is to trial
fit the insulation and mark the center. Once marked I removed the insulation.
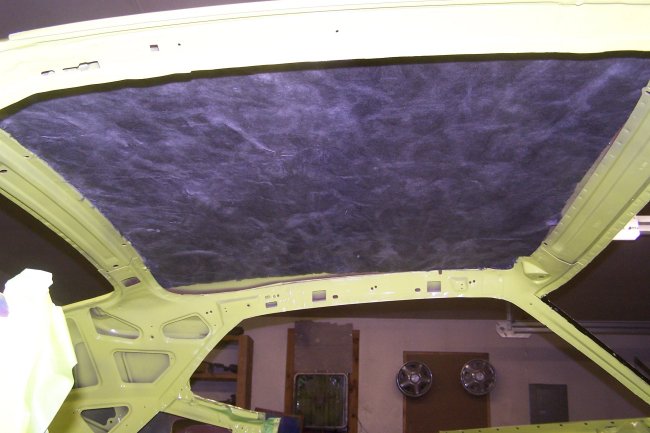 I covered the interior with a sheet of plastic and then sprayed the underside of the roof with 2 coats of 3M interior spray adhesive. I sprayed a good liberal
coat of the same adhesive to the back of the new insulation. It absorbs a lot of adhesive so you have to use a lot. After allowing 15 minutes for the adhesive
to setup I installed the insulation.
I covered the interior with a sheet of plastic and then sprayed the underside of the roof with 2 coats of 3M interior spray adhesive. I sprayed a good liberal
coat of the same adhesive to the back of the new insulation. It absorbs a lot of adhesive so you have to use a lot. After allowing 15 minutes for the adhesive
to setup I installed the insulation.
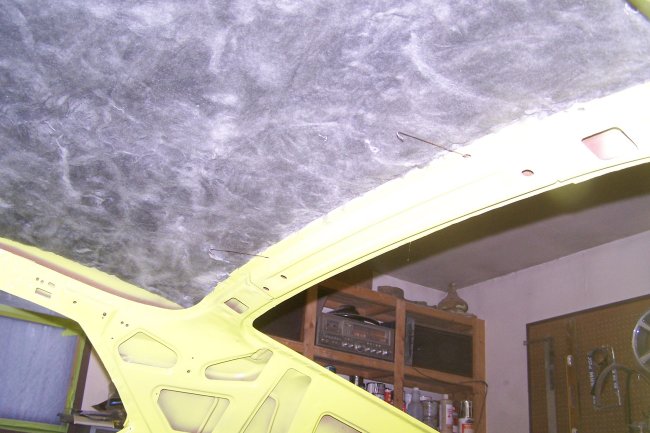 The next thing that goes in is the wire hooks by the rear window as shown in this picture. The hooks hold the headliner rods in position. Though not shown here,
I install all of the screws for the coat hooks (4), sunvisors (6) and the upper windshield garnesh moulding (5). Once the headliner is installed you can easily
locate the screw heads. If you use a good pointed phillip screwdriver and start to unscrew the screws, what will happen is the screwdriver will cut a nice hole through
the headliner material and the screws will come right out. Its a lot easier then trying to fish around for a screw hole and you don't make a hole in the headliner in the wrong location.
Also installed now, but not shown, is the rear headliner retainers. These are the sheetmetal pieces with sharp points that hold the headliner in place just above the sail panels.
The next thing that goes in is the wire hooks by the rear window as shown in this picture. The hooks hold the headliner rods in position. Though not shown here,
I install all of the screws for the coat hooks (4), sunvisors (6) and the upper windshield garnesh moulding (5). Once the headliner is installed you can easily
locate the screw heads. If you use a good pointed phillip screwdriver and start to unscrew the screws, what will happen is the screwdriver will cut a nice hole through
the headliner material and the screws will come right out. Its a lot easier then trying to fish around for a screw hole and you don't make a hole in the headliner in the wrong location.
Also installed now, but not shown, is the rear headliner retainers. These are the sheetmetal pieces with sharp points that hold the headliner in place just above the sail panels.
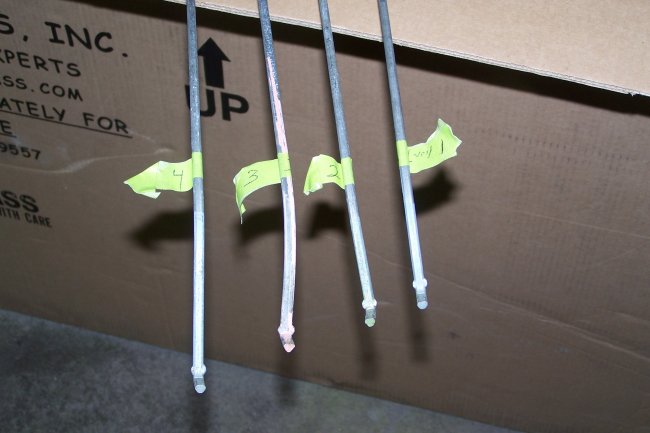 Here are the headliner rods. I labeled them as I removed them from the car #1 being the front one. They are also color coded at one end. Starting at the front of the car they are
natural (bare), green, pink and gray.
Here are the headliner rods. I labeled them as I removed them from the car #1 being the front one. They are also color coded at one end. Starting at the front of the car they are
natural (bare), green, pink and gray.
 When you get a new headiner its in a small box and is folded up. This leaves really nast wrinkles. What I do is lay the headliner out in the hot sun for a day. Then I roll it up.
Before inserting the rods in the new headliner, I fold it in half and marked the center line. I also mark the centerline in the car at the windshield and at the rear window.
When the rods are inserted into the headliner the material is way too long. This is OK at this time. What I do is I center each rod in the headliner and pull the fabric tight. I
then scrunch up the ends so that the very end of the rods stick out. Then its installed in the car. At each mounting location there are two holes for the rods. Ford used them to make up
for tolerance errors in the shell. For this car I used the top holes. Note: At this time the wire hooks at the rear window are not attached to the back rod.
When you get a new headiner its in a small box and is folded up. This leaves really nast wrinkles. What I do is lay the headliner out in the hot sun for a day. Then I roll it up.
Before inserting the rods in the new headliner, I fold it in half and marked the center line. I also mark the centerline in the car at the windshield and at the rear window.
When the rods are inserted into the headliner the material is way too long. This is OK at this time. What I do is I center each rod in the headliner and pull the fabric tight. I
then scrunch up the ends so that the very end of the rods stick out. Then its installed in the car. At each mounting location there are two holes for the rods. Ford used them to make up
for tolerance errors in the shell. For this car I used the top holes. Note: At this time the wire hooks at the rear window are not attached to the back rod.
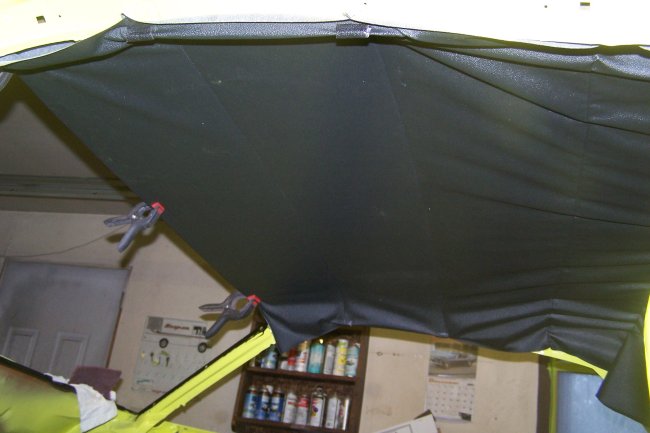 Once in the car I start at one end of the #2 rod. Using a razor blade I pull the fabric tight while cutting the material that the rod goes in. You should only cut enough material off
the loop material to pull the headliner tight along the rod. Too much will result in a bump in the headliner. I uses clamps and pieces of old windlace to hold the fabric tight once its trimmed.
I then repeat the process on the oposite side of the #2 rod. Once #2 is done I repeat the process on #1 and then on #3.
Once in the car I start at one end of the #2 rod. Using a razor blade I pull the fabric tight while cutting the material that the rod goes in. You should only cut enough material off
the loop material to pull the headliner tight along the rod. Too much will result in a bump in the headliner. I uses clamps and pieces of old windlace to hold the fabric tight once its trimmed.
I then repeat the process on the oposite side of the #2 rod. Once #2 is done I repeat the process on #1 and then on #3.
 I repeat the process on #4 last, but I don't hook the fabric on the headliner brackets. Once satisfied with the trimming of the fabric for the loops, I hook the wire hooks to the #4 rod. Then
I go the front of the car and pull the headliner forward as hard as I can to removed all of the wrinkles between the rods. I then go around the car and clamp everything in place. Old windlace is
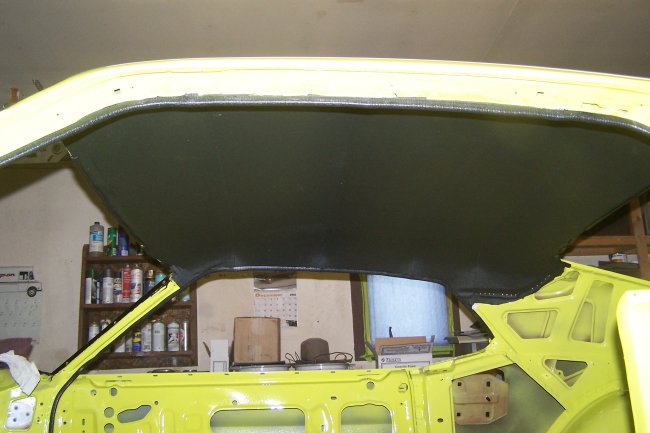
perfect for this. At this point I glue everything in place. I use contact cement for this. I do the sides first. I then move to the rear window. At this point I hook the material through the hooks on the headliner retainer.
Its also a good idea to apply some contact cement to the brackets. I do the windshield last. In this picture you can see the finished headliner. There isn't a wrinkle in site. The whole installation process
took me 4 hours to complete.
I repeat the process on #4 last, but I don't hook the fabric on the headliner brackets. Once satisfied with the trimming of the fabric for the loops, I hook the wire hooks to the #4 rod. Then
I go the front of the car and pull the headliner forward as hard as I can to removed all of the wrinkles between the rods. I then go around the car and clamp everything in place. Old windlace is
perfect for this. At this point I glue everything in place. I use contact cement for this. I do the sides first. I then move to the rear window. At this point I hook the material through the hooks on the headliner retainer.
Its also a good idea to apply some contact cement to the brackets. I do the windshield last. In this picture you can see the finished headliner. There isn't a wrinkle in site. The whole installation process
took me 4 hours to complete.
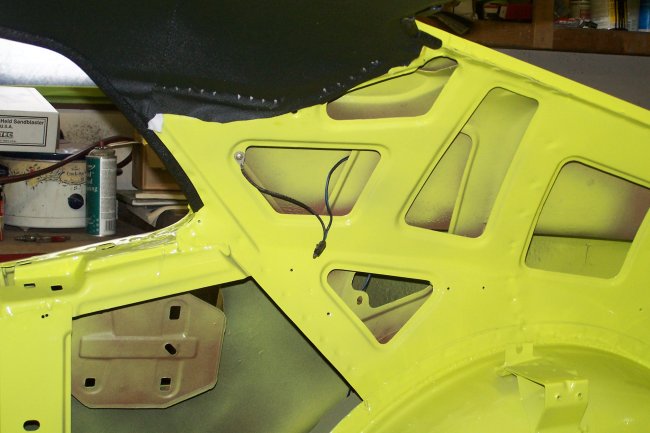 Next comes the sailpanels, but first the wiring for the sailpanel lights must go in. On the right side of the car (fastback only) there is a seperate wire that goes from the light, over the RH rocker panel
and plugs in under the dash at the RH underdash light. The left side has a short harness that plugs into the main rear harness back towards the trunk. So you don't have to install the entire tail harness at
this point if you don't want to.
Next comes the sailpanels, but first the wiring for the sailpanel lights must go in. On the right side of the car (fastback only) there is a seperate wire that goes from the light, over the RH rocker panel
and plugs in under the dash at the RH underdash light. The left side has a short harness that plugs into the main rear harness back towards the trunk. So you don't have to install the entire tail harness at
this point if you don't want to.
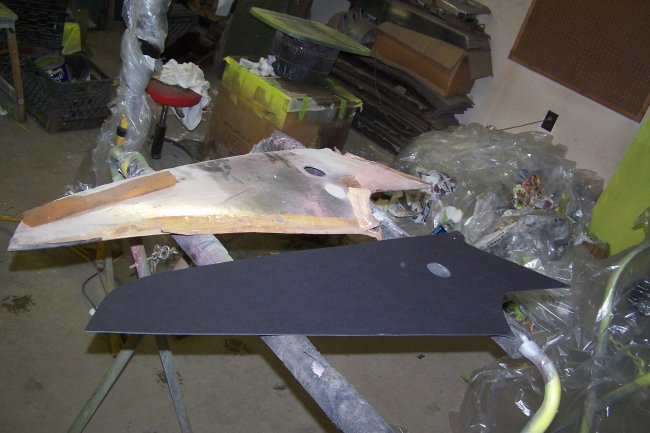 The repo sailpanels are much different then the originals. The repos are just a piece of thick cardboard cut to shape with a piece of headliner material that you have to glue in place. The originals were
made up of a layer of thin cardboard, a layer of thin styrofoam and a layer of painted cardboard with the headliner moon crater pattern pressed into them.
The repo sailpanels are much different then the originals. The repos are just a piece of thick cardboard cut to shape with a piece of headliner material that you have to glue in place. The originals were
made up of a layer of thin cardboard, a layer of thin styrofoam and a layer of painted cardboard with the headliner moon crater pattern pressed into them.
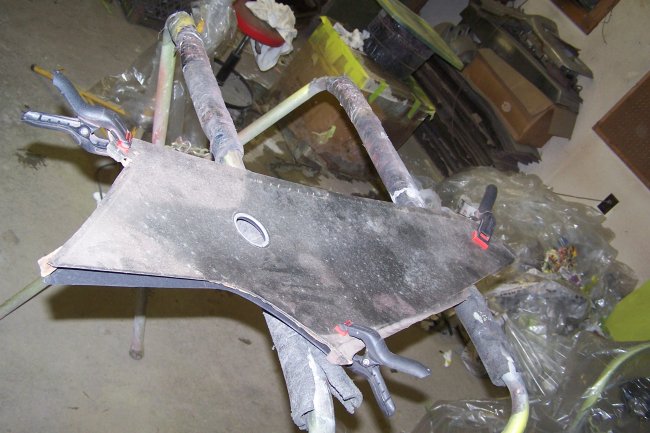 On the original sailpanel there is a metal ring, with a flat spot, that surrounds the hole for the light. Repos do not come with these. Its important to install the metal ring in the new panel. Its
also important to get the flat spot in the same orientation. Without it, the light will not be held in place correctly and may fall out. I start by clamping the new sail panel to the old and mark the location
of the flat spot on the back.
On the original sailpanel there is a metal ring, with a flat spot, that surrounds the hole for the light. Repos do not come with these. Its important to install the metal ring in the new panel. Its
also important to get the flat spot in the same orientation. Without it, the light will not be held in place correctly and may fall out. I start by clamping the new sail panel to the old and mark the location
of the flat spot on the back.
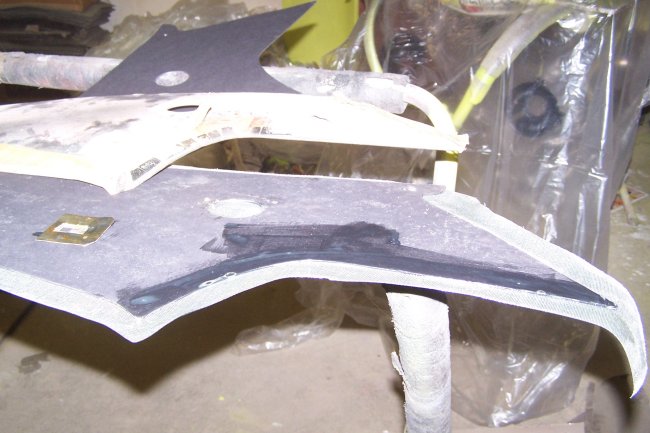 Using contact cement, never use spray adhesive, I attach the fabric to the new sailpanel cardboard. Then I contact cement the cardboard clip retainer (shown on the left, but not installed) in place. At the same location
the material wraps around the back. This is where the sail panel meets the headliner when its installed. This area is contact cemented as well. In this picture you can see where
I had just applied the contact cement. Once this was done I installed the metal ring. There is a strip of foam that is supposed to be glued to the back,but
its not shown in any of the pictures I took. The last thing to do is to trim off the access. The bottom of the sailpanel (bottom when installed) is trimmed flush. The rest of
the material is needed since the sail panel is partially glued in place.
Using contact cement, never use spray adhesive, I attach the fabric to the new sailpanel cardboard. Then I contact cement the cardboard clip retainer (shown on the left, but not installed) in place. At the same location
the material wraps around the back. This is where the sail panel meets the headliner when its installed. This area is contact cemented as well. In this picture you can see where
I had just applied the contact cement. Once this was done I installed the metal ring. There is a strip of foam that is supposed to be glued to the back,but
its not shown in any of the pictures I took. The last thing to do is to trim off the access. The bottom of the sailpanel (bottom when installed) is trimmed flush. The rest of
the material is needed since the sail panel is partially glued in place.
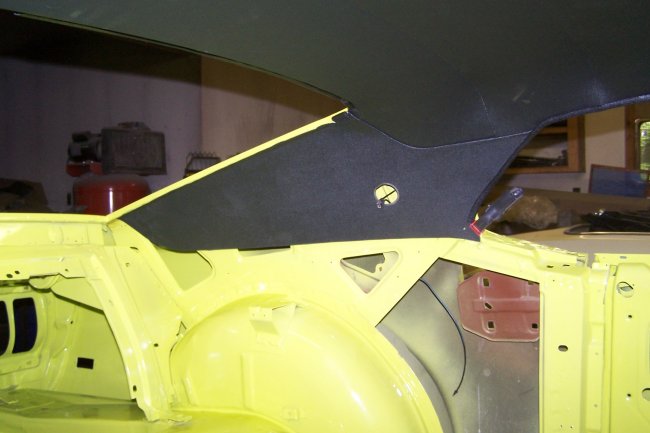 In this picture the LH sailpanel is installed. The panel is glued to the underside of the rear window opening, but not wrapped around the lip. It is glued around the lip by the quarter window however.
1) Wipe the new weatherseal down with thinner or Wax&Grease remover. new weather seals have releasing agent on them from the molding process.
2) Lightly fill the glass channel with Window Weatherstip adhesive and install the weather seal. You may want to tape it down and let it cure overnight before you install it so its not so messy.
3) Install the window moulding clips.
4) Lay a bead of bedding compound around the parameter of the window opening in the corner. You should put extra at each clip.
5) Because this is messy I apply 2 1/2" masking tape along the entire inside portion of the weather seal and the underside of the window opening inside the car.
6) Install a 3/8" or 1/4" nylon rope in the weather seal channel. Start at the bottom center of the window. Allow a good 2 feet of extra rope to hang out at each end. Tape the extra rope to the underside of the glass.
7) Get a friend to help you drop the glass in the hole. Make sure its centered. When you first drop it in the hole it won't look like there is much of a gap along the parameter, but there will be one once the window is fully installed.
8) Starting at the bottom center, pull the ropes towards the corners. Have a friend apply light pressure to the glass.
9) At the corners it will take a bit of force to pull the rope to go around the corners. Don't worry, just give it a good tug.
10) With your friend still appling pressure pull the rope along each side. Once both side are done pull either rope to finish the top.
11) Remove the tape from the weather seal. A good Wax&Grease remover can be used to clean your hands and the excess.
12) On the outside of the car use 2 1/2" masking tape to mask off the paint along the perimeter of the window opening.
13) Using window bedding compound or the urethane windshield adhesive fill the gap around the window.
14) Install the window mouldings and remove the tape.
15) Wipe off access with Wax&Grease remover only.
16) Have a beer and be glad that its over with.
 Here is a picture of the rear window opening with all of the clips and the bedding compound applied. Tis was taken just before I dropped the window in.
 I originally had to remove one of the moulding clip studs to repair the window opening. Luckily I was able to buy screw-in studs to fix it.
1) Black-out the lip of the windshield opening. The factory did this to prevent body color from showing through the glass.
2) Install the moulding clips. Note: At the top corner on each side there is a clip that gets screwed in (refer to picture).
3) Install the two winshield stops that are located at the bottom of the windshield.
4) Test fit the windshield in the opening. Center the windhshield in the opening and mark the center using tape. Be careful its fragil when resting on metal. Note: The gaps along the sides will be much tighter without that Butyl tape.
5) If the gap at the top of the windshield is more than 3/16 then you should shim the windshield up at the lower stops. Windshield kits come with hard rubber spacers just for this purpose.
6) Remove the winshield and clean the parameter thoroughly. using a 3/8 butyl windshield kit install it on to the back side of the windshield along the very edge, but without hanging over the sides. Apply some short stripes of butyl tape at the inside corners for extra protection.
7) This is your last chance to install a VIN border decal on the VIN tag. You should cut the center out of the decal before installing it.
8) With a friends help remove the protective tape and install the glass start at the bottom. You want to lightly rest it at the bottom. And then lighty drop it in place at the top.
9) Adjust the glass so that it is centered. Then press the glass down in place. Be careful. Too much force will crack the glass.
10) Once satisfied with the fit seal the perimeter of the glass with windshield adhesive. Clean up any mess using Wax&Grease remover only.
11) Along the bottom of the winshield, about 1/4 from the bottom, Ford applied a long strip of rigid foam. Perhaps it was there to divert water. You will have to make a new one.
12) After the winshield adhesive has cured install the mouldings.
 Here is a picture showing the moulding clip that is screwed in plate (top clip).
 Here are the factor windshield stops
 Here is the VIN tag with the border decal installed. Originally this would be printed on the tag. You can get the decals from NPD for $15.
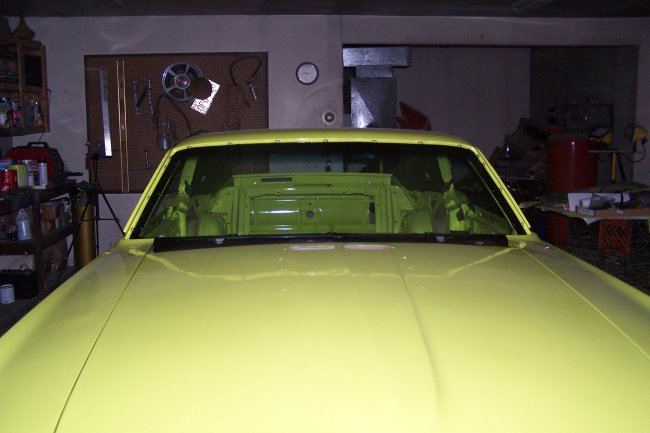 Here is the windshield after it was installed. The glass is new Carlite brand. It cost me $190 delivered.
 Here is a picture with the lower windshield seal in place. I made it from a 5 foot long piece of rigid black foam, which was cut 1/4" wide. Also visible in this picture are the two large foam blocks
that are glued in place on the upper cowl. These help hold up the upper filler panel.
Here is a picture with the lower windshield seal in place. I made it from a 5 foot long piece of rigid black foam, which was cut 1/4" wide. Also visible in this picture are the two large foam blocks
that are glued in place on the upper cowl. These help hold up the upper filler panel.
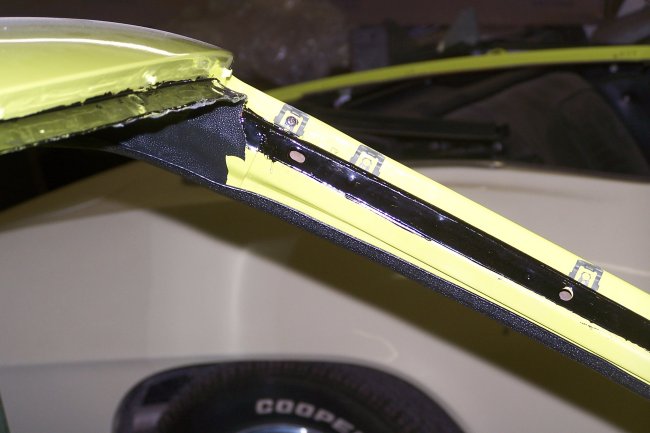
 Here is the windshield after all of the mouldings have been installed. The lower moulding is screwed in place and goes in prior to installing the upper filler panel. The ends of the mouldings
are screwed in place just inside the door jamb. The screws are supposed to be hex self-tapping screws which are gold cad plated.
Here is the windshield after all of the mouldings have been installed. The lower moulding is screwed in place and goes in prior to installing the upper filler panel. The ends of the mouldings
are screwed in place just inside the door jamb. The screws are supposed to be hex self-tapping screws which are gold cad plated.
 Here is view of the upper filler panel installed with the correct hardware. All of the hardware is supposed to be gold cad plated self-tapping hex screws, though you can get away with just silver cad screws.
The washer jets are also gold cad plated. The screws I replaced with new hardware from AMK Products. The jets I replated using Castwell Platings Copy Cad kit.
Though a little difficult to see here, there is a copper grounding clip screwed in place next to the weather seal. This clip was installed on all cars that were originally order with a radio. It was used to ground the
hood to the car to reduce noise. Unfortunately the clip digs into the paint on the underside of the hood. I just benfd the ends f hte prongs donw so they don't hit the hood.
Here is view of the upper filler panel installed with the correct hardware. All of the hardware is supposed to be gold cad plated self-tapping hex screws, though you can get away with just silver cad screws.
The washer jets are also gold cad plated. The screws I replaced with new hardware from AMK Products. The jets I replated using Castwell Platings Copy Cad kit.
Though a little difficult to see here, there is a copper grounding clip screwed in place next to the weather seal. This clip was installed on all cars that were originally order with a radio. It was used to ground the
hood to the car to reduce noise. Unfortunately the clip digs into the paint on the underside of the hood. I just benfd the ends f hte prongs donw so they don't hit the hood.