 Unfortunately this process usually starts with regluing the door glass. In 1969 only, Ford glued the window brackets to the glass. Unfortunately the adhesive they
picked did not stand the test of time. That and the lack of window stops at the bottom of the door. The first part of the repair process is to remove the brackets from the glass
, if they didn't already fall apart on their own. Then the adhesive is removed from the glass and from the brackets. Usually just a razor blade can be used on the glass. The
adhesive has to be ground off the brackets. You should remove all of the old adhesive. It doesn't matter if you rough up the service if the brackets.
Unfortunately this process usually starts with regluing the door glass. In 1969 only, Ford glued the window brackets to the glass. Unfortunately the adhesive they
picked did not stand the test of time. That and the lack of window stops at the bottom of the door. The first part of the repair process is to remove the brackets from the glass
, if they didn't already fall apart on their own. Then the adhesive is removed from the glass and from the brackets. Usually just a razor blade can be used on the glass. The
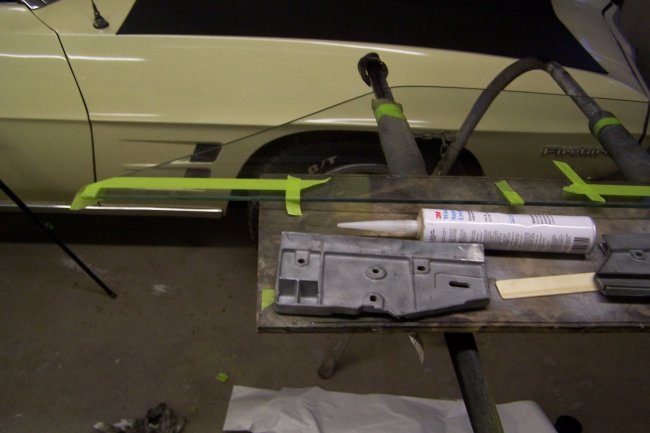
adhesive has to be ground off the brackets. You should remove all of the old adhesive. It doesn't matter if you rough up the service if the brackets.The next hing to do is to mark off where the brackets are to be glued onto the glass. Each bracket is glued 3/4" from the outer ends of the glass. In this picutre you can see that I used 3/4" masking tape to mark the ends.
 The next step is to apply several beads of urethane windshield, I use the 3M brand, to both sides of the glass where the brackets are to be installed. Then I apply the windshield adhesive to the
inside of the brackets, including the bottom and sides.
The next step is to apply several beads of urethane windshield, I use the 3M brand, to both sides of the glass where the brackets are to be installed. Then I apply the windshield adhesive to the
inside of the brackets, including the bottom and sides.
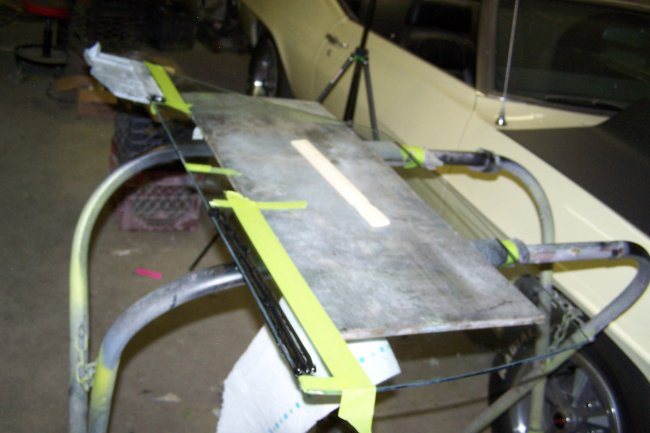
 The brackets are then slid into place. Its important to get the glass to be centered in the channels of the brackets. If they are too cocked the glass will not align to the roof rail weather strip.
In this picture the brackets and the vertical stainless moulding are glued in place. I use the same windshield adhesive to hold the vertical stainless moulding to the glass.
The brackets are then slid into place. Its important to get the glass to be centered in the channels of the brackets. If they are too cocked the glass will not align to the roof rail weather strip.
In this picture the brackets and the vertical stainless moulding are glued in place. I use the same windshield adhesive to hold the vertical stainless moulding to the glass.
 Next comes the upper stoppers. Usually the felt is so warn on these that it will cause the window to rattle. The felt can be easily repaired. The felt is actually window sweep material. In this case
I got a few small pieces of window sweep from a hot rod parts supplier at a car show and riveted new pieces in place.
Next comes the upper stoppers. Usually the felt is so warn on these that it will cause the window to rattle. The felt can be easily repaired. The felt is actually window sweep material. In this case
I got a few small pieces of window sweep from a hot rod parts supplier at a car show and riveted new pieces in place.
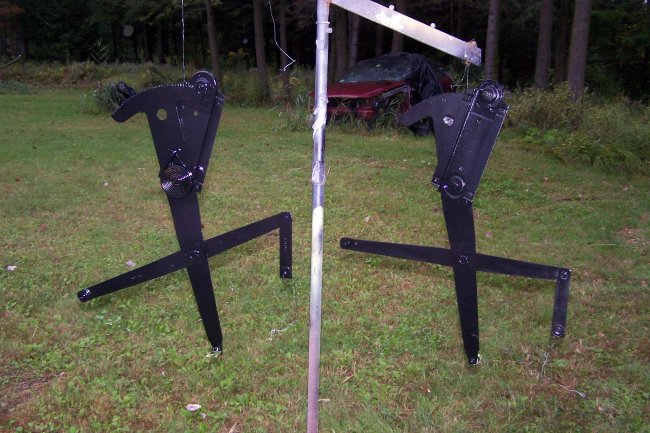 The window requlators are next. I got a nice used set at Carlisle, since my originals were bent by someone who out the glass. All the new ones needed was to be cleaned, repainted and regreased.
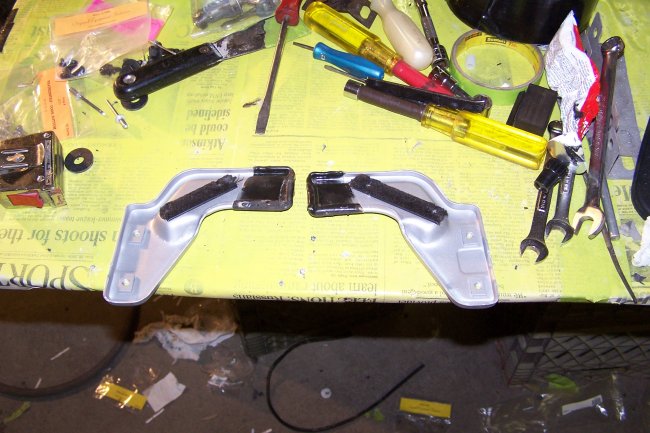
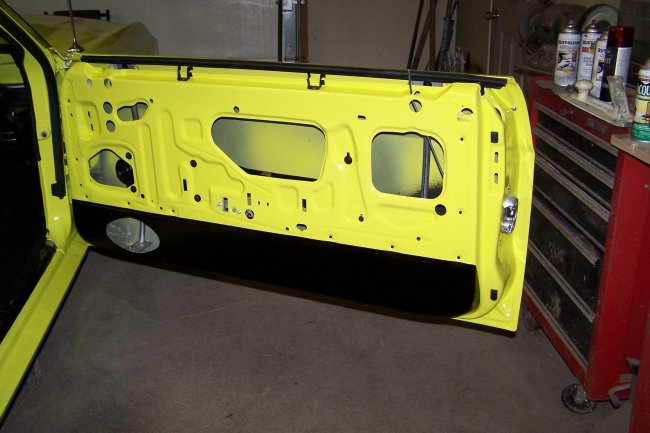
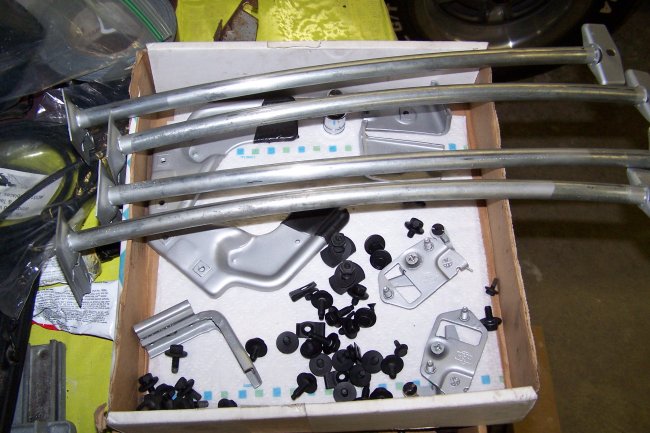 The rest of the door hardware should be restored and ready for installation prior to installing the glass. It should be noted that the window guides are specific to one side of the car only. They are
labeled RH and LH, so they are easily identifiable.
The rest of the door hardware should be restored and ready for installation prior to installing the glass. It should be noted that the window guides are specific to one side of the car only. They are
labeled RH and LH, so they are easily identifiable.
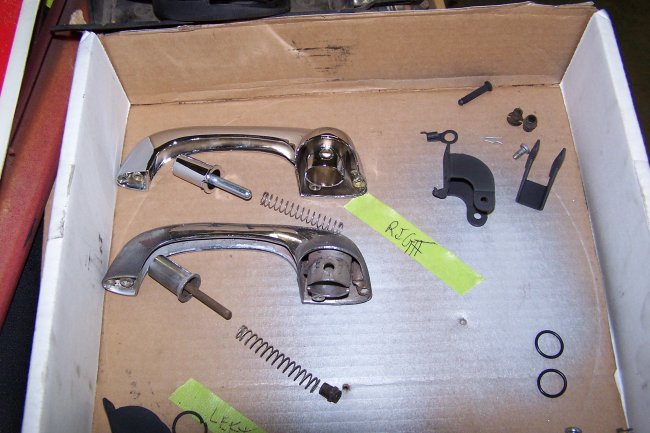 Excellent quality door handles can be purchased at most of the Mustang parts suppliers. Though you do have to reuse parts from your originals. There is only a slight difference between the originals and the repos.
As can be seen in this picture, the rod on the push button is much different, but it still works just as well as the original.
Excellent quality door handles can be purchased at most of the Mustang parts suppliers. Though you do have to reuse parts from your originals. There is only a slight difference between the originals and the repos.
As can be seen in this picture, the rod on the push button is much different, but it still works just as well as the original.
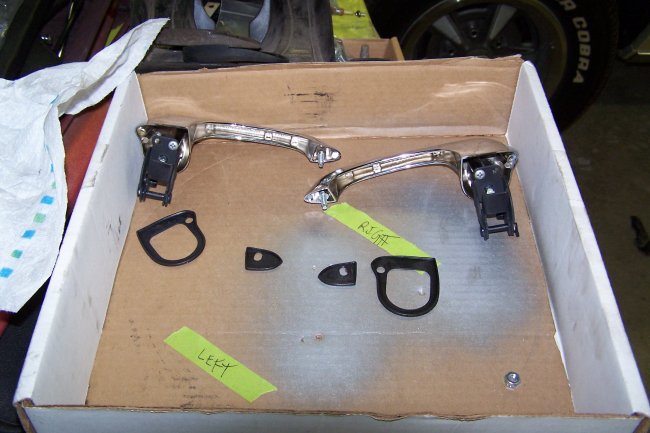 Here are the new door handles all asssembled.
 The door latches only required cleaning and a little paint to make them look new again. Technically they should be replated, but they were in such good shape that I didn't want to go threw the expense.
 Next all of the hardware is installed in the door, including the window sweep. The screws at the bottom of the door should be kept loose until the door glass is aligned.
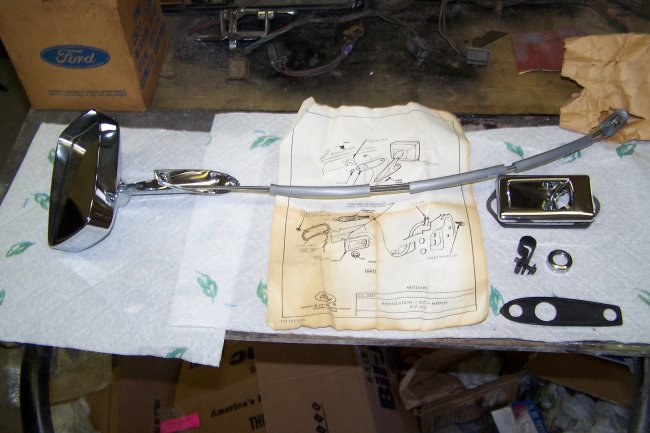 This particular car came with a deluxe remote driver's side mirror. I purchased an NOS one from ebay, which you can see in this picture. It came with everything except for the base gasket and the screws
that hold the mirror to the door.
This particular car came with a deluxe remote driver's side mirror. I purchased an NOS one from ebay, which you can see in this picture. It came with everything except for the base gasket and the screws
that hold the mirror to the door.
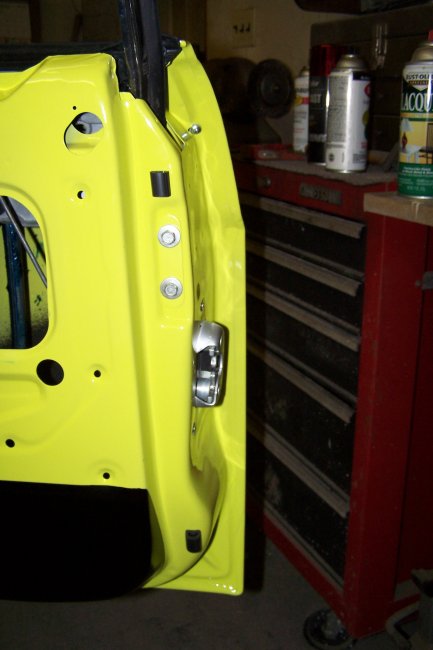
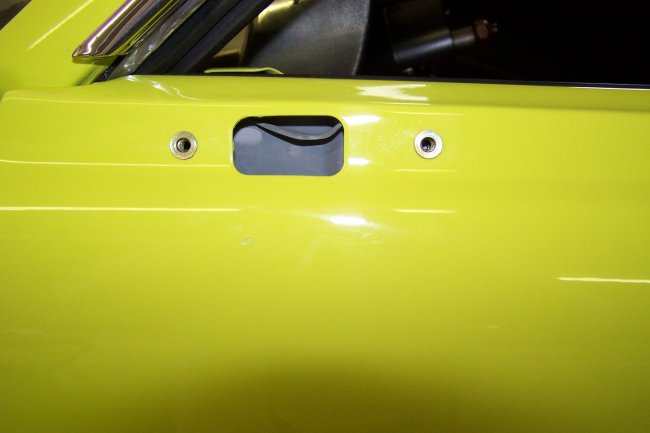 The mirror is mounted to the door using chrome machine screws and rivenuts. I installed the rivenuts on the door after the car was painted, as shown in this picture. Rivenuts are installed using a special
rivetgun. After breaking a cheap gun installing a rivnut I bought a nice $75 one that really works. I do not suggest using just a nut and bolt kit that most Mustang suppliers sell. Its almost impossible
to install them that way.
The mirror is mounted to the door using chrome machine screws and rivenuts. I installed the rivenuts on the door after the car was painted, as shown in this picture. Rivenuts are installed using a special
rivetgun. After breaking a cheap gun installing a rivnut I bought a nice $75 one that really works. I do not suggest using just a nut and bolt kit that most Mustang suppliers sell. Its almost impossible
to install them that way.
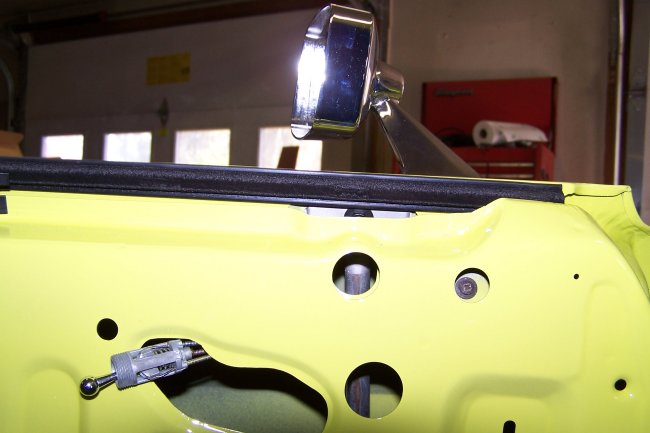 The mirror installs pretty easily. Inside the door there is a plastic retainer that is used to keep the cable from contacting the window. In this picture you can see the head of the screw that holds the
retainer in place.
The mirror installs pretty easily. Inside the door there is a plastic retainer that is used to keep the cable from contacting the window. In this picture you can see the head of the screw that holds the
retainer in place.
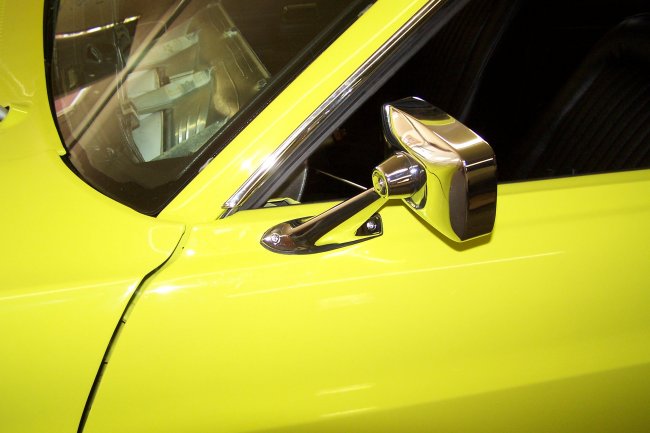 Here is a picture of the mirror installed.
 The door glass installation is relatively easy. The hard part is to get the glass inside the door. Then it needs to be attached to the regulator and the guide brackets need to be bolted in place. The door glass and
the rear quarter window need to be aligned to each other and to the roof rail weather strip at the same time. Once the glass is aligned the upper door stops need to be installed and tighened down. In this picture you can see
the back door stop plate and screws. The plate is supposed to be painted body color. NOte: don't forget to grease the window guides.
The door glass installation is relatively easy. The hard part is to get the glass inside the door. Then it needs to be attached to the regulator and the guide brackets need to be bolted in place. The door glass and
the rear quarter window need to be aligned to each other and to the roof rail weather strip at the same time. Once the glass is aligned the upper door stops need to be installed and tighened down. In this picture you can see
the back door stop plate and screws. The plate is supposed to be painted body color. NOte: don't forget to grease the window guides.
 One of the things that lead to failure of the door glass was that Ford only installed a stopper at the bottom center of the glass. So when you rolled the window down to the stopper, you could apply more downword force that in
essence pulled the brackets right off the glass. A simple fix for this is to cut 1 1/2" pieces of heater hose and wrap them around the vertical guides. Then, when the window is rolled down the brackets will hit them before the
glass bottoms out on the center stopper.
One of the things that lead to failure of the door glass was that Ford only installed a stopper at the bottom center of the glass. So when you rolled the window down to the stopper, you could apply more downword force that in
essence pulled the brackets right off the glass. A simple fix for this is to cut 1 1/2" pieces of heater hose and wrap them around the vertical guides. Then, when the window is rolled down the brackets will hit them before the
glass bottoms out on the center stopper.
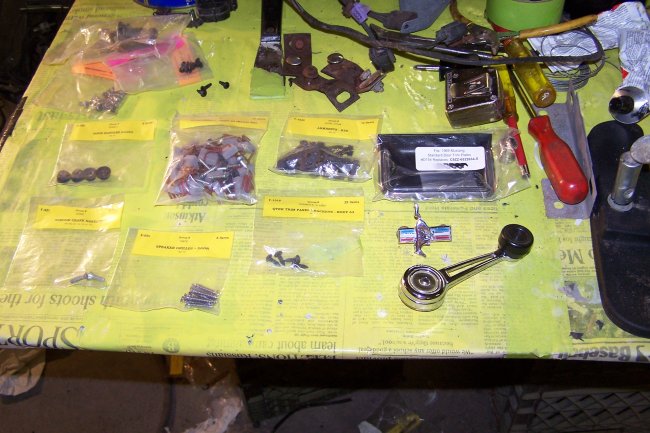 Now its time to install the door panels. Here is all the hardware necessary. I bought all of the the screws and clips new from AMK Products. It should be noted that this car has a standard interior with stereo speakers on
the doors. In order for the door handles to clear the speaker grills Ford intalled door handles from deluxe interior cars.
Now its time to install the door panels. Here is all the hardware necessary. I bought all of the the screws and clips new from AMK Products. It should be noted that this car has a standard interior with stereo speakers on
the doors. In order for the door handles to clear the speaker grills Ford intalled door handles from deluxe interior cars.
 Here is a comparison of an original door panel with a reproduction panel with original hardware installed on it. You can tell that the repo material is grayish when compared to an original.
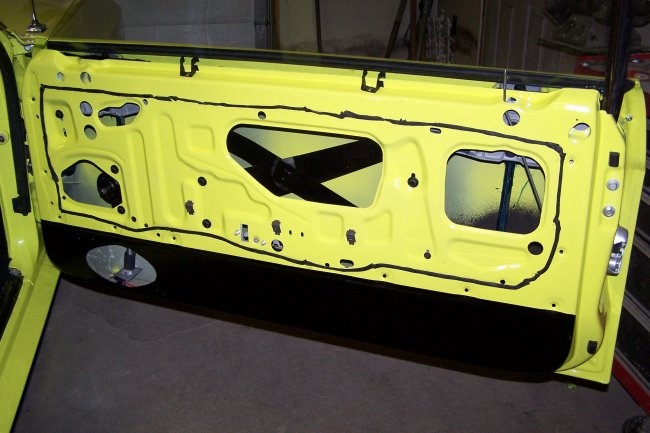 The first thing that needs to get done before installing the door panels is to install the watershields. The watershield is held in place using an adhesive. I just use strip caulk which is very simular to what was originally by Ford.
This is still done today on modern cars.
The first thing that needs to get done before installing the door panels is to install the watershields. The watershield is held in place using an adhesive. I just use strip caulk which is very simular to what was originally by Ford.
This is still done today on modern cars.
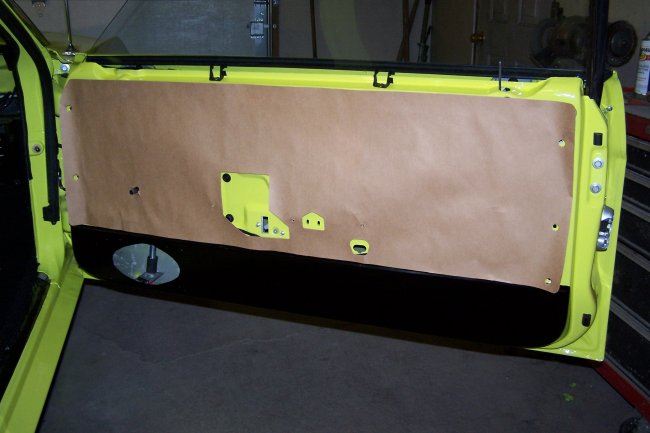 The watershield just sticks to the adhesive.
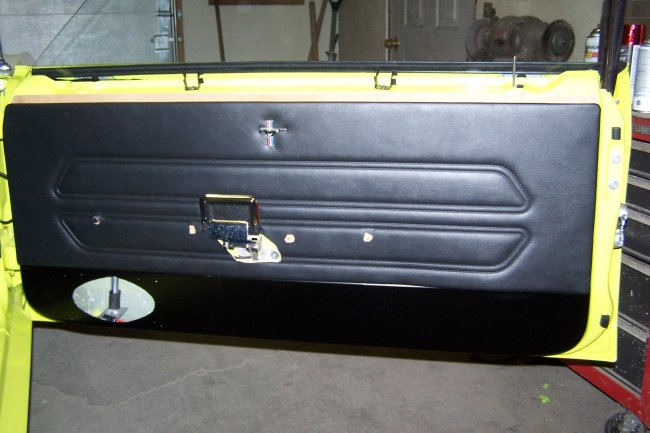 With the clips inserted in the back, the door panel is just pressed into place. The door handle should be bolted in place at this time.
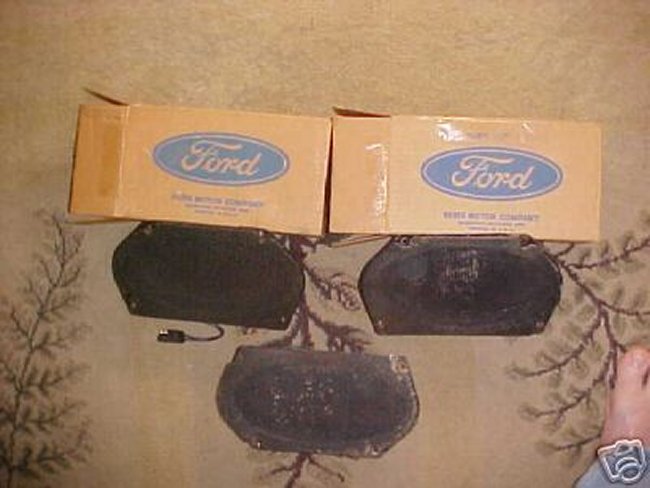 Here is a set of original door speakers that I got of e-bay. The reproductions speakers are just wrong. You shouldn't buy them. They don't fit and you have to modify them and your door just to get
them to sit flush.
Here is a set of original door speakers that I got of e-bay. The reproductions speakers are just wrong. You shouldn't buy them. They don't fit and you have to modify them and your door just to get
them to sit flush.
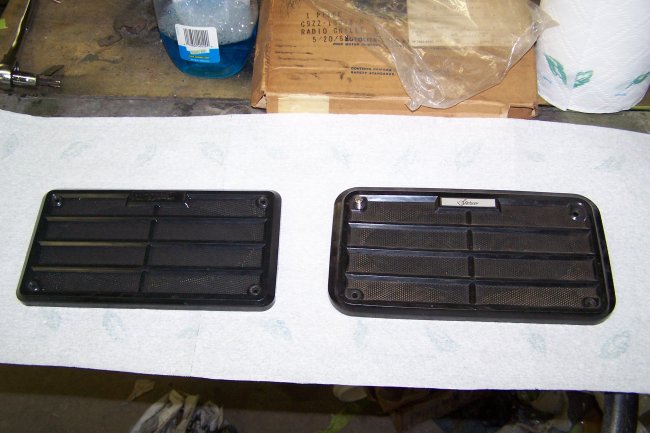 Cars with standard interiors use different speaker grills then cars with deluxe interiors. Only the deluxe interior version is reproduced, but with a crappy 'Stereo' logo. In this picture you can see 2 NOS versions of
the speaker grill. The Standard one is on the right. You can expect to pay around $100 each for one. Notice that the deluxe on is larger ? Note: Some on took the logo off from the standard cover to put on a repo deluxe
grill.
Cars with standard interiors use different speaker grills then cars with deluxe interiors. Only the deluxe interior version is reproduced, but with a crappy 'Stereo' logo. In this picture you can see 2 NOS versions of
the speaker grill. The Standard one is on the right. You can expect to pay around $100 each for one. Notice that the deluxe on is larger ? Note: Some on took the logo off from the standard cover to put on a repo deluxe
grill.
 Here is a picture of the back side of the grills. Notice that the standard one is smaller and it doesn't have the wide lip around the parameter ? What can't be see in this pictures is that the standard grill is taller
then the deluxe version. This is so that it can cover the speaker which is mounted flush to the door face. On a deluxe interior car the speaker would be recessed within the door panel.
Here is a picture of the back side of the grills. Notice that the standard one is smaller and it doesn't have the wide lip around the parameter ? What can't be see in this pictures is that the standard grill is taller
then the deluxe version. This is so that it can cover the speaker which is mounted flush to the door face. On a deluxe interior car the speaker would be recessed within the door panel.
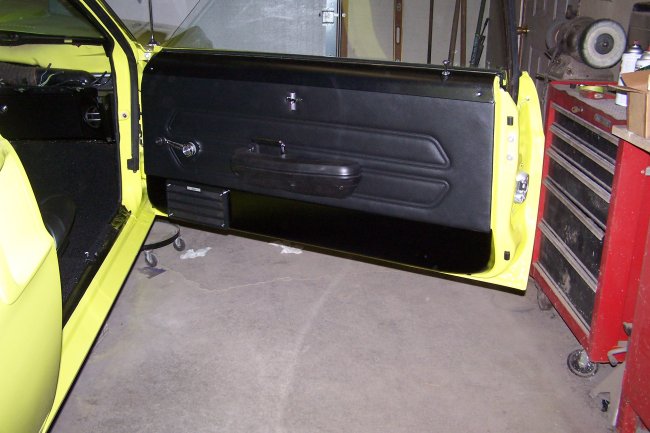 Here's the passanger's door all together. Though its not as fancy as a car with a deluxe interior, it is identical to what the first Boss cars were built with.
 Here's the driver's door all together, but without a speaker grill. That's because it took me quite a while to find a second one. I actually got lucky. I got a used pair of e-bay for $20. The seller didn't know, like many people, that
standard ones are different and just listed them as 'used speaker grills for those who didn't want to spend the money for the repos'. Hehe. Know your parts !
Here's the driver's door all together, but without a speaker grill. That's because it took me quite a while to find a second one. I actually got lucky. I got a used pair of e-bay for $20. The seller didn't know, like many people, that
standard ones are different and just listed them as 'used speaker grills for those who didn't want to spend the money for the repos'. Hehe. Know your parts !