 28) I had a lot of work to perform on the repo rear underseat pan to get it to look correct before I installed it.
 |
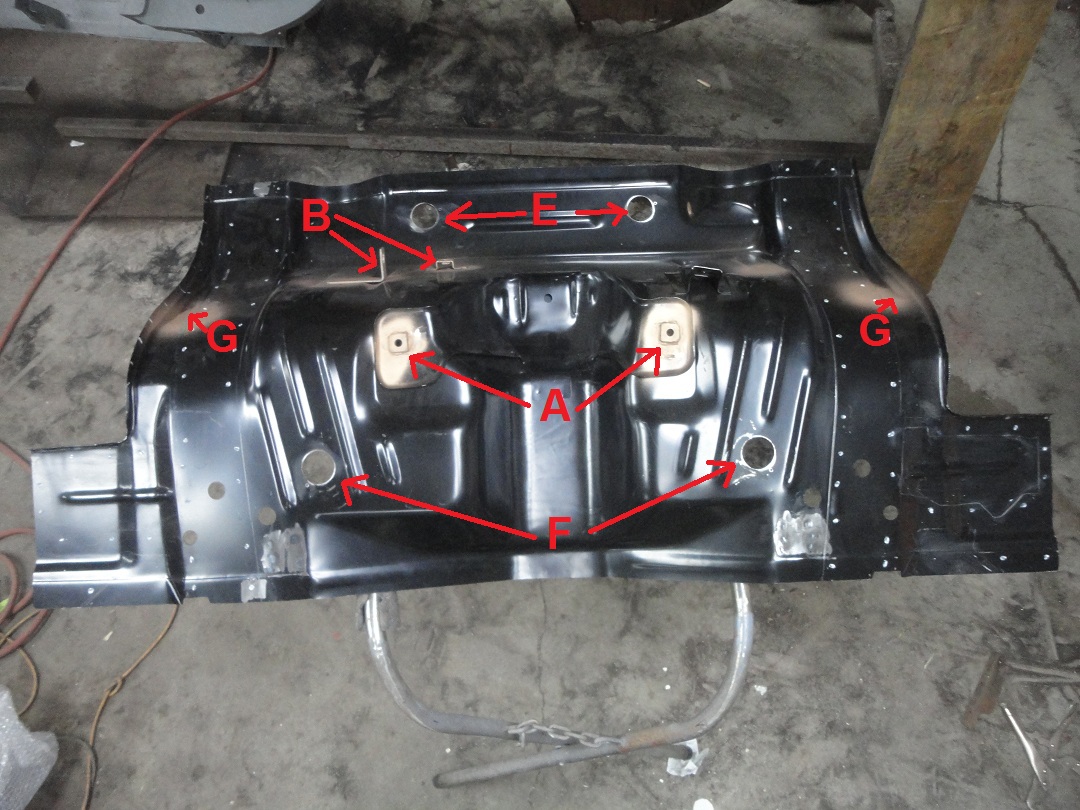 A) The seatbelt anchor nuts were standard hardware store hex nuts. They were even the wrong size! What a terrible thing to discover after the car is painted! To fix this I removed the nuts and welded on the original ones.
B) The pans were supplied with a brake hose bracket and an exhaust hanger bracket that needed to be welded on. They looked a little different (only noticable with a side-by-side comparison) then the originals. So I sandlbasted and welded on the originals. |
 C) The upper rear seat mounting brackets looked slightly different than the originals and appeared to be welded in different locations (too high). Again I used the originals. To make sure they were in the correct location, I mounted
the floor pan and rear back seat in the car and welded the brackets to the pan.
C) The upper rear seat mounting brackets looked slightly different than the originals and appeared to be welded in different locations (too high). Again I used the originals. To make sure they were in the correct location, I mounted
the floor pan and rear back seat in the car and welded the brackets to the pan.D) The lower rear seat brackets, which come not welded in place, were completely different than the originals. So I found myself using the originals for the lower seat brackets as well. 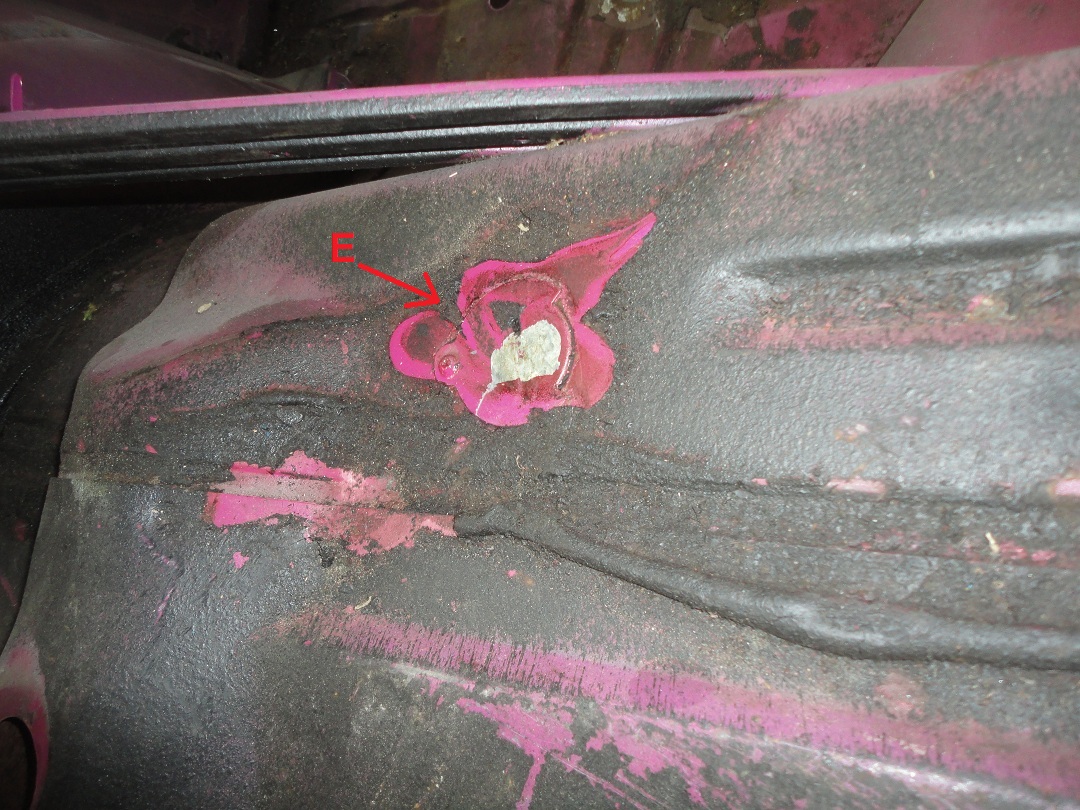 E) I'm not sure when Dodge stopping doing this, but my car had round metal access covers just forward of the shock covers
below the package tray. The covers were screwed in place and then seamsealed before the car was painted. The repo rear
underseat pan did not have these holes (later style?), so I had to make them.
E) I'm not sure when Dodge stopping doing this, but my car had round metal access covers just forward of the shock covers
below the package tray. The covers were screwed in place and then seamsealed before the car was painted. The repo rear
underseat pan did not have these holes (later style?), so I had to make them.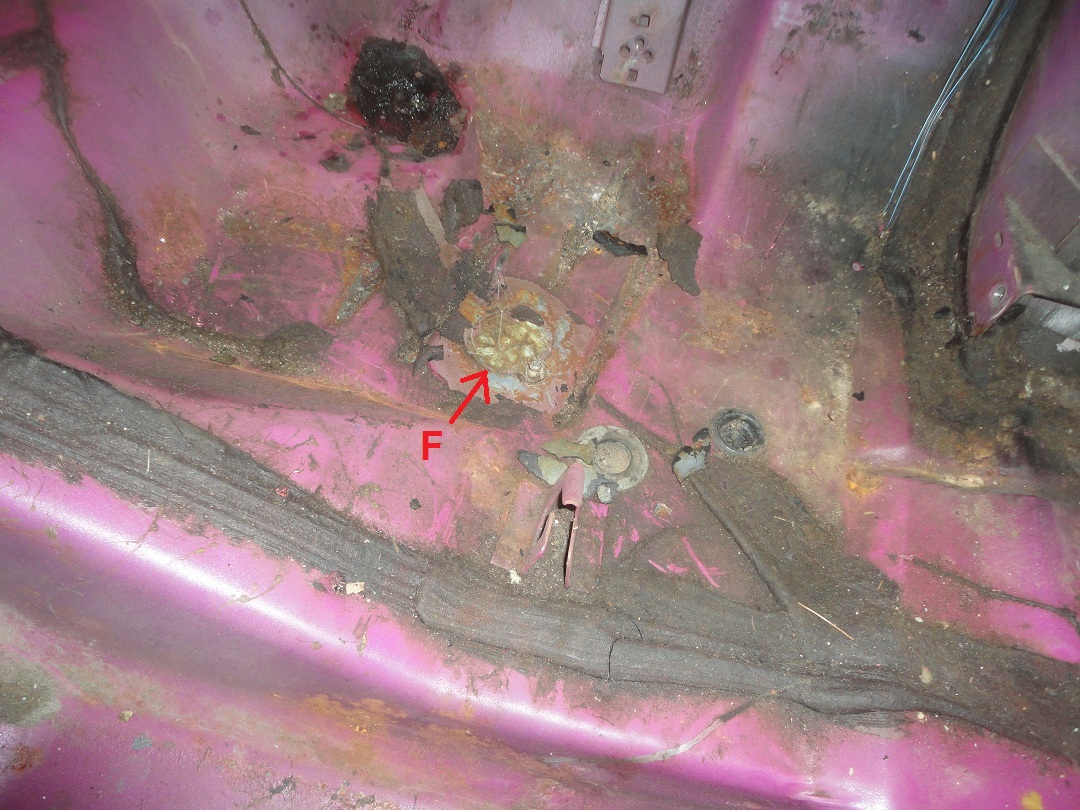 F) The same style covers were under the rear seat. The repo rear underseat pan had much smaller holes in place of these
(did the factor use rubber plugs in later models instead of metal covers ?). I had to fix these holes as well
F) The same style covers were under the rear seat. The repo rear underseat pan had much smaller holes in place of these
(did the factor use rubber plugs in later models instead of metal covers ?). I had to fix these holes as wellG) The repo rear underseat pan had two extra holes that over hung the frame rail at the top of the panel. I had to fix them since the holes were not completely covered by the frame rails. |
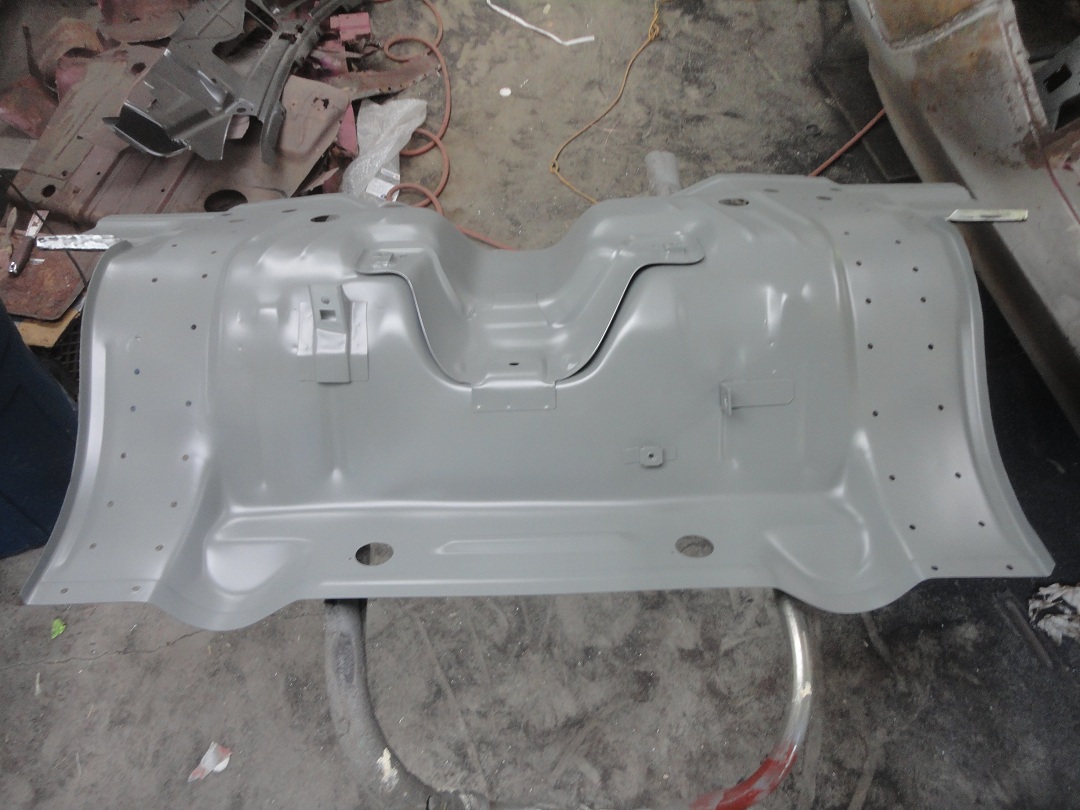 29) After fixing the repo rear underseat pan I drilled the plug weld holes in it where it would be welded to the rear frame
rails and primed it with epoxy primer.
29) After fixing the repo rear underseat pan I drilled the plug weld holes in it where it would be welded to the rear frame
rails and primed it with epoxy primer. |
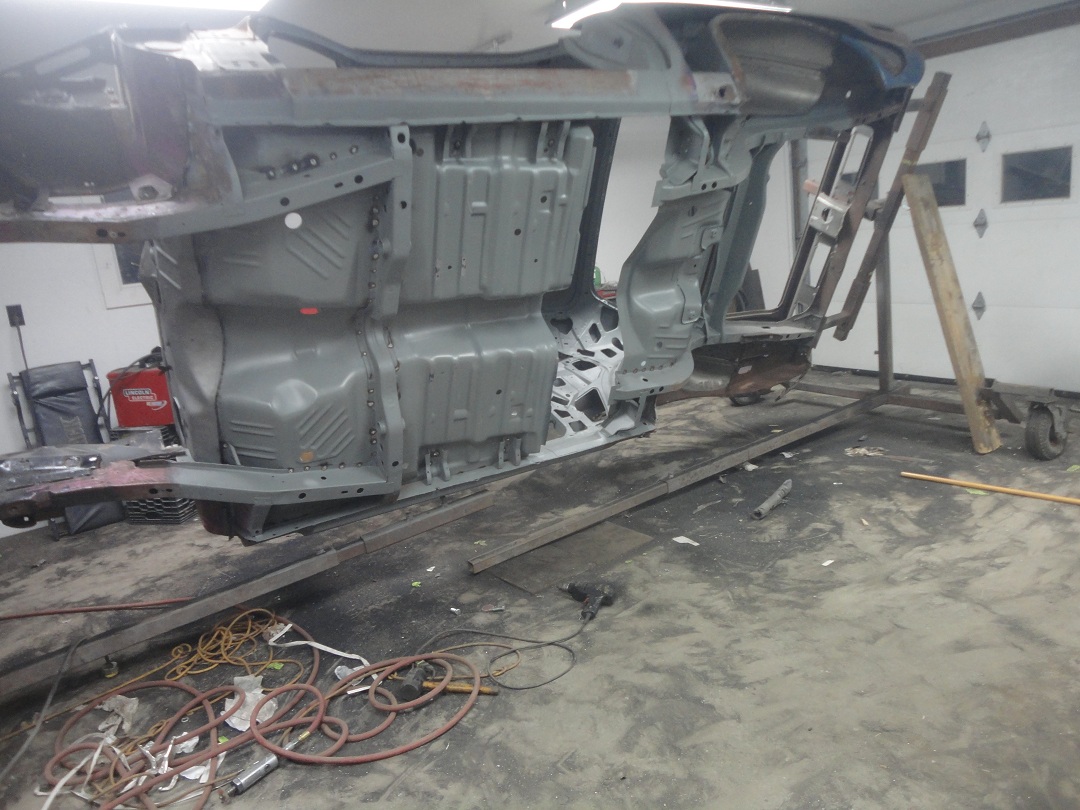
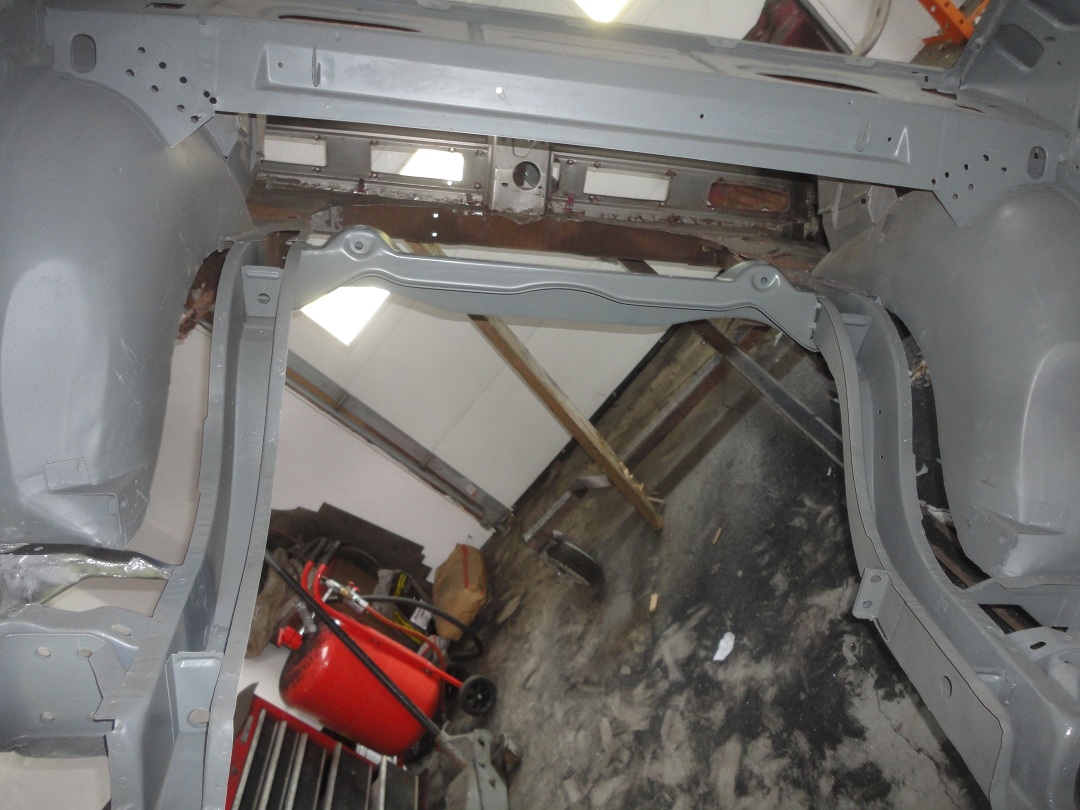 30) Here is the rear seat area almost ready to receive the pan. I had to weld in a new frame rail reenforcement (left)
since the original one was not fixable. In this picture the lip on the frame rail is primed. Just prior to welding, I
clamped the pan in place, marked all of the holes with a Sharpee, removed the pan and then ground the Sharpee marks
to bare metal.
30) Here is the rear seat area almost ready to receive the pan. I had to weld in a new frame rail reenforcement (left)
since the original one was not fixable. In this picture the lip on the frame rail is primed. Just prior to welding, I
clamped the pan in place, marked all of the holes with a Sharpee, removed the pan and then ground the Sharpee marks
to bare metal. |
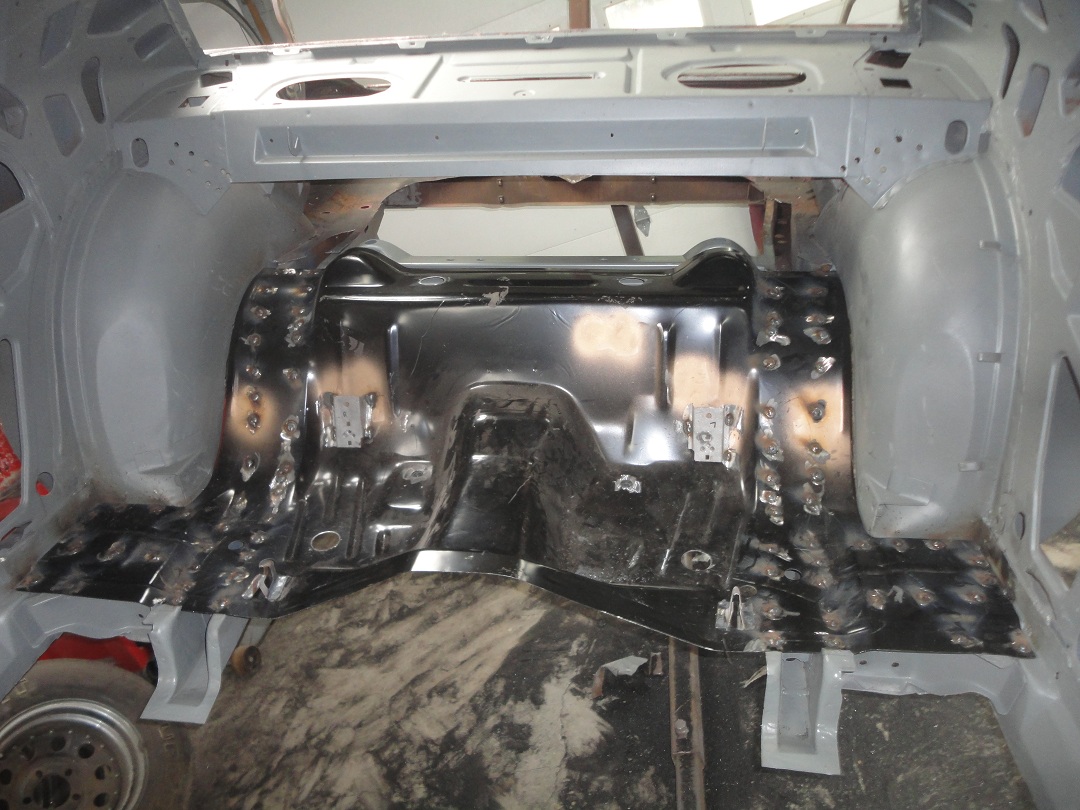
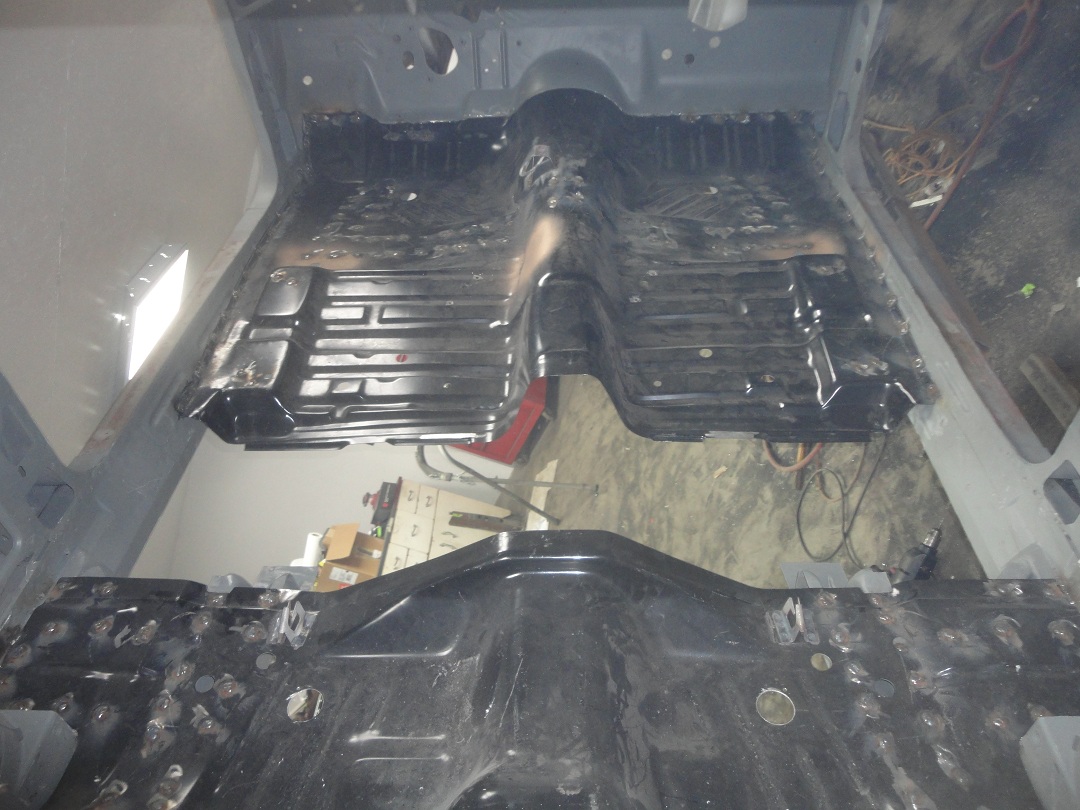
 31) Here is an underside picture taken after the pan was welded in. All of the weld spots can be seen as burn marks
in the primer. This is not big deal since I needed to dress all the welds and reprime anyways.
31) Here is an underside picture taken after the pan was welded in. All of the weld spots can be seen as burn marks
in the primer. This is not big deal since I needed to dress all the welds and reprime anyways. |
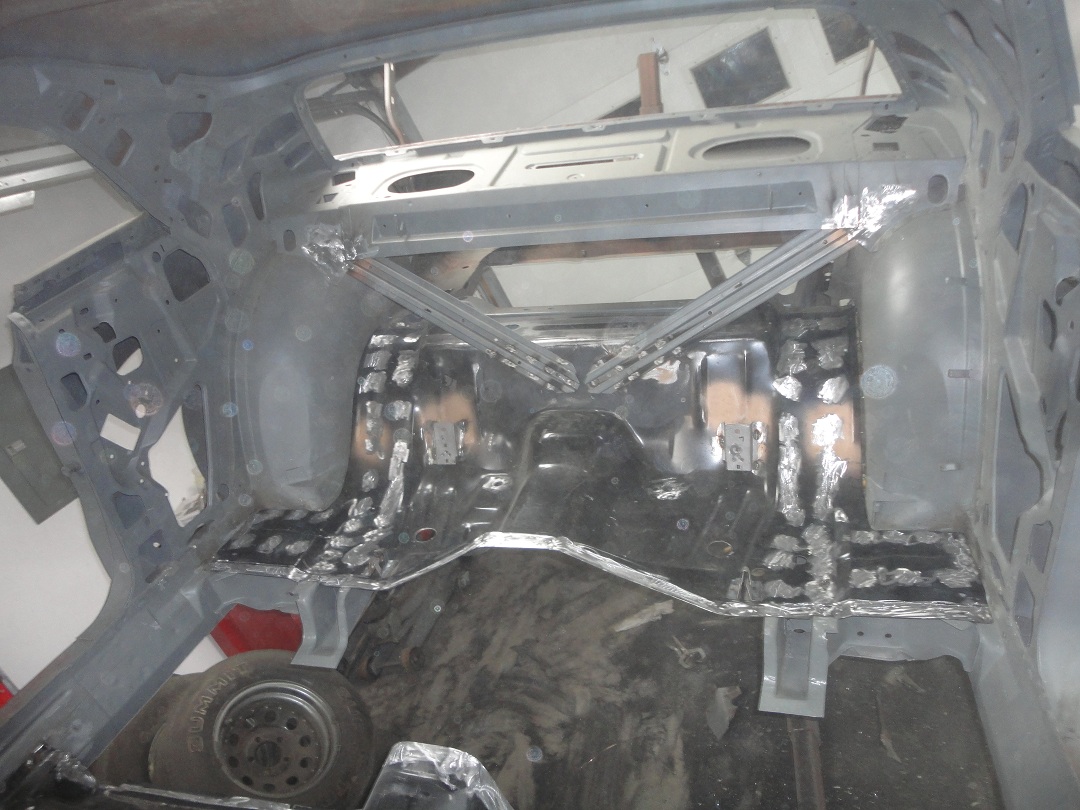
 32) Here is an inside picture. Yo can see that used the original seat brackets.
 |
 33) The next step was to grind the welds down and weld in the rear seat crossbraces. A piece of the original floor
was used as reference for drilling out the plug weld holes.
33) The next step was to grind the welds down and weld in the rear seat crossbraces. A piece of the original floor
was used as reference for drilling out the plug weld holes. |
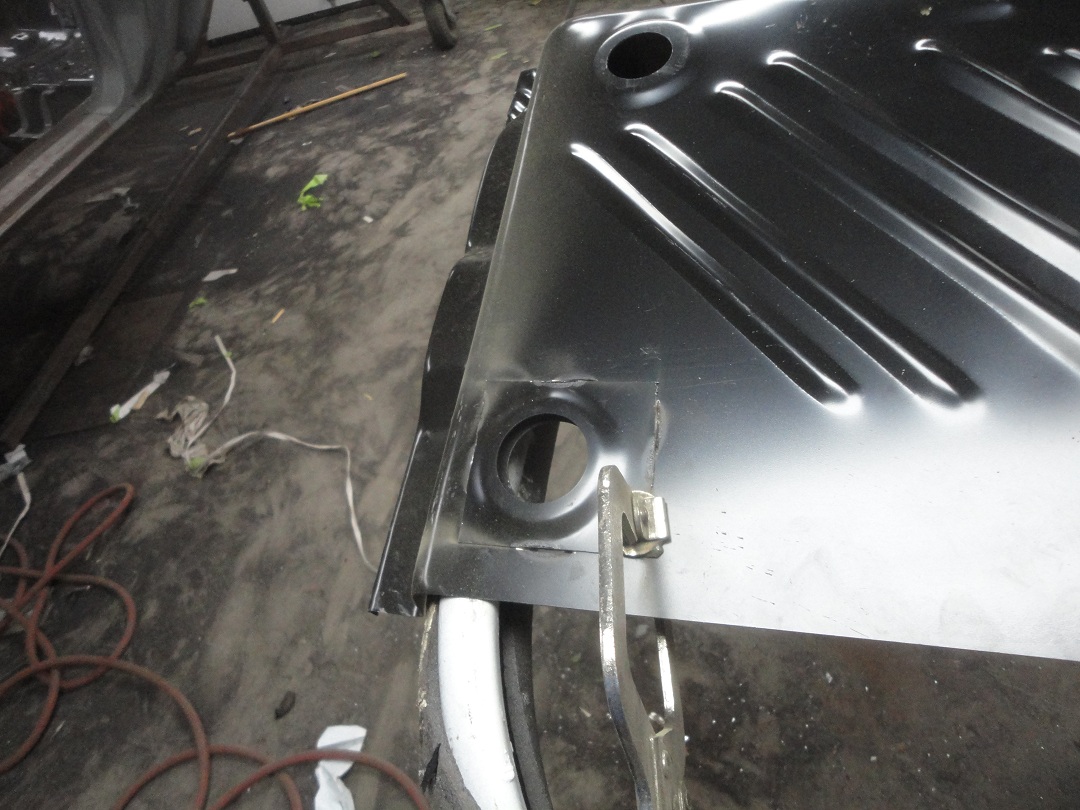
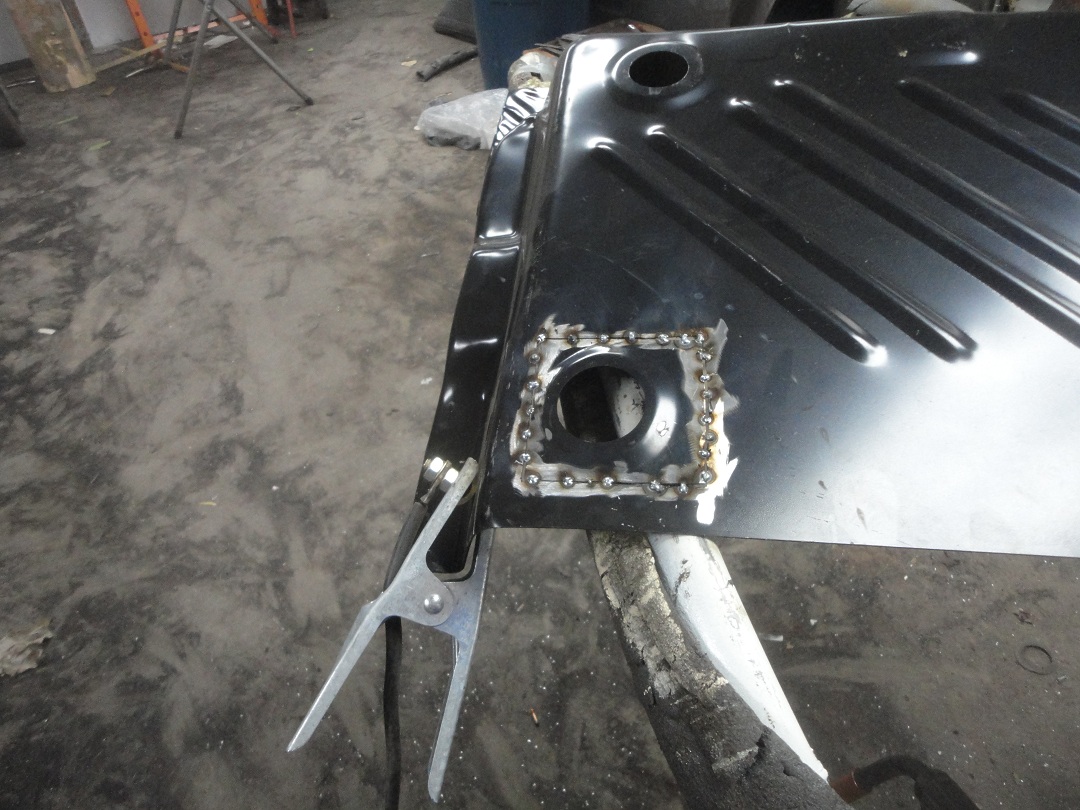
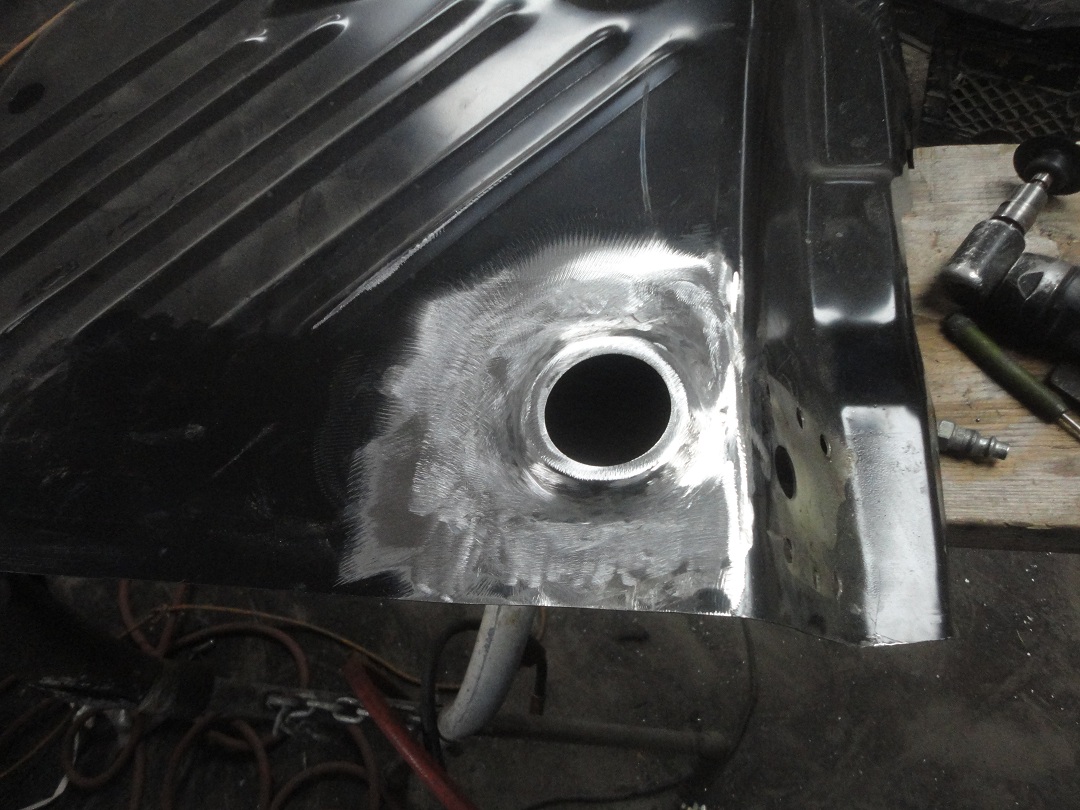
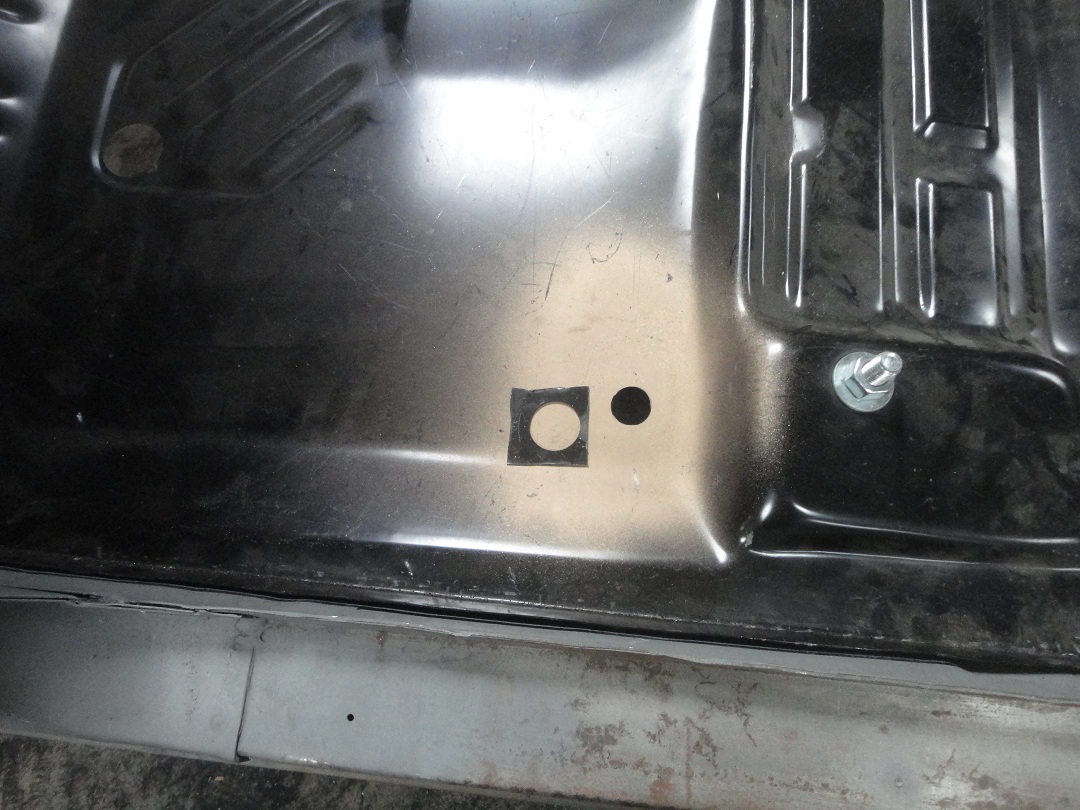 34) The next step was to install the front floor pan. There were a couple items I had to fix on the new front pan as
well. The holes just infront of the seats were too big. I had to cut out around the holes and weld in new pieces.
Then I drilled holes of the correct size. In this picture I placed the piece that I cut out next to the completed
repair to show how different the hole size was. This is nothing you want to discover after the car is painted.
34) The next step was to install the front floor pan. There were a couple items I had to fix on the new front pan as
well. The holes just infront of the seats were too big. I had to cut out around the holes and weld in new pieces.
Then I drilled holes of the correct size. In this picture I placed the piece that I cut out next to the completed
repair to show how different the hole size was. This is nothing you want to discover after the car is painted.Though not shown here, there was a bump in the center hump were the automatic shifter goes. It probably was to allow clearance for shifters after 1970. I cut the bump open and welded it flat to make it look correct for my car. |
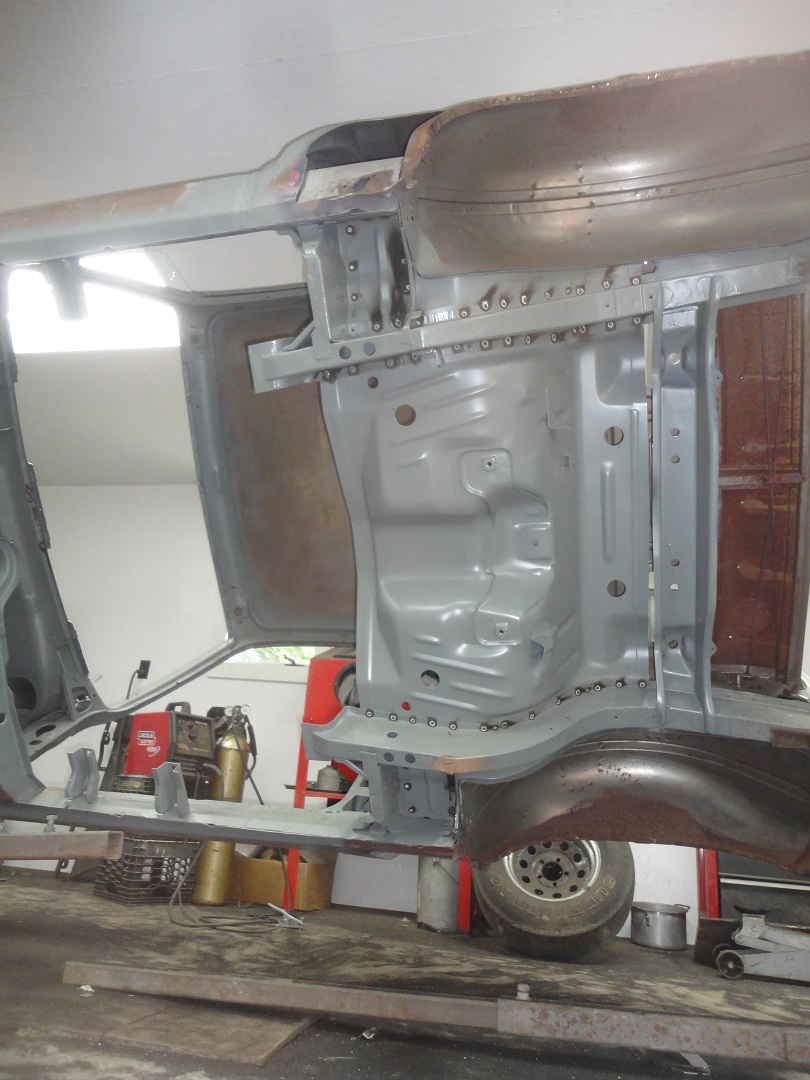
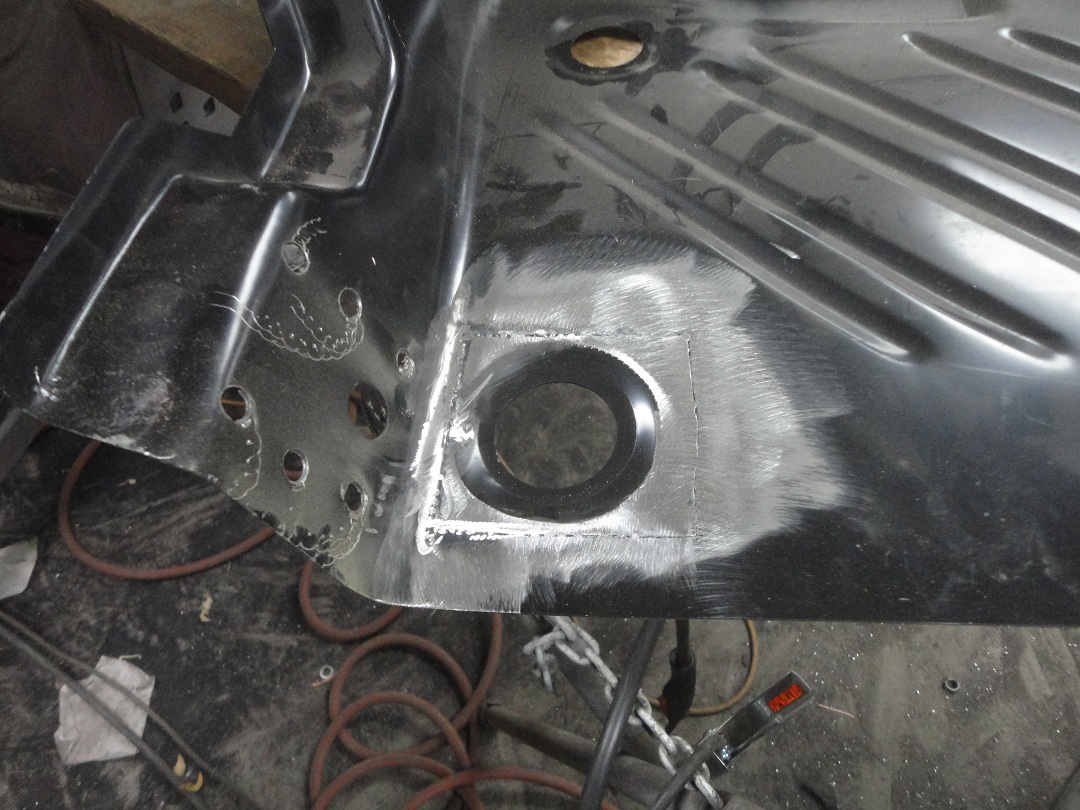
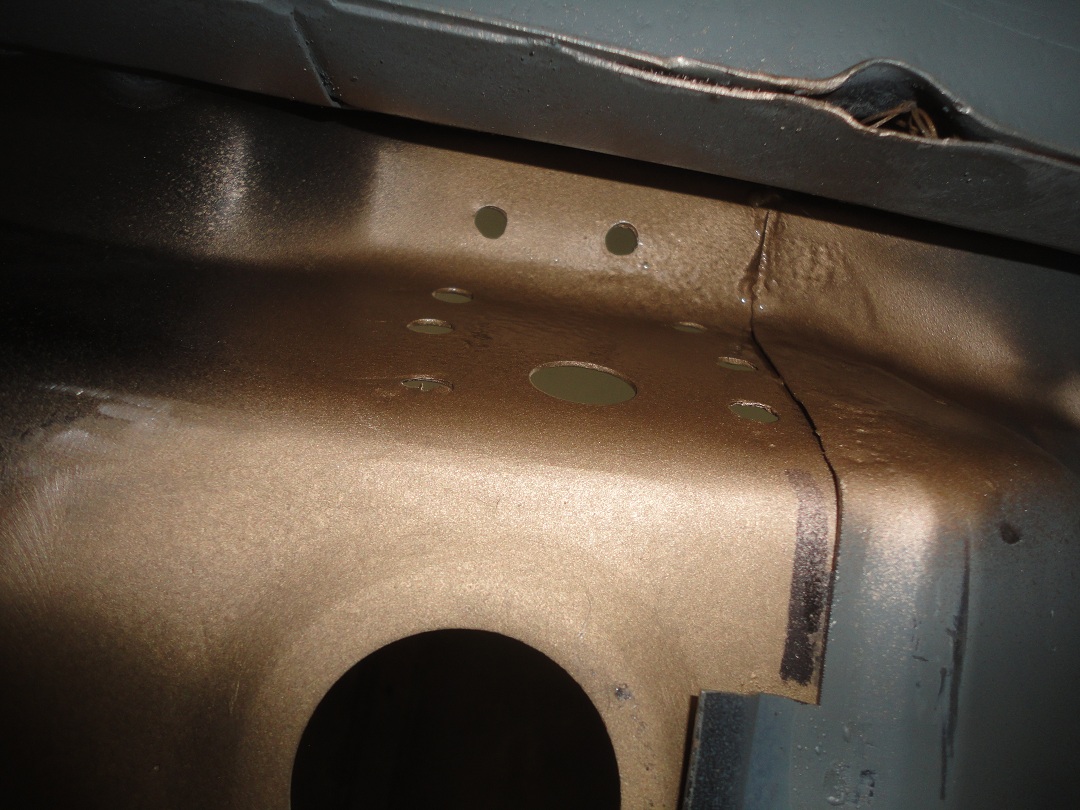
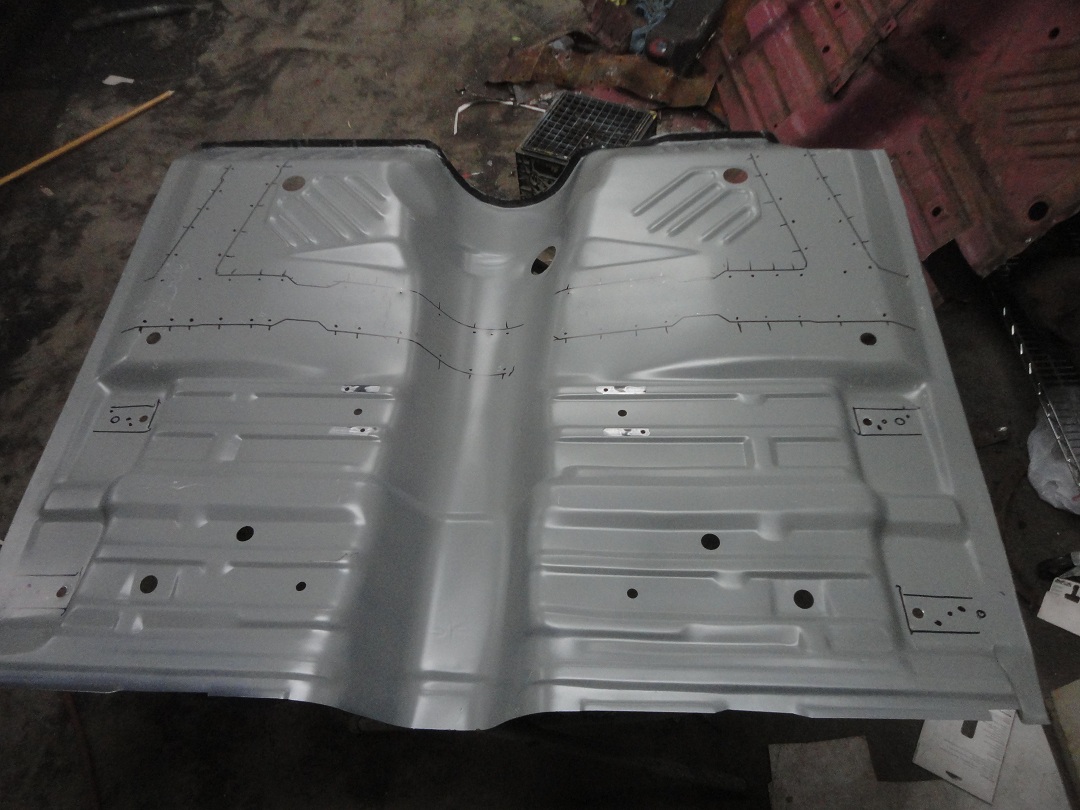 35) Here is the front pan after it was primed and fitted to the car. I had traced out the areas where the
pan made contact with the frame rails and put little tick marks were the factory spot welds were. I then put black dots
where I wanted to drill the plug weld holes.
35) Here is the front pan after it was primed and fitted to the car. I had traced out the areas where the
pan made contact with the frame rails and put little tick marks were the factory spot welds were. I then put black dots
where I wanted to drill the plug weld holes. |
 36) I then flipped the pan over and prepped the plug weld holes for welding.
|
 37) Here is the pan after welding. Sorry the picture is a little cloudy, but to be honest the air gets pretty cloudy after
all of that welding.
37) Here is the pan after welding. Sorry the picture is a little cloudy, but to be honest the air gets pretty cloudy after
all of that welding. |
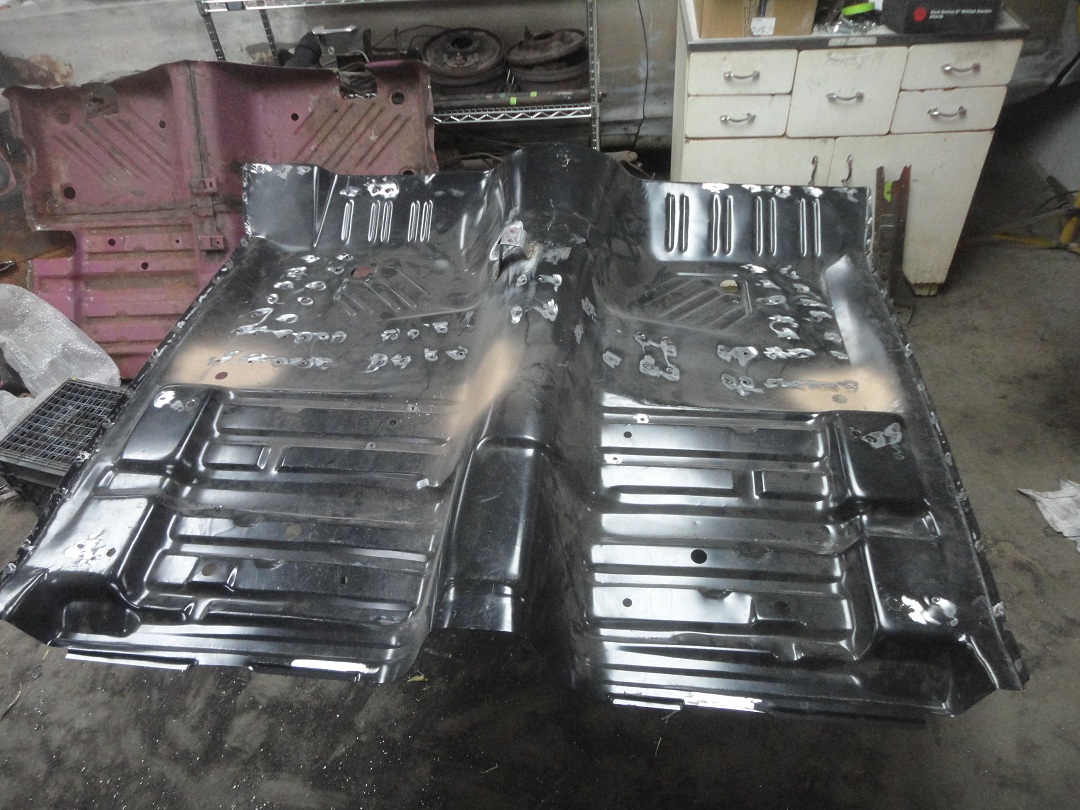
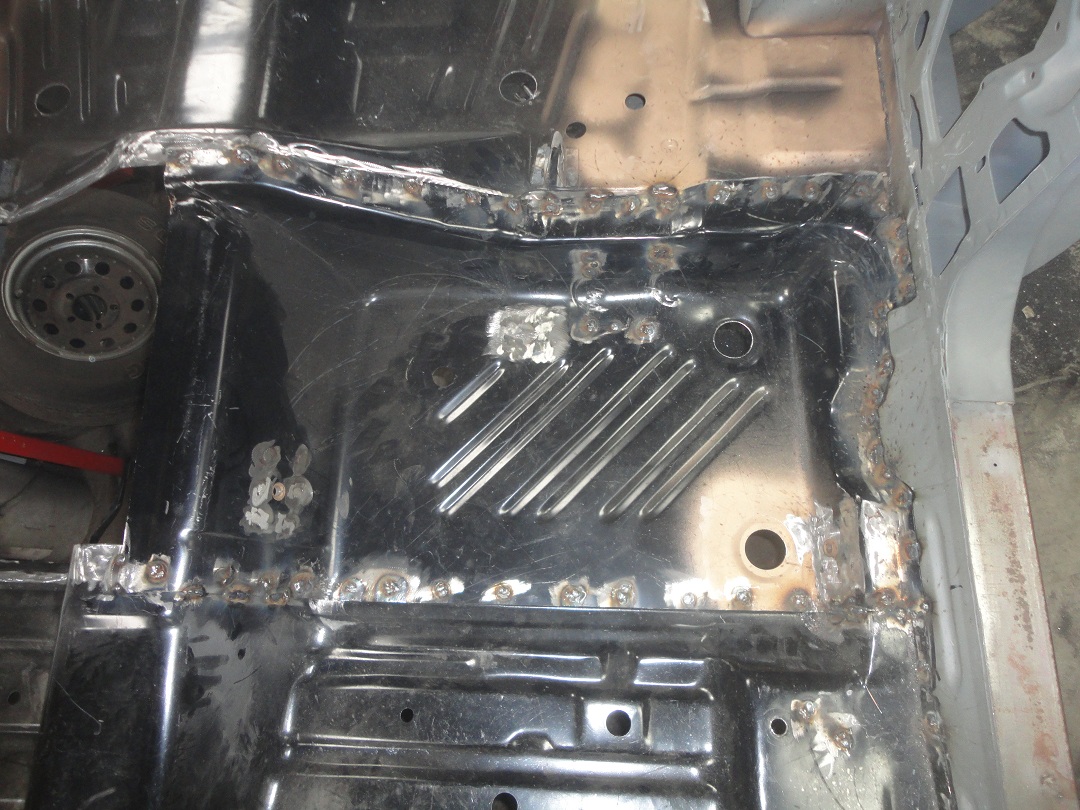
 38) Here is the underside. The reason why I primed the underside of the floorpans before installation is that there
are a lot of areas that can't be primed very well after the pans are installed. Priming them before installation
allows me to protect those areas a little better than just leaving them with the black primer on them.
38) Here is the underside. The reason why I primed the underside of the floorpans before installation is that there
are a lot of areas that can't be primed very well after the pans are installed. Priming them before installation
allows me to protect those areas a little better than just leaving them with the black primer on them. |
 39) The rear toe pans also needed some work. The rear most floor pan plug holes were undersized for the plugs, which is
just a matter of drilling the holes out. The bigger problem is that the front plug holes were dippled in the wrong
direction. They were dippled up instead of down. To fix it, I had to cut sections out of each floor pan and weld them
back in upside down (from the way they were stamped).
39) The rear toe pans also needed some work. The rear most floor pan plug holes were undersized for the plugs, which is
just a matter of drilling the holes out. The bigger problem is that the front plug holes were dippled in the wrong
direction. They were dippled up instead of down. To fix it, I had to cut sections out of each floor pan and weld them
back in upside down (from the way they were stamped).I cut one from the right pan and clamped it in the correct orientation on the left one (shown here). I used the new piece as a template for cutting out the left side. That way I had at least one piece that was a perfect fit for the hole. |
 40) I explain the butt-welding process in much greater detail on my other car project pages, so I will only touch on it
lightly here. The new piece is held in place over the old piece. The old piece (underneath) is cut out using the new
piece as a guide. The new piece is welded in place using tack-welds around the perimeter. Air is blown onto each weld to
cool the metal as each weld is being applied. Tack-welds are continued to be applied around the perimeter inbetween
each previous tack-weld. This is done until no voids are left.
40) I explain the butt-welding process in much greater detail on my other car project pages, so I will only touch on it
lightly here. The new piece is held in place over the old piece. The old piece (underneath) is cut out using the new
piece as a guide. The new piece is welded in place using tack-welds around the perimeter. Air is blown onto each weld to
cool the metal as each weld is being applied. Tack-welds are continued to be applied around the perimeter inbetween
each previous tack-weld. This is done until no voids are left.
|
 41) Butt-welds don't generally penetrate all the way through unless you champer the cut edges. This picture shows what I am
talking about. In this case I applied tack-welds from the oposite side of the weld (the side shown). Then the welds are
ground down. Usually with a grinding disk.
41) Butt-welds don't generally penetrate all the way through unless you champer the cut edges. This picture shows what I am
talking about. In this case I applied tack-welds from the oposite side of the weld (the side shown). Then the welds are
ground down. Usually with a grinding disk. |
 42) Here is a view of the underside all ready for epoxy primer. This came out so good that no filler will be required.
 |
 43) Here the left rear toe pan is welded in. The rear plug hole has been drilled to the correct size, the original seat belt
anchor plates are welded in and the e-brake cable bracket is welded in (not shown, on underside of pan)
43) Here the left rear toe pan is welded in. The rear plug hole has been drilled to the correct size, the original seat belt
anchor plates are welded in and the e-brake cable bracket is welded in (not shown, on underside of pan) The one additional thing I would like to say is that the toe pans do not fit the curve of the front portion of the frame rails. This doesn't seem to be a flaw in the repo part. It appears the original factory parts were just as bad. I have observed this on many cars. |
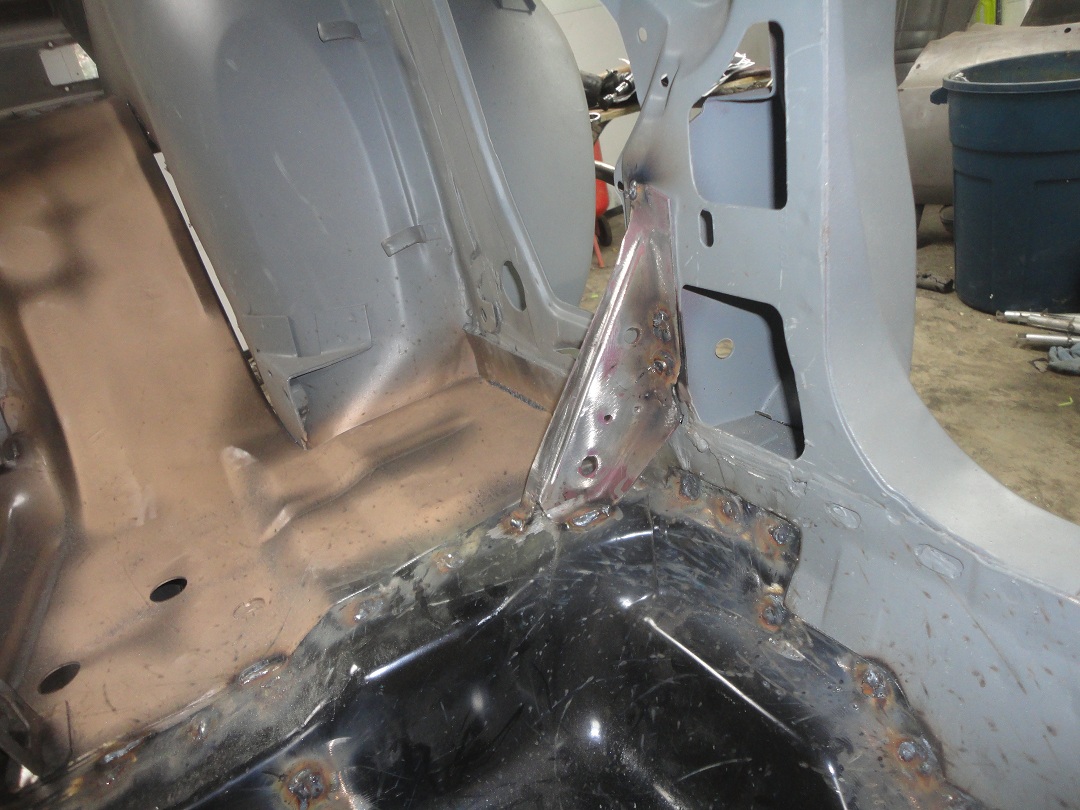 44) The B-pillar brace goes on after the toe pans.
 |
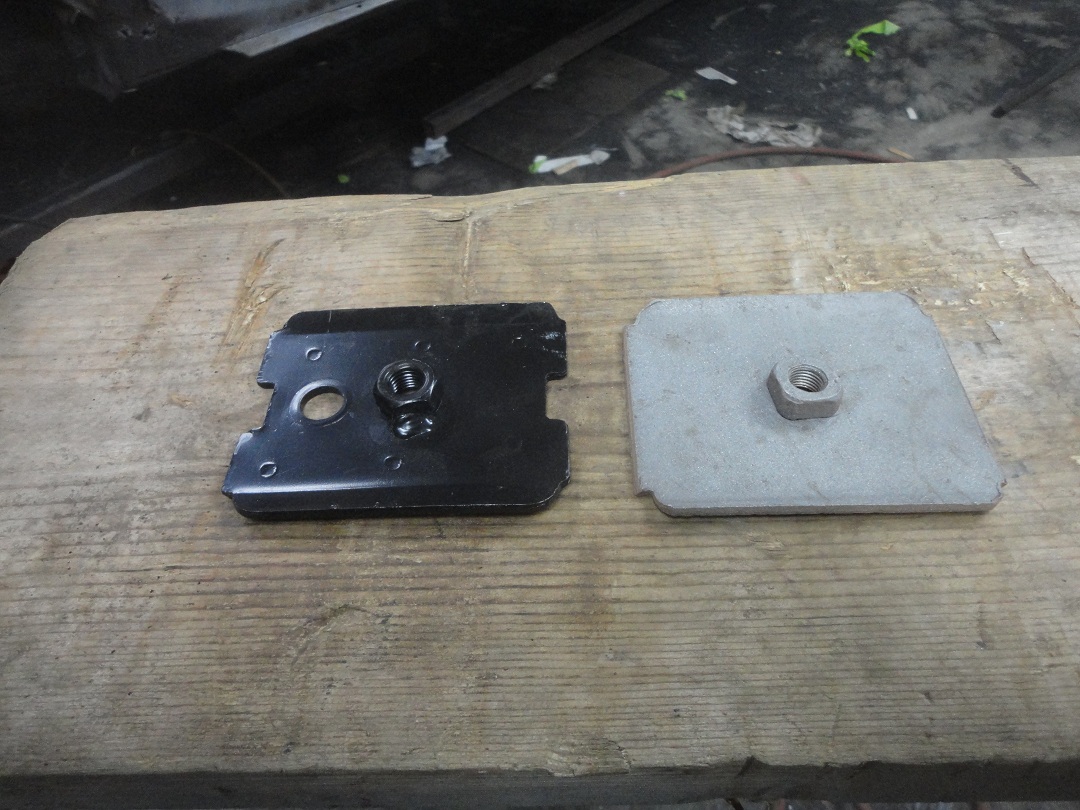 45) Here is why I used the original seatbelt anchor plates. There are lots of diffrences, but the most import thing to know
is that the repo has the wrong size nut (at least for a 1970).
45) Here is why I used the original seatbelt anchor plates. There are lots of diffrences, but the most import thing to know
is that the repo has the wrong size nut (at least for a 1970). |
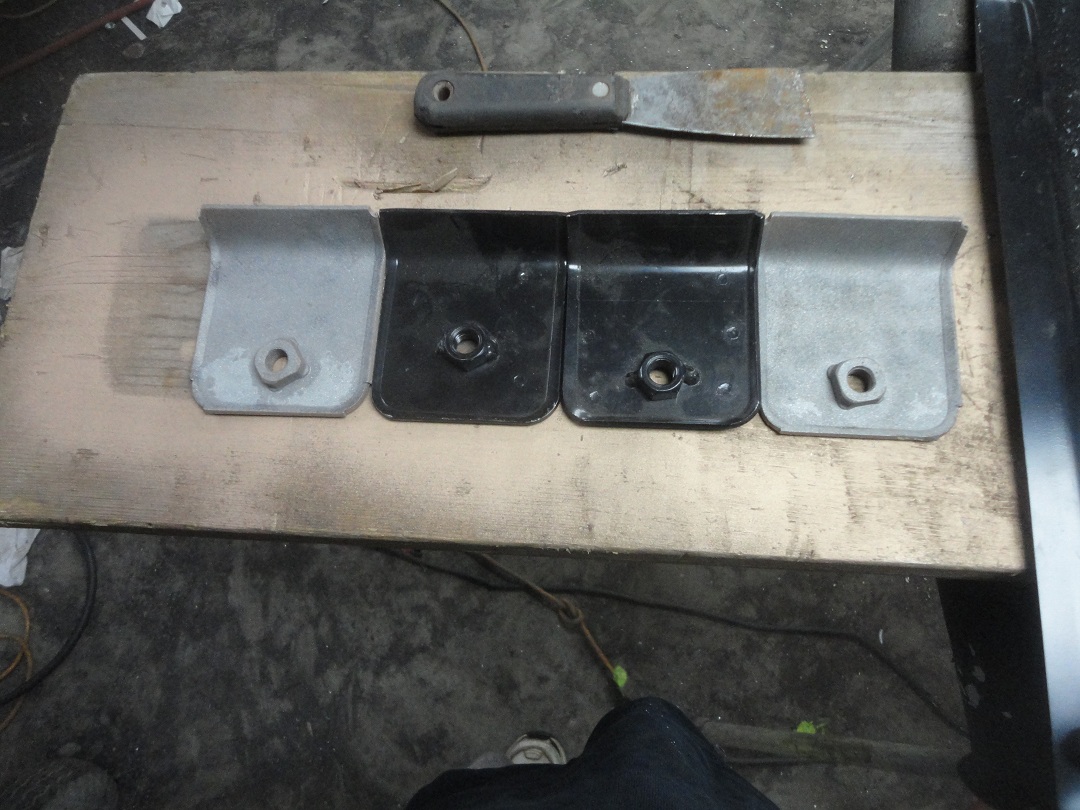 46) Here are the outboard ones that are visible when looking underneath the car. One of the repos had the nut mounted in the
wrong location (not to mention that it is also the wrong size and style). I had to a drill a new hole in the LH toe pan
to use the original plate.
46) Here are the outboard ones that are visible when looking underneath the car. One of the repos had the nut mounted in the
wrong location (not to mention that it is also the wrong size and style). I had to a drill a new hole in the LH toe pan
to use the original plate. |
 47) The repo pans come with the seatbelt anchor plates welded to them. For the left side I was able to change out the
brackets and weld the pan in. For the right side I had to weld the seatbelt anchor plate in after I
welded the toe pan in because the seatbelt plate overlapped the front floor pan. Strangely enough, the original floor
pans had the same problem from the factory.
47) The repo pans come with the seatbelt anchor plates welded to them. For the left side I was able to change out the
brackets and weld the pan in. For the right side I had to weld the seatbelt anchor plate in after I
welded the toe pan in because the seatbelt plate overlapped the front floor pan. Strangely enough, the original floor
pans had the same problem from the factory. In this picture you can see where the right side seatbelt anchor plate was going to be welded. |
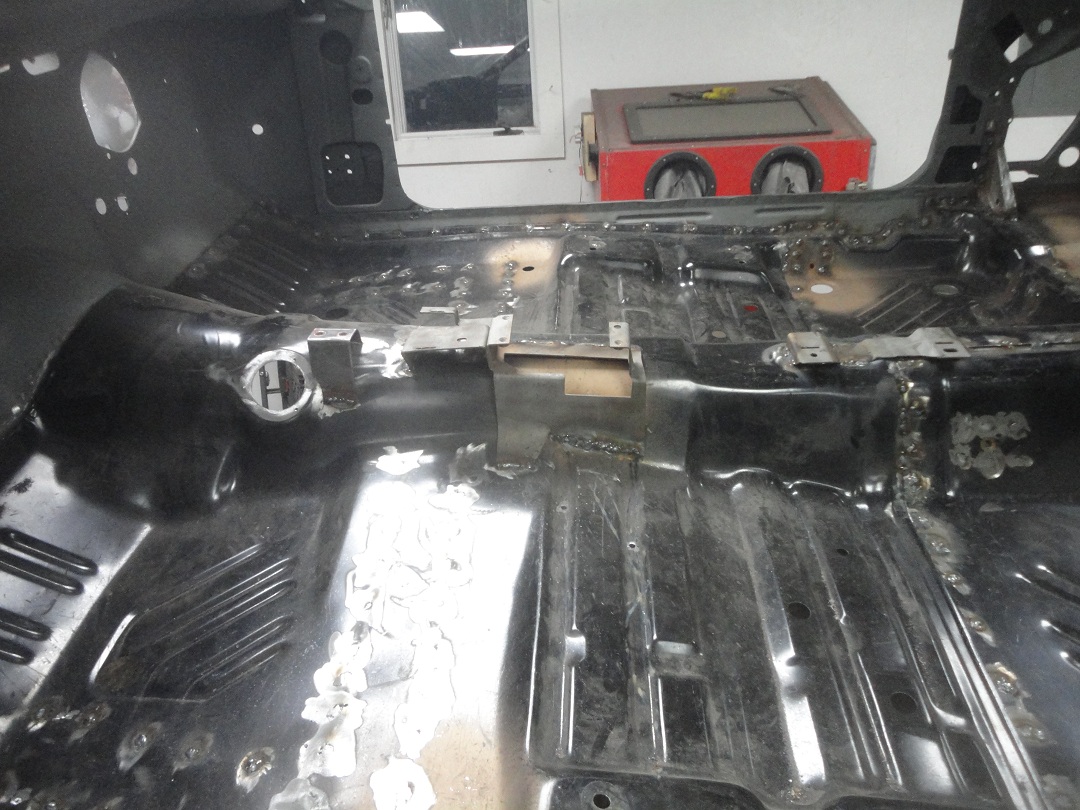
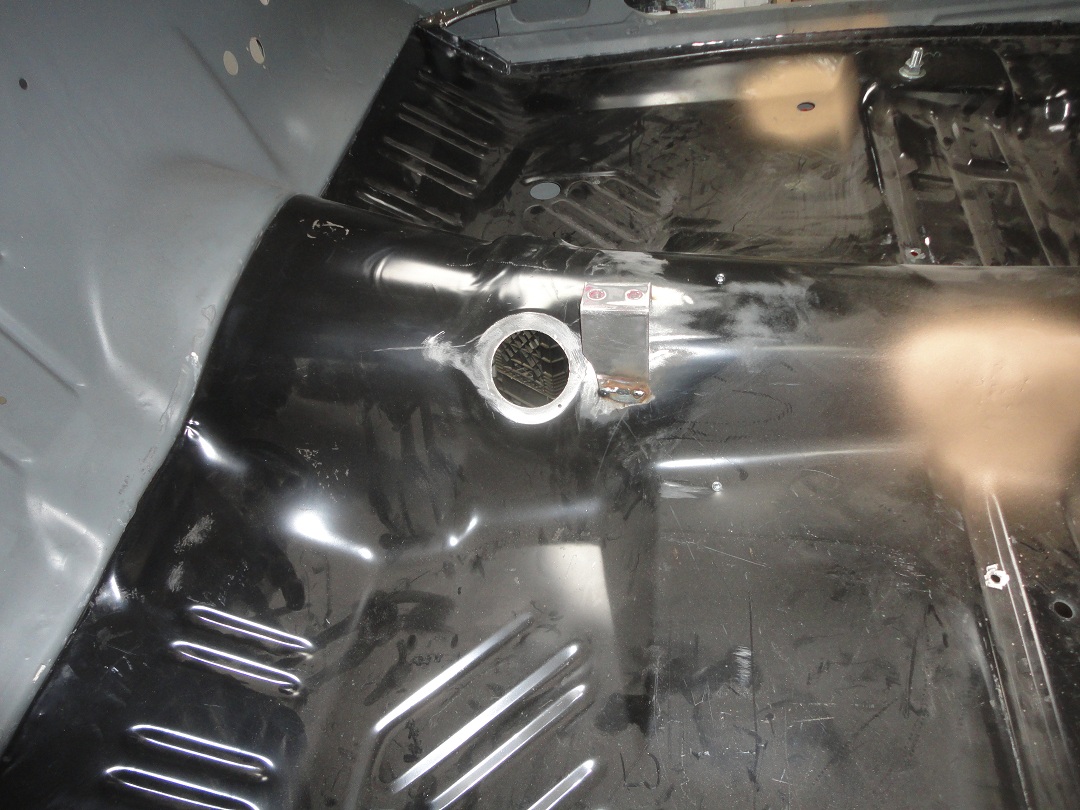 48) The last bit of welding on the floors was to install the console and shifter brackets. The hole for the
automatic shifter wasn't drilled so I had to go out and buy a hole saw just to drill the one hole.
48) The last bit of welding on the floors was to install the console and shifter brackets. The hole for the
automatic shifter wasn't drilled so I had to go out and buy a hole saw just to drill the one hole.The shifter boot and linkage was used as a reference to position the bracket to the floor before welding. |
 49) The console took a bit of time since the hump on the repo floor was not quite the same as the original one. I used
the console and shifter to help position the brackets. The trick was to set the brackets so that the woodgrain
panel was not raised up by the shifter. This was probably fixed by 1971 when Dodge added a 5th screw to the panel.
49) The console took a bit of time since the hump on the repo floor was not quite the same as the original one. I used
the console and shifter to help position the brackets. The trick was to set the brackets so that the woodgrain
panel was not raised up by the shifter. This was probably fixed by 1971 when Dodge added a 5th screw to the panel. |
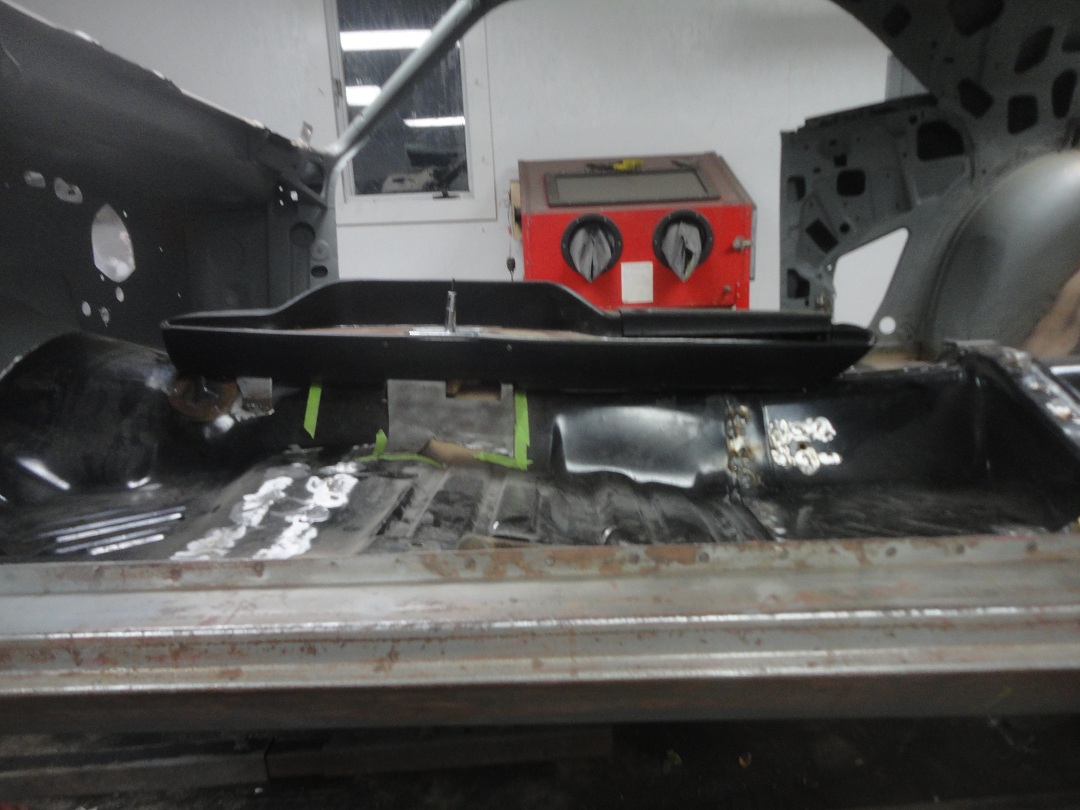
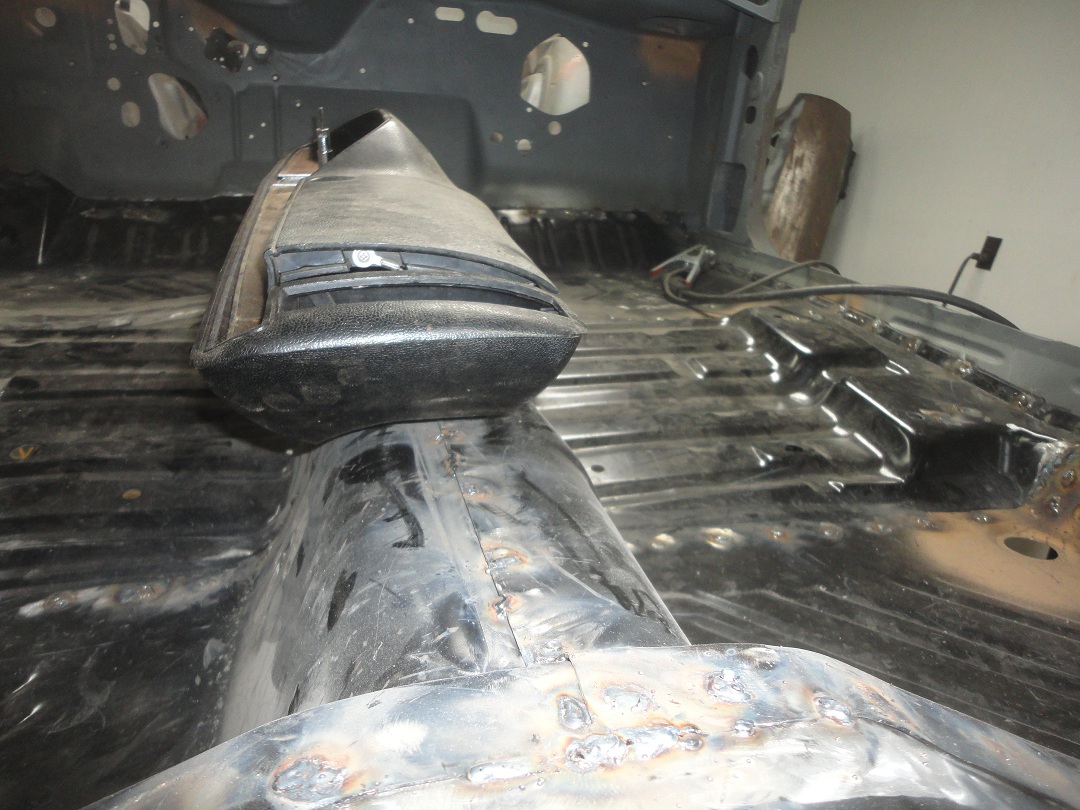 50) This rear view shows how the rear of the console overhangs the center hump on the driver's side.
 |
 51) The brackets were tack welded in place and the console was refitted (with the shifter) to ensure everthing was in
the correct position before the brackets were fully welded to the floor.
51) The brackets were tack welded in place and the console was refitted (with the shifter) to ensure everthing was in
the correct position before the brackets were fully welded to the floor. |