With the headliner in it was time to focus on getting the dash in the car. This involves getting everything on the firewall restored and installed.
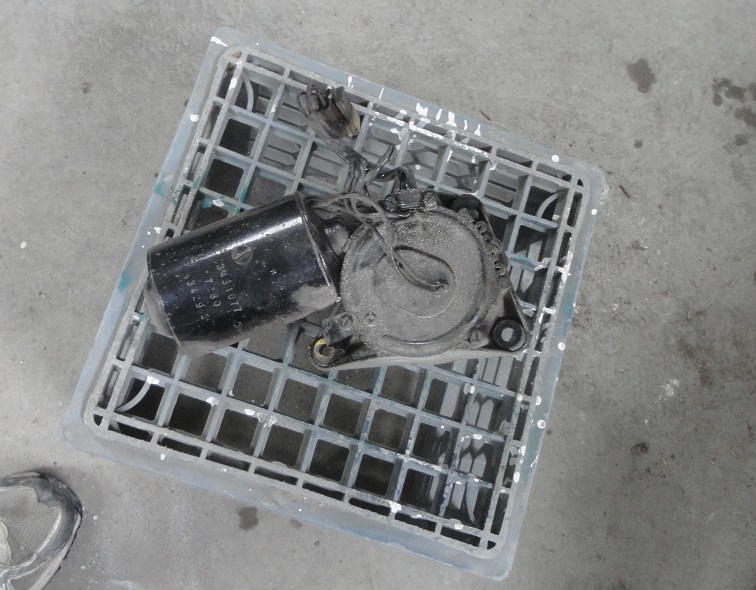
I restored most of the pieces concurrently, but for the sake of explanation I'll do one at a time.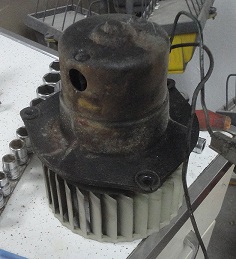 266) First on the list is the A/C Heater Box. Here is my A/C blower motor before restoration.The blower was originally zinc plated. Something to look for on a restored car is to see if the blower was replated or just painted silver.
 |
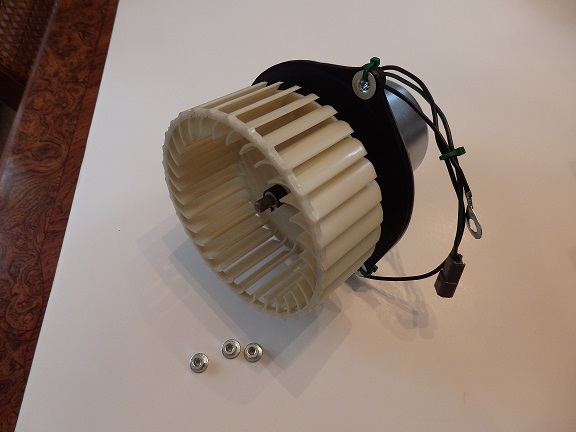
 267) It just so happens (lucky me!), an excellent Mopar parts restorer, Stephan Fournier, lives just across the US/Canadian border from me. I was able to bring him lots of parts (I will show you them as
I go along with the narative). He restored my blower motor, the wiper motor, door latches, headlight buckets, AC lines, power steering hoses and a whole bunch of brackets and hardware. He even restored my starter relay!
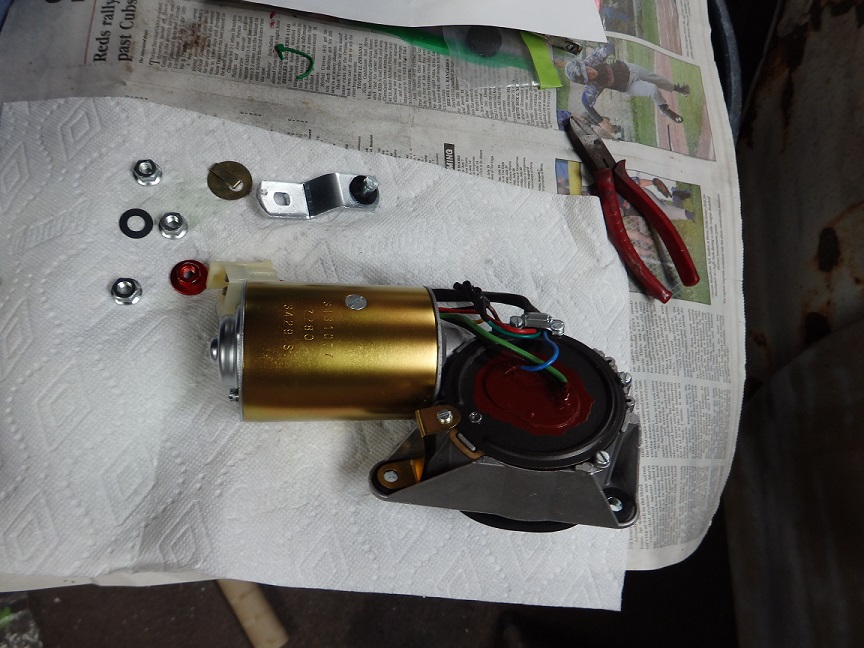
Here is the A/C blower motor after he was done with it.
267) It just so happens (lucky me!), an excellent Mopar parts restorer, Stephan Fournier, lives just across the US/Canadian border from me. I was able to bring him lots of parts (I will show you them as
I go along with the narative). He restored my blower motor, the wiper motor, door latches, headlight buckets, AC lines, power steering hoses and a whole bunch of brackets and hardware. He even restored my starter relay!
Here is the A/C blower motor after he was done with it. |
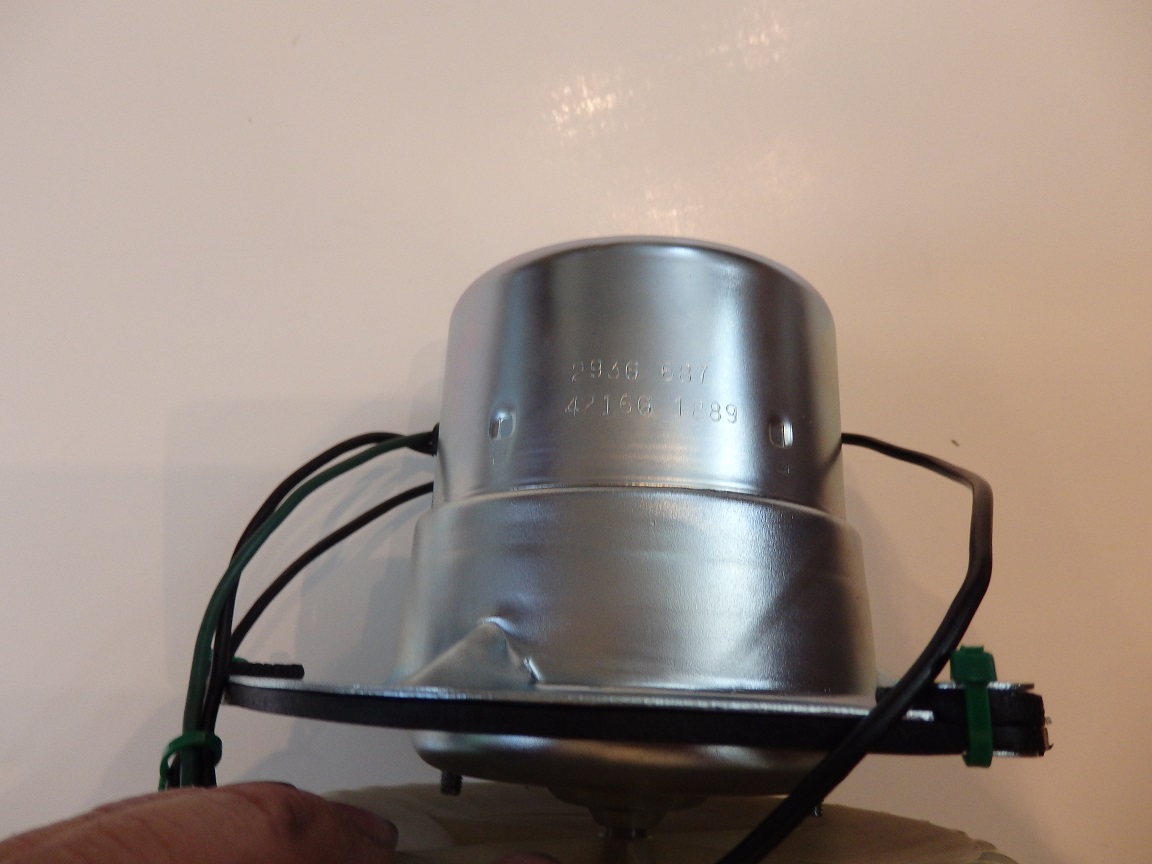
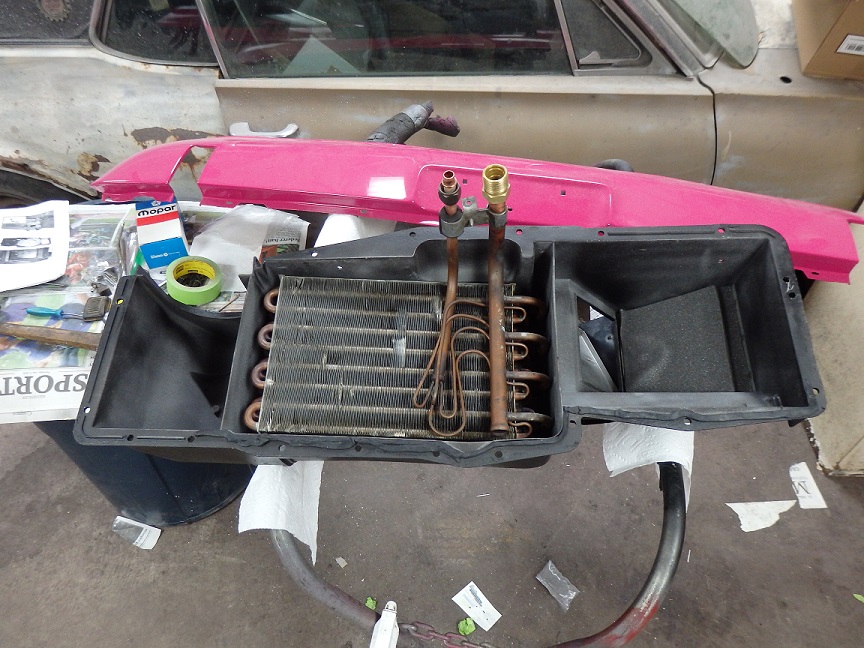
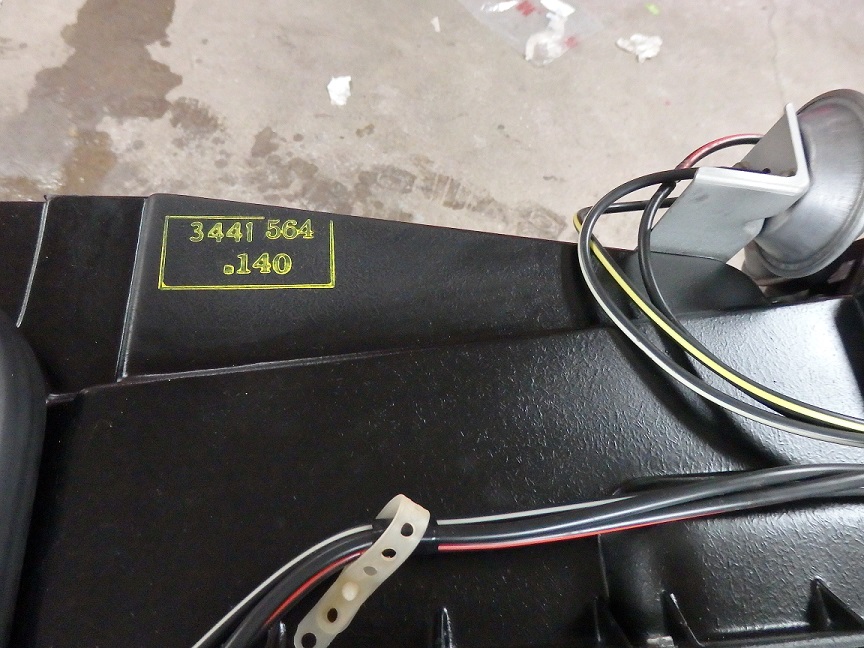
 268) Here is the A/C Heater Box freshly removed from the firewall. Stamped on the top is the partnumber and assembly date code.
 |
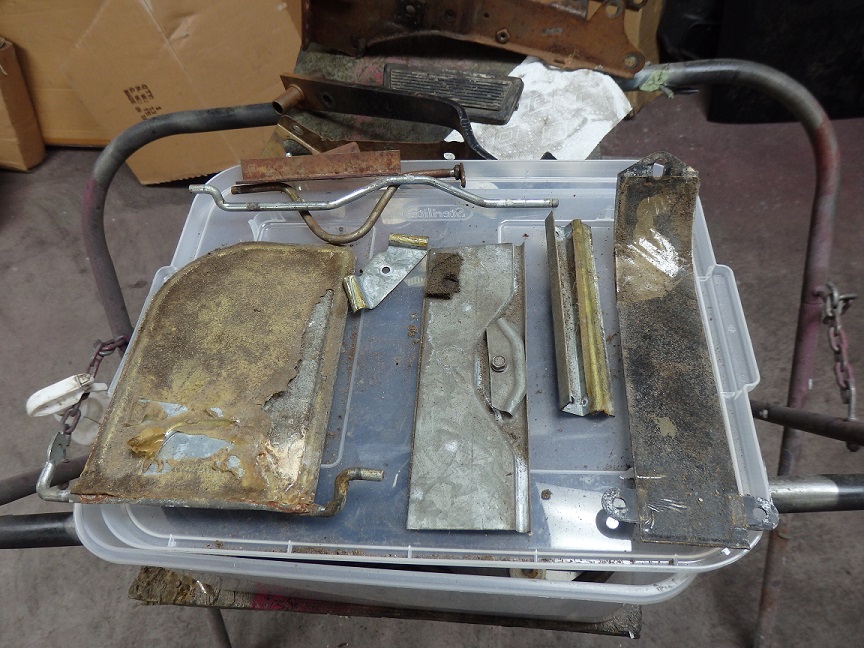 269) Restoration is quite simple so I won't go deeply into the process. Basically you take it a part, clean it up, replace the foam and put it back together.
Typically you don't need to repaint the box, but in my case I had no choice. I did not clean up enough to look new.
269) Restoration is quite simple so I won't go deeply into the process. Basically you take it a part, clean it up, replace the foam and put it back together.
Typically you don't need to repaint the box, but in my case I had no choice. I did not clean up enough to look new. In this picture you can see some of the flapper doors with fully deterioriated foam. |
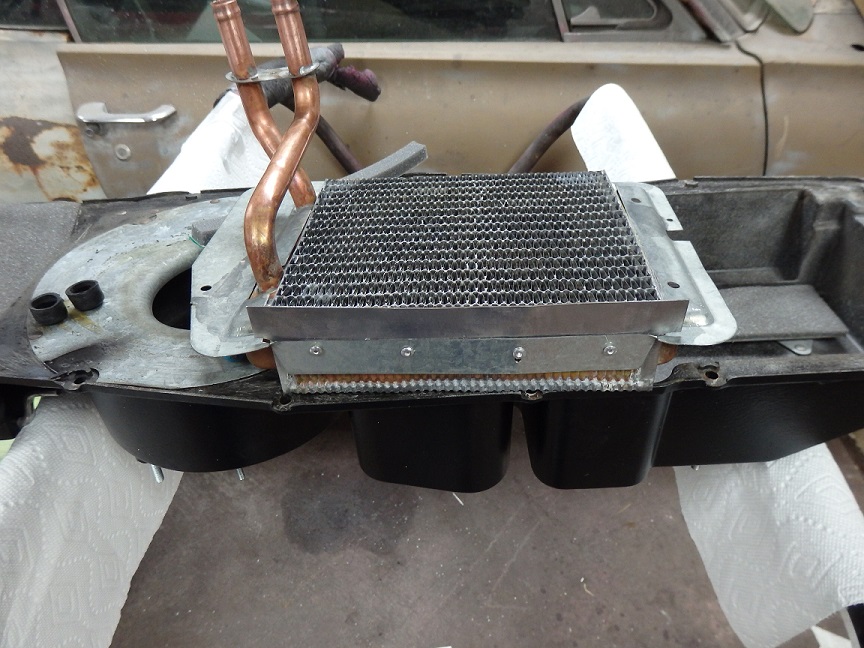
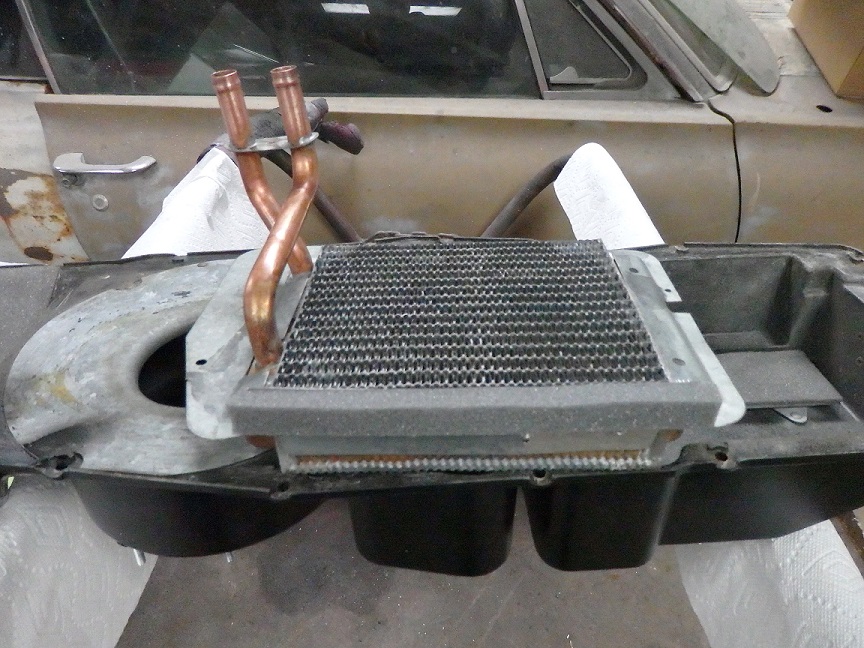 270) I purchased new foam from Resto Rick, since he has the best kits around.
I replaced the heater core, having had bad experiences in the past with old ones. I was disappointed to find that the new core was missing a bracket that was pinch welded to the original one. Without it, the heater flapper would have nothing to seal against. So I ended up having to rivet the original bracket to the new core in order to have a place to attach the flapper foam sealing strip. |
 271) The heater core is just screwed in place, followed by a big gasket.
 |
 272) The original A/C evaporator was jsut cleaned up and reinstalled. It bolts to the other half of the heater box.
 |
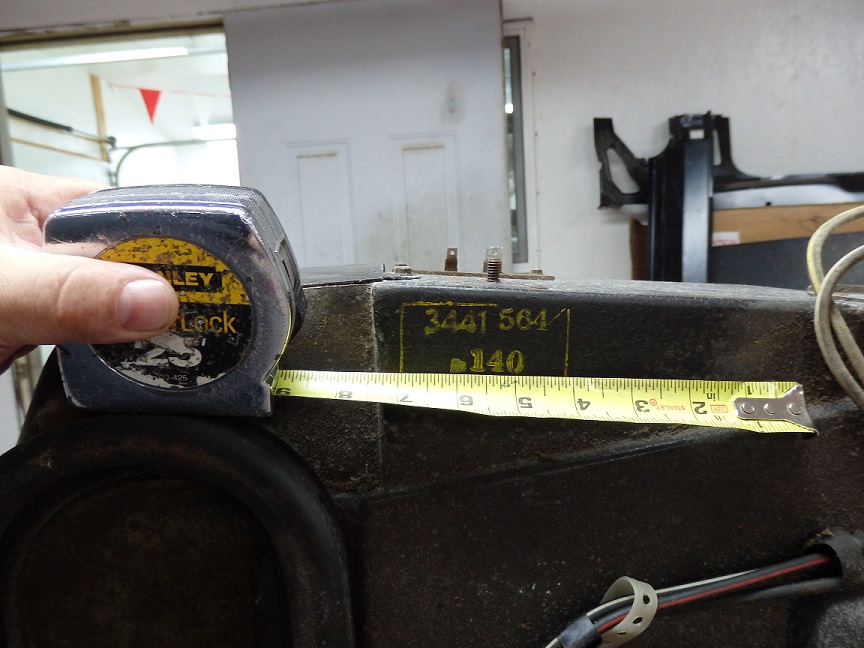
 273) One detail I did not want to miss was the ink stamping. I took pictures of the ink stamp with a ruler in the shot to establish scale and
was able to generate a JPG of what I wanted the new ink stamp to look like. I ordered the stamp from RubberStampChamp.com.
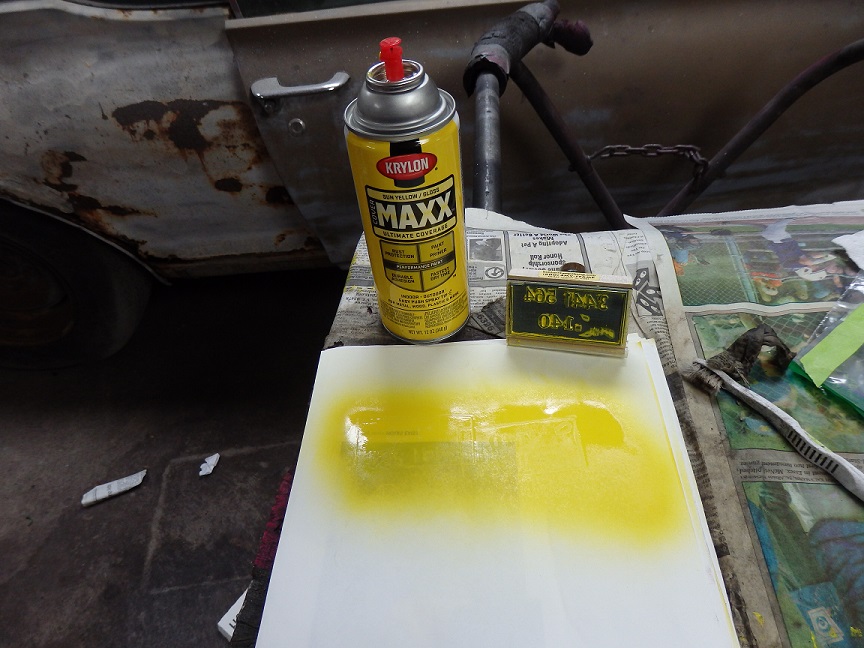
273) One detail I did not want to miss was the ink stamping. I took pictures of the ink stamp with a ruler in the shot to establish scale and
was able to generate a JPG of what I wanted the new ink stamp to look like. I ordered the stamp from RubberStampChamp.com. Here is the stamp with the paint I used. It took me a lot of practice to get it right. For me, I had to spray the paint evenly on a piece of paper that was on a rigid background (a piece of plywood). I stamped the heater box after a couple practice stamps to get the feel for it. |
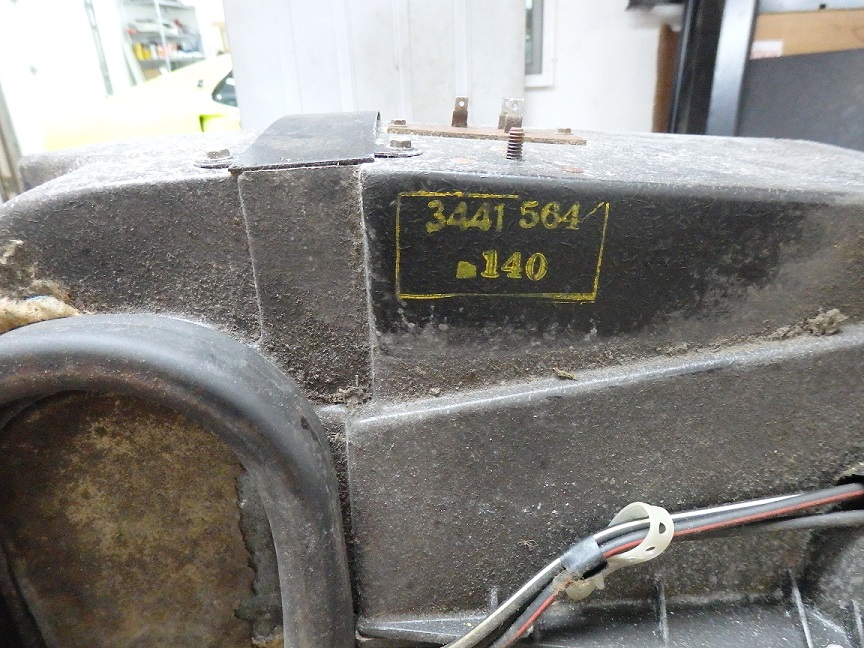
 274) Here is the new stamping next to the original. How'd I do ?
 |
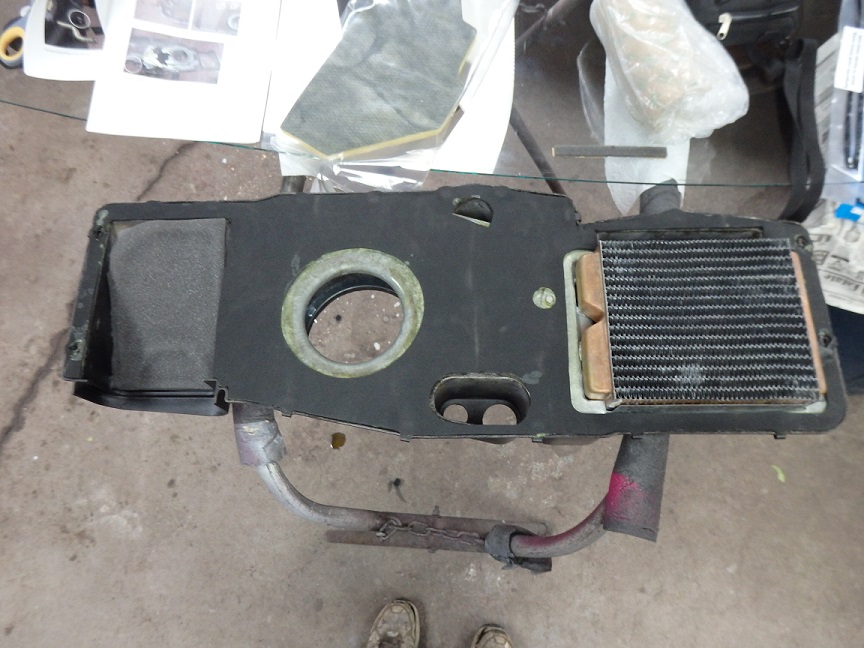
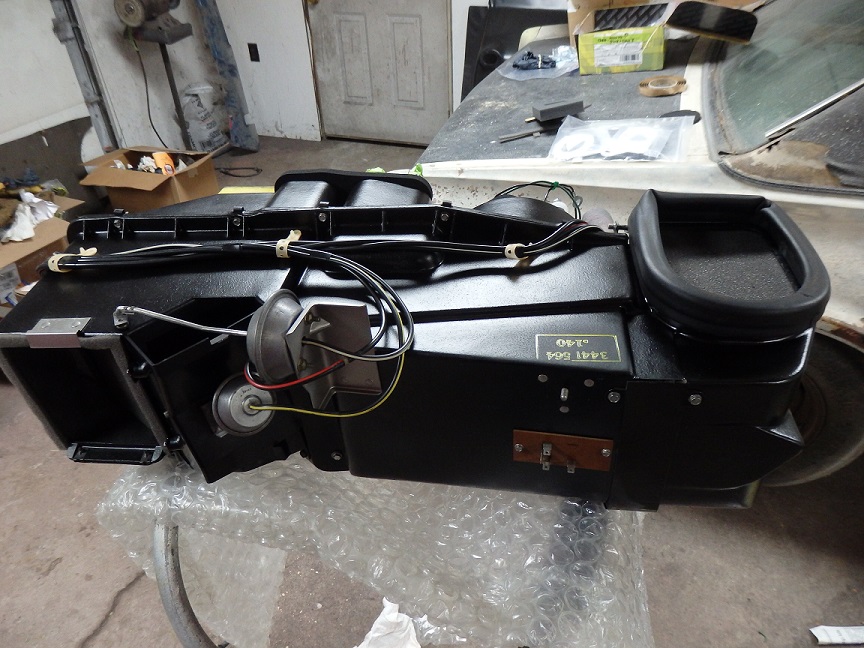 275) He is the A/C heater box all restored and ready to go into the car.
 |
 276) Here is the wiper motor before and after it was restored by Stephan Fournier. It's hard to believe that it's the same one.
 |
|
|
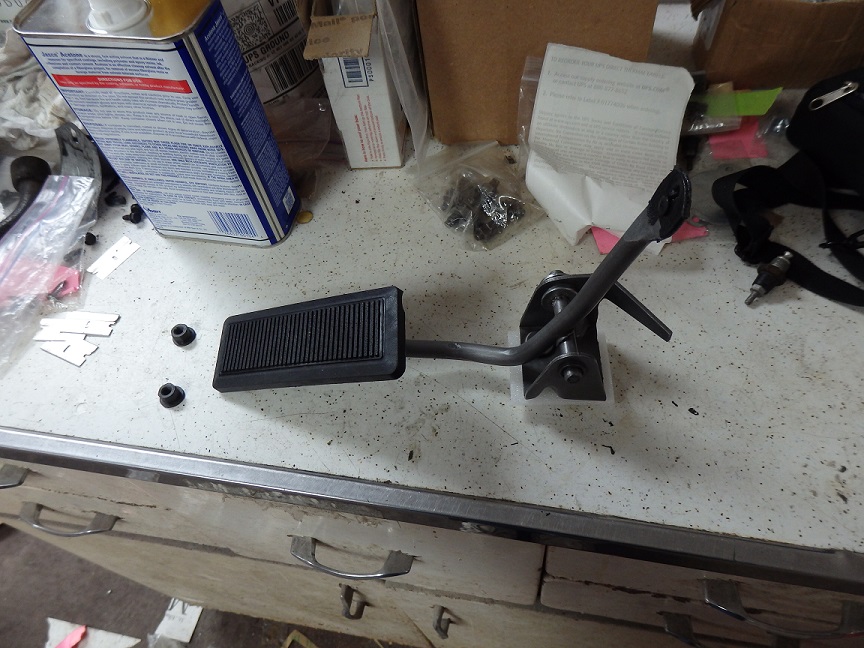 278) I took the gas pedal a part and soaked the metal pieces in phosphoric acid, which I bought at HomeDepot. After soaking overnight, I cleaned it
up with a scuff pad and satin clear coated it. The plastic pedal I bought new. The nuts were rephosphate plated by Stephan.
278) I took the gas pedal a part and soaked the metal pieces in phosphoric acid, which I bought at HomeDepot. After soaking overnight, I cleaned it
up with a scuff pad and satin clear coated it. The plastic pedal I bought new. The nuts were rephosphate plated by Stephan. |

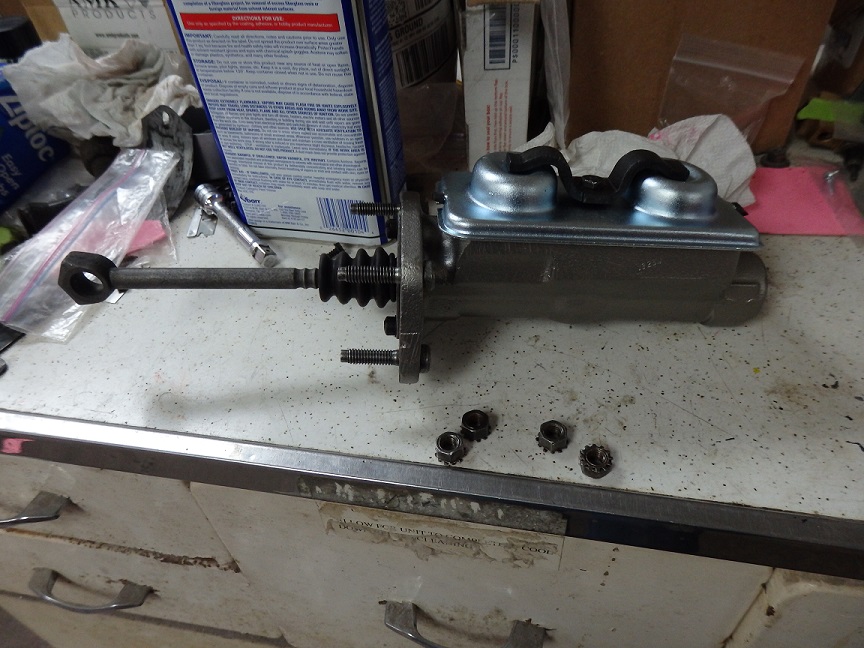 279) The original master cylinder was long gone. I located a new one on e-bay, which coincidetally came from another 1970 Challenger. I bead blasted
and painted the body and rebuilt it using an NOS Chrysler Master Cylinder rebuild kit that I also bought from E-bay. The cover and hold-down bolt I had
replated by Stephan. The cover was originally just clear zinc (silver), but all the restored and original examples I've found are yellow zinc,
so I guess I will have to send it back to Stephan to get the "popular" finish put on it to avoid getting point deductions at shows.
279) The original master cylinder was long gone. I located a new one on e-bay, which coincidetally came from another 1970 Challenger. I bead blasted
and painted the body and rebuilt it using an NOS Chrysler Master Cylinder rebuild kit that I also bought from E-bay. The cover and hold-down bolt I had
replated by Stephan. The cover was originally just clear zinc (silver), but all the restored and original examples I've found are yellow zinc,
so I guess I will have to send it back to Stephan to get the "popular" finish put on it to avoid getting point deductions at shows.The manual brake master cylinders have studs pressed into them for mounting. The nuts, which install from the inside of the car, are red dyed zinc. I had none of these parts, so I had to located a some used originals. These I found from Wolfie's Cars. They've helped me out a lot on this project. |
 280) The pedal support was dismantled and the major steel pieces were soaked in phoshoric acid overnight. After soaking the parts were soaked in a baking soda solution
to neutralize the acid. Then the parts were scuffpadded and satin clear coated. Additionally the brake pedal was painted satin black with a new pad installed afterwords.
280) The pedal support was dismantled and the major steel pieces were soaked in phoshoric acid overnight. After soaking the parts were soaked in a baking soda solution
to neutralize the acid. Then the parts were scuffpadded and satin clear coated. Additionally the brake pedal was painted satin black with a new pad installed afterwords. |
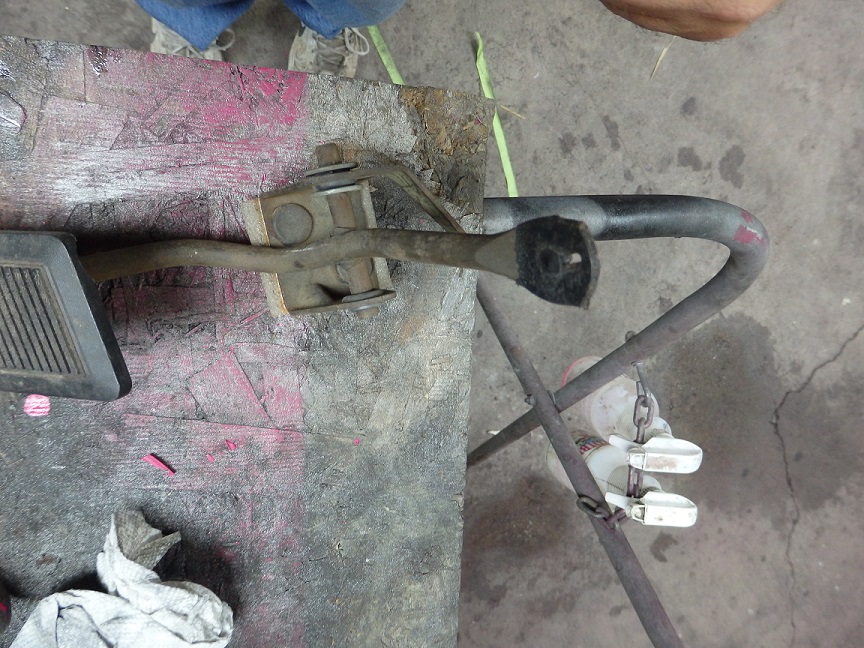
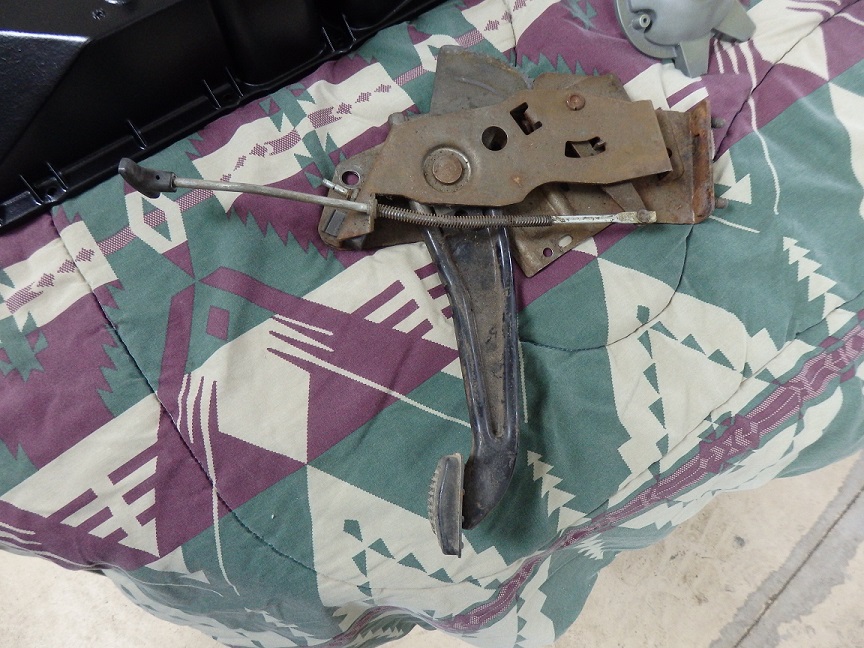 281) The parking brake assembly, 1970 only design, was a little harder to do. It doesn't really come a part. I removed the handle, by drilling out the rivet. But besides the switch and the rubber
stopper, it doesn't come a part any futher. I soaked the assembly in phoshoric acid overnight and then soak it in baking soda solution to neutralize the acid. It took a lot of
scrubbing with pieces of scuff pads to clean it up. I then coated it with satin clear and painted the pedal arm, followed by the installation of a new pad.
281) The parking brake assembly, 1970 only design, was a little harder to do. It doesn't really come a part. I removed the handle, by drilling out the rivet. But besides the switch and the rubber
stopper, it doesn't come a part any futher. I soaked the assembly in phoshoric acid overnight and then soak it in baking soda solution to neutralize the acid. It took a lot of
scrubbing with pieces of scuff pads to clean it up. I then coated it with satin clear and painted the pedal arm, followed by the installation of a new pad.The release rod cleaned up with a scuff pad, so no replating necessary. I bought a new rivet to re-attach it from RivetsOnLine.com. This is the same place the I get my other rivets for fixing the grill and assembling some dash parts.The handle I just bought new. |
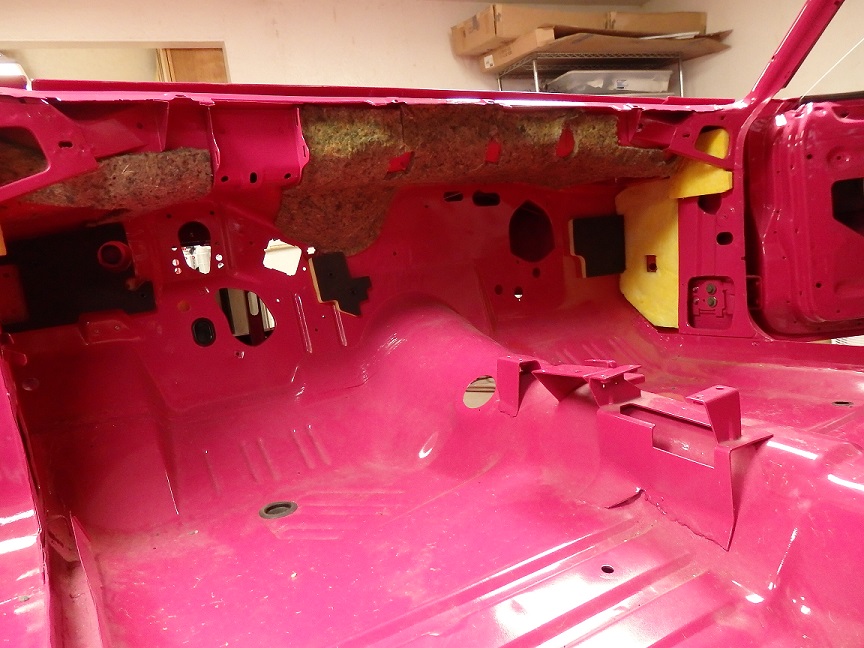 282) With most of the firewall items restored, it was time to start putting them on. I started with insulation. Some of the available kits do not come with the insulation that goes in the
upper corners. So I bought a kit from Resto Rick since his kits are pretty complete. Here is everthing installed. The padding that goes on the underside of the cowl gets contact
cemented in place. The others are just stuck in place or clipped in place.
282) With most of the firewall items restored, it was time to start putting them on. I started with insulation. Some of the available kits do not come with the insulation that goes in the
upper corners. So I bought a kit from Resto Rick since his kits are pretty complete. Here is everthing installed. The padding that goes on the underside of the cowl gets contact
cemented in place. The others are just stuck in place or clipped in place. |
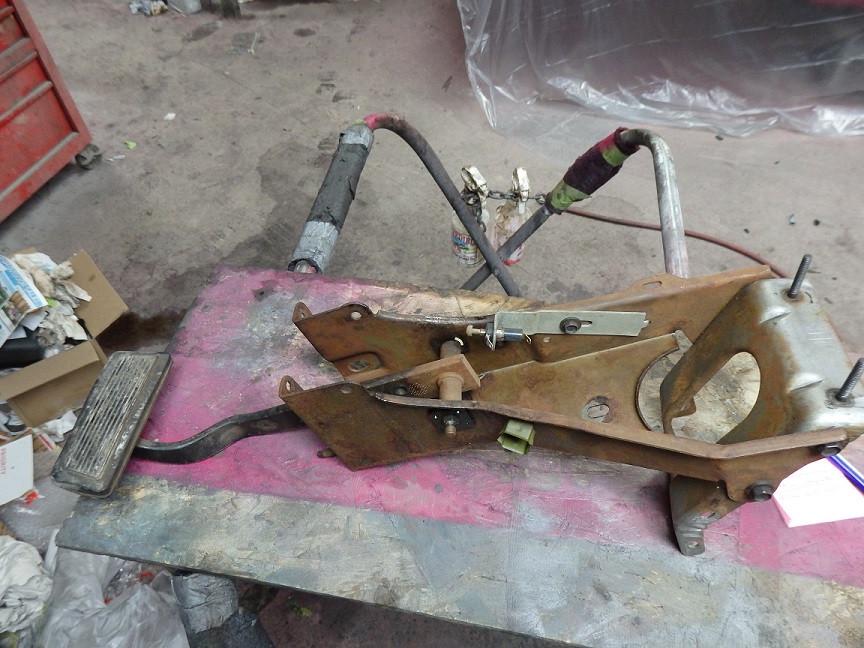
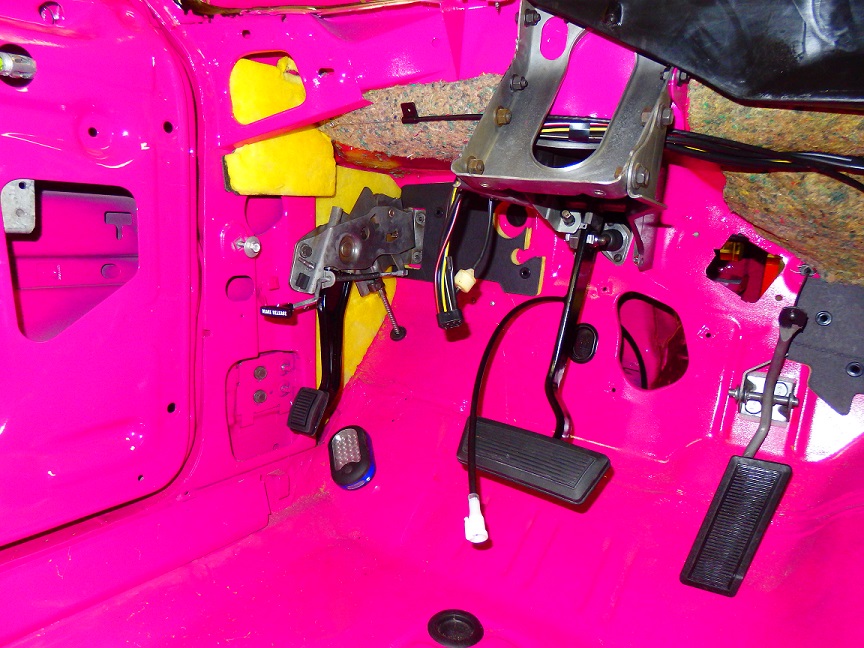 283) They pedal support, gas pedal and parking brake assembly go in quickly. One thing to note is that the emergency brake cable had to be connected to the parking brake assembly
before the parking brake assembly was bolted in place. The assembly was changed in 1971 to make it easier to replace the cable.
283) They pedal support, gas pedal and parking brake assembly go in quickly. One thing to note is that the emergency brake cable had to be connected to the parking brake assembly
before the parking brake assembly was bolted in place. The assembly was changed in 1971 to make it easier to replace the cable. |
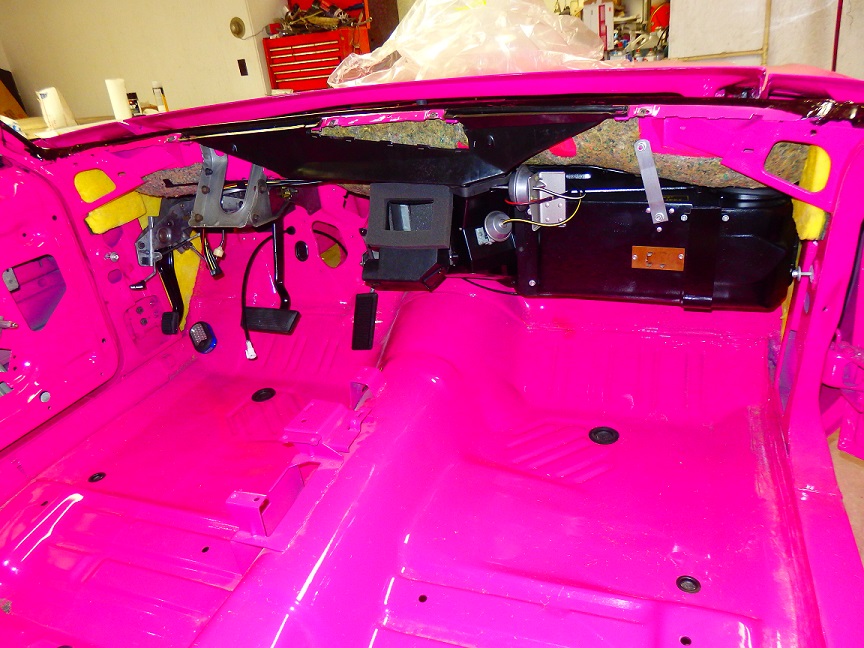
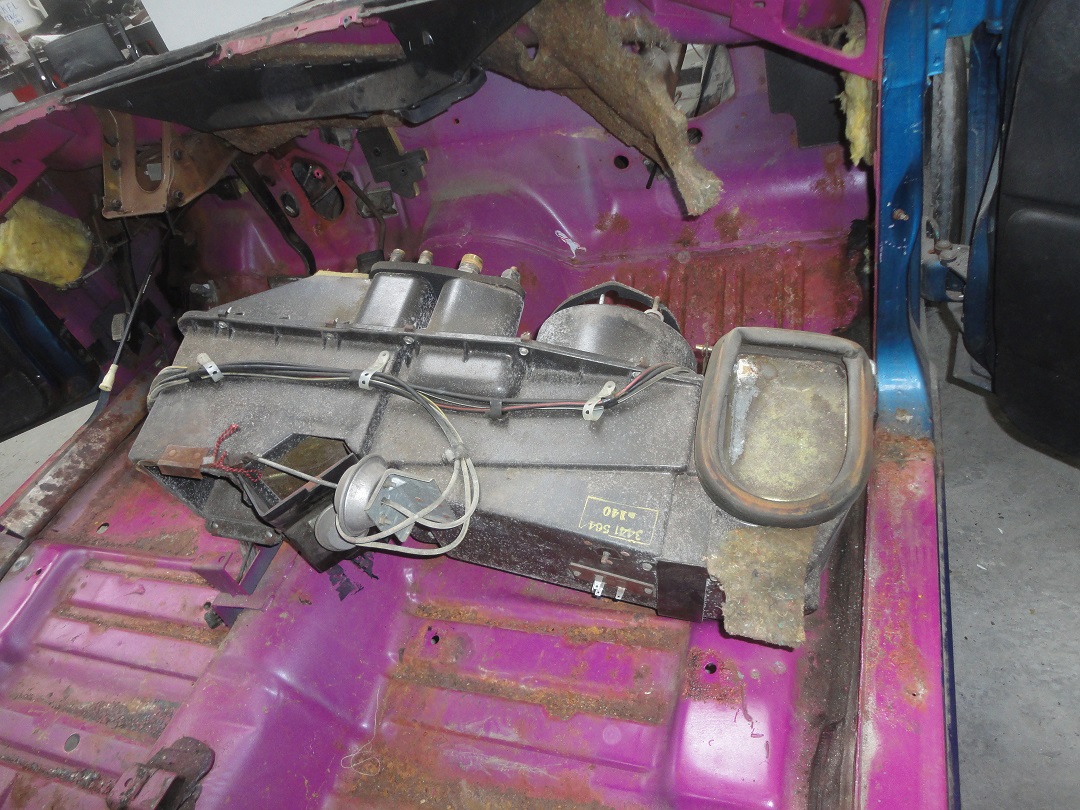
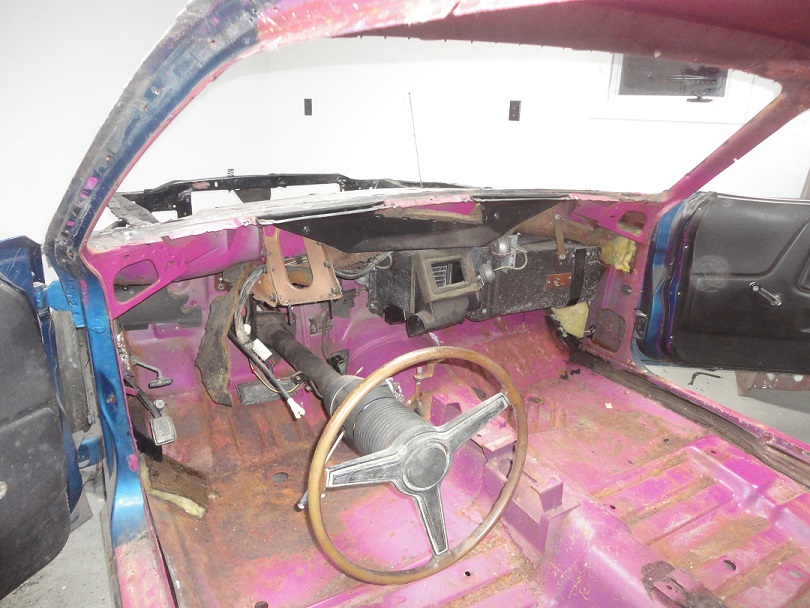 284) Next to go in was the A/C heater box and defroster duct. With that installed it was ready for the dash. It certainly looks a lot better then it did when
I originally pulled the dash out.
284) Next to go in was the A/C heater box and defroster duct. With that installed it was ready for the dash. It certainly looks a lot better then it did when
I originally pulled the dash out. |
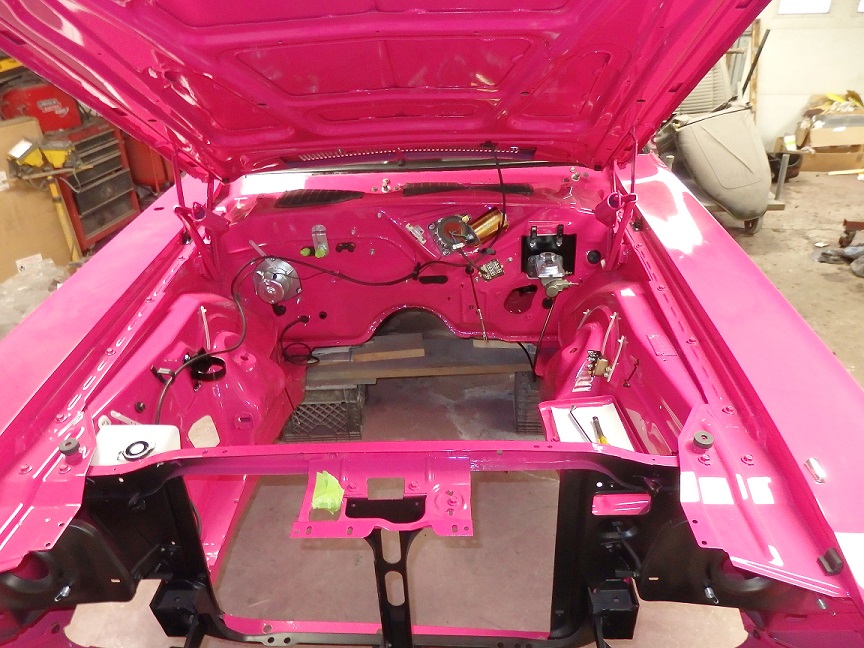 285) Here's a shot of the engine compartment. Components restored by Stephan Fournier can be seen all over. One thing to notice with this car is that the upper cowl was not blacked-out.
The factory did not put the blackout on this car for some reason. Some of the other Panther Pink cars that I've seen don't have the backout either. I'm not really sure why some were
blacked-out and others not. Cars that did not recieve the blackout treatment had just the window opening blacked-out with a brush. To replicate the original factory look for this car,
I just brushed black windshield primer in the same areas.
285) Here's a shot of the engine compartment. Components restored by Stephan Fournier can be seen all over. One thing to notice with this car is that the upper cowl was not blacked-out.
The factory did not put the blackout on this car for some reason. Some of the other Panther Pink cars that I've seen don't have the backout either. I'm not really sure why some were
blacked-out and others not. Cars that did not recieve the blackout treatment had just the window opening blacked-out with a brush. To replicate the original factory look for this car,
I just brushed black windshield primer in the same areas. |