|
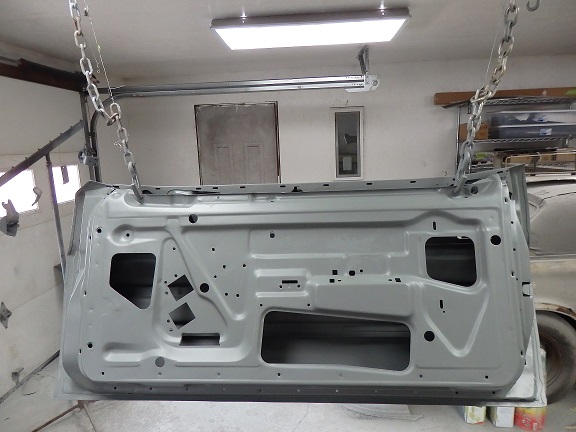
With summer over and the work completed on the Jag, it was time to return to work on the Challenger. First up, the Doors. Though there were no rust holes on the driver's door, there was some significant damage to the skin. There was a massive crease down the middle of the door that someone attempted to repair by drilling lots of holes and using a slide-pull. All they did was turn the skin into swiss cheese and buried it in bondo. The damage was too intensive to repair without needing a 1/4" think layer of filler when I was done. So I opted to reskin it.  161) I started by taking a bunch of pictures of the seams on along the inside of the door since I would need to duplicate the original factory look. Once done, it was a matter of taking a die grinder to grind the fold along the parimeter of the door. The top was held in place with spot welds, so I just ground those down until the metal was thin enough to break them free with a putty knife.
 In this picture you can see the inside of the original door skin. The primer dip line is visible and as you can see the factory undercoat was applied to the door prior to the door actually being skinned. This is evident because the primer dip is on top of the undercoat and it is impossible to apply undercoat in that manner when there is a large beam going down the middle of the door. |
 162) Here's the inner door frame. You can see the primer dip level very clearly. .
 |
 163) The first thinkg I did to the inner door frame was to sandblast it and prime it with DP40 epoxy primer.
 |
 164) I also primed and undercoated the inside face of the new AMD door skin. Youu can see bare metal spots along the perimeter of the skin. This is because the door skins were to be spotwelded in place like the factory originally did it.
 |
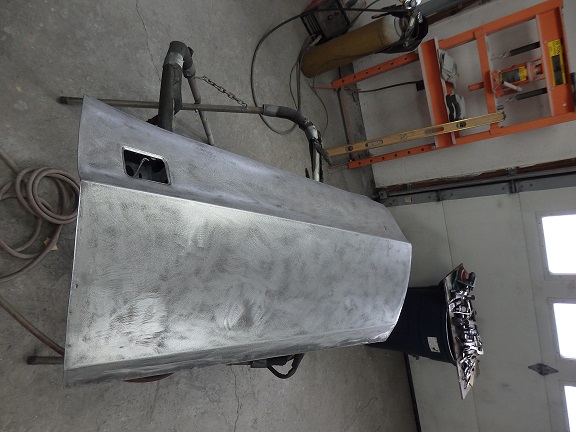
 165) Skinning a door is relatively easy. The skin is placed and aligned. Then the lip of the skin is hammered and dollied flat aloong the perimeter. The corners need extra care to get the shape right. I always trial fit the door to the car to make sure everything lines up before the skin is welded.
 |
 166) No matter how good you are there still needs to be some filler work on the reskinned door. More on this shortly. Here is the driver's door after filler work and priming.
 |
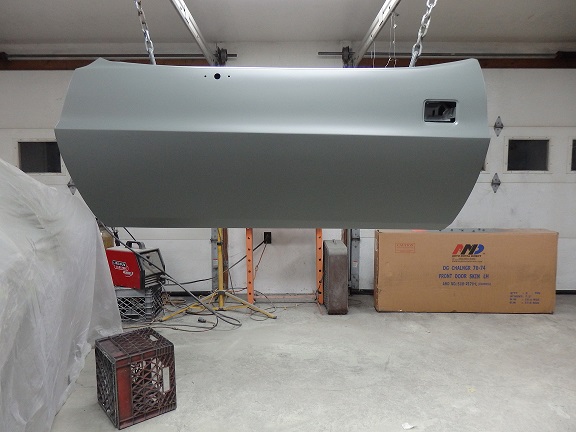
 167) The whole door is primed at the same time. The result is a new looking door, inside and out.
 |
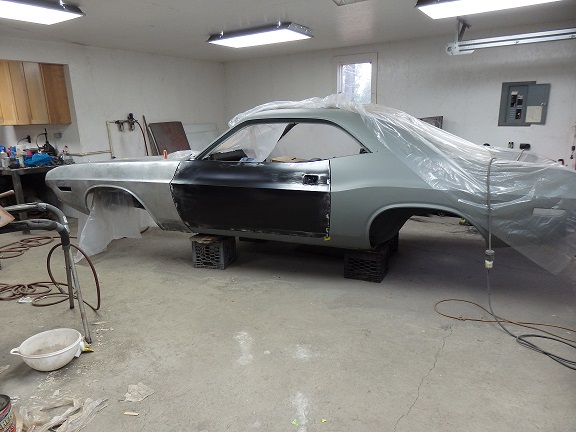
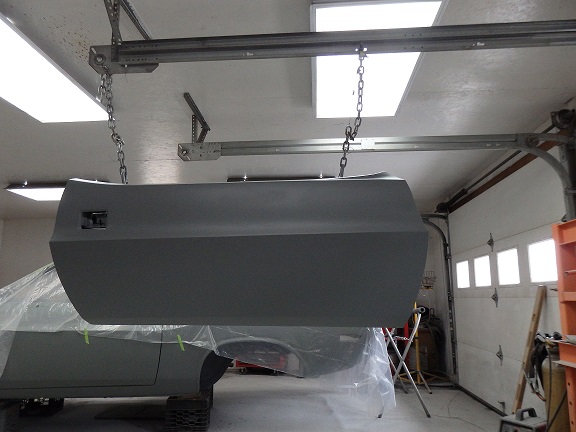
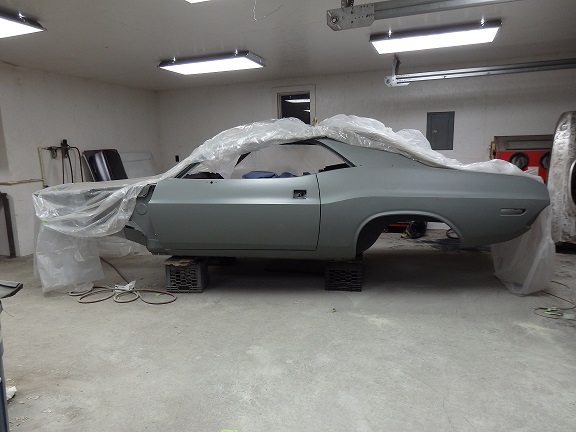 168) The door hinges were rebuilt and primed at the same time as the doors. Once dried, everything was hung on the car.
 |
The passengers door actually had small rust holes at the bottom front and it also had a big crease down the middle from a prior accident. rust holes started to form at the very front on the inner door frame as well. The best way to repair the door was to reskin it. With the old skin off the inner door frame was sandblasted, repaired and primed on the inside.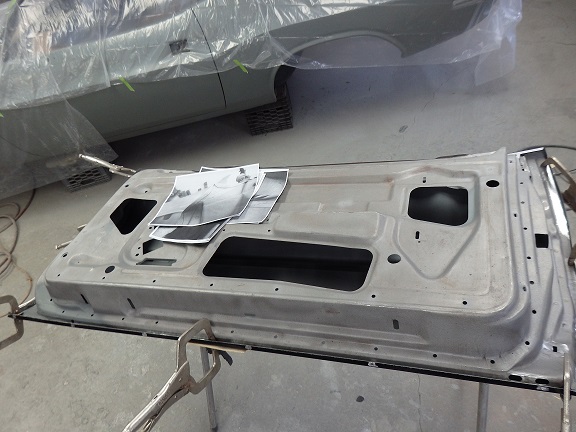 169) Lets take a closer look at the reskinning of a door. Here the previously prepared door skin is clamped in place. Reference pictures with measurements were used to position the skin in the right location. As with the left side, the door was hung on the car to verify the alignment. With the skin positioned correctly the edges were folded over and the skin was spotwelded in place using a pinch welder.
 |
 170) First the face of the door was ground flat along the perimeter with a disk sander with 40 grit disks. This takes out the majority of the imperfections cuased by hammer and dollying the skin in place.
 |
 171) Next the rest of the black primer is ground off. The repo skins are never perfect. They have slight waves in the metal and then there is the inevitable shipping damage that needs correcting. Here the primer was removed using a 80 grit paper on an orbital sander.
 |
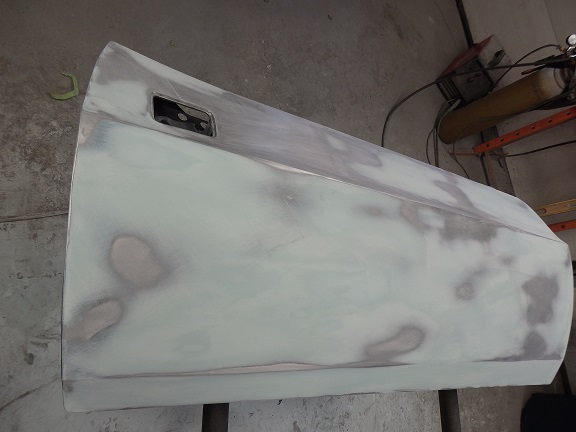 172) Here is the door ready for primer. It looks like there is a lot of filler on the door, but it is very thin. Most of the imperfections could have been taken care of in the highbuild primer stage, but I like to catch any series imperfection at this stage.
 |
 173) Here the door is all in primer.
 |
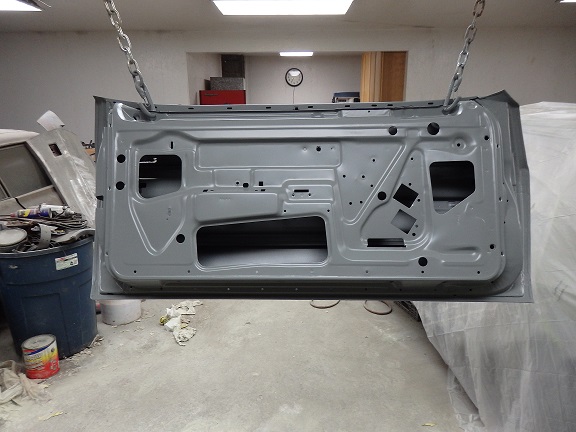
 174) As with the left door, the right one is primed on both sides.
 |