Another problem, is the fact the 1969 SportRoofs have scoops in the rear quarters and the repo quarters do not have the openings. The repos are made from the 1970 version of the quarter, which not only does not have the scoops, but also has a different crease in the area of the scoop.
The obvious solution would be leave the original door opening and rear sections in place. There are several ways to do this. One is to cut the old quarter off about an inch from the ends and just lap the new panel over the old, but his requires building the panel out with filler beyond the cars original body lines. Most people make use a a flaring to to avoid this. But this doesn't hide the fact that this can be detected from inside the trunk. This is the typical method used sine its easier. However, there is a much better method that when done correctly is virtually impossible to detect by eye. This method is called butt-welding. It takes some experience to master, but the results are very pleasing. Having never done this before, I decide to do some research. I was lucky enough to come across a website for a shop that does total restorations of musclecars (over restored in my opinion). Their name is Muscle Car Restorations. They specialize in Mopars and have hundreds of pictures on line, but no text/instructions. They do wonderful work. After downloading and examining every picture, I deduced a method for replacing quarters. I have attempted to outline how I did it here. I think it was funny that when I explained what I was going to to to my father, who's been in the autobody business since the 50's and to my brother who is a professional bodyman, they thought I was crazy. They were pretty suprised when I was all done, that they couln't tell that the quarters were changed.
So follow along and see how I did it.
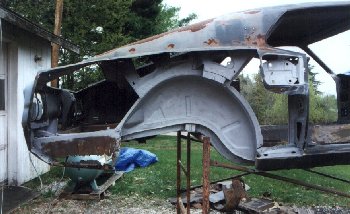
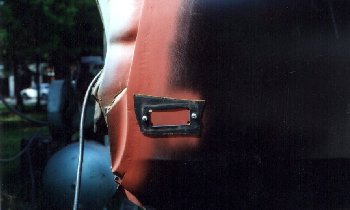
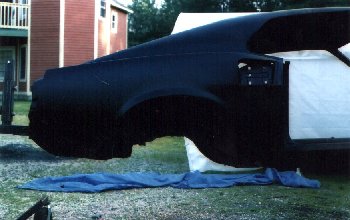
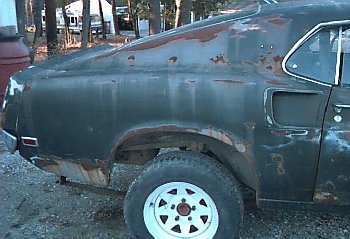 Here is the right rear quarter in its original state. Some hack had filled the big rust hole that
was in it with fiberglass using a piece of cardboard in the trunk to hold the shape. This is a typical
thing to look for. With a little undercoat on the inside and a good paint job over the outside, a major
hole can be easily disguised, just waiting to blister out on that $12,000 RUSTored car you just bought.
Here is the right rear quarter in its original state. Some hack had filled the big rust hole that
was in it with fiberglass using a piece of cardboard in the trunk to hold the shape. This is a typical
thing to look for. With a little undercoat on the inside and a good paint job over the outside, a major
hole can be easily disguised, just waiting to blister out on that $12,000 RUSTored car you just bought.
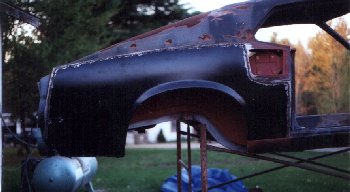
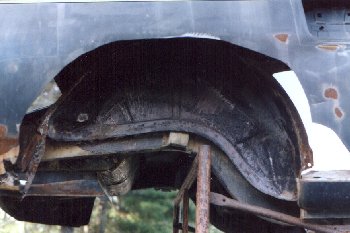 The first thing I did was cut-off just enough of the quarter to remove the outer wheelhouse so that the
new one could be installed. Here it is with the wheelhouse removed.
The first thing I did was cut-off just enough of the quarter to remove the outer wheelhouse so that the
new one could be installed. Here it is with the wheelhouse removed.
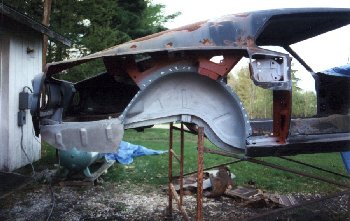
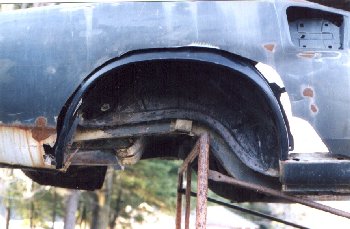 The next step was to temporarilly install the new outer wheelhouse. For what is claimed to be the
best repos on the market, they surely leaves alot to be desired in the way of fit. The end that covers
the rocker panel is completely wrong. I had to cut it off and use a piece of the original. Here it is
clamped in place.
The next step was to temporarilly install the new outer wheelhouse. For what is claimed to be the
best repos on the market, they surely leaves alot to be desired in the way of fit. The end that covers
the rocker panel is completely wrong. I had to cut it off and use a piece of the original. Here it is
clamped in place.
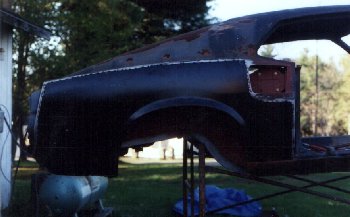
 With the wheelhouse clamped in its correct position it was time to prepare the quarter skin. As mentioned
before the quarter skin had to be modified. Every edge was cut-off accept for the wheelhouse opening and the short
section that welds to the rocker panel. Also a section was cut-off to reveal the side scoop. The quarter skin was
carefully positioned, clamped and tack welded in a few places over the original quarter. The detail and fit of the
skin was very good.
With the wheelhouse clamped in its correct position it was time to prepare the quarter skin. As mentioned
before the quarter skin had to be modified. Every edge was cut-off accept for the wheelhouse opening and the short
section that welds to the rocker panel. Also a section was cut-off to reveal the side scoop. The quarter skin was
carefully positioned, clamped and tack welded in a few places over the original quarter. The detail and fit of the
skin was very good.
One last detail prior to cutting was the marking of the side marker hole opening. I did this by spray painting the sidemarker hole in the trunk.
 Using a pneumatic panel cutting saw I cut-out the old panel while simultaneously trimming the new one. By doing it
this way, the skin is a perfect fit for the hole. Here is a picture of what it looked like after the cutting. Notice
the rusted out lower trunk extension.
Using a pneumatic panel cutting saw I cut-out the old panel while simultaneously trimming the new one. By doing it
this way, the skin is a perfect fit for the hole. Here is a picture of what it looked like after the cutting. Notice
the rusted out lower trunk extension.
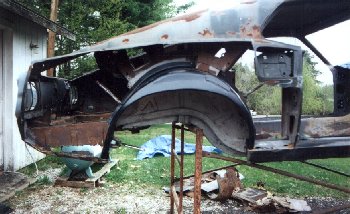
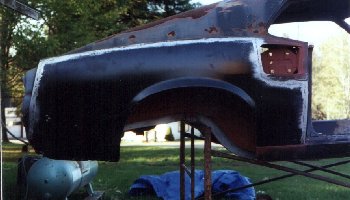
 With the wheelhouse removed, I sandblasted all visible surfaces.
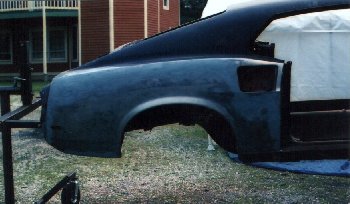
 Using the original as a template, I trimmed the new lower trunk extension. I then cut-off the old one and
welded in a new one. With that done, I primed every surface. Shown here in mid-process, the red is a redoxide
epoxy primer. The gray is a zinc weld-though primer.
Using the original as a template, I trimmed the new lower trunk extension. I then cut-off the old one and
welded in a new one. With that done, I primed every surface. Shown here in mid-process, the red is a redoxide
epoxy primer. The gray is a zinc weld-though primer.
 At this point the new outer wheelhouse was welded in place. The weld-through primer only seems to work good
when it is fully dried and the heat on the MIG welder is turned up high.
At this point the new outer wheelhouse was welded in place. The weld-through primer only seems to work good
when it is fully dried and the heat on the MIG welder is turned up high.
 With the wheelhouse fully welded in, the seams were sealed and a final coat of epoxy primer was applied.
 Now the fun part begins. The new quarter skin is clamped in place and slowly tack welded every inch or so. Eastwood sells
special clamps for butt welding. However, I didn't have any. I used visegripes and some of the old blades that I used to
cut the panels to set the spacing. Since the new and old panels were cut at the same time, the new ones are slightly smaller
by the thickness of the saw blade (curf of the blade), so using the same blades as spacers is a better approach.
Now the fun part begins. The new quarter skin is clamped in place and slowly tack welded every inch or so. Eastwood sells
special clamps for butt welding. However, I didn't have any. I used visegripes and some of the old blades that I used to
cut the panels to set the spacing. Since the new and old panels were cut at the same time, the new ones are slightly smaller
by the thickness of the saw blade (curf of the blade), so using the same blades as spacers is a better approach.
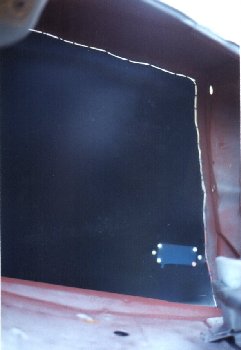 To show you what I mean, here's a picture taken from the inside after the spot welding was completed.
Notice the blue painted area with the holes ? This is where the side marker light belongs.
To show you what I mean, here's a picture taken from the inside after the spot welding was completed.
Notice the blue painted area with the holes ? This is where the side marker light belongs.
 I cut the area for the side marker off from the original quarter and bolted it to the new quarter and used it as a guide for
my tools to cut out the hole.
I cut the area for the side marker off from the original quarter and bolted it to the new quarter and used it as a guide for
my tools to cut out the hole.
 Once the spot welding was complete, it was just a matter of carefully filling the gap by stitch welding. Once that was done
the wheelhouse opening was welded.
Once the spot welding was complete, it was just a matter of carefully filling the gap by stitch welding. Once that was done
the wheelhouse opening was welded.
 Once the welding was complete, the welds were ground down inside and outside. I use a stone on the grinder to take the big
welds down and a sanding disk to clean the weld.
Once the welding was complete, the welds were ground down inside and outside. I use a stone on the grinder to take the big
welds down and a sanding disk to clean the weld.
 The next thing to do was the final filler work. Some people use lead, but I was not about to learn lead working and butt
welding at the same time for fear of warping the quarter. I used Evercoat fiberglass filler for the first coat and then
Evercoat polyester filler.
The next thing to do was the final filler work. Some people use lead, but I was not about to learn lead working and butt
welding at the same time for fear of warping the quarter. I used Evercoat fiberglass filler for the first coat and then
Evercoat polyester filler.
 With a thick coat of epoxy primer the quarter panel work was completed.