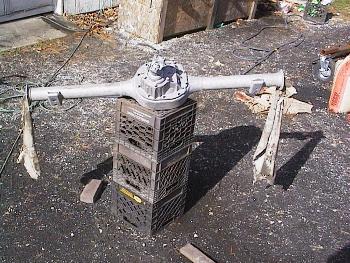
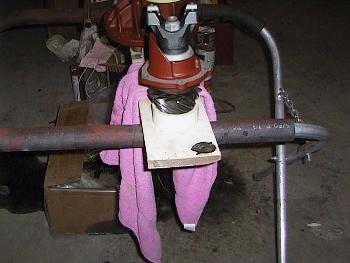
 At some point in the car's history the pumpkin (differential) was changed. My parts car had the correct rearend with the tag, but the housing
was very rusty. So I used the original housing with the pumpkin from the parts car. I temporarily set the pumpkin from the parts car in the
original housing for sandblasting.
At some point in the car's history the pumpkin (differential) was changed. My parts car had the correct rearend with the tag, but the housing
was very rusty. So I used the original housing with the pumpkin from the parts car. I temporarily set the pumpkin from the parts car in the
original housing for sandblasting.
|
|
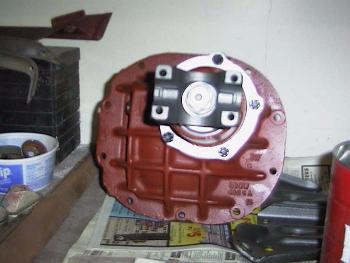
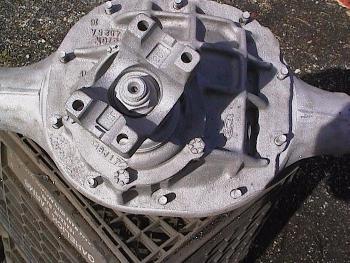 Here's a close-up of the pumpkin. I guess they called it a pumpkin because of the redish orange primer the factory painted it with.
|
|
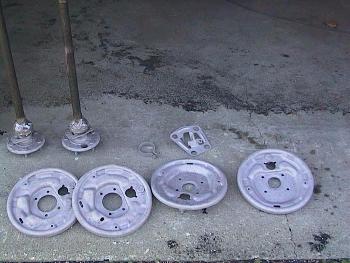 I also sandblasted the backing plates and the ends of the axle shafts. The axle bearings were wrapped in duct tape to keep the
sand out of them. I've seen where some restores sandblast and paint everything as one unit. The factory painted everything separate and
it should look that way. Besides, if you're going threw the trouble of taking the car apart this far it doesn't hurt to take everything
apart and inspect for wear and damage.
I also sandblasted the backing plates and the ends of the axle shafts. The axle bearings were wrapped in duct tape to keep the
sand out of them. I've seen where some restores sandblast and paint everything as one unit. The factory painted everything separate and
it should look that way. Besides, if you're going threw the trouble of taking the car apart this far it doesn't hurt to take everything
apart and inspect for wear and damage.
|
|
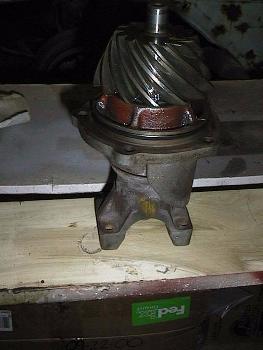 Here's the pinion and yoke. Notice the dab of yellow paint on the yoke ? This was either an inspectin mark or a line-up
mark. I'll reproduce it just before I put the rearend back in the car. I checked the seals and bearings. Since I could find
nothing wrong I didn't got threw the trouble of rebuilding it.
Here's the pinion and yoke. Notice the dab of yellow paint on the yoke ? This was either an inspectin mark or a line-up
mark. I'll reproduce it just before I put the rearend back in the car. I checked the seals and bearings. Since I could find
nothing wrong I didn't got threw the trouble of rebuilding it.
|
|
 Here it is again after being restored. It was masked and painted in stages. The yoke was painted first using grey cast blast paint. The nut and dust
seal were painted using aluminum cast bast. Then the painted areas were masked off and it was primed in with the housing using red epoxy primer.
Here it is again after being restored. It was masked and painted in stages. The yoke was painted first using grey cast blast paint. The nut and dust
seal were painted using aluminum cast bast. Then the painted areas were masked off and it was primed in with the housing using red epoxy primer.
|
|
 Here is the pumpkin re-assembled. The red epoxy primer is really close to the color the factory orignally used.
|
|
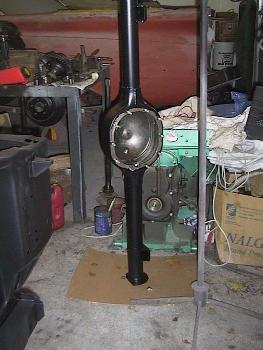 The rear housing was primed and painted semi-gloss black.
|
|
 The backing plates were also primed and painted semi-gloss black.
|
|
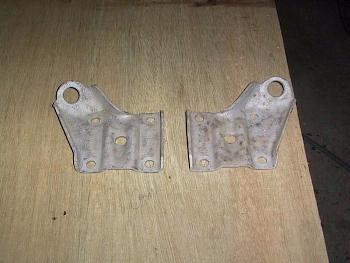 The rear spring shock plates were sandblasted ....
|
|
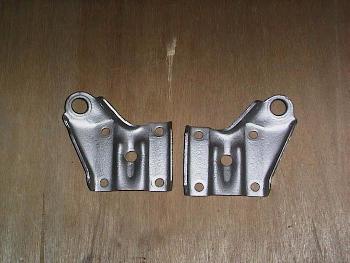 and painted with Rustoleum stainless steel paint to reproduce the original natural finish.
|
|
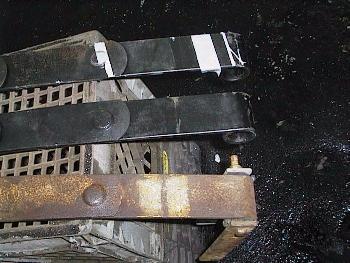 I purchased a new set of rear leafsprings. They are relatively cheap at $99 a pair and they are identical to the original ones.
Here's a picture of an original one next to the new ones. Notice that the ends of the leafs are the same ? Also, notice the yellow
stripes ? These were put on at the factory so that the assembly line worker could identify the springs. From the books I've read and
from what I've been told, this car should have 3 yellow strips on the springs. I have found no evidence of a third strip on either of
the original springs. None of the references show a set of springs with 2 yellow strips. So I will only put 2 strips on the new springs
once they are stripped and painted. They need to be stripped because the manufacturer painted them black rather poorly and they also
painted part numbers on them.
I purchased a new set of rear leafsprings. They are relatively cheap at $99 a pair and they are identical to the original ones.
Here's a picture of an original one next to the new ones. Notice that the ends of the leafs are the same ? Also, notice the yellow
stripes ? These were put on at the factory so that the assembly line worker could identify the springs. From the books I've read and
from what I've been told, this car should have 3 yellow strips on the springs. I have found no evidence of a third strip on either of
the original springs. None of the references show a set of springs with 2 yellow strips. So I will only put 2 strips on the new springs
once they are stripped and painted. They need to be stripped because the manufacturer painted them black rather poorly and they also
painted part numbers on them.
|
|
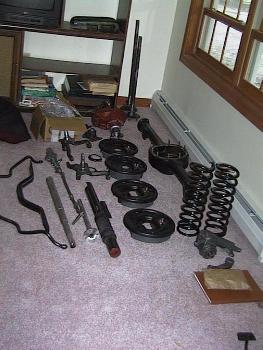 At this point the rear suspension remains disassembled until the car is painted. I will post more rearend pictures once I start re-assembling
the car. Meanwhile the parts are residing comfortably in my spare bedroom.
At this point the rear suspension remains disassembled until the car is painted. I will post more rearend pictures once I start re-assembling
the car. Meanwhile the parts are residing comfortably in my spare bedroom.
|