 With the sheetmetal all cut-in and hung, it was time to have it painted (Finally!). My brother runs
a body shop with a new booth and since he personally paints up to a dozen cars a week, I decided to have
him spray my car. His fee -- a case of beer. The shop is 35 miles from my house and I had to get the car there.
Since the suspension was to be installed after the car was painted (like the factory did it) so that I could get
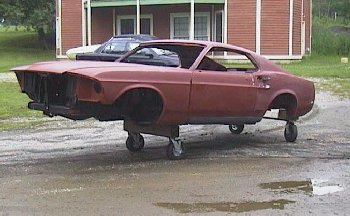
the correct overspray on the undercarriage, I had to device a way to transport it. What I did was I bolted 6in X 6in
wood blocks to the underside using the holes that the factory used to mount the car on the assembly line. I then attached
the casters from the rotisserie to the blocks. This work out pretty could. I could easily move the car arround.
With the sheetmetal all cut-in and hung, it was time to have it painted (Finally!). My brother runs
a body shop with a new booth and since he personally paints up to a dozen cars a week, I decided to have
him spray my car. His fee -- a case of beer. The shop is 35 miles from my house and I had to get the car there.
Since the suspension was to be installed after the car was painted (like the factory did it) so that I could get
the correct overspray on the undercarriage, I had to device a way to transport it. What I did was I bolted 6in X 6in
wood blocks to the underside using the holes that the factory used to mount the car on the assembly line. I then attached
the casters from the rotisserie to the blocks. This work out pretty could. I could easily move the car arround.
|
|
 Notice how the front is higher up than the back ? This is so I could get it up the ramps on my father's car trailer.
|
|
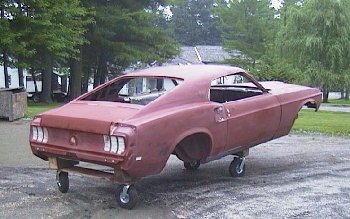
 Here it is on the trailer, all mounted down and almost ready for transport. The front fenders were temporarily bolted for
transport. They were painted off the car.
Here it is on the trailer, all mounted down and almost ready for transport. The front fenders were temporarily bolted for
transport. They were painted off the car.
|
|
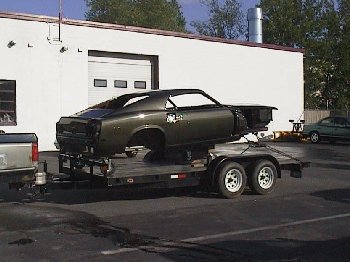 Here it is all painted and ready for the return trip home. It was painted with a basecoat/clearcoat system. After it was
painted I sanded the whole thing down with 1500 grit using a rubber palm sanding pad. This took a whole day. I then buffed
it using a 1 step buffing compound by 3M. Then it was waxed. The paint actaully came out so good I could have gotten away
without sanding and buffing it. It takes a lot of skill to paint in a basecoat/clearcoat system without having to buff.
Here it is all painted and ready for the return trip home. It was painted with a basecoat/clearcoat system. After it was
painted I sanded the whole thing down with 1500 grit using a rubber palm sanding pad. This took a whole day. I then buffed
it using a 1 step buffing compound by 3M. Then it was waxed. The paint actaully came out so good I could have gotten away
without sanding and buffing it. It takes a lot of skill to paint in a basecoat/clearcoat system without having to buff.
|
|
 Here it is safely back home. I brought the fenders back home later. I really like the Dark Jade color. It has a nice gold sparkle to
it when the sun hits it. It is going to look very sharp when its back together.
Here it is safely back home. I brought the fenders back home later. I really like the Dark Jade color. It has a nice gold sparkle to
it when the sun hits it. It is going to look very sharp when its back together.
|