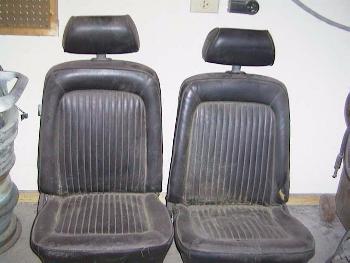
 The original front seats were missing, but I was able to locate a pair for $100 in a local salvage yard. Here's a picture of
them when I got them home. Since these were black and my interior is going to be dark ivy gold, I had to buy new covers. This isn't
really a big problem since I probably would have had to reupholster the originals anyway. There are some other pieces on the seats that
are supposed to be dark ivy gold that can't be bought new: hinge covers, headrest bezel and headrest plate. I was able to locate some
original dark ivy gold parts and a real good set of seat tracks from a Want Ad I had posted at the
Vintage-Mustang Forum
The original front seats were missing, but I was able to locate a pair for $100 in a local salvage yard. Here's a picture of
them when I got them home. Since these were black and my interior is going to be dark ivy gold, I had to buy new covers. This isn't
really a big problem since I probably would have had to reupholster the originals anyway. There are some other pieces on the seats that
are supposed to be dark ivy gold that can't be bought new: hinge covers, headrest bezel and headrest plate. I was able to locate some
original dark ivy gold parts and a real good set of seat tracks from a Want Ad I had posted at the
Vintage-Mustang Forum
|
|
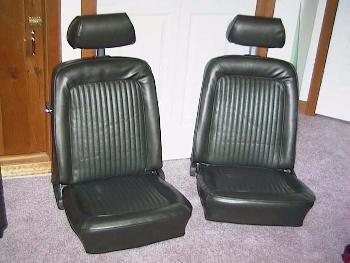 Here are the seats after the reupholstery process. They look pretty good. I should be able to take out some of the wrinkles once the seats
are in the car. Its kind of hard to do on a work bench.
Here are the seats after the reupholstery process. They look pretty good. I should be able to take out some of the wrinkles once the seats
are in the car. Its kind of hard to do on a work bench.
|
|
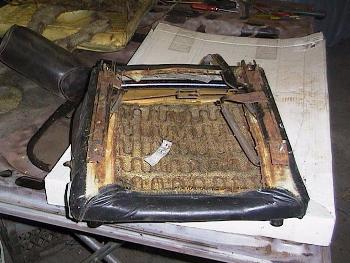 The first thing I did was seperate the seat backs from the bottoms. Here's a picture of the underside of the right seat. The tracks were
a lot worse than they look in this picture.
The first thing I did was seperate the seat backs from the bottoms. Here's a picture of the underside of the right seat. The tracks were
a lot worse than they look in this picture.
|
|
 With the tracks removed its easy to get at the hog rings that hold the seat fabric to the frame. What I do is use a good screwdriver
and force it into the rings and twist them open.
With the tracks removed its easy to get at the hog rings that hold the seat fabric to the frame. What I do is use a good screwdriver
and force it into the rings and twist them open.
|
|
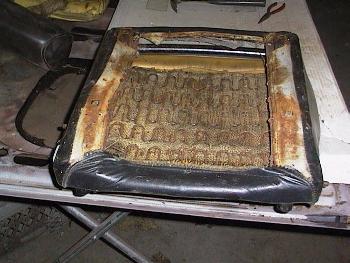
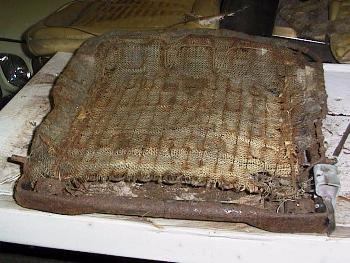
 I leave the hogrings in place where the upholstery is attached through the seat bun. I cut the cloth loop that holds the wire that the
hogrings clip to. Here's the base with the fabric removed. you can still see part of the the cloth (white) loop. With the fabric out of
the way its easy to remove the rest of the hogrings. Then the seat bun just comes right off.
I leave the hogrings in place where the upholstery is attached through the seat bun. I cut the cloth loop that holds the wire that the
hogrings clip to. Here's the base with the fabric removed. you can still see part of the the cloth (white) loop. With the fabric out of
the way its easy to remove the rest of the hogrings. Then the seat bun just comes right off.
|
|
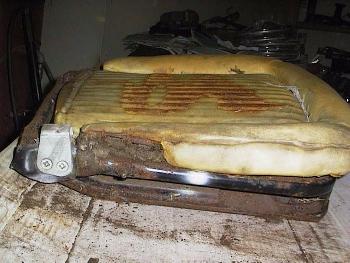
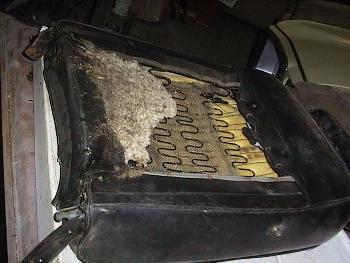
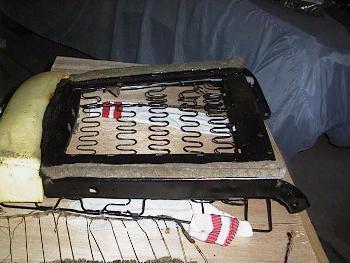
 Removing the seat bun reveals a cloth cover that is used to keep the seat springs from cutting into the seat bun. Hogringed around the perimeter
of the seat frame is a padding material that keeps the edge of the spring frame from digging into the seat bun and fabric. It has to be removed
very carefully. Its very easy to tare apart. Hogringed on top off all of that is a paper wrapped wire that is used to tiedown the center section of
the seat upholstery. It is very important to note exactly where this goes or the seat upholstery will not fit right.
Removing the seat bun reveals a cloth cover that is used to keep the seat springs from cutting into the seat bun. Hogringed around the perimeter
of the seat frame is a padding material that keeps the edge of the spring frame from digging into the seat bun and fabric. It has to be removed
very carefully. Its very easy to tare apart. Hogringed on top off all of that is a paper wrapped wire that is used to tiedown the center section of
the seat upholstery. It is very important to note exactly where this goes or the seat upholstery will not fit right.
|
|
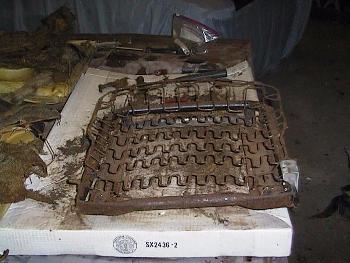 Here is the remaining seat springs. You may notice at the right is the metal bracket that the seat back latches to. I needed to apply heat to the
mounting screws to get them out. But I could not do it without setting the seat foam on fire. So I had to do it last.
Here is the remaining seat springs. You may notice at the right is the metal bracket that the seat back latches to. I needed to apply heat to the
mounting screws to get them out. But I could not do it without setting the seat foam on fire. So I had to do it last.
|
|
 After several fun hours of sandblasting, I painted the seat frames semi-gloss black.
|
|
 Here is the right front seat base with new cloth, the boarder padding and the wire tiedown installed.
|
|
 With the seat bun installed (no that's not a pee stain, its glue to hold the center down) next comes the fun of installing the fabric. The seat
bases are the hardest part. The trick is to hog ring the back in place first with the fabric turned inside out at the front. Then the fabric needs
to be carefully wrapped around the front of the frame and hogringed in place. Once thats done I use a wire with a hook on it to hook onto the wire
that is used to hold down the center section and hogring that into place. This takes practice.
With the seat bun installed (no that's not a pee stain, its glue to hold the center down) next comes the fun of installing the fabric. The seat
bases are the hardest part. The trick is to hog ring the back in place first with the fabric turned inside out at the front. Then the fabric needs
to be carefully wrapped around the front of the frame and hogringed in place. Once thats done I use a wire with a hook on it to hook onto the wire
that is used to hold down the center section and hogring that into place. This takes practice.
|
|
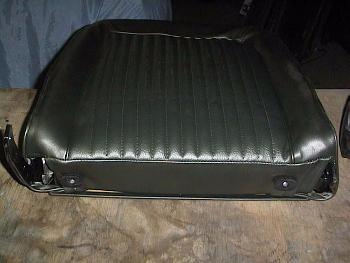
 Here is the completed base with latch bracket and bumpers installed. I guess I did OK this time. No fatalities, but lots of cursing.
|
|
 The tare down of the seat backs is relatively easy. At least the mouse that was living in this one vacated it before I opened it up.
|
|
 The seat buns for the backs are made of two pieces. The smaller piece is glued in place. The backs of the frames have strips of padding
glued to them to prevent the upholstery from rubbing and taring around the sides.
The seat buns for the backs are made of two pieces. The smaller piece is glued in place. The backs of the frames have strips of padding
glued to them to prevent the upholstery from rubbing and taring around the sides.
|
|
 Here's the frame with everything removed.
|
|
 Here it is after sandblasting and painting. This was taken after the seat latch linkage and the headrest guide were installed.
|
|
 Here's the back side with the back seat foam and padding glued in place.
|
|
 Here's the finished back. The backs are considerably easier to upholster than the bottoms.
|
|
 The head rests are simple. There's a metal cover at the bottom that's held on with 2 screws. And the fabric
is just stapled in place.
The head rests are simple. There's a metal cover at the bottom that's held on with 2 screws. And the fabric
is just stapled in place.
|
|
 Just like this.
|
|
 Here's the used seat tracks and hardware I got for $25.
|
|
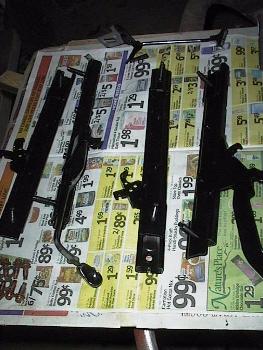 All I did was sandblast them and paint them.
|