|
|
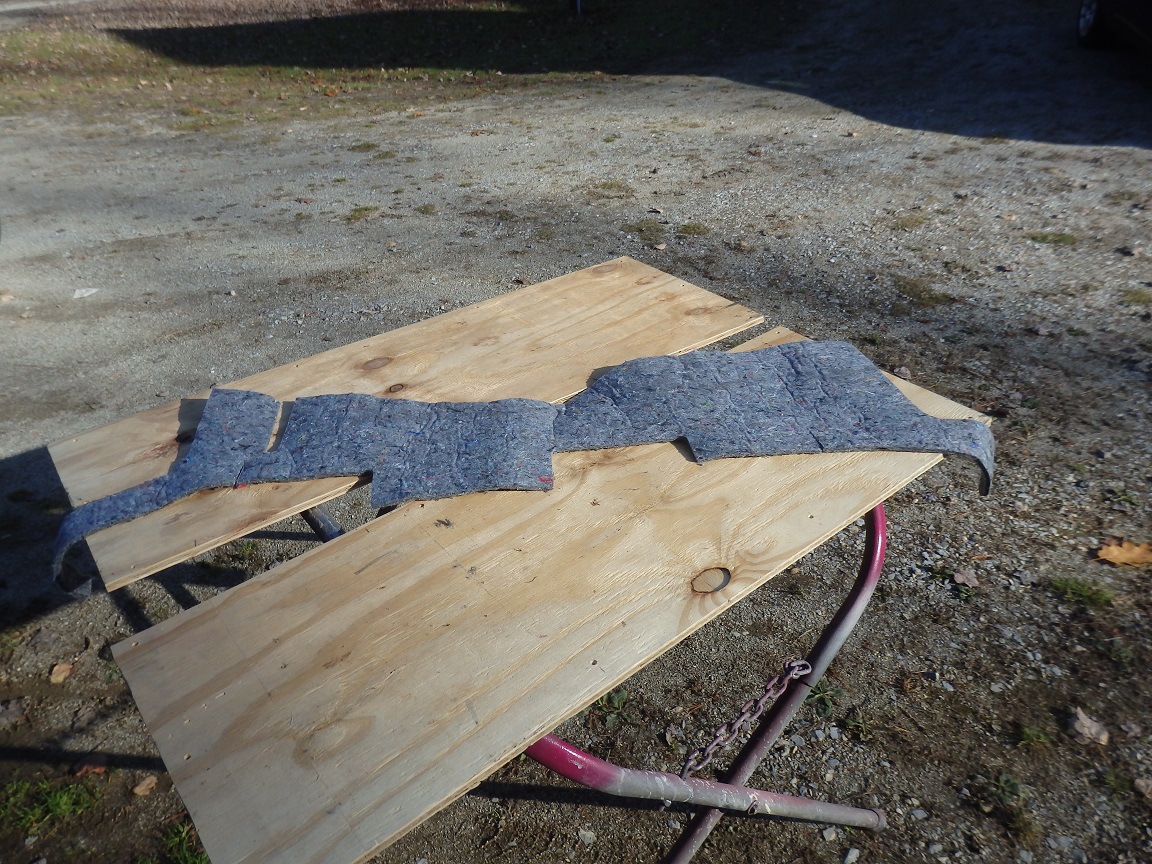
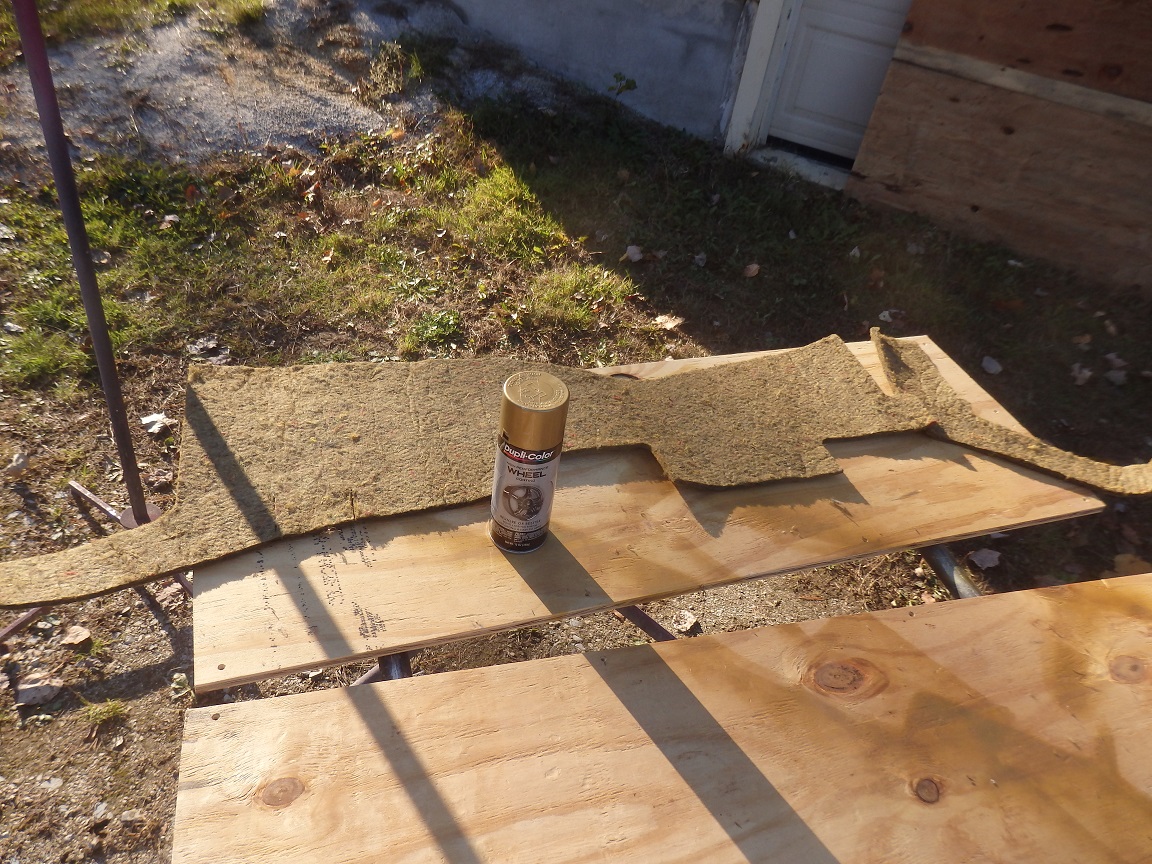
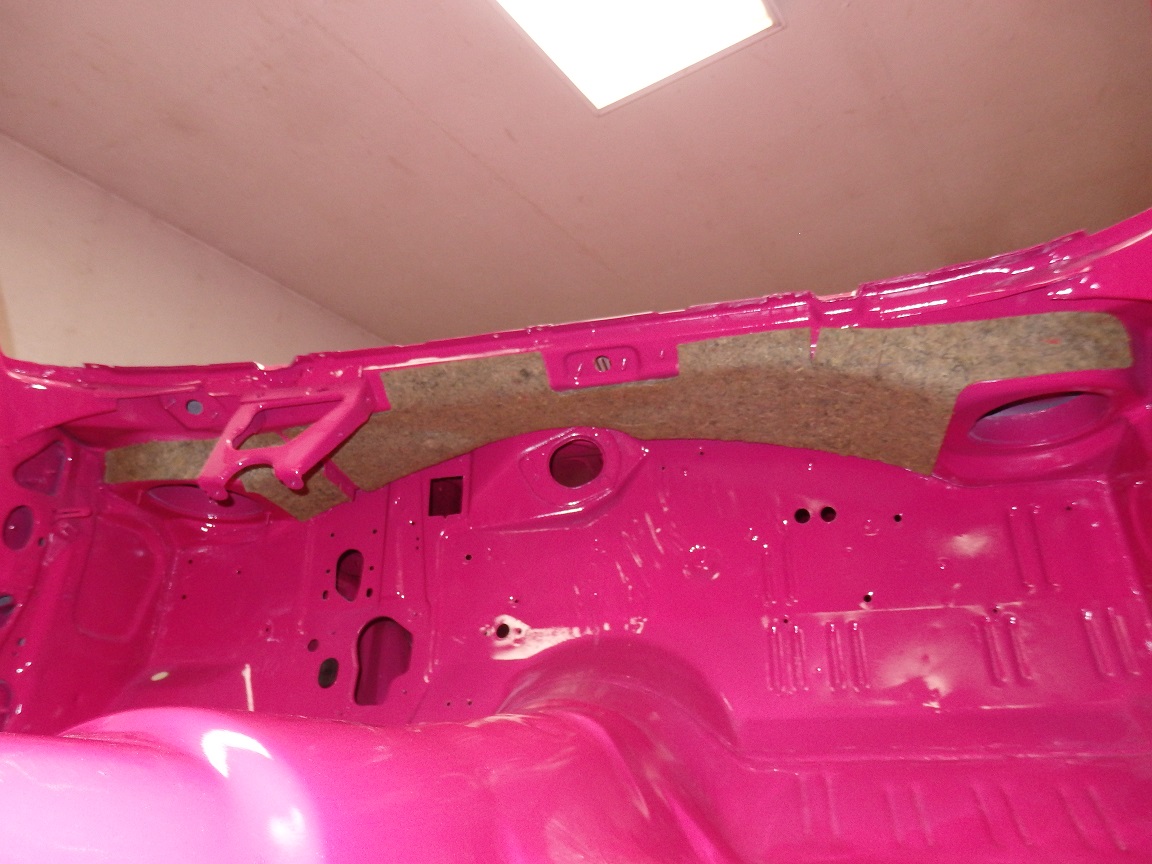
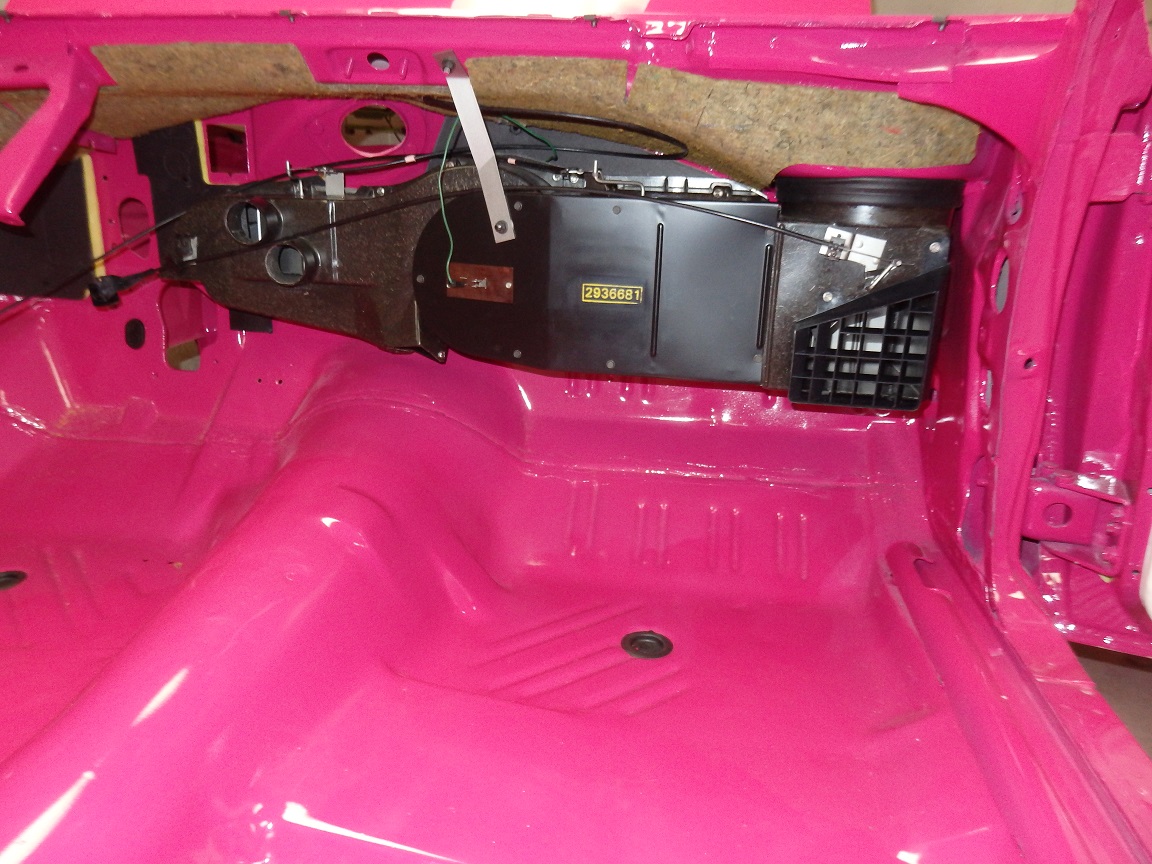
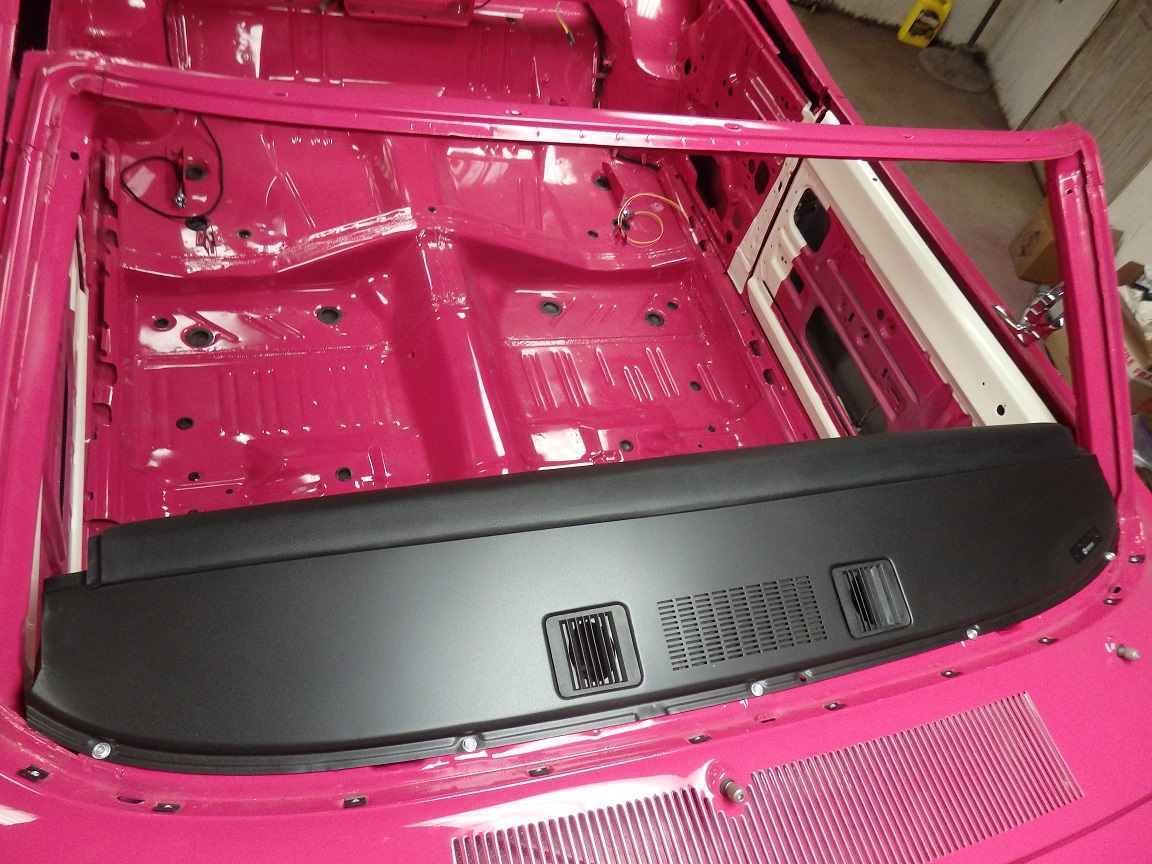
The repo cowl insulation comes in the wrong color. I found some pictures online of a restoration where someone painted theirs to look more accurate. So I gave it a shot. Seemed to work. |
|
|
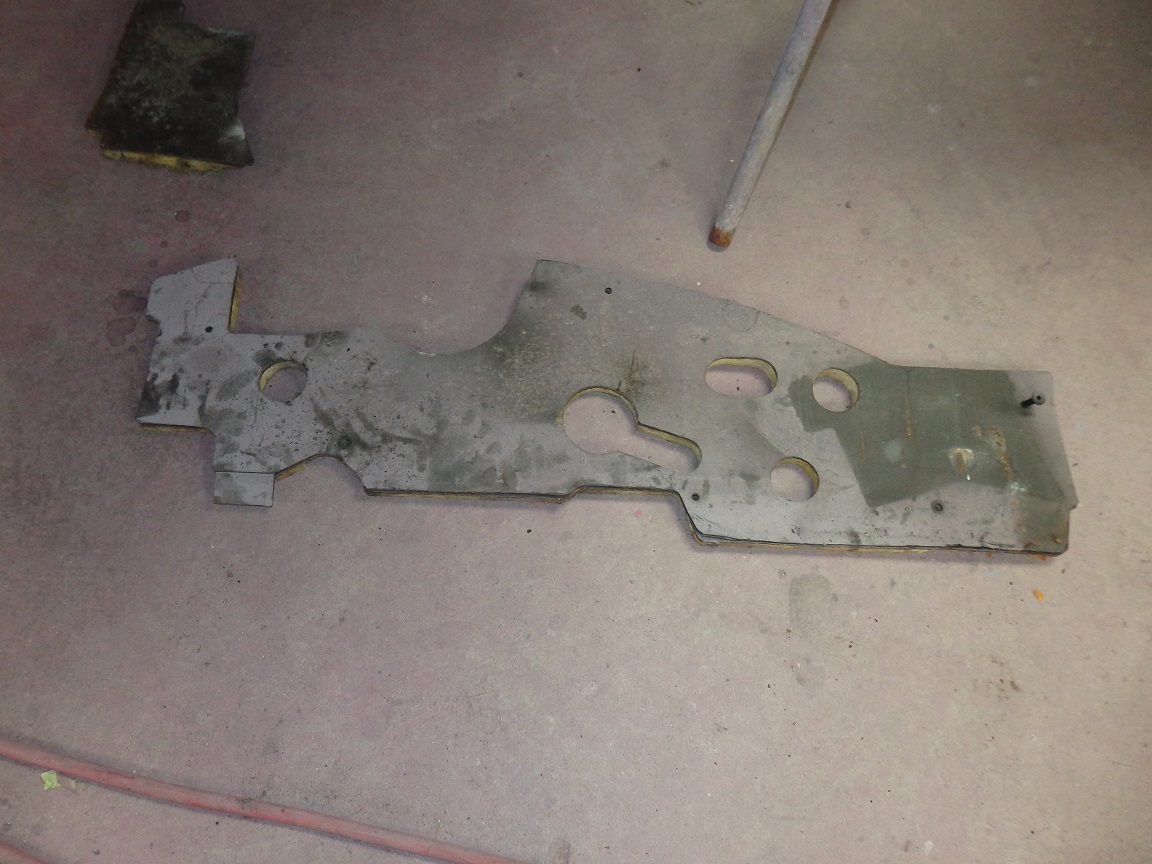
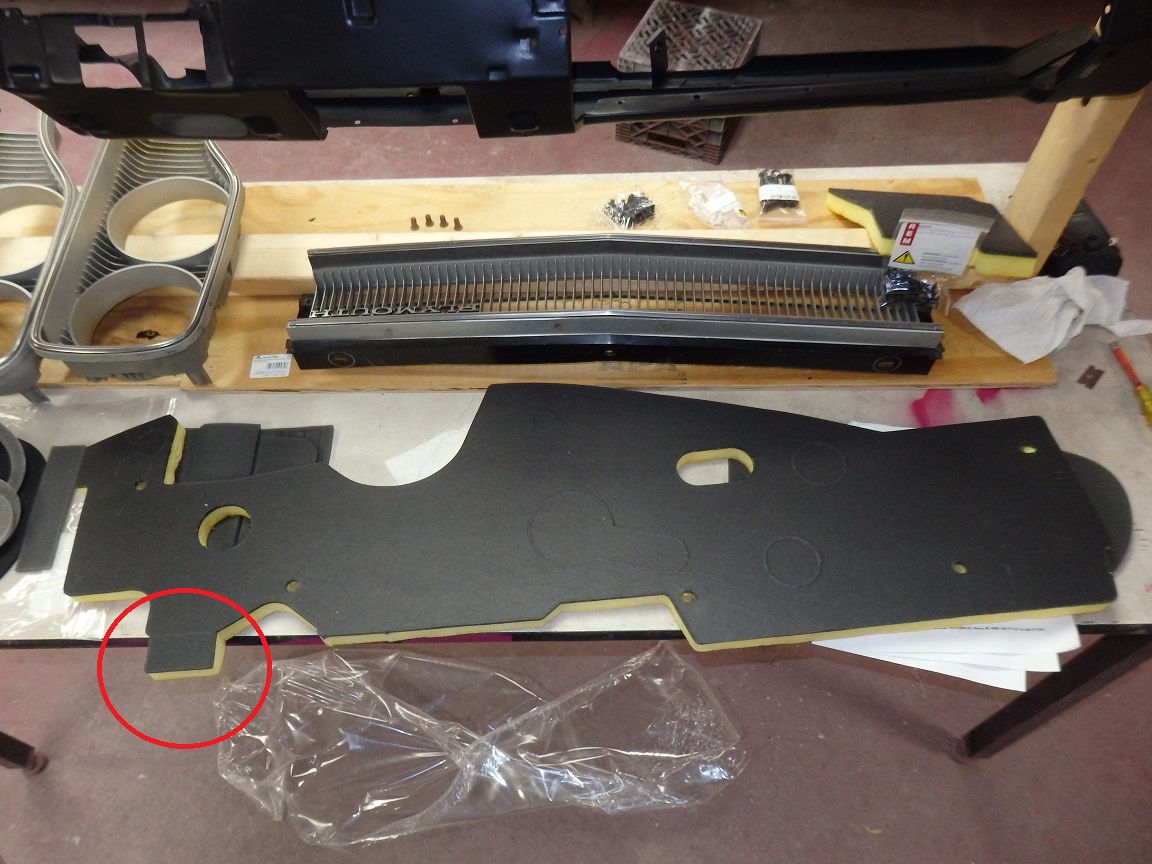
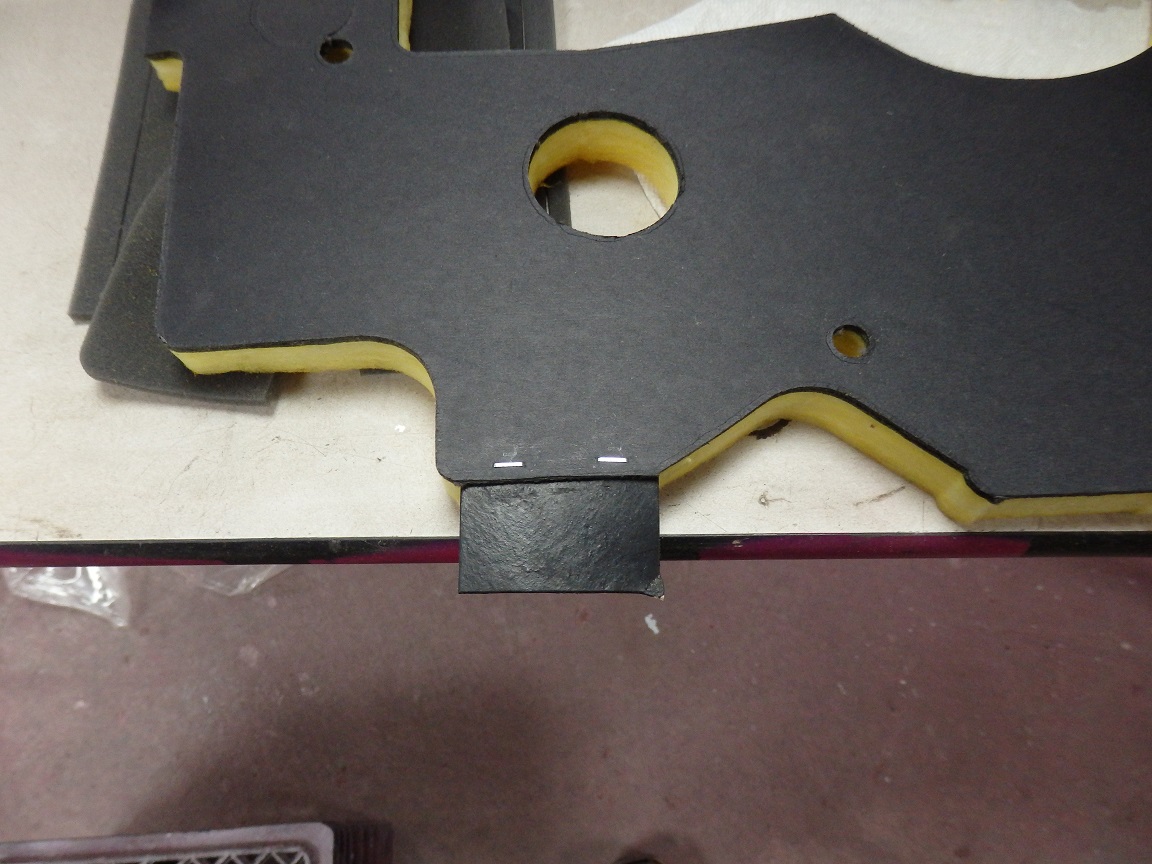
The repo firewall pad looks close to the original, but did not have the correct rubber flap detail. So I moved it over from my original one. The staples are stainless steel. |
|
|
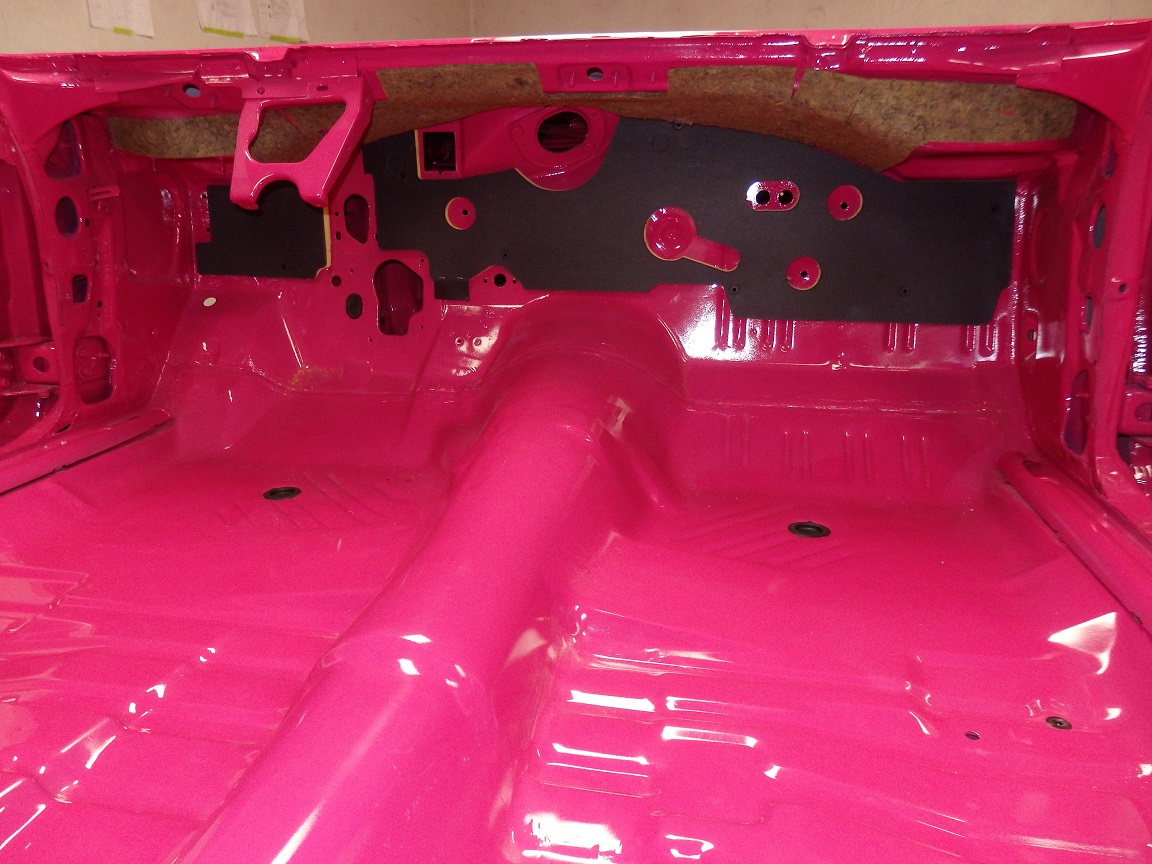
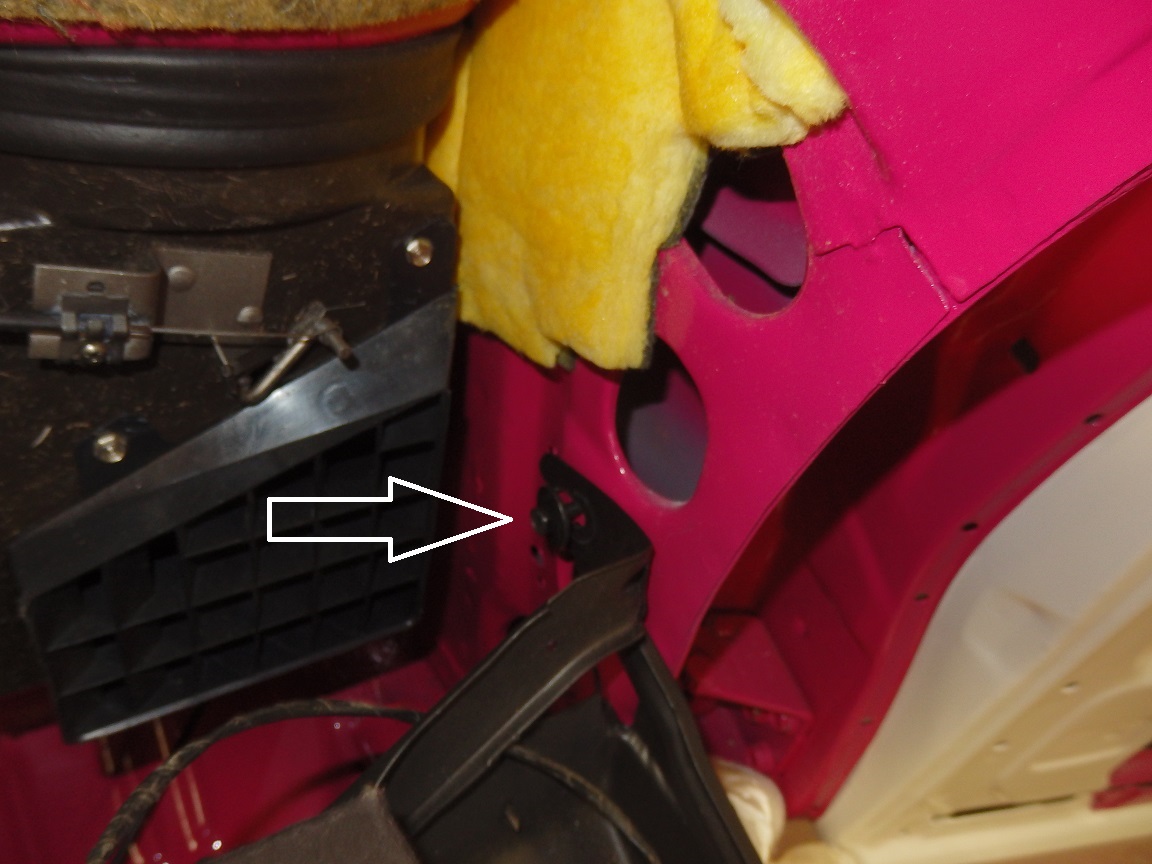
The cowl insulation was glued in using 3M General Spray Adhesive. The firewall pad is held in with special plastic plugs. I had to buy the correct ones seperately. The trick to installing them is to tap them in a little with a
hammer and then pull them through with a pair of pliers from within the engine compartment. |
|
|
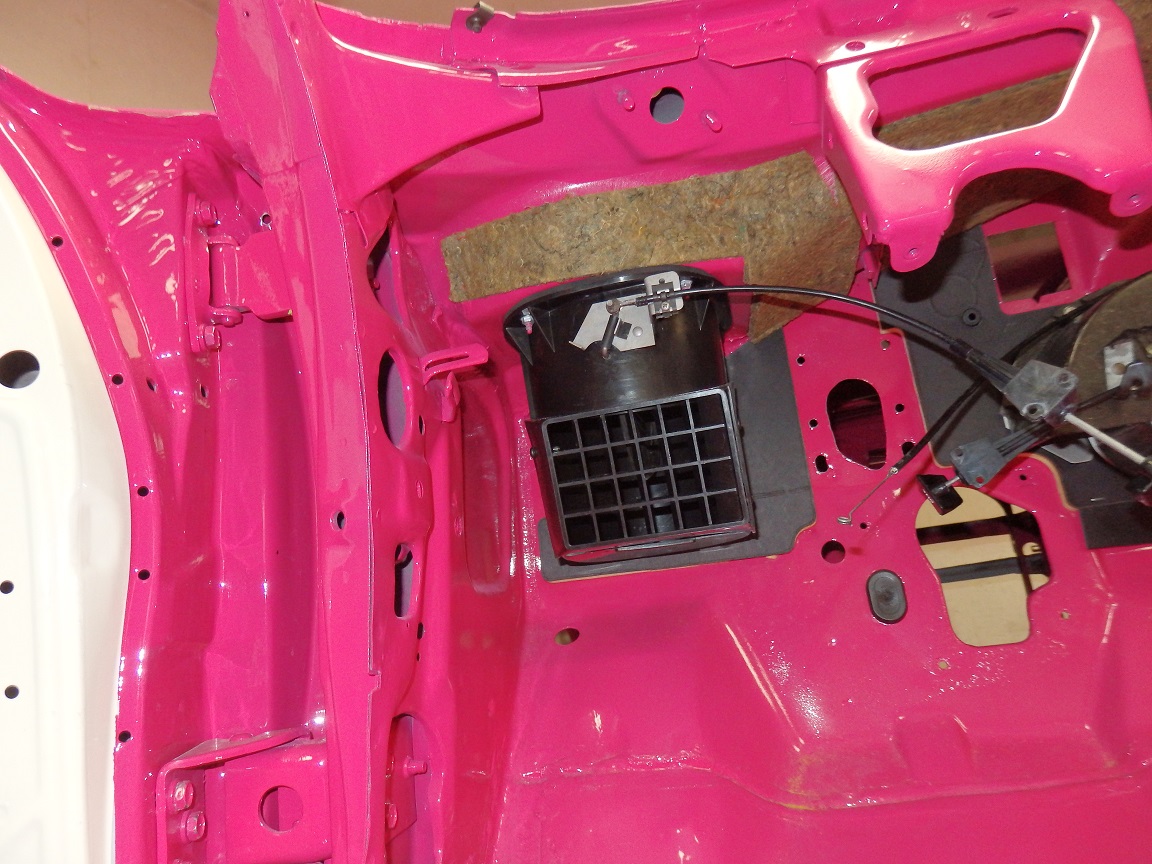
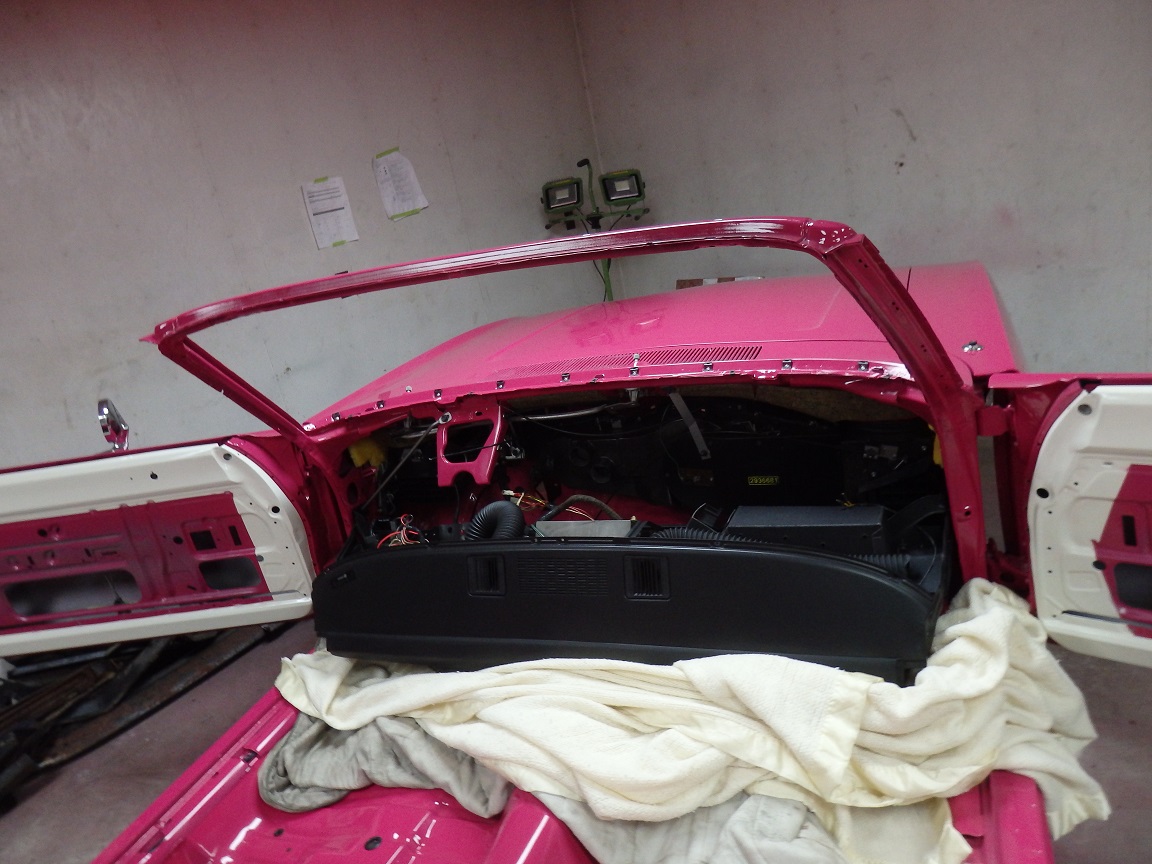
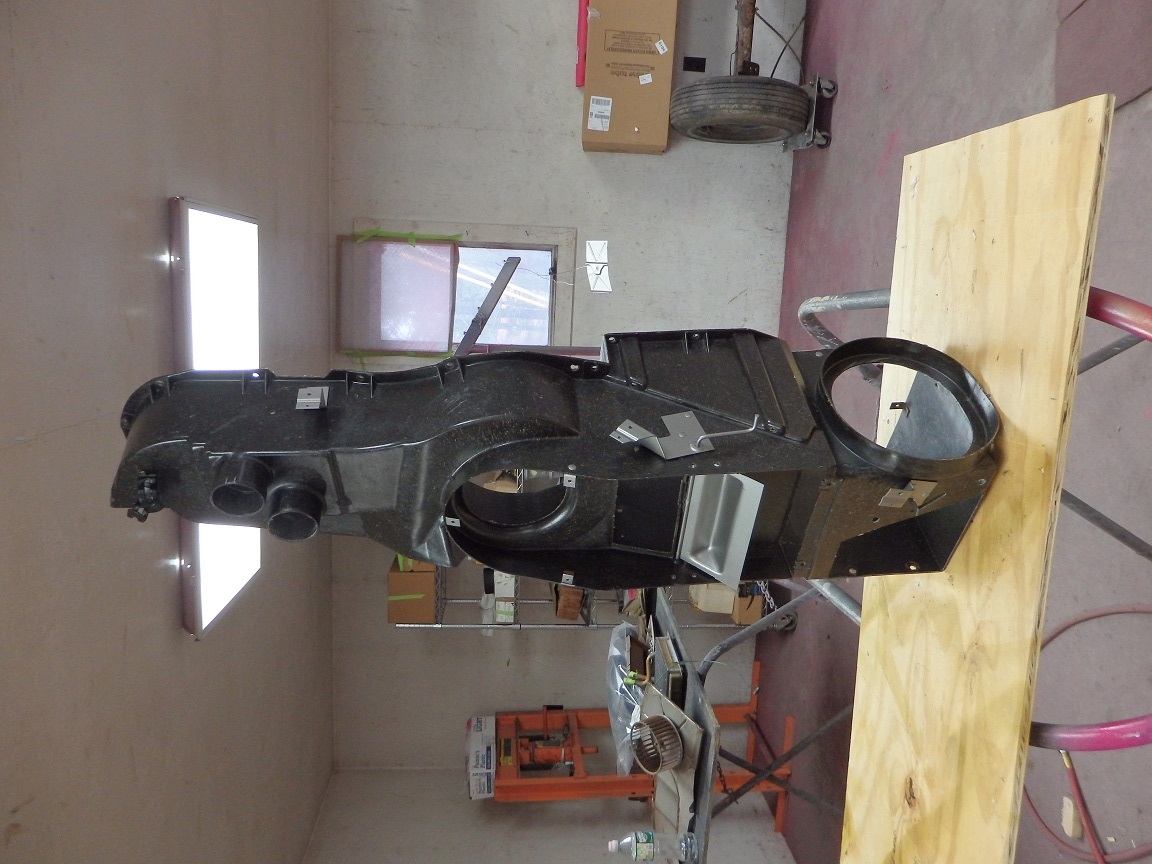
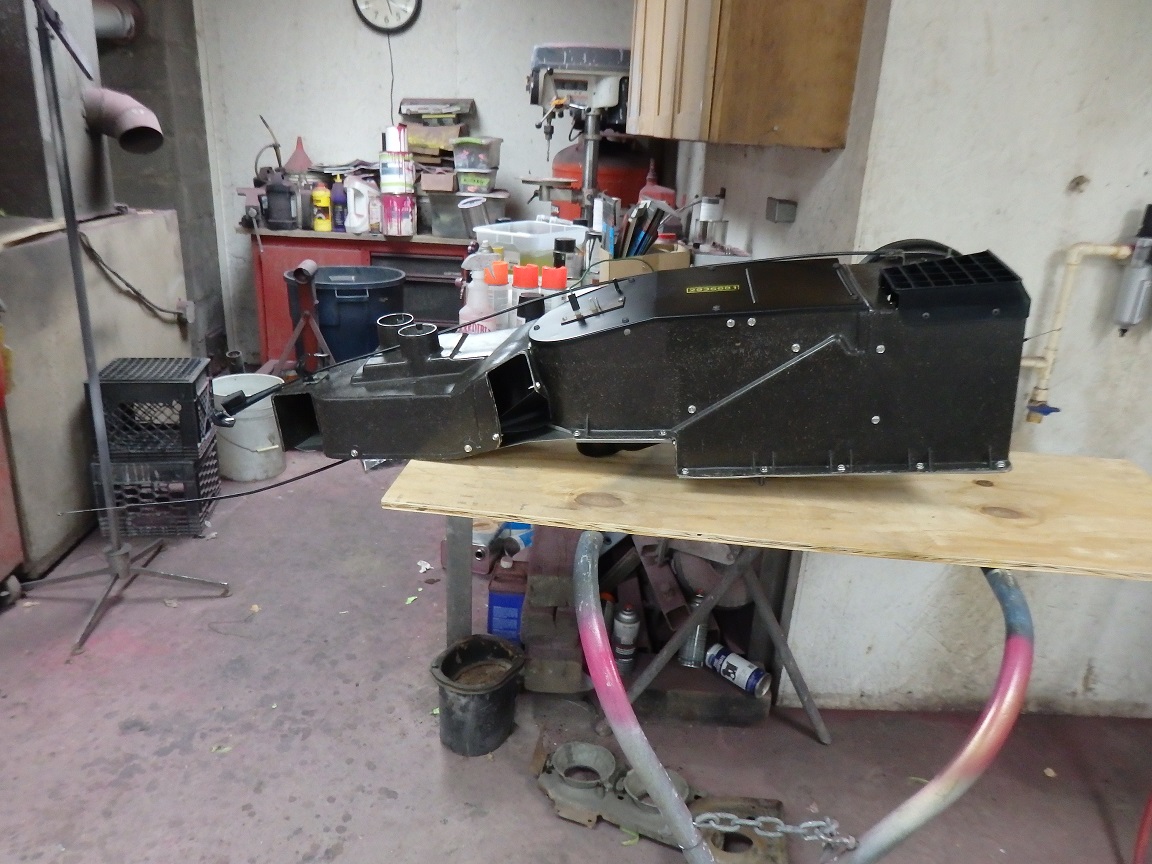
Normally the wiper mechanism is the next thing to get installed, but the parts weren't back from restoration. So I restored and install the heater box and LH air vent assembly while waiting. |
|
|
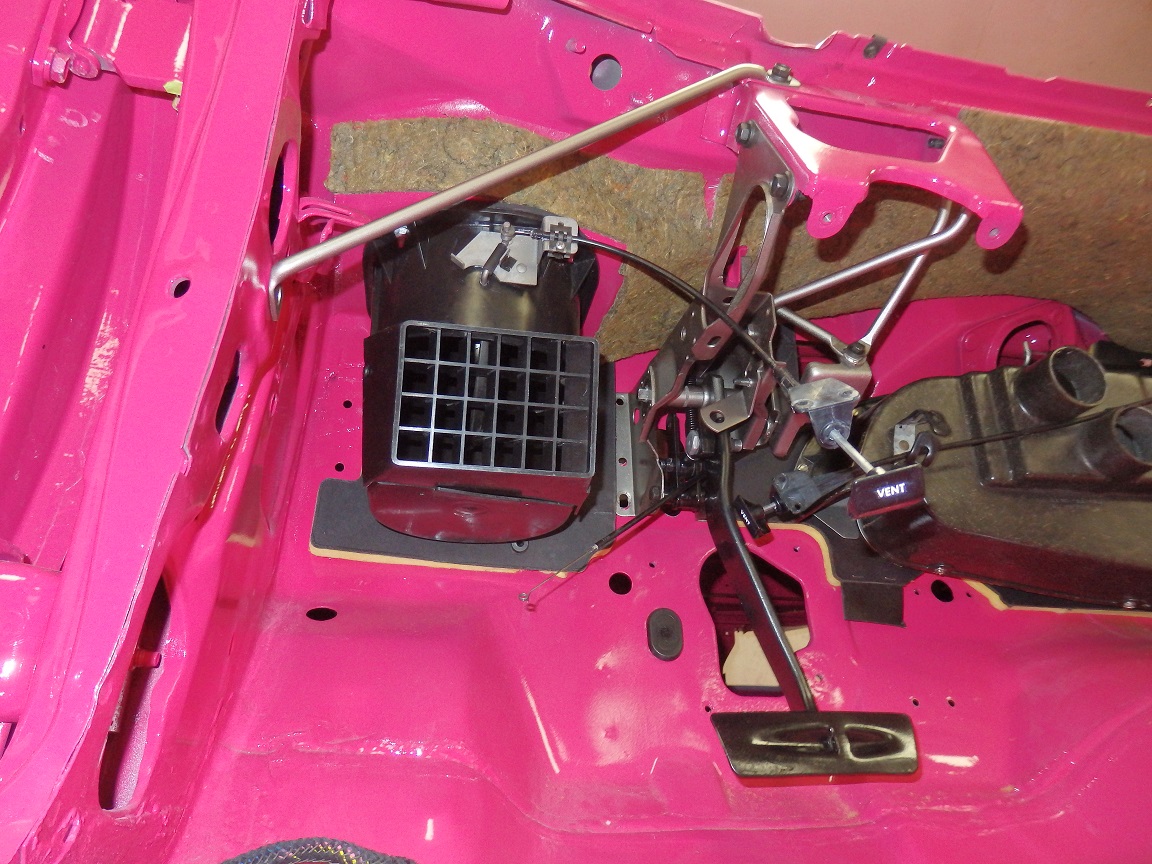
The pedal support was restored next and installed. One thing to note is the nuts that hold the brake booster in place are red zinc dichromate. They don't reproduce these nuts with that coating. I had to locate some used ones. |

|
|
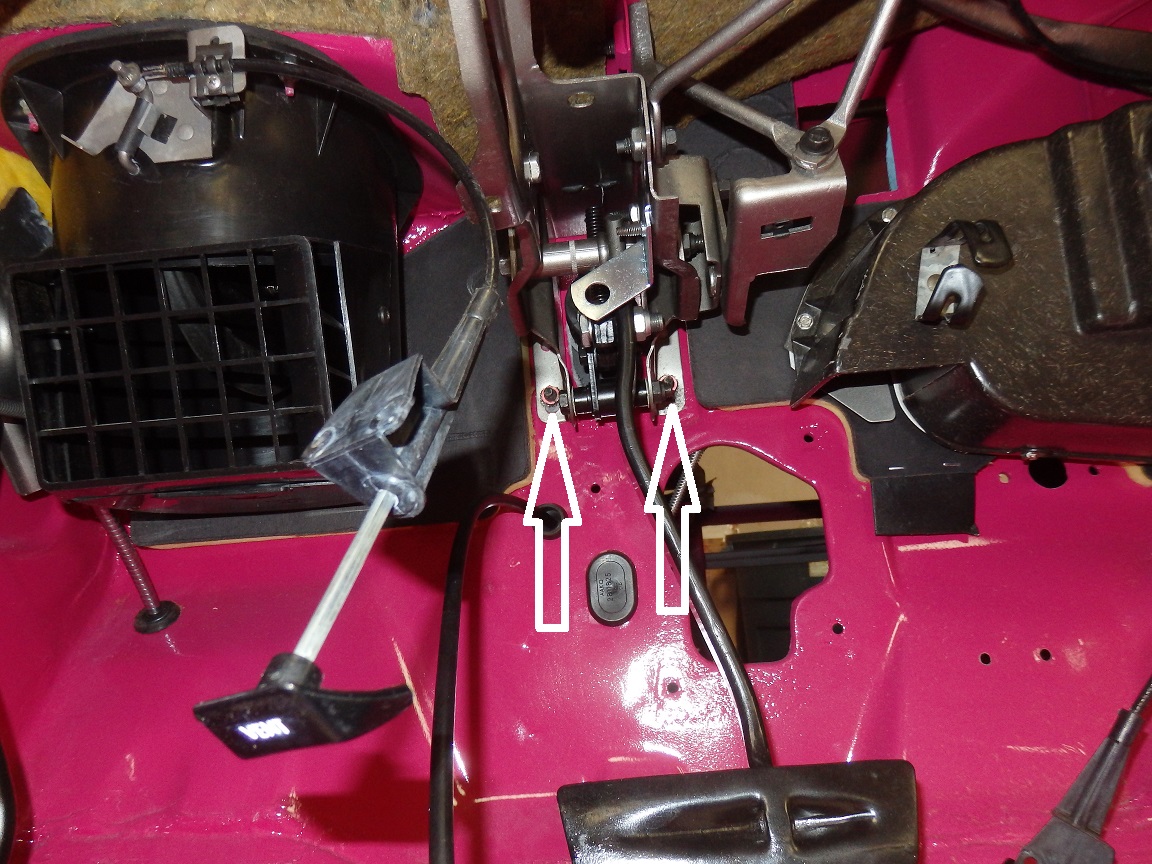
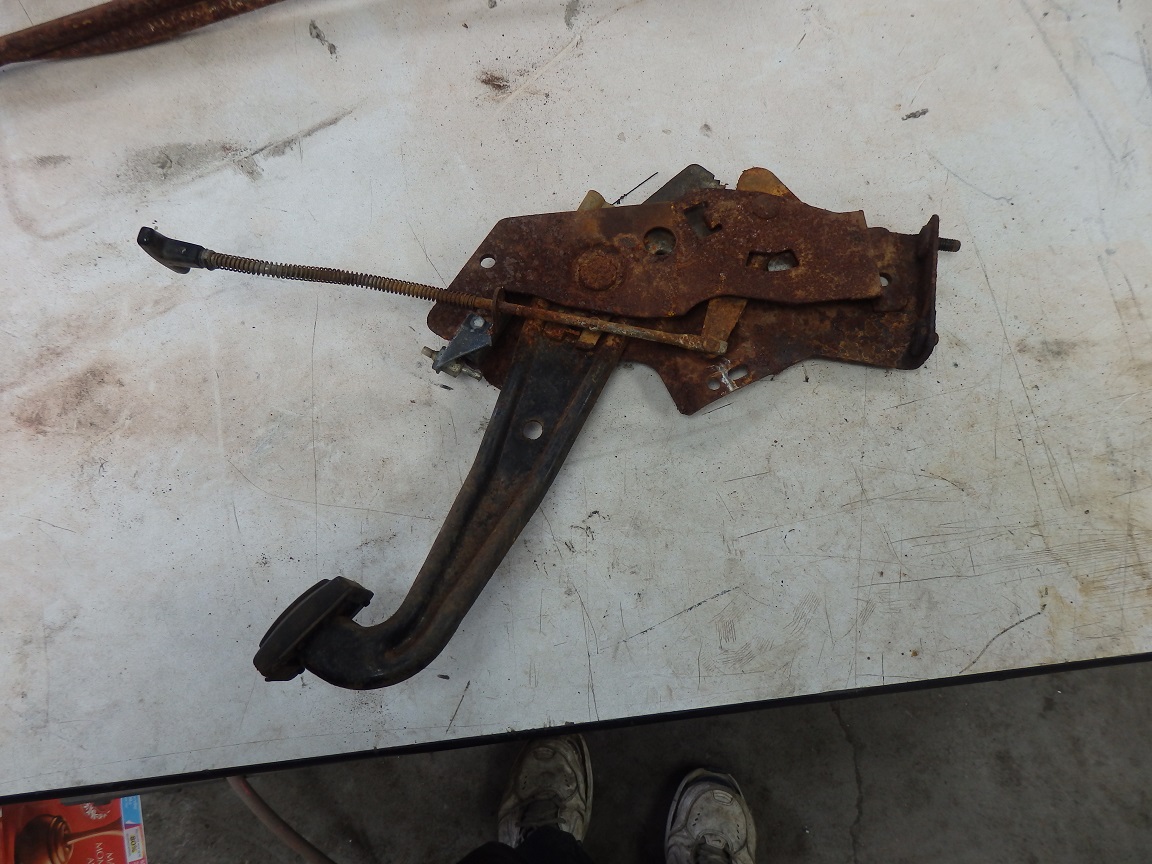
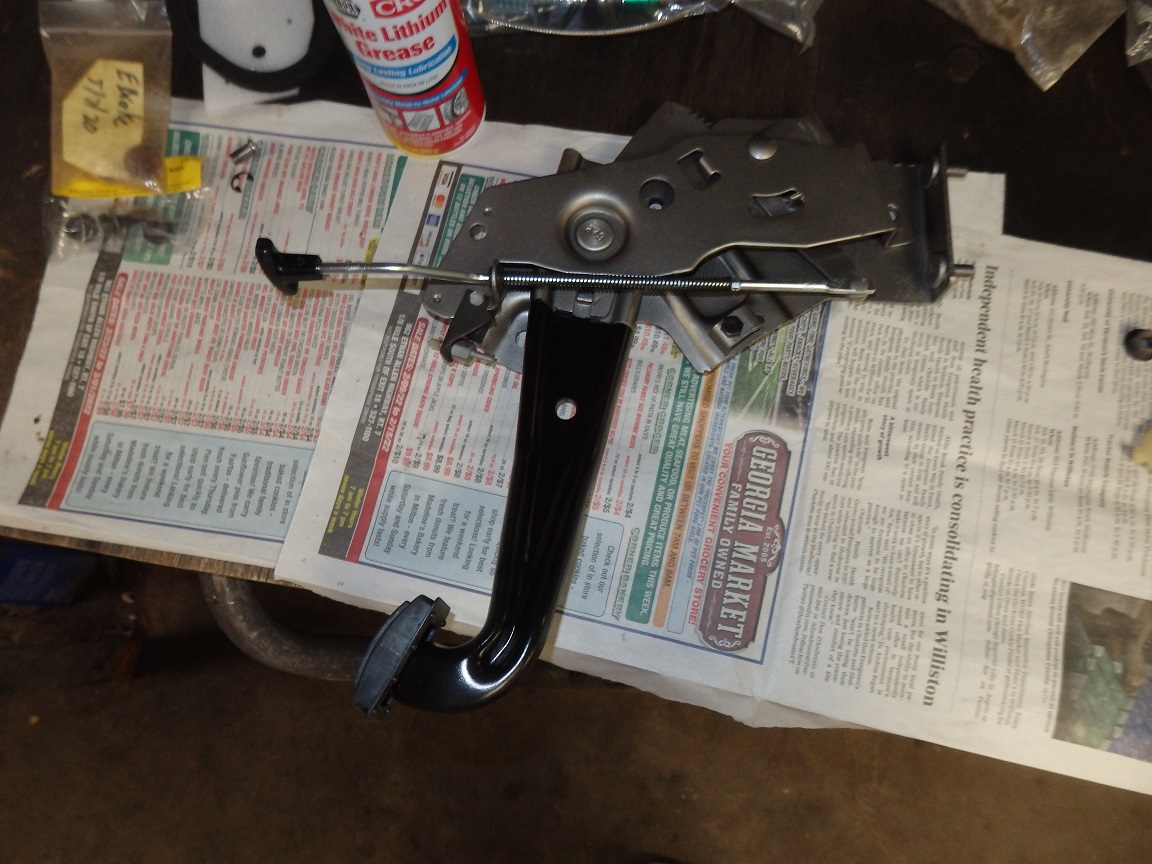
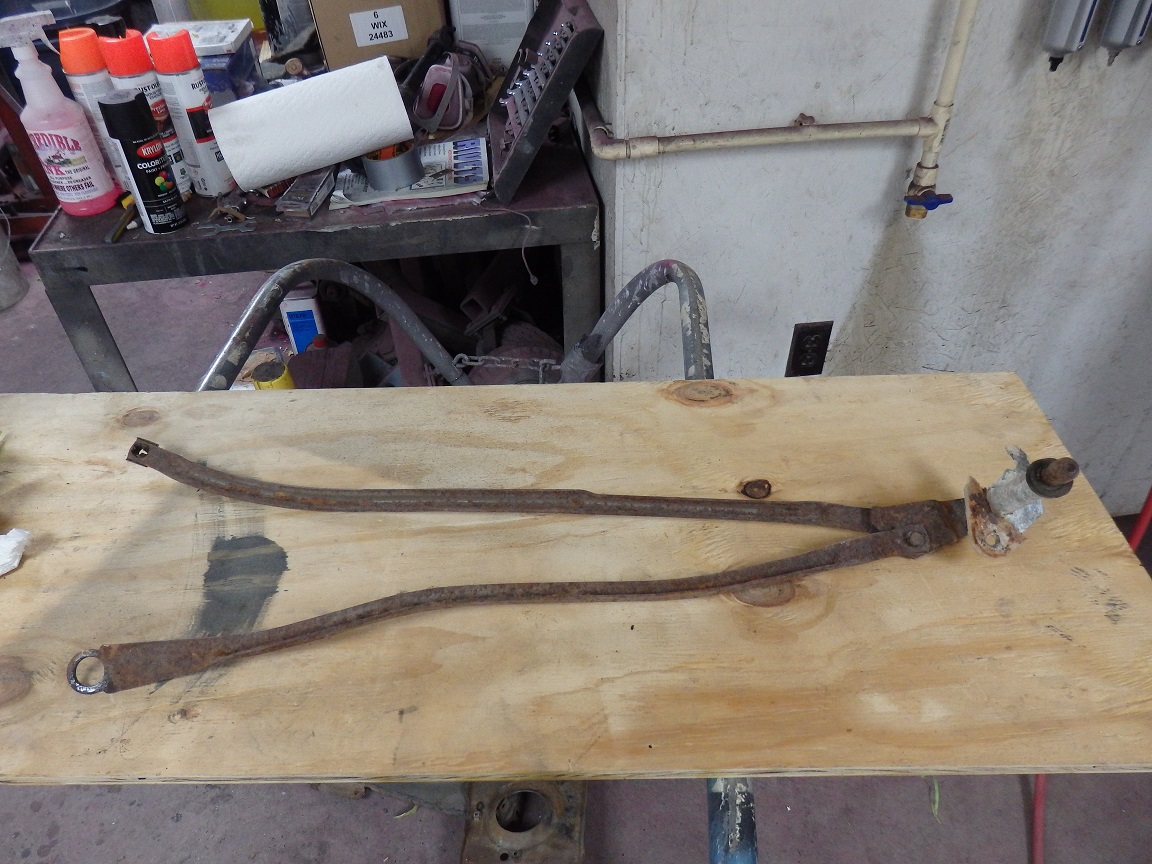
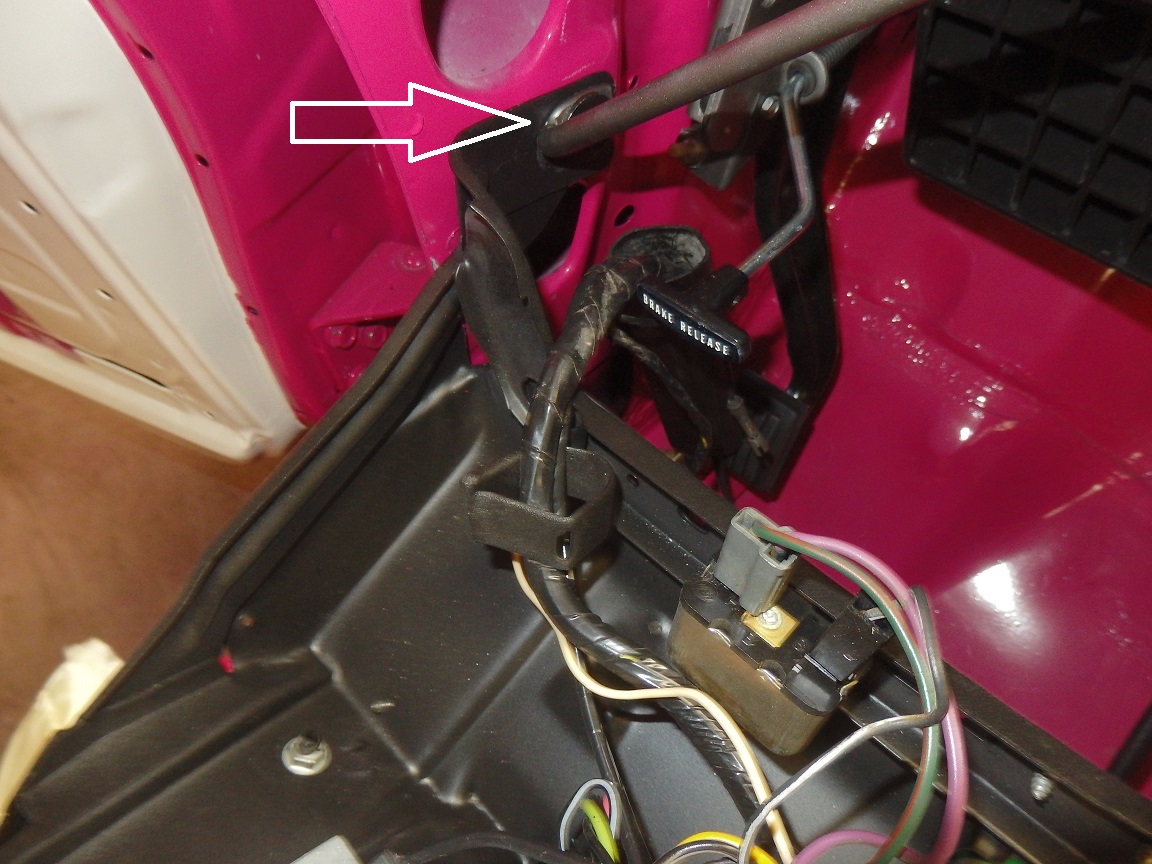
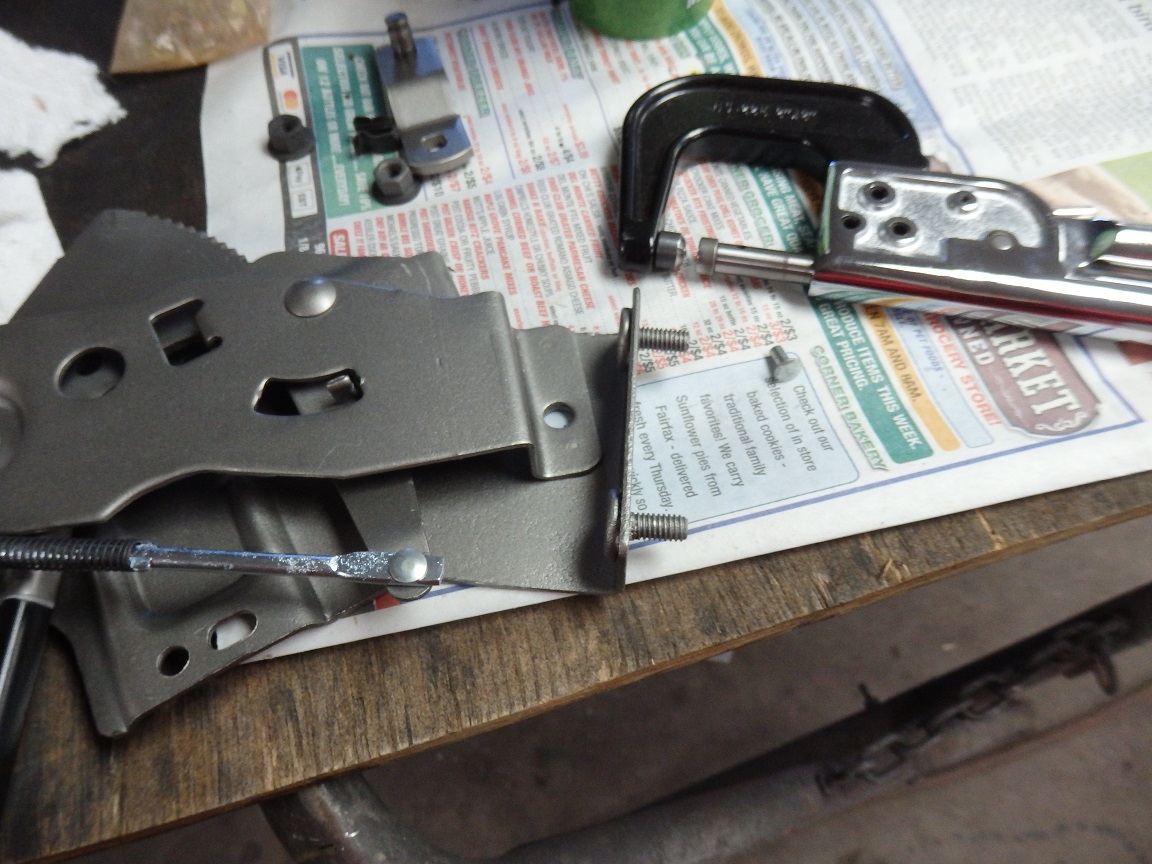
Usually you want to install the parking brake assembly before the LH air vent, but as you can see the original one was a rusted mess. So I ended up finding a used one and restoring that one. I had sent out the handle rod
for plating, so it took a while for me to put the parking brake asby in. |
|
|
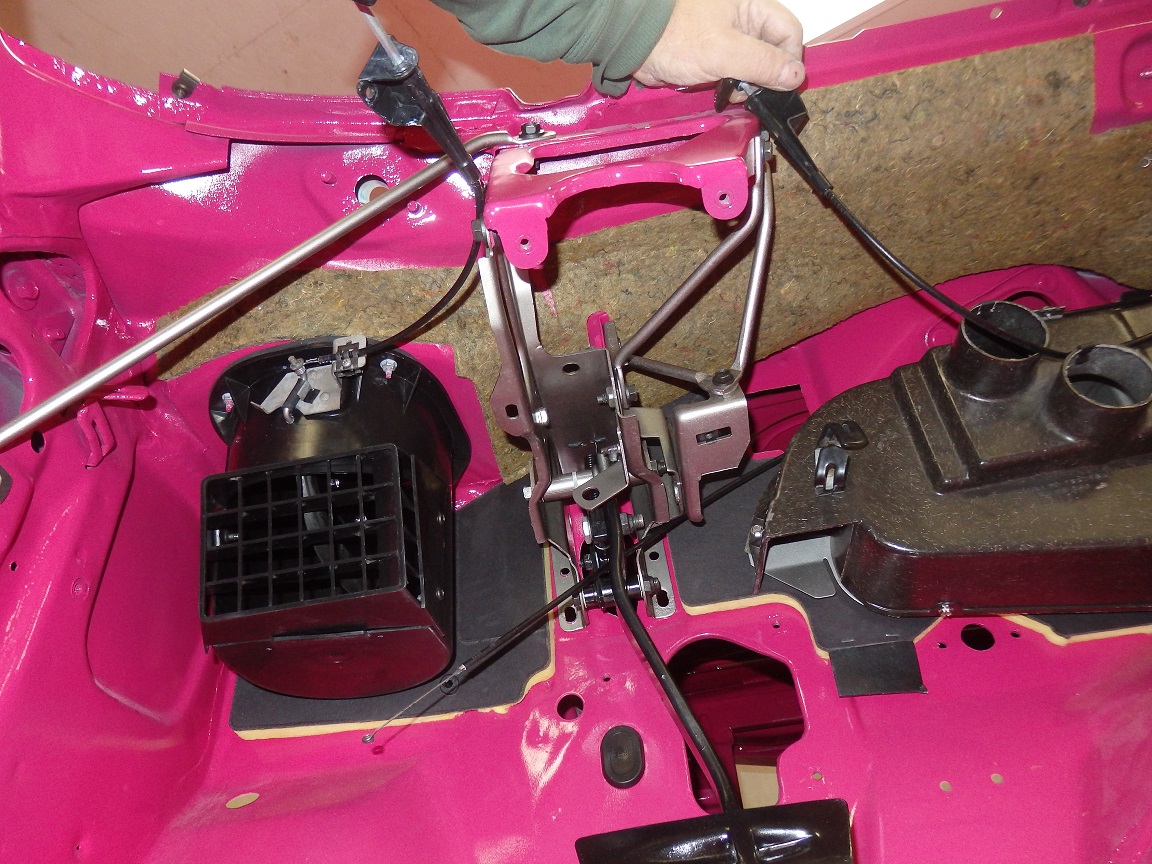
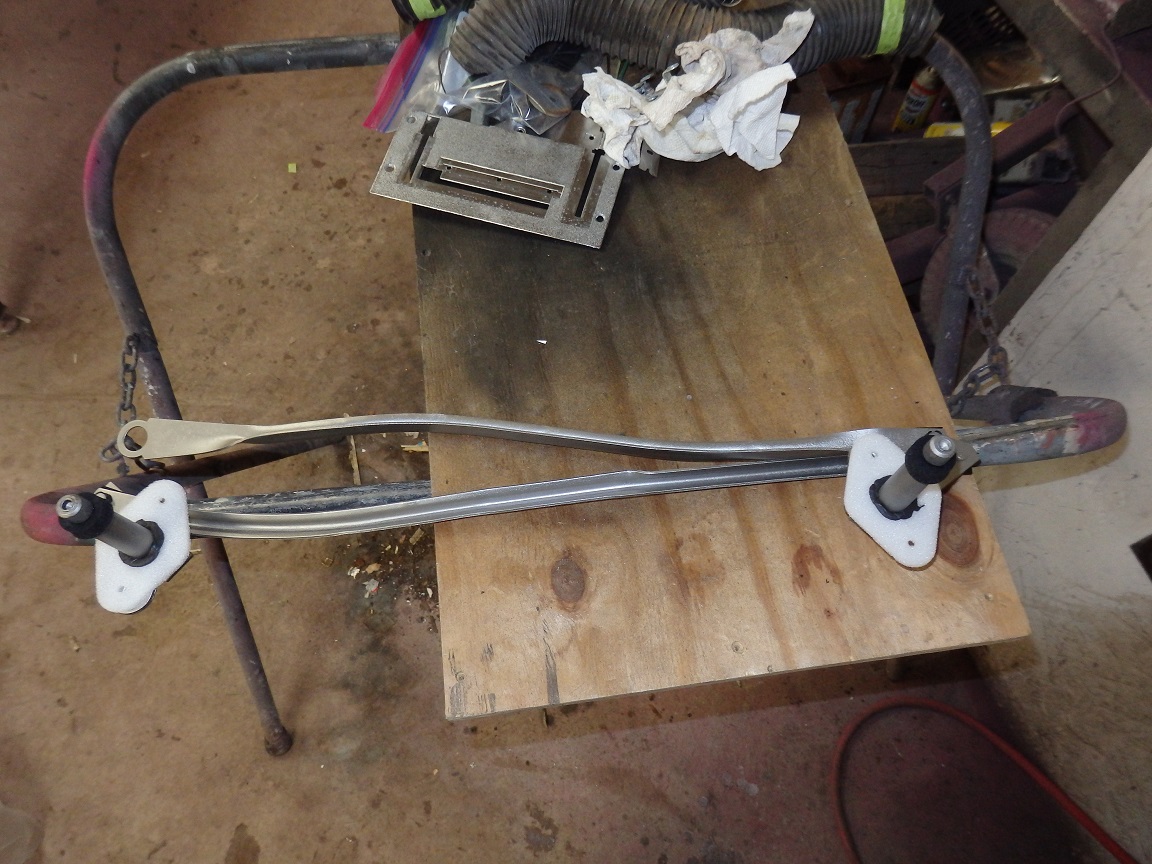
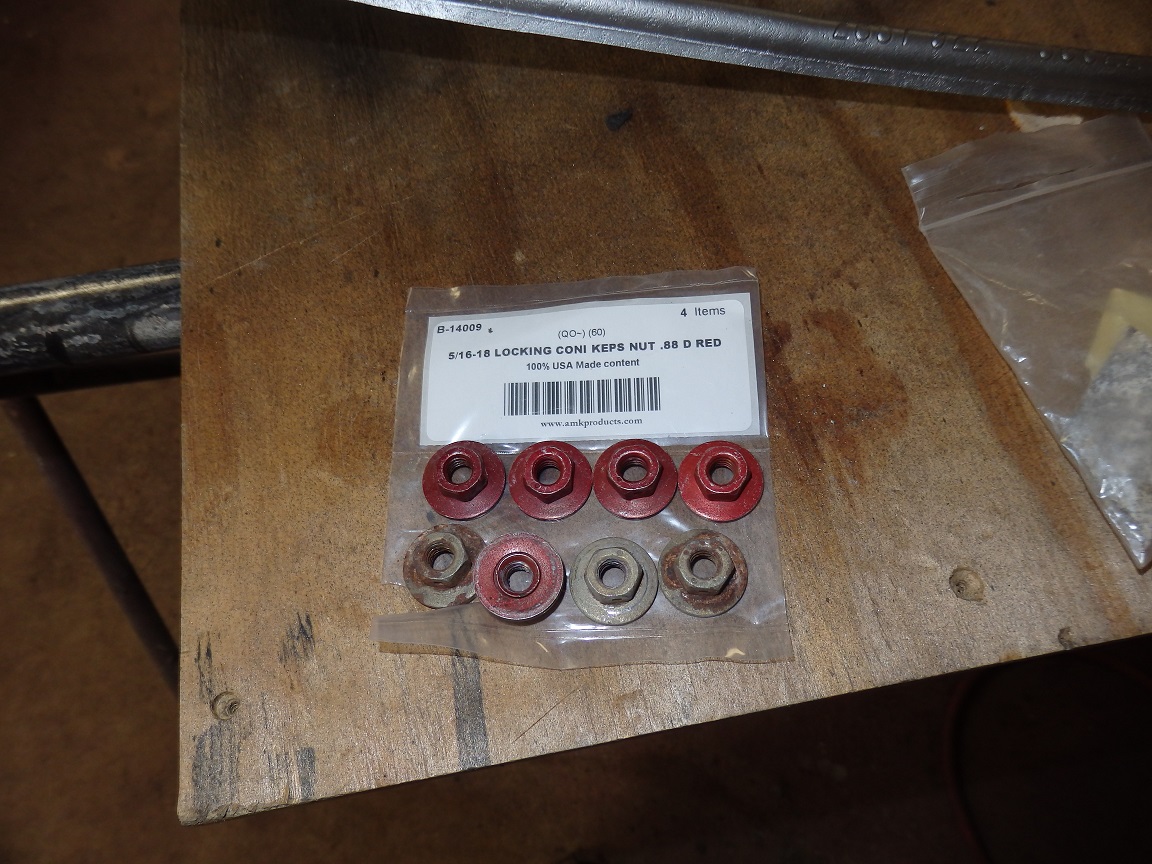
The original wipor pivots were seized and pretty coroded, so I ended up locating a set of them and restored those as well. The original nuts that held the linkage in place were faded from the original red, but you can still
buy the correct ones. |

|
|
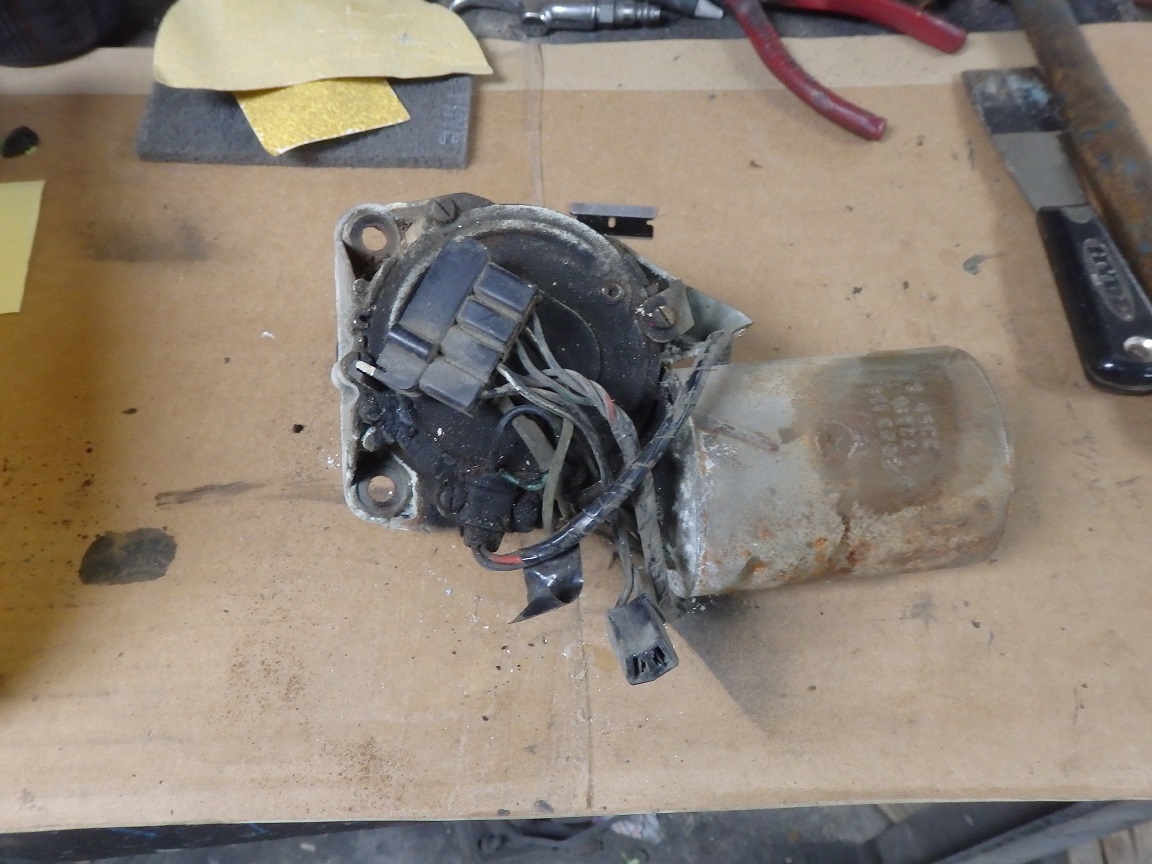
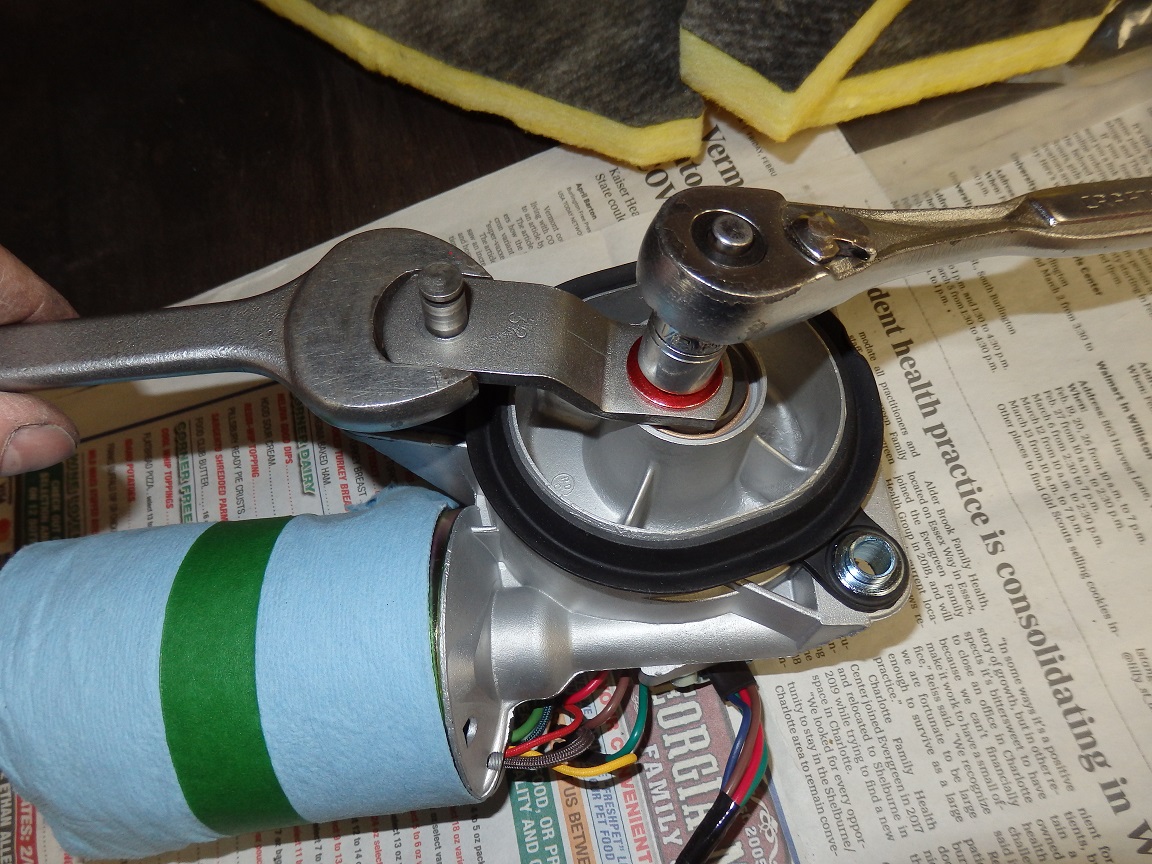
As with the wiper motor assembly from my Challenger I sent the original Satellite wiper motor out to be restored by Stephan Fournier up in Quebec. Hid did a bunch of parts for this car for me including the door latches and the
convertible top pump. I heard that he was going to retire after he finished up my work. I haven't confirmed this. It should be noted that it is easy to damage the plastic gears inside the motor when bolting the bracket in place. You have to install it the way I have it shown here. |
|
|
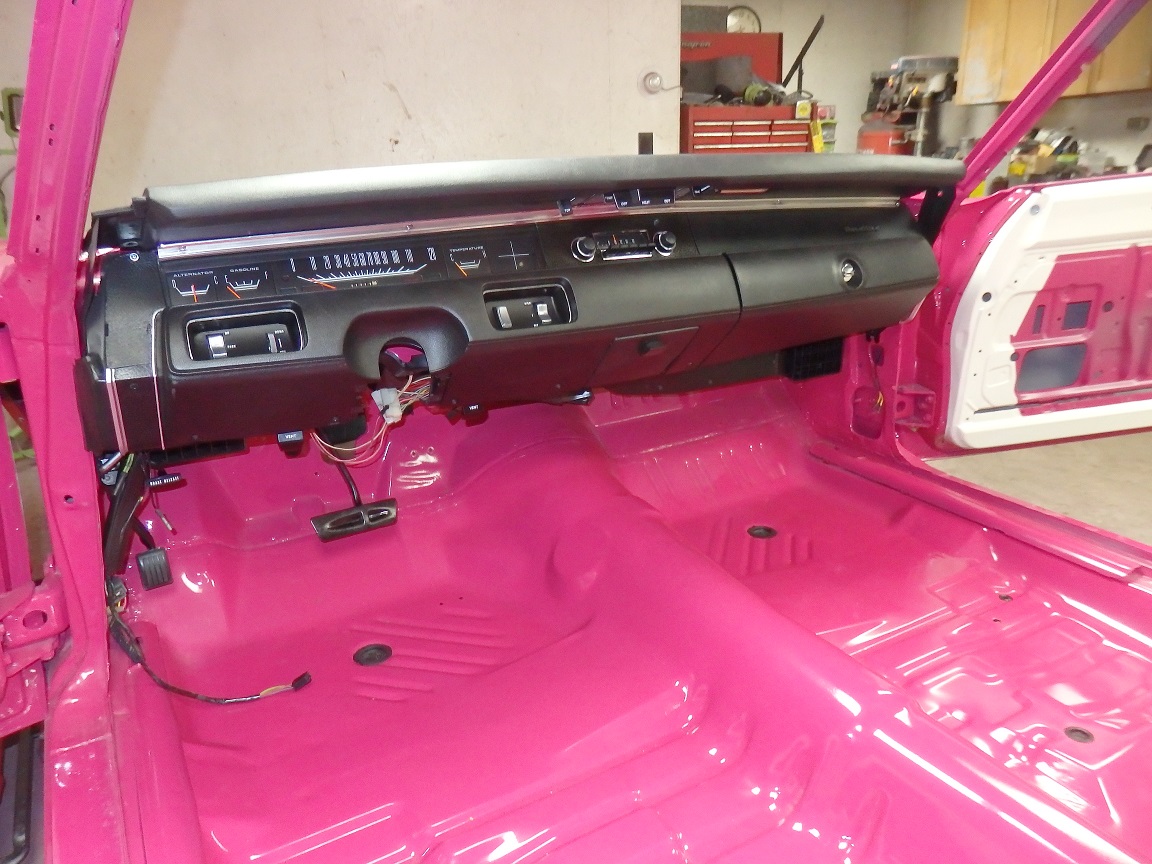
Installing the dash is super easy. You screw in the lower dash bolts a little bit and you hook the bottom of the dash over them (between A-pillar and brace on the LH side). |
|
|
Then you connect the speedometer cable, vent hoses and feed the heater box cables though the dash where the heater controls go (you should not have installed the controls at this point). Then you just swivel the dash
up and bolt it in. Easy breezy. |
| Heater Box Details |


|
|
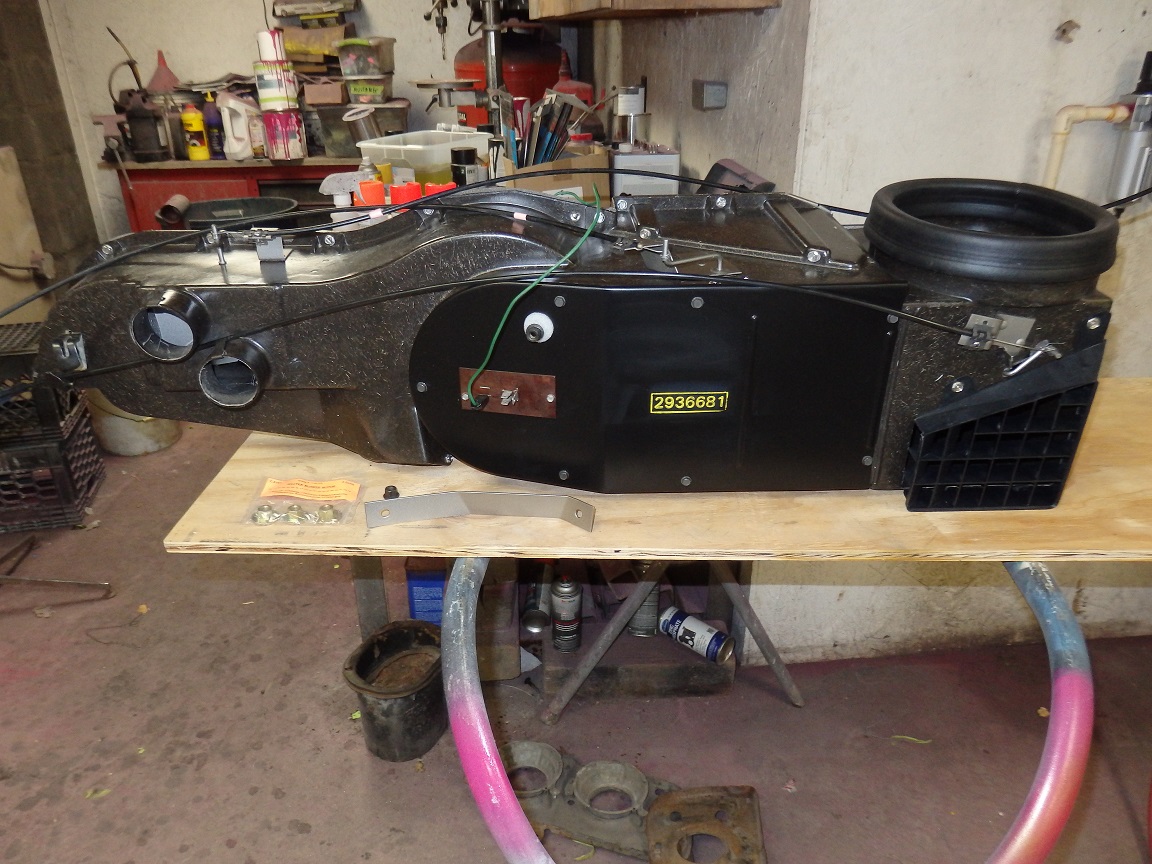
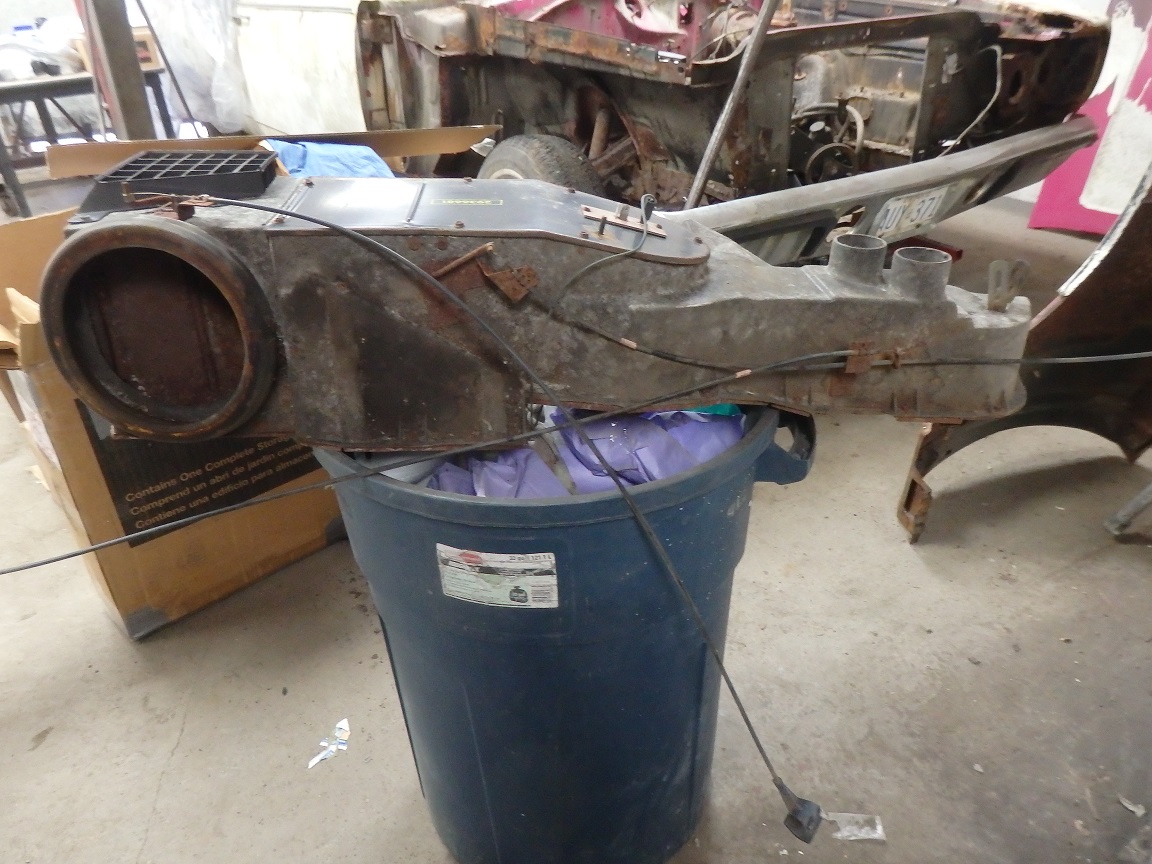
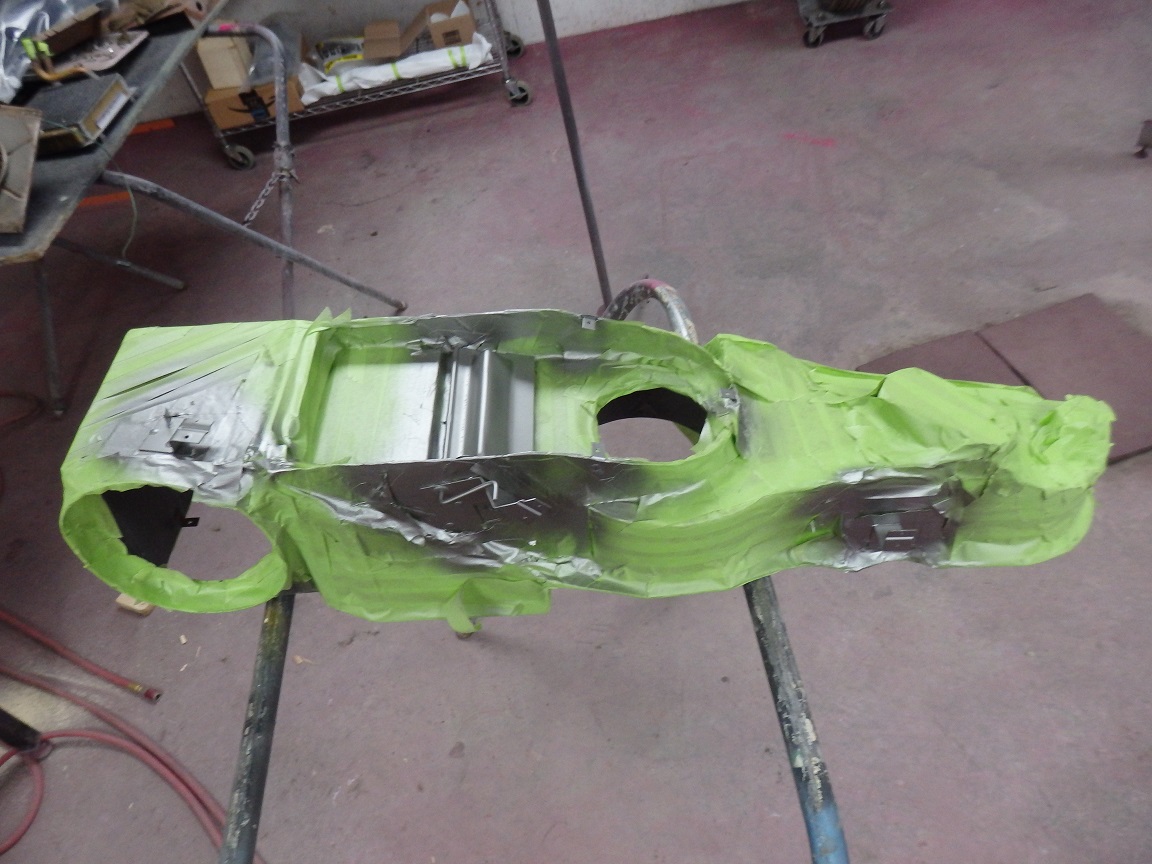
The fiberglass on the original heater box was a crumbly mess with no hopes of restoring it. I did find an excellent used one from a 1969, but it cost me $500 delivered. At least it was crated really well..... |

|
|
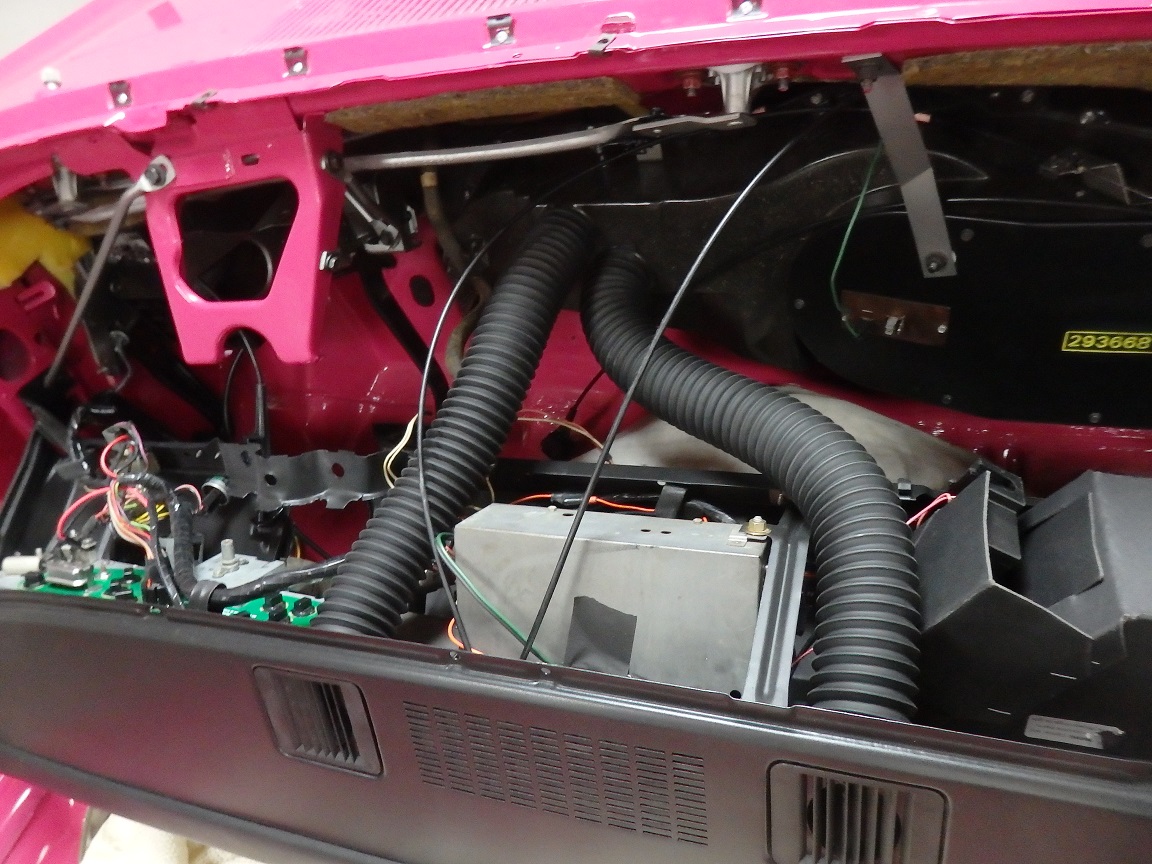
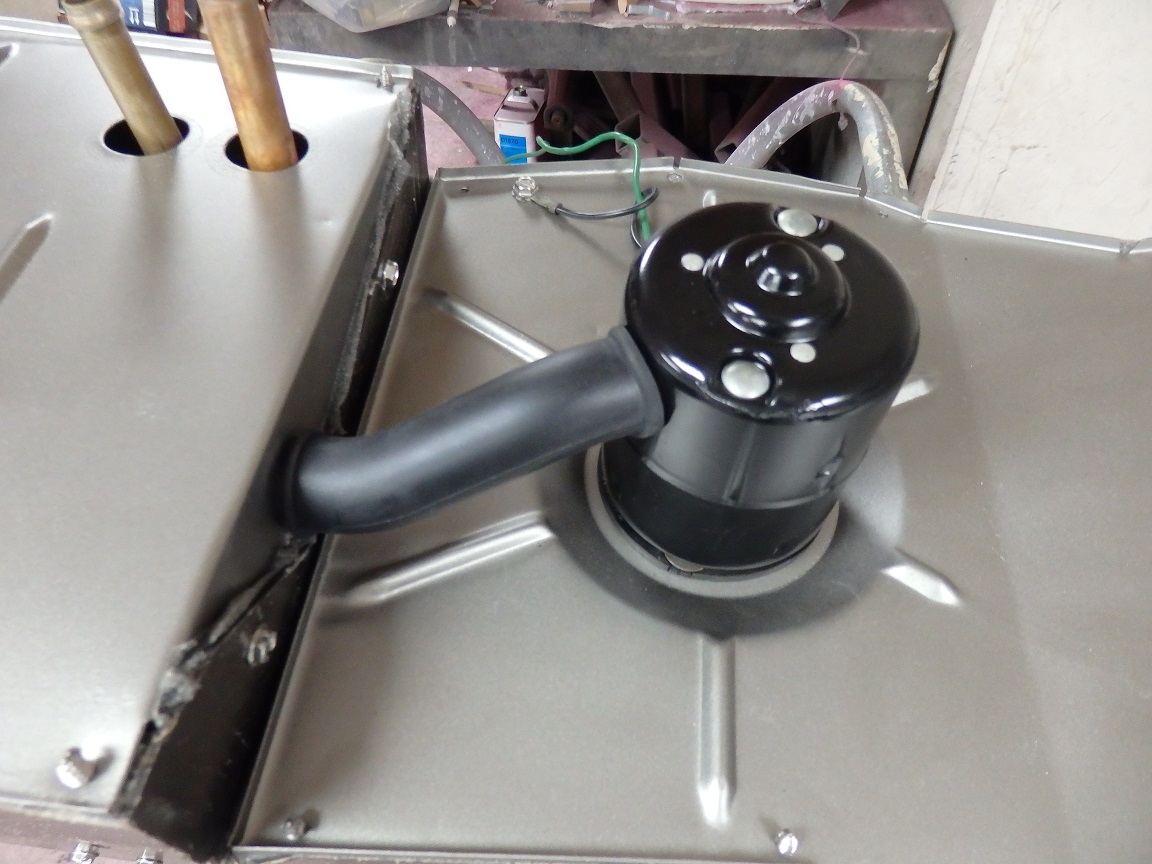
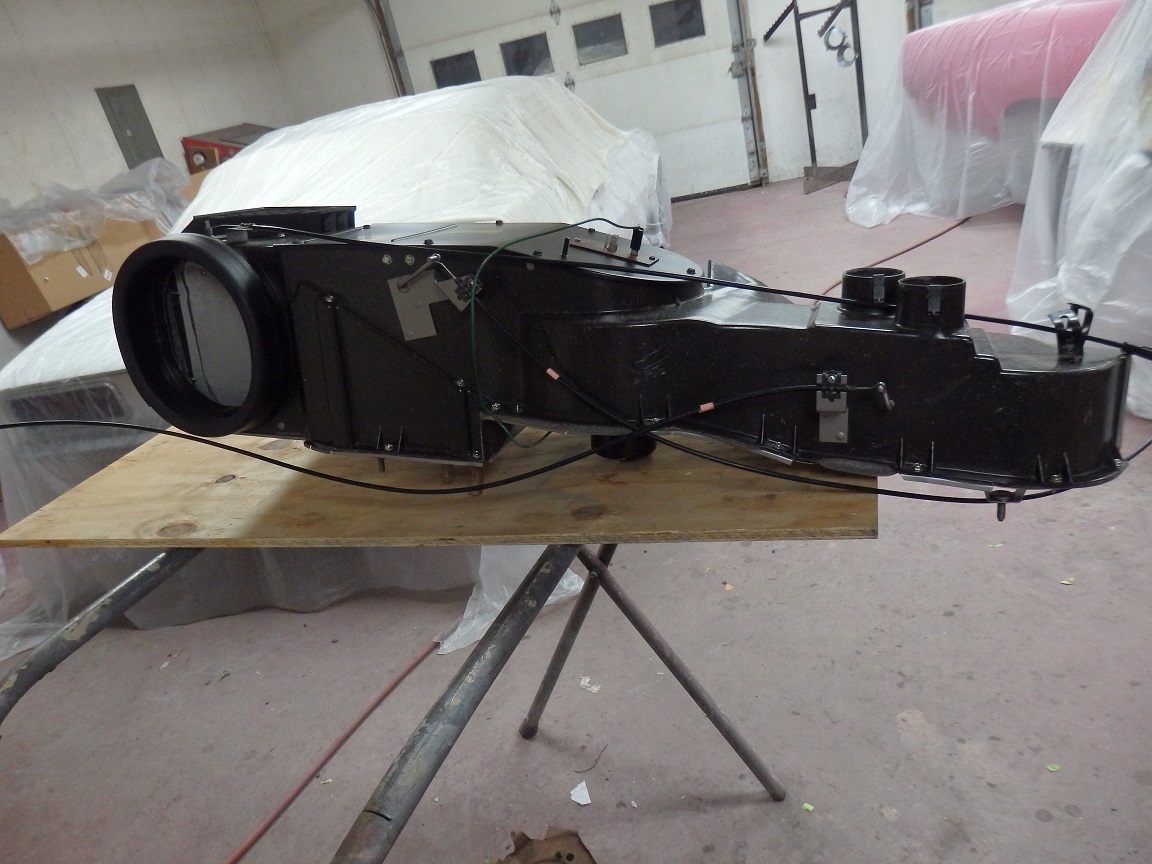
The housing of the heater box is bare fiberglass. All I had to do was scrub it with soapy water to make it look new. The metal pieces that are rivetted to it are supposed to be natural steel. I restored it by sealing the
fiberglass with tape, beadblasting the metal parts and then painting the metal with Seymours Stainless Steel paint. Kits to restore heater boxes are pretty inexpensive, but the foam for the door flaps do not come with adhesive backing. So I had to use 3M spray adhesive. |
|
|
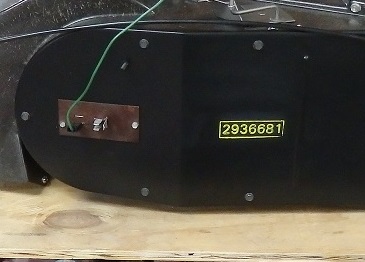
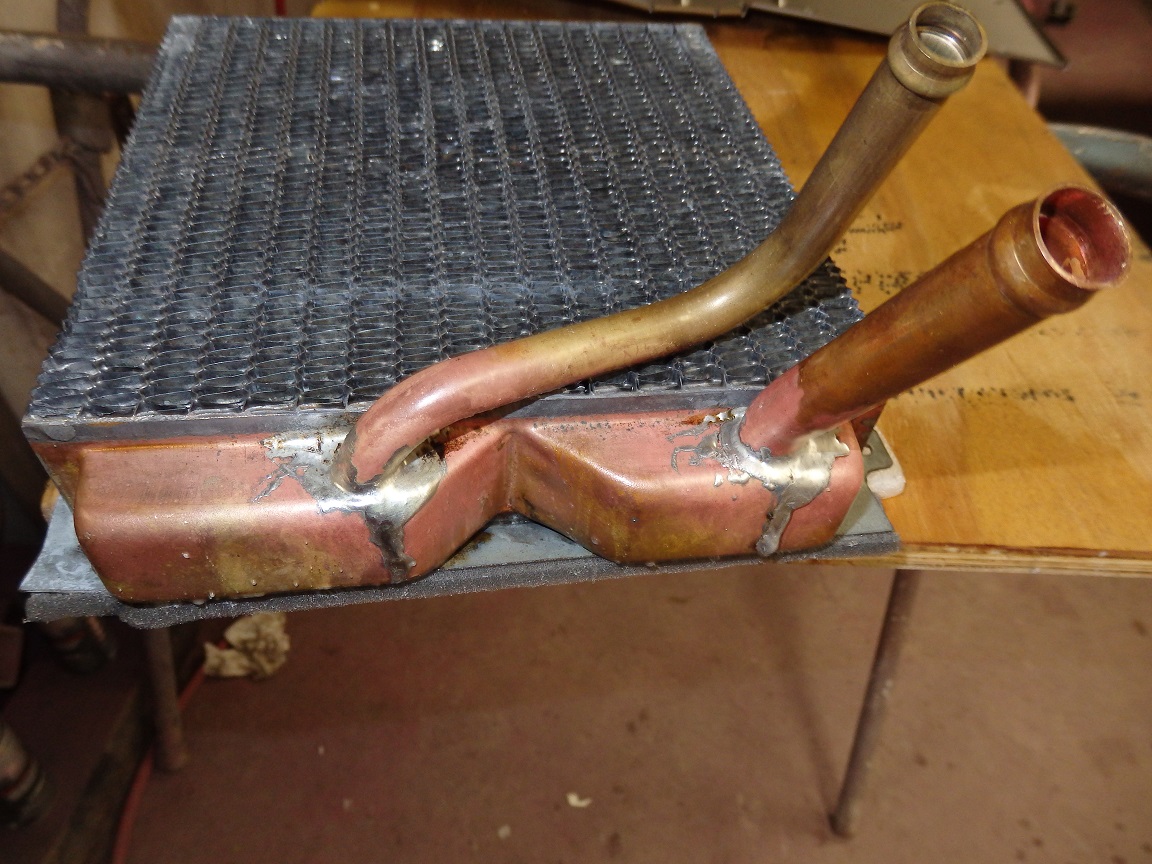
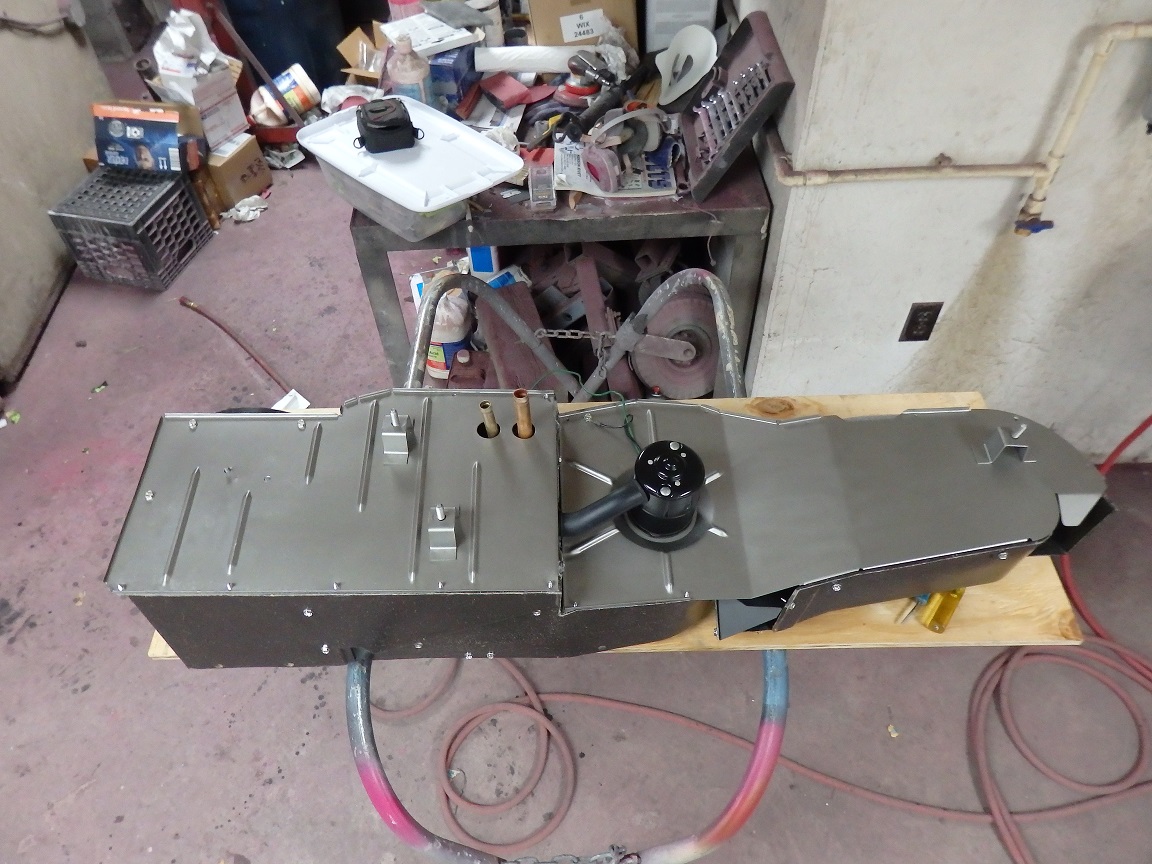
There is a guy out there who makes the correct rubber ink stamps for heater boxes. He sells them off his website and ebay. This number,2936681, is the correct later 1970 part number that was stamped on the original. What makes this heater box different than the 68/69 version is that one of the heater core inlets are larger in diameter than the other. To improve heating I guess. I bought a repo heater core, but the tubes were not soldered in the correct orientation and they broke free when I tried to adjust them. So I ended up resoldering them in the correct way. |
|
|
Here's a bunch of shots showing the fully restored heater box and cables. |
| Misc Underhood Items |
|
|
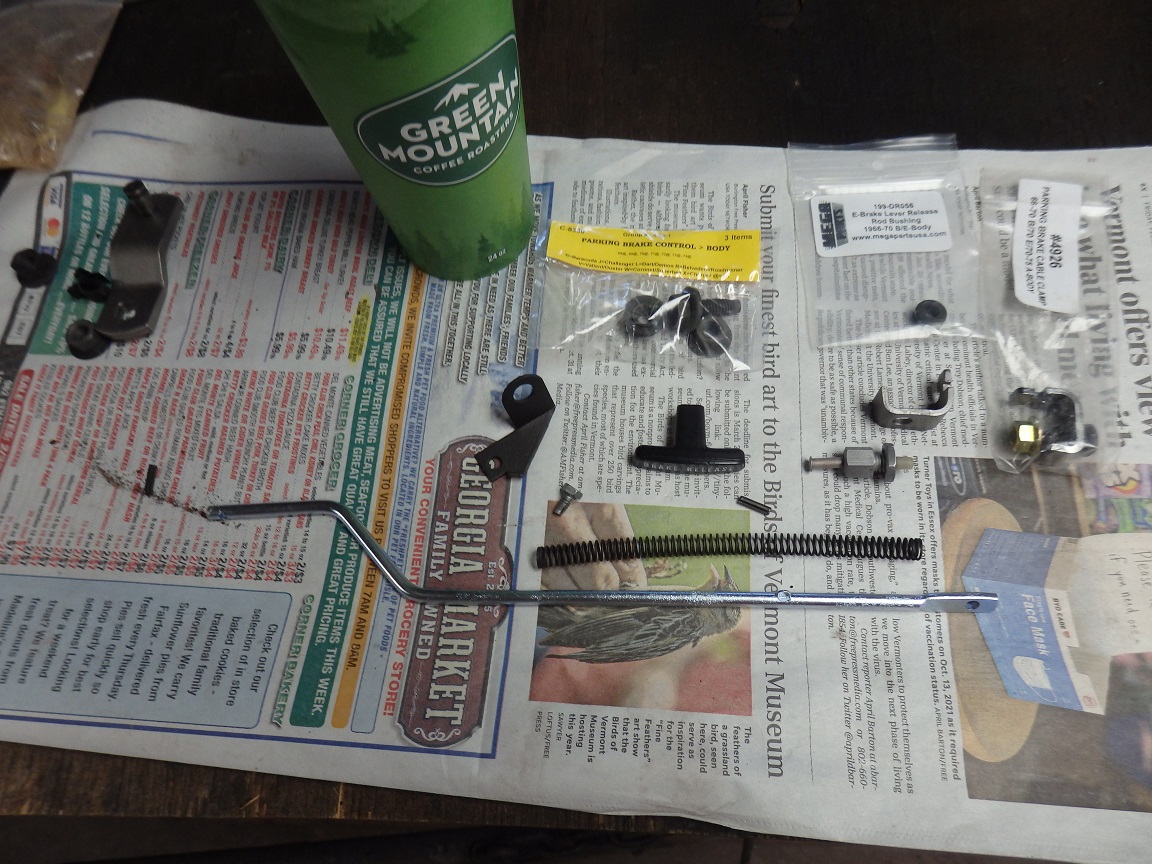
I mentioned previously I had to replace the rusty original parking brake assembly. The body of it was beadblasted and painted with Seymour Stainless Steel paint along with the pedal arm itself being painted black. A detail that is not always restored is the rod for the release lever. I had mine zinc plated like the original. I also had the correct rivet and crimping tool for reinstalling it. |


|
|
Here's some random details. The brake proportioning valve and hold-off I used are nice repos. The brake line kit I bought from Inline Tube did not come with the correct master cylinder lines, but I sent them my originals
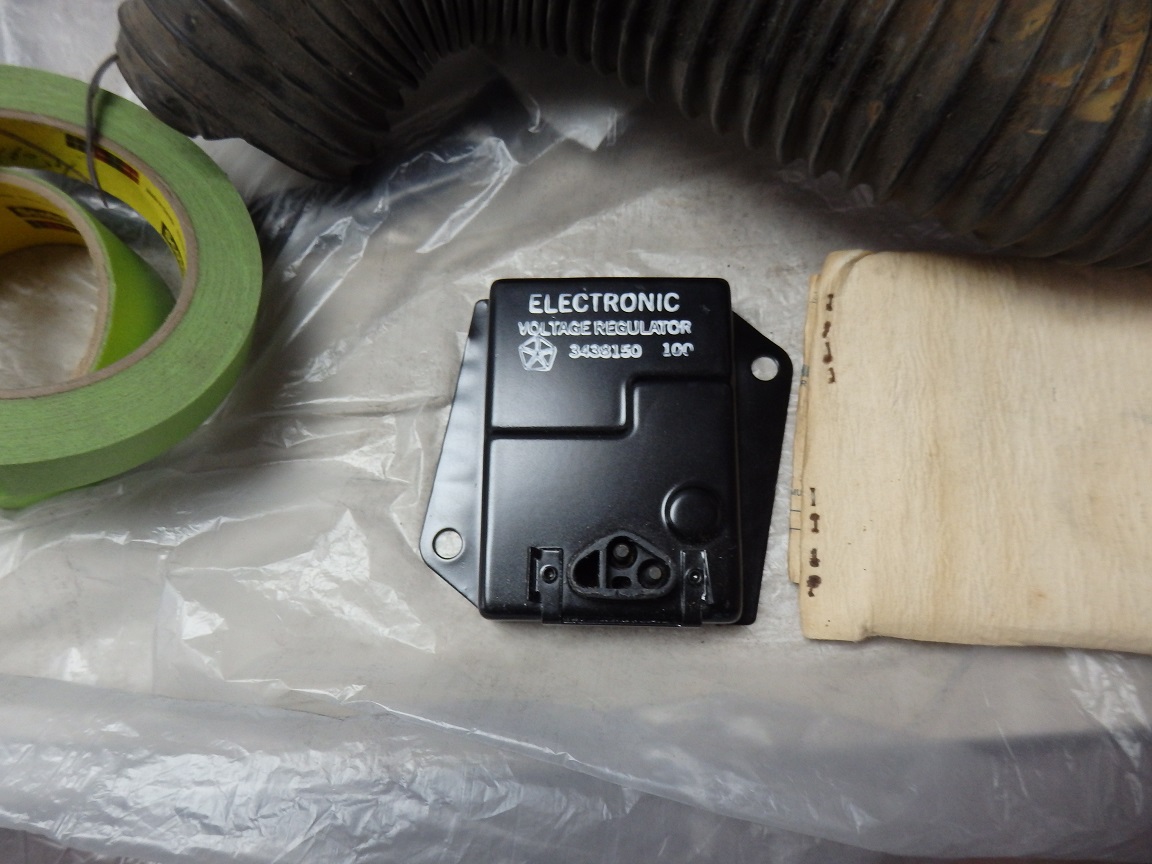
and they quickly made me a correct set for my car. The voltage regulator is a new origanal that ECS Automotive repainted and stamped with the correct part number and date code (10th week of 1970). You can easily spot a correct one as they have a raised step area and a raised circle. Repos and newer NOS parts do not have these details. Also shown are the repo voltage regulator mounting bracket and repo ignition ballast resistor with correct part number stamping. |

|
|
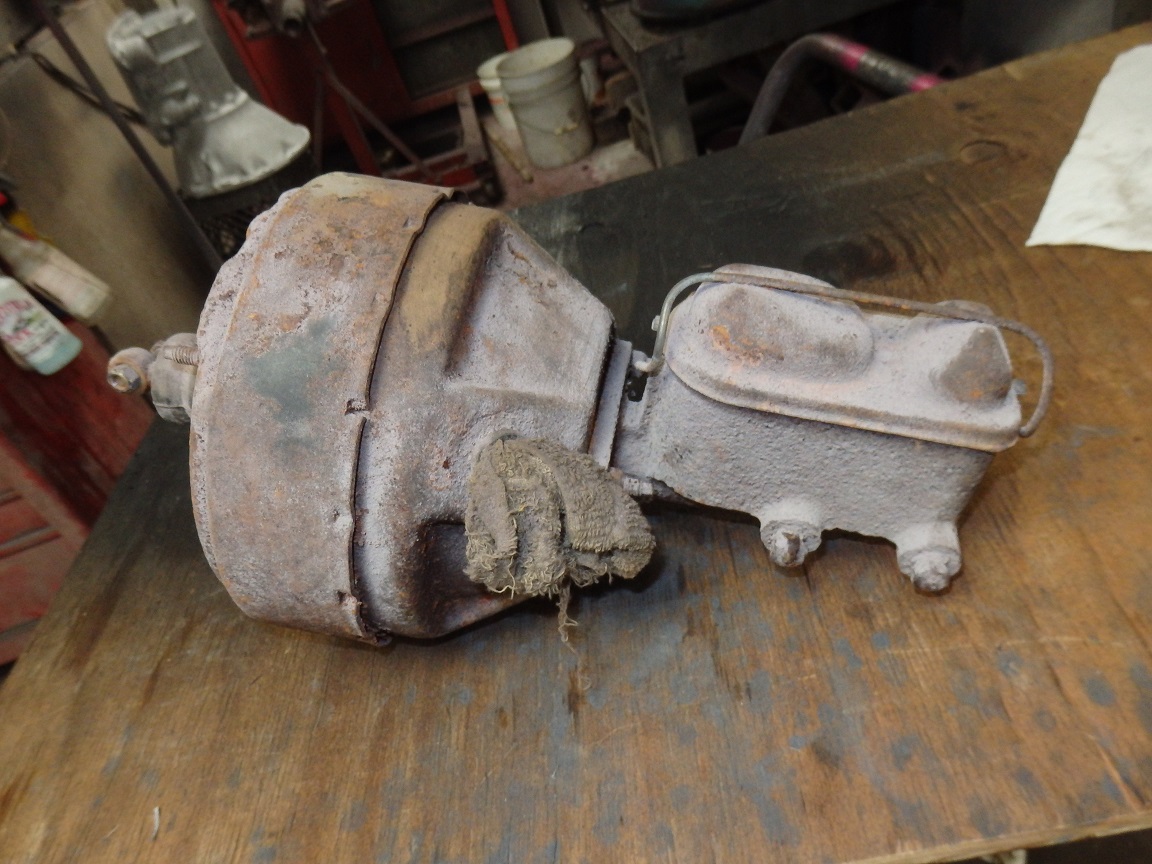
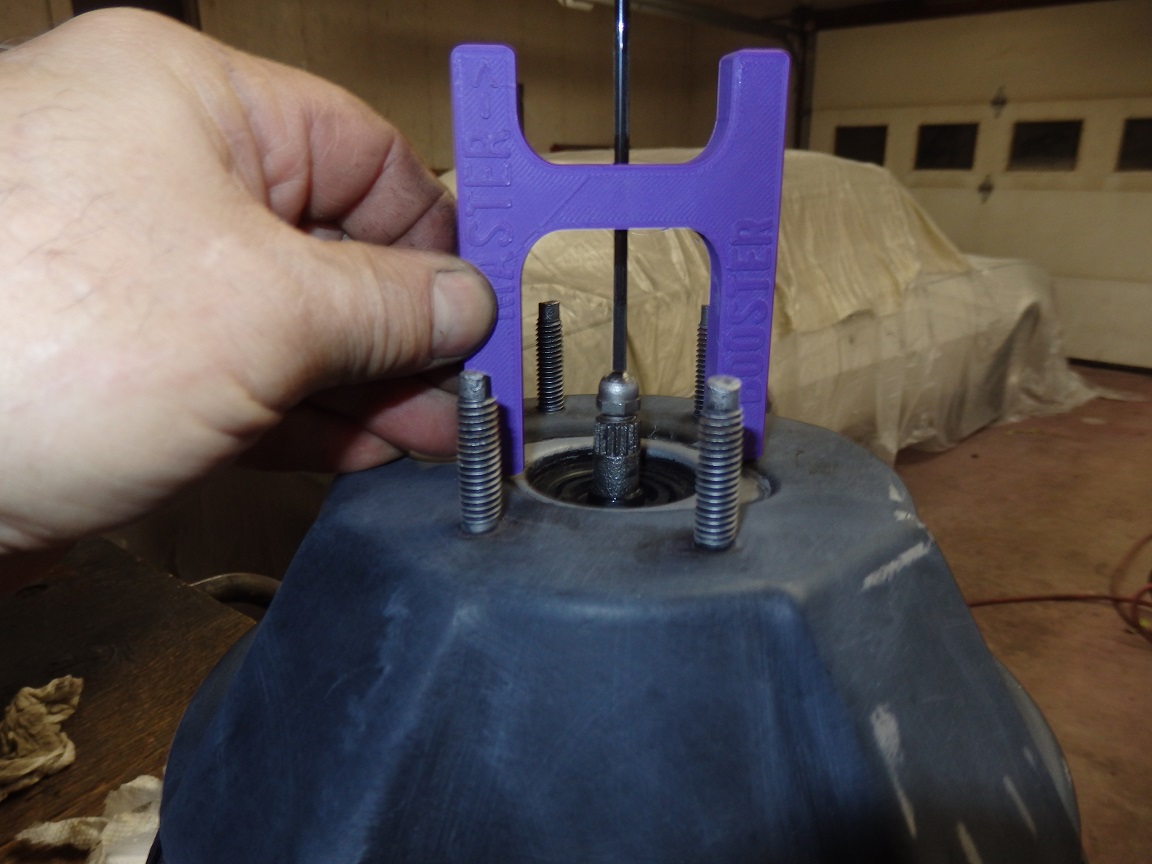
As with many other firewall items on this car, the brake booster and master cylinder where to rough to restore. I found a correct original set on ebay. Overpriced as usual. I sent the booster to
Brake Boosters to restore, though I had to repaint it to my satisfaction. For those who don't know, you have to adjust the booster rod so that it doesn't quite contact the piston plunger in the master cylinder. This is done using a tool like this. You put it on the face of the master and move the pin so that it bottoms out on the plunger in the master. Then you flip it over and align it to the face of the booster. You adjust the treaded stop on the booster so that it just contacts the pin on the tool. It's ok if you have a 0.020" gap or so, but it is not ok if the stop is adjust too far out as the booster will start engaging the brakes.... |
|
|
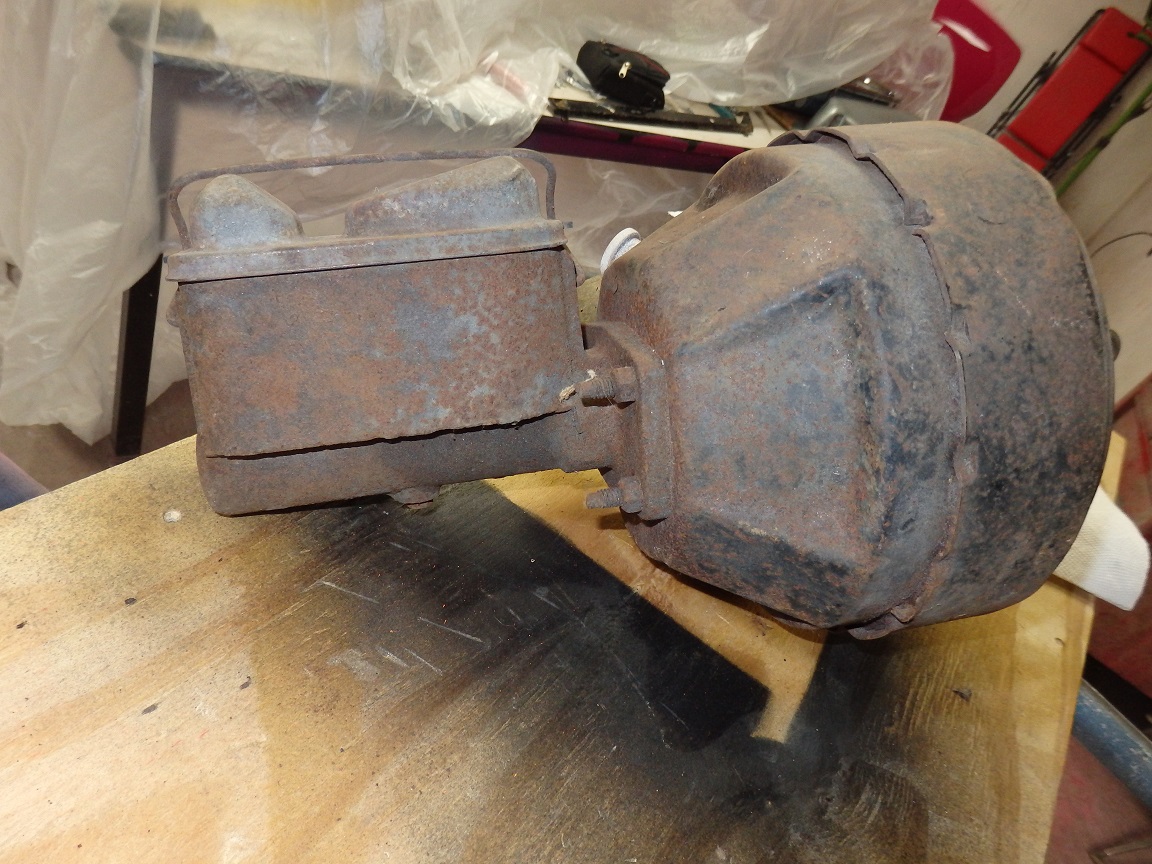
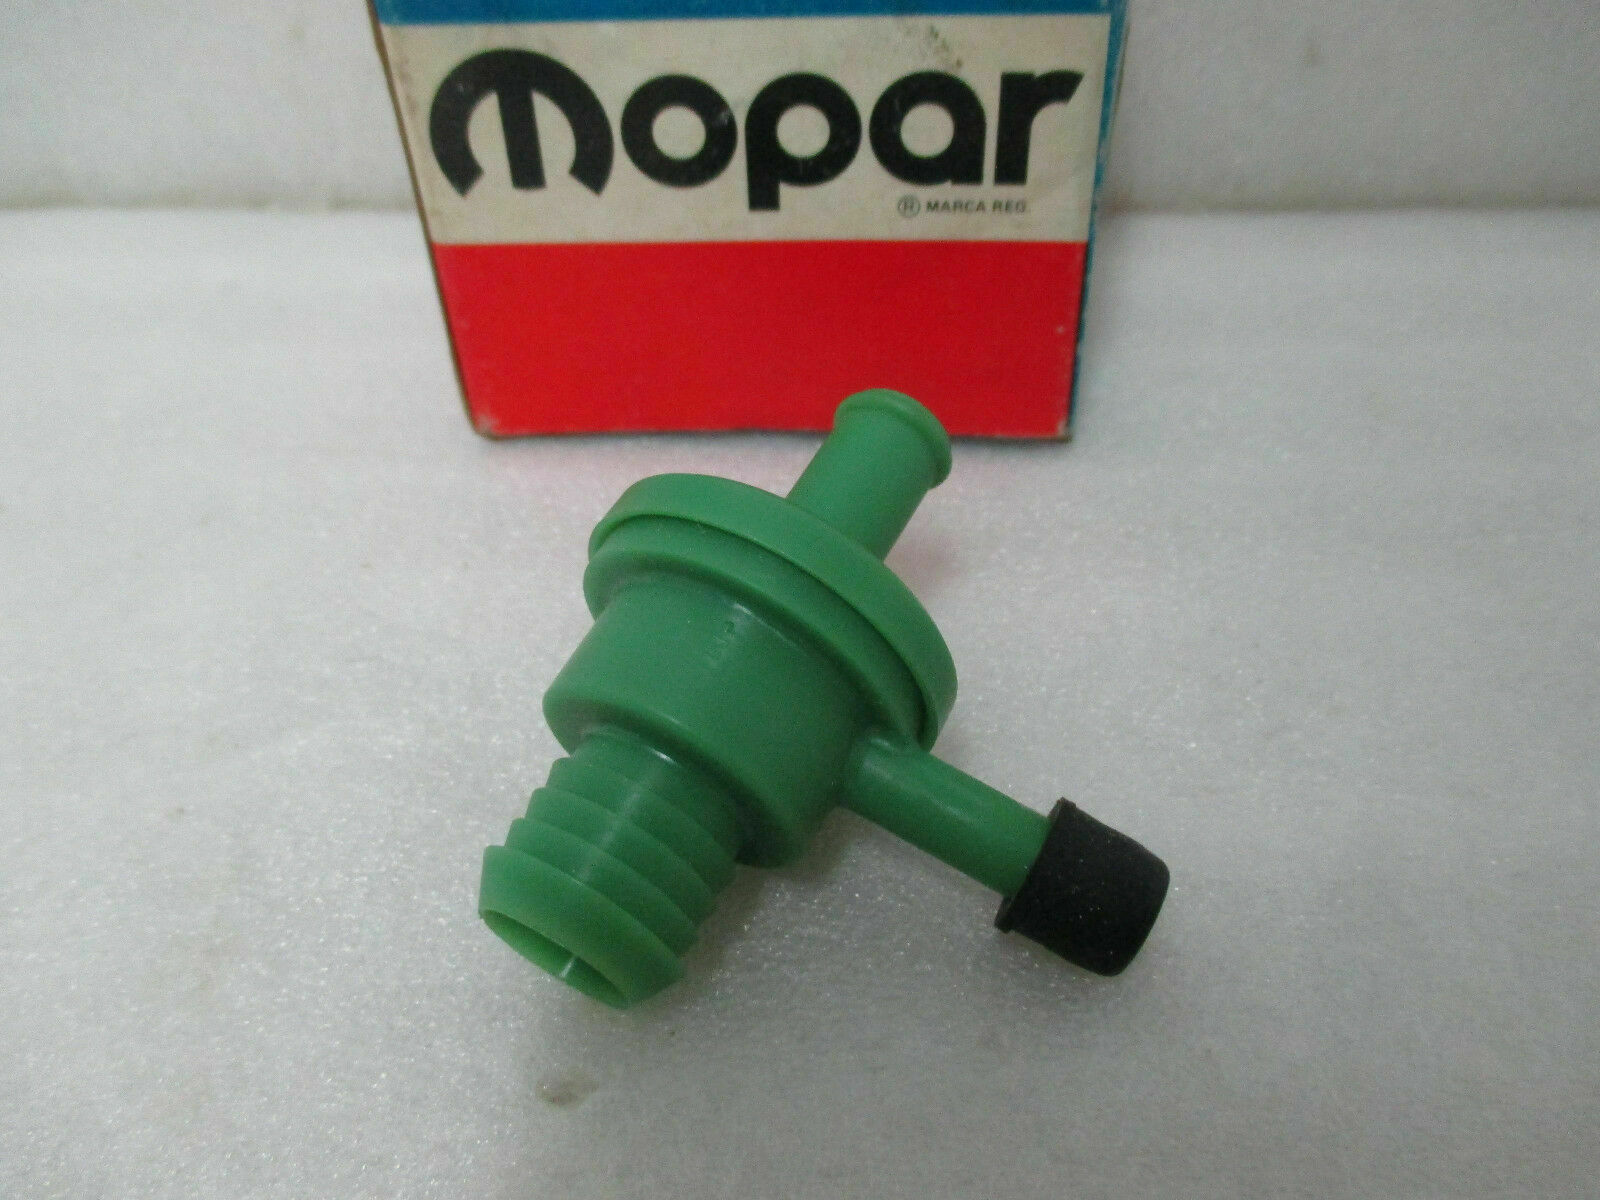
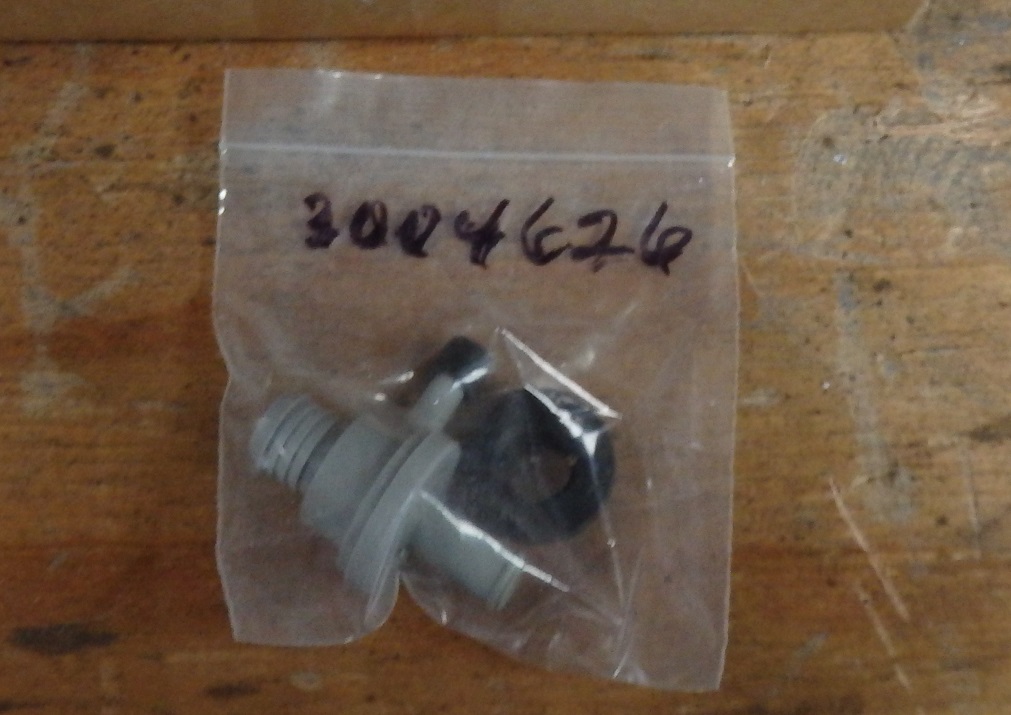
As a finishing touch I was able to locate an NOS check valve to plug into the booster (the green one). It took me 2 tries as an ebay seller posted a picture of the very expensive correct one and then swapped it out with the $12 repo
gray one you see above. |