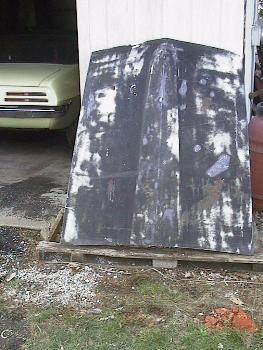
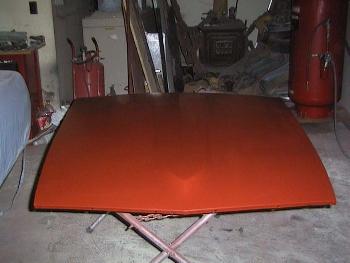
 The original hood was long gone, but the car came with a used hood. When I stripped the paint off the hood I found lots of
through rust just under the paint across the entire front. The hood may have been stored outside upside down. Though I could have
fixed it, I doubt that the repair would last more than 5 years, before the filler would start to blister. I was lucky enough to have
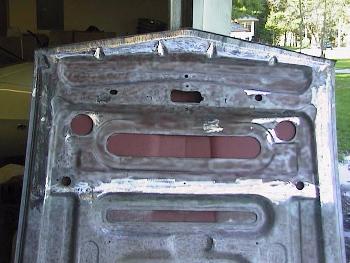
purchased a parts car for $125 early on. Its hood, pictured here, was actually pretty good on the top, but had lots of rust holes
on the underside near the front. This seems to be a common form of hood cancer on these Mustangs. With the cost of a good used
one in the $400 - $600 range I decided to fix what I had.
The original hood was long gone, but the car came with a used hood. When I stripped the paint off the hood I found lots of
through rust just under the paint across the entire front. The hood may have been stored outside upside down. Though I could have
fixed it, I doubt that the repair would last more than 5 years, before the filler would start to blister. I was lucky enough to have
purchased a parts car for $125 early on. Its hood, pictured here, was actually pretty good on the top, but had lots of rust holes
on the underside near the front. This seems to be a common form of hood cancer on these Mustangs. With the cost of a good used
one in the $400 - $600 range I decided to fix what I had.
|
|
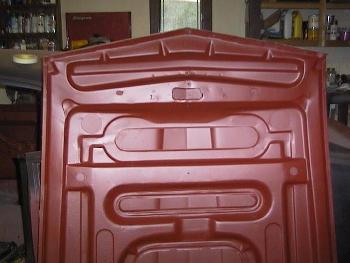
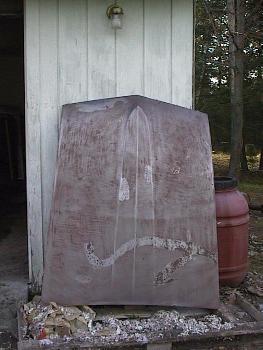 The first thing I did was strip all of the paint off the hood. I always use paint stripper to take paint off body panels. No
media blasting - EVER ! The hood had been repainted at some point. The big squiggle mark that can been seen on the hood is what
appears to have been made by someone who removed a couple deep scratches using an orbital sander. They burned through both layers
of paint and primed the entire hood with some spray can primer. If they had painted the hood the squiggle would appear as a big
wave in the hood.
The first thing I did was strip all of the paint off the hood. I always use paint stripper to take paint off body panels. No
media blasting - EVER ! The hood had been repainted at some point. The big squiggle mark that can been seen on the hood is what
appears to have been made by someone who removed a couple deep scratches using an orbital sander. They burned through both layers
of paint and primed the entire hood with some spray can primer. If they had painted the hood the squiggle would appear as a big
wave in the hood.
|
|
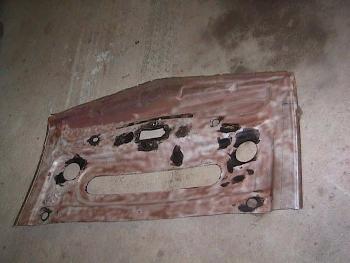 Here is the section that I cut out of the scrapped hood. The easiest way to do this is to remove the top skin from the hood and cut
down the piece required from the remaining metal.
Here is the section that I cut out of the scrapped hood. The easiest way to do this is to remove the top skin from the hood and cut
down the piece required from the remaining metal.
|
|
|
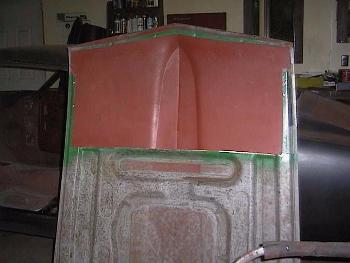 Here is the hood with the rusted section removed. I trimmed the patch down to the size I needed and then clamped it in place. I then
sprayed green paint around the edges and removed the patch. This left a perfect outline of the patch so that I could trim off the
extra metal. Since the patch was to be butt-welded in place I had to take off a little beyond the outline. With that done I cleaned and
primed the underside of the hood skin. This hood will never rust through from the inside now.
Here is the hood with the rusted section removed. I trimmed the patch down to the size I needed and then clamped it in place. I then
sprayed green paint around the edges and removed the patch. This left a perfect outline of the patch so that I could trim off the
extra metal. Since the patch was to be butt-welded in place I had to take off a little beyond the outline. With that done I cleaned and
primed the underside of the hood skin. This hood will never rust through from the inside now.
|
|
 The underside of the patch was sandblasted and coated with a weld through primer. When it was set in place I applied big beads of seam
sealer to the areas that the factory originally did when they attached the top and bottom pieces together. Here is a picture taken of
the patch after it was butt-welded in place and the weld was ground down.
The underside of the patch was sandblasted and coated with a weld through primer. When it was set in place I applied big beads of seam
sealer to the areas that the factory originally did when they attached the top and bottom pieces together. Here is a picture taken of
the patch after it was butt-welded in place and the weld was ground down.
|
|
 I applied a thin layer of filler to smooth out the imperfections and then primed it. Here it is after priming.
|
|
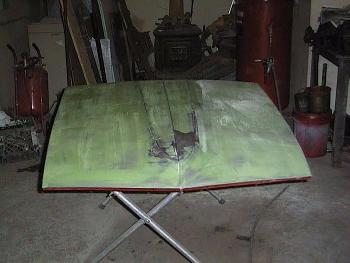 The top of the hood had a some small waves and dings. What I did was put a very thin coat of filler over the hood surface and
hand sanded the hood lighty using a big board sander.
The top of the hood had a some small waves and dings. What I did was put a very thin coat of filler over the hood surface and
hand sanded the hood lighty using a big board sander.
|
|
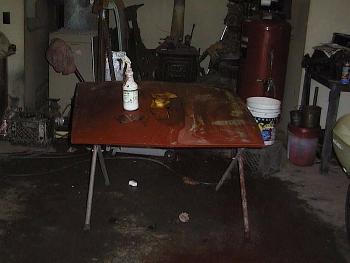 The hood was then primed and then paddle sanded with 220 grit paper to take out the last of the imperfections. Since hoods are
made out of one big sheet of metal they tend to be touchy when sanding. They like to bow in with the slightest amount of force.
This makes achieving a nice flat ripple free surface difficult.
The hood was then primed and then paddle sanded with 220 grit paper to take out the last of the imperfections. Since hoods are
made out of one big sheet of metal they tend to be touchy when sanding. They like to bow in with the slightest amount of force.
This makes achieving a nice flat ripple free surface difficult.
|
|
 Here is the hood after final priming. It will be sanded with 400 grit just prior to painting.
|