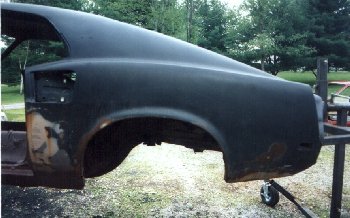
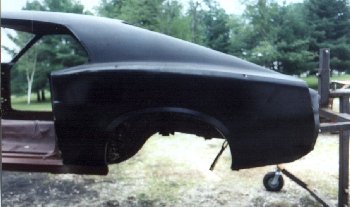
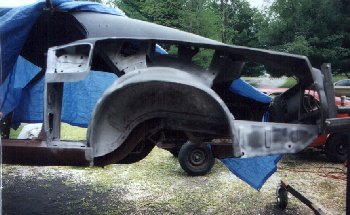
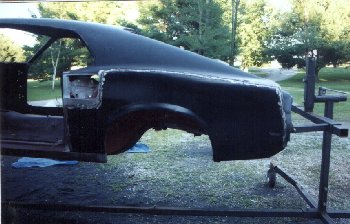
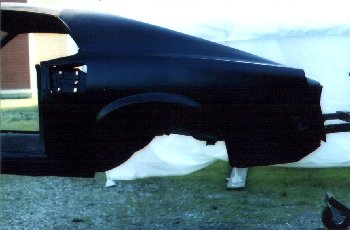
 Here is the left rear quarter in its original state. There was a badly repaired jamb in the front and ,of course,
the typical rust holes in the rear lower section.
Here is the left rear quarter in its original state. There was a badly repaired jamb in the front and ,of course,
the typical rust holes in the rear lower section.
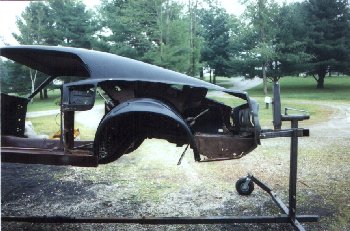
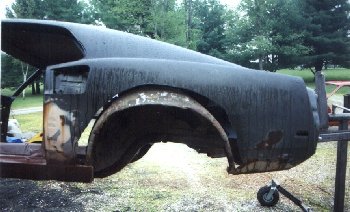 Just as I did with the right side, the first thing I did was cut-off just enough of the quarter to remove
the outer wheelhouse so that the new one could be installed. Why cut off so little ? This in done in order
to leave as much of the original quarter in place A) so that the new panel can be clamped in the exact location
and B) so that when the panels are cut, the vibration from the cutting is greatly reduced by having some much
metal to cut through.
Just as I did with the right side, the first thing I did was cut-off just enough of the quarter to remove
the outer wheelhouse so that the new one could be installed. Why cut off so little ? This in done in order
to leave as much of the original quarter in place A) so that the new panel can be clamped in the exact location
and B) so that when the panels are cut, the vibration from the cutting is greatly reduced by having some much
metal to cut through.
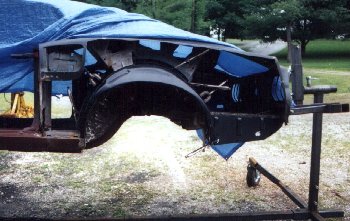
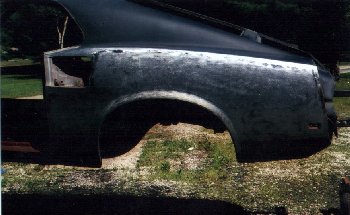
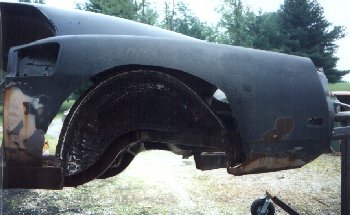 Here is a view with the outer wheelhouse removed. It should be noted that the lower rear section of the original
quarter was left in tact. This is needed to correctly align the new outer.
Here is a view with the outer wheelhouse removed. It should be noted that the lower rear section of the original
quarter was left in tact. This is needed to correctly align the new outer.
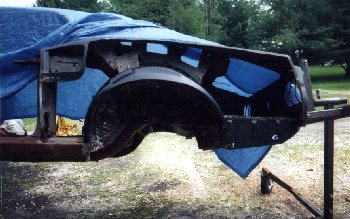
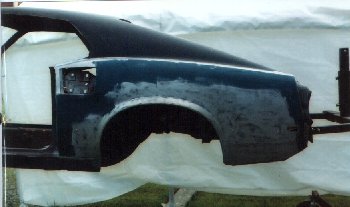
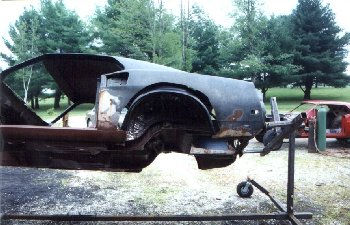 Again the next step was to temporarily install the outer wheelhouse. Here it is
clamped in place. Just like the other side, I had to trim off the section of the outer by the rocker and
weld on a piece from the original. Unlike what I did before, at no point did I remove the new outer.
Again the next step was to temporarily install the outer wheelhouse. Here it is
clamped in place. Just like the other side, I had to trim off the section of the outer by the rocker and
weld on a piece from the original. Unlike what I did before, at no point did I remove the new outer.
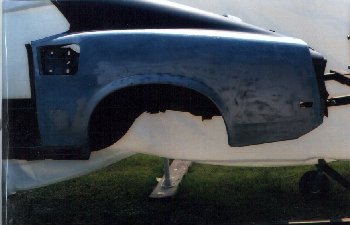
 With the wheelhouse clamped in its correct position it was time to prepare the quarter skin. As with the right side,
every edge was cut-off accept for the wheelhouse opening and the short section that welds to the rocker panel. The
quarter skin was carefully positioned, clamped and tack welded in a few places over the original quarter.
With the wheelhouse clamped in its correct position it was time to prepare the quarter skin. As with the right side,
every edge was cut-off accept for the wheelhouse opening and the short section that welds to the rocker panel. The
quarter skin was carefully positioned, clamped and tack welded in a few places over the original quarter.
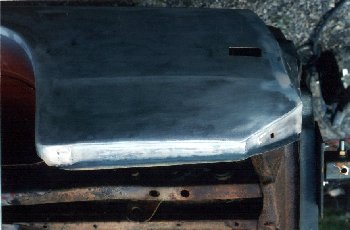
 Using the pneumatic panel cutting saw, I cut-out the old panel while simultaneously trimming the new one. Here is a
picture of what it looked like after the cutting. Notice that the scoop area and the rusted out lower trunk extension.
Using the pneumatic panel cutting saw, I cut-out the old panel while simultaneously trimming the new one. Here is a
picture of what it looked like after the cutting. Notice that the scoop area and the rusted out lower trunk extension.
 Using the original as a template, I trimmed the new lower trunk extension. I then cut-off the old one and
welded in a new one. Extra care was taken to make sure that the rear portion of the outer wheelhouse was
clamped in the correct position. Here's the outer wheelhouse and lower extension clamped in place, just before welding.
Using the original as a template, I trimmed the new lower trunk extension. I then cut-off the old one and
welded in a new one. Extra care was taken to make sure that the rear portion of the outer wheelhouse was
clamped in the correct position. Here's the outer wheelhouse and lower extension clamped in place, just before welding.
 At this point the new outer wheelhouse and lower trunk extension were welded in place.
 With the welding done I sandblasted all visible surfaces.
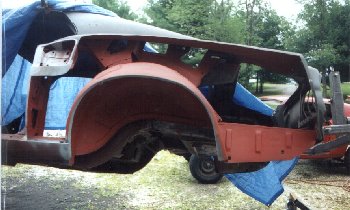 Everything was then primed as seen here. The wheelhouse lip was primed using zinc weld-through primer.
 The new quarter skin was clamped in place and slowly tack welded every inch or so. Just as before, I
used visegripes and some of the old saw blades to set the spacing between the new panel and the car.
Here it is fulley tack welded. This process took about 15 minutes.
The new quarter skin was clamped in place and slowly tack welded every inch or so. Just as before, I
used visegripes and some of the old saw blades to set the spacing between the new panel and the car.
Here it is fulley tack welded. This process took about 15 minutes.
 Once the spot welding was complete, it was just a matter of carefully filling the gap by stitch welding. This is where the
greatest risk of warping the panel occurs. With the heat level at 3 on my MIG welder and by jumping around instead of just
welding straight across the panel I avoided this problem.
Once the spot welding was complete, it was just a matter of carefully filling the gap by stitch welding. This is where the
greatest risk of warping the panel occurs. With the heat level at 3 on my MIG welder and by jumping around instead of just
welding straight across the panel I avoided this problem.
 Once the welding was complete, the welds were ground down inside and outside. This time I just used sanding disks on my
grinder to clean the welds. The sanding disks are made out of strips of sandpaper aligned in a circle. They are
great for cleaning up spot welds and for taking paint off quickly. This is much safer then using a stone since there is
a lesser change of warping the panel.
Once the welding was complete, the welds were ground down inside and outside. This time I just used sanding disks on my
grinder to clean the welds. The sanding disks are made out of strips of sandpaper aligned in a circle. They are
great for cleaning up spot welds and for taking paint off quickly. This is much safer then using a stone since there is
a lesser change of warping the panel.
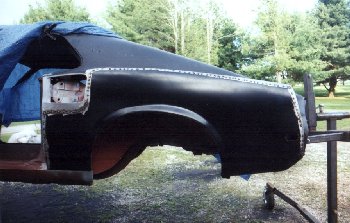
 With the welds cleaned up I used an orbital sander to remove all of the factory primer from the panel.
At this point it takes a close inspection to tell that the panel has been replaced.
With the welds cleaned up I used an orbital sander to remove all of the factory primer from the panel.
At this point it takes a close inspection to tell that the panel has been replaced.
 The next thing to do was the filler work to fill the imperfections. I used Evercoat fiberglass filler for the first coat and then
Evercoat polyester filler to fill the minor scratches.
The next thing to do was the filler work to fill the imperfections. I used Evercoat fiberglass filler for the first coat and then
Evercoat polyester filler to fill the minor scratches.
 Here is a view as I started to take down the filler. I use a 16 inch airboard. Don't be fooled by how much filler there appears to be.
The coat is paper thin at its thickest. It is feathered way out so that the body line appears correct.
Here is a view as I started to take down the filler. I use a 16 inch airboard. Don't be fooled by how much filler there appears to be.
The coat is paper thin at its thickest. It is feathered way out so that the body line appears correct.
 Here is a view of the lower rear section. On the previous page I omitted a discussion about this area, mainly because I didn't have
a picture. This is a dead giveaway that the quarters have been changed. Thisrecessed area is not reproduced in the repo quarters.
I had to make this section for both sides myself using the rusted out section as a template. I was lucky enough to have the back
section, where the rear valance panel is attached, still intact. Though I could reproduce it, this area needs to be correct so that
the valance fits correctly.
Here is a view of the lower rear section. On the previous page I omitted a discussion about this area, mainly because I didn't have
a picture. This is a dead giveaway that the quarters have been changed. Thisrecessed area is not reproduced in the repo quarters.
I had to make this section for both sides myself using the rusted out section as a template. I was lucky enough to have the back
section, where the rear valance panel is attached, still intact. Though I could reproduce it, this area needs to be correct so that
the valance fits correctly.
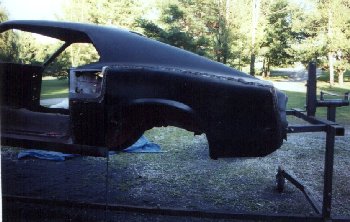
 With a thick coat of epoxy primer the last quarter panel work was completed.
After completing these quarters I replaced a pair on my cousin, Kris Luce's, 1970 Mach I as payment for the rotisserie. It took me 24 hours to replace his quarters, though I did not reproduce the lower section on his. You can see Kris's car here Kris's Website. Look for Jezabelle.