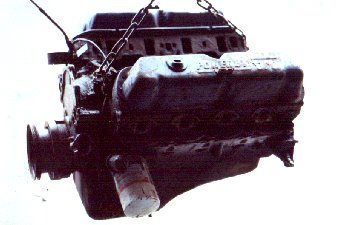
 Here is the engine I was lucky enough to locate. It came out of a 1969 Mustang coupe
about 20 years ago and has been in storage ever since. I got if for $250.
Here is the engine I was lucky enough to locate. It came out of a 1969 Mustang coupe
about 20 years ago and has been in storage ever since. I got if for $250.
|
|
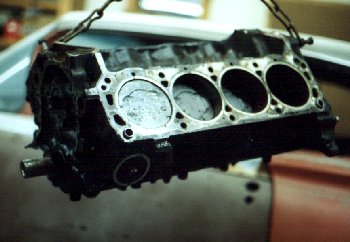 With the heads off, the corrosion on the cylinder walls is visible. With the pistons out
I gave the cylinders a quick honing just to see how bad the walls were. They cleanedup rather
well, but I'll still need to get a local machinist's opinion.
With the heads off, the corrosion on the cylinder walls is visible. With the pistons out
I gave the cylinders a quick honing just to see how bad the walls were. They cleanedup rather
well, but I'll still need to get a local machinist's opinion.
|
|
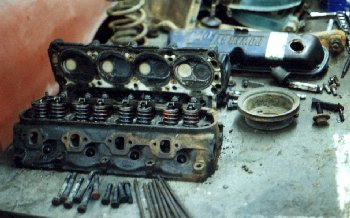 Here's are the heads ready to be sent out for rebuilding.
|
|
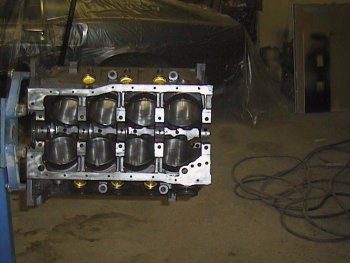 Here's the block back from the machine shop. The cylinders were bored out 0.030, new frost plugs and cam
bearings where installed.
Here's the block back from the machine shop. The cylinders were bored out 0.030, new frost plugs and cam
bearings where installed.
|
|
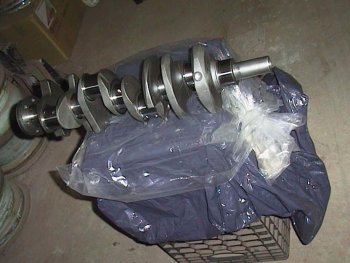 Here's the crank which had to be turned 0.010.
|
|
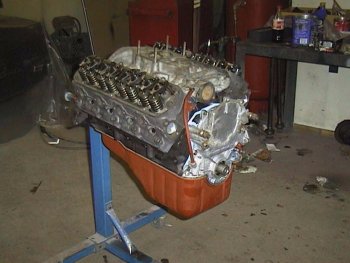 Here's the engine partially assembled. The heads where shaved and received new valves and springs.
|
|
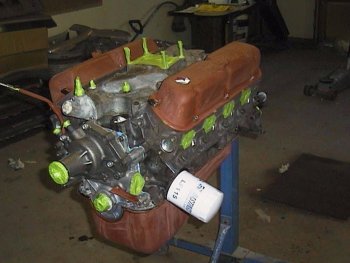 Here it is all masked up and ready for priming. The oil filter is a cheap off the shelf part. I painted it with the engine.
Once the engine is broken in I will replace it with a reproduction Autolite filter. Originally the factory would put on Autolite filters
that where painted blue (off the engine) and were stamped with just a part number. They were replaced with the familiar white filter at
the time of the first oil change.
Here it is all masked up and ready for priming. The oil filter is a cheap off the shelf part. I painted it with the engine.
Once the engine is broken in I will replace it with a reproduction Autolite filter. Originally the factory would put on Autolite filters
that where painted blue (off the engine) and were stamped with just a part number. They were replaced with the familiar white filter at
the time of the first oil change.
|
|
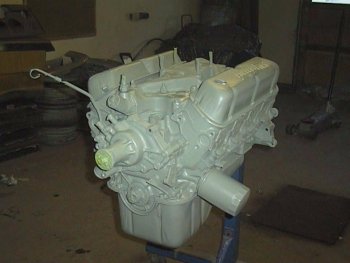 With a new Ford water pump installed and with the valve covers (with wire clips) attached I primed the engine
with epoxy primer.
With a new Ford water pump installed and with the valve covers (with wire clips) attached I primed the engine
with epoxy primer.
|
|
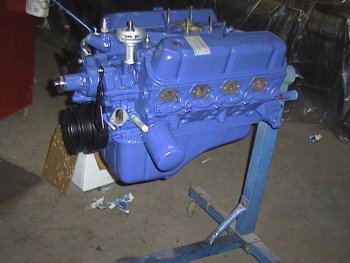 Here it is all painted. I used Plasti-Kote Ford Blue #224. The engine is a darker blue than the picture shows. Notice that
I've installed the emissions decal and some of the brackets and distributor.
Here it is all painted. I used Plasti-Kote Ford Blue #224. The engine is a darker blue than the picture shows. Notice that
I've installed the emissions decal and some of the brackets and distributor.
|
|
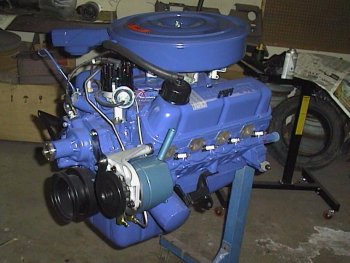 Here it is with some more goodies installed. I took this picture while I was waiting for the exhaust manifolds to finish
baking in the oven.
Here it is with some more goodies installed. I took this picture while I was waiting for the exhaust manifolds to finish
baking in the oven.
|
|
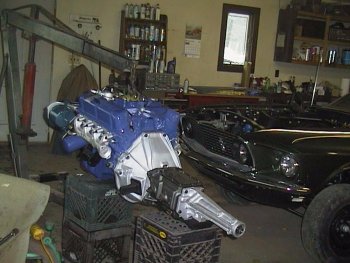 This picture was taken just before I installed the engine. As you can see the newly rebuilt transmission is installed. I removed the
carburetor and installed an engine pull plate. I had to level the carb spacer installed since the mounting bolts do not have threads far
enough down to mount the plate directly to the intake.
This picture was taken just before I installed the engine. As you can see the newly rebuilt transmission is installed. I removed the
carburetor and installed an engine pull plate. I had to level the carb spacer installed since the mounting bolts do not have threads far
enough down to mount the plate directly to the intake.
|
|
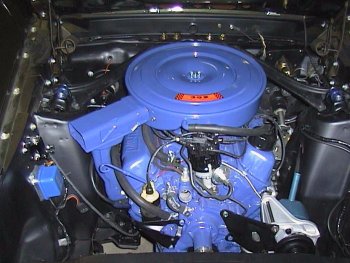
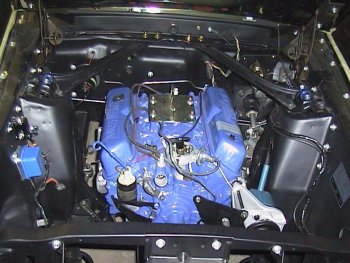 Here it is back home in the engine compartment. The installation went rather smoothly. It only took the two of us 10 minutes. When the
engine was on the hoist the transmission dropped really low in the back. I had a helper lift the transmission, which required little effort,
so that the engine was level. Then we pushed the hoist over the engine compartment. Then it was just a matter of gradually lowering the hoist,
moving the hoist towards the rear of the car and letting the transmission dip low so that it would fit into the transmission tunnel. This was
done in gradual steps with lots of teeth grinding in fear of dropping the whole thing.
Here it is back home in the engine compartment. The installation went rather smoothly. It only took the two of us 10 minutes. When the
engine was on the hoist the transmission dropped really low in the back. I had a helper lift the transmission, which required little effort,
so that the engine was level. Then we pushed the hoist over the engine compartment. Then it was just a matter of gradually lowering the hoist,
moving the hoist towards the rear of the car and letting the transmission dip low so that it would fit into the transmission tunnel. This was
done in gradual steps with lots of teeth grinding in fear of dropping the whole thing.
|
|
 At last it was time to complete the re-assembly of the engine compartment components.
|