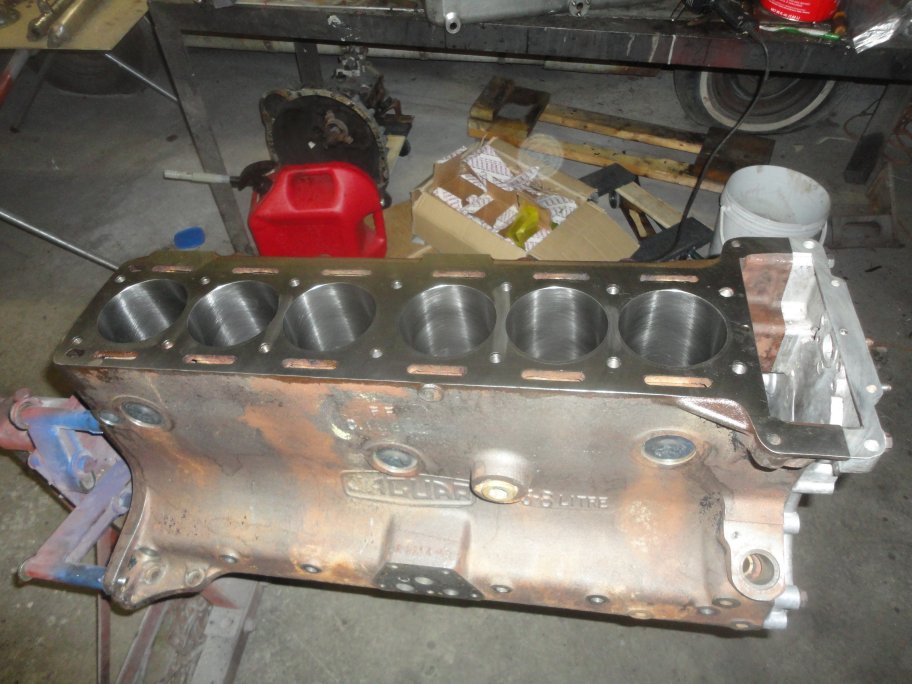
 1) Here is the block when I got it back from the machine shop the first time. The cylinders were bored 0.020" using new Mahle 0.020" pistons as a reference
to set the correct clearance. The clearance spec is actually stamped on the pistons which also come with the rings installed (cost $500).
1) Here is the block when I got it back from the machine shop the first time. The cylinders were bored 0.020" using new Mahle 0.020" pistons as a reference
to set the correct clearance. The clearance spec is actually stamped on the pistons which also come with the rings installed (cost $500). |
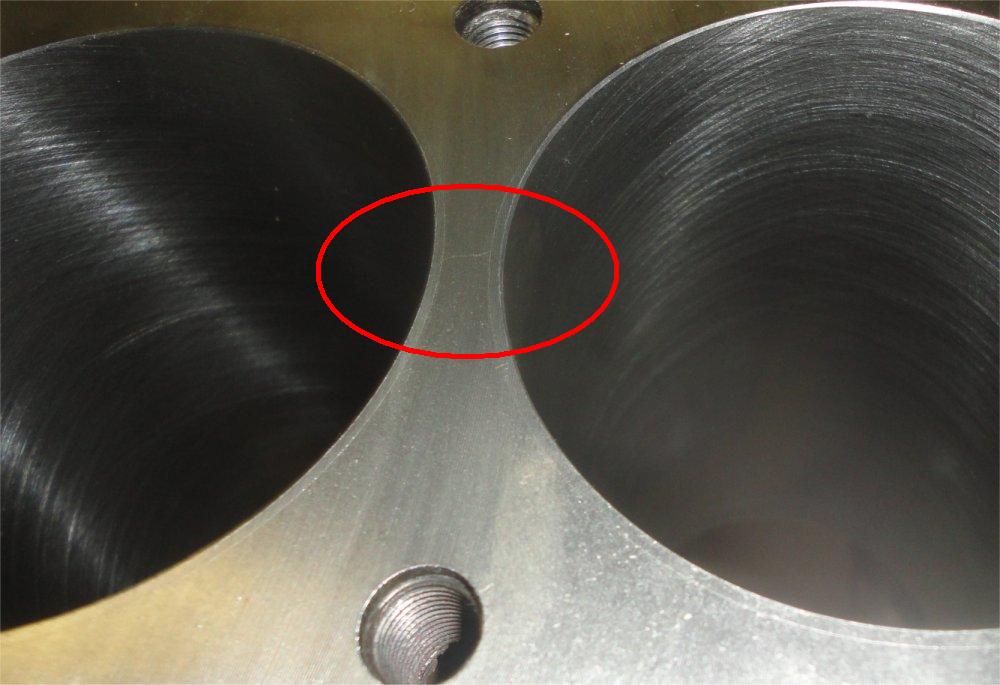 2) What I discovered after the fact was that there were cracks between the cylinder walls in between 3 different cylinder locations. This is a common problem with the 3.8L and 4.2L engines.
If you are going to rebuild a 6 cylinder Jaguar engine, you will need to check for cracks.
2) What I discovered after the fact was that there were cracks between the cylinder walls in between 3 different cylinder locations. This is a common problem with the 3.8L and 4.2L engines.
If you are going to rebuild a 6 cylinder Jaguar engine, you will need to check for cracks.
|
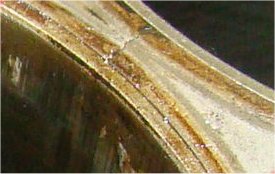 3) Here is a close-up image of a typical crack from another block. The light gray lines are where the metal head gasket seals between the cylinders. The darker areas are actually
exposed to the combustion chamber. As you can see the crack is partially inside the combustion chambers.
3) Here is a close-up image of a typical crack from another block. The light gray lines are where the metal head gasket seals between the cylinders. The darker areas are actually
exposed to the combustion chamber. As you can see the crack is partially inside the combustion chambers.
|
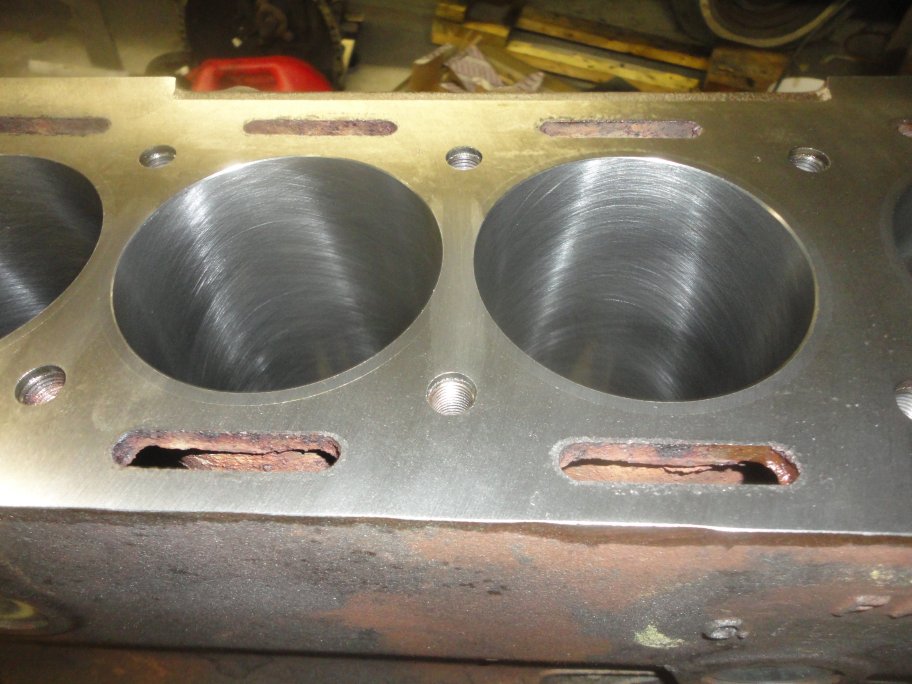
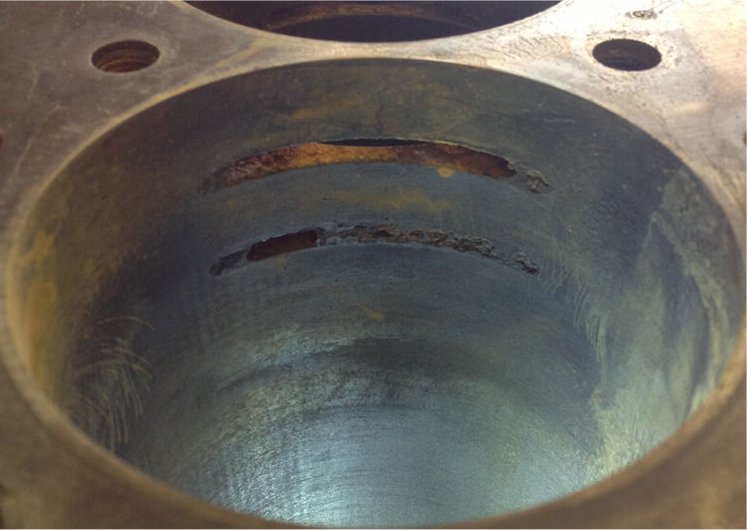 4) Here is an image, also from a block that has had is cylinder liner (sleeve) removed. This block also has a crack in the same location. The first thing you may notice
is that there are slits cut into the walls. These are factory cut passages that allow coolent to flow around the cylinder. Jaguar had to do this because the cylinders were placed
very close together.
4) Here is an image, also from a block that has had is cylinder liner (sleeve) removed. This block also has a crack in the same location. The first thing you may notice
is that there are slits cut into the walls. These are factory cut passages that allow coolent to flow around the cylinder. Jaguar had to do this because the cylinders were placed
very close together.Look closely and you will see that the crack goes all the way down to the first slit. This means that coolant can seep up the crack and into the combustion chamber! |
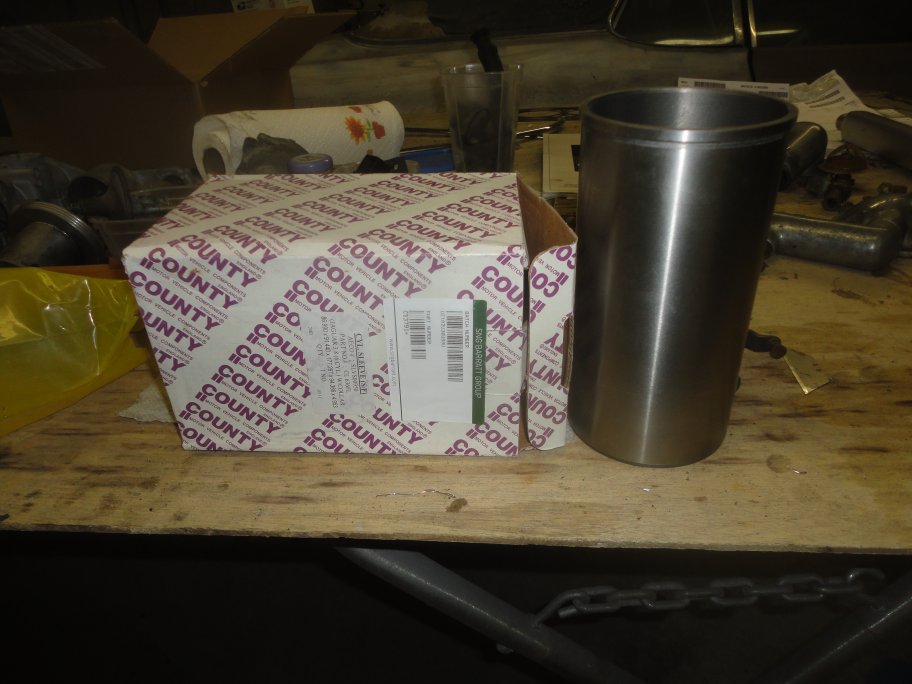 5) There are couple fixes for this. Some machine shops will actually tap a hole inbetween the cylinders and loctite a screw in the hole.Then they just machine the screw down to the deck. The other method, which is
prefered, is to replace the liners with these flanged liners (Top Hat Liners). A set of 6 cost me $225 from SNG Barratt. The flange at the top creates a wider surface for the head gasket to seal
and also prevents the cylinder liner from dropping.
5) There are couple fixes for this. Some machine shops will actually tap a hole inbetween the cylinders and loctite a screw in the hole.Then they just machine the screw down to the deck. The other method, which is
prefered, is to replace the liners with these flanged liners (Top Hat Liners). A set of 6 cost me $225 from SNG Barratt. The flange at the top creates a wider surface for the head gasket to seal
and also prevents the cylinder liner from dropping.
|
 6) Here is my block back from the machine shop with the flanged liners installed (I was not charged for the installation). There is just a slight space in between the liners were the crack is evident. However, the crack was
sealed with loctite before the liners went in and the head gasket seals beyond the crack. An extra benefit of installing new liners is that the slits between the cylinders can be cleaned out. The slits typically
get filled with crud, which reduces cooling. Crud can be seen partially blocking the bottom slit in the picture in step 4.
6) Here is my block back from the machine shop with the flanged liners installed (I was not charged for the installation). There is just a slight space in between the liners were the crack is evident. However, the crack was
sealed with loctite before the liners went in and the head gasket seals beyond the crack. An extra benefit of installing new liners is that the slits between the cylinders can be cleaned out. The slits typically
get filled with crud, which reduces cooling. Crud can be seen partially blocking the bottom slit in the picture in step 4.Also, since the flanged liners come in one size the block can be bored back to its standard size. Since I was stuck with the 0.020" pistons, having installed the connecting rods on them, I had the block bored to 0.020". |
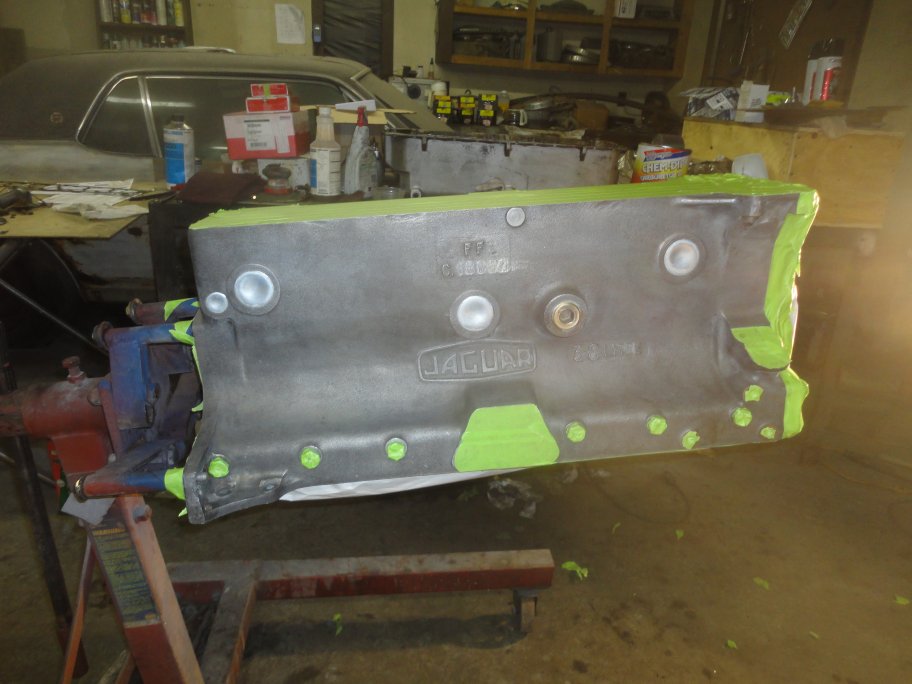
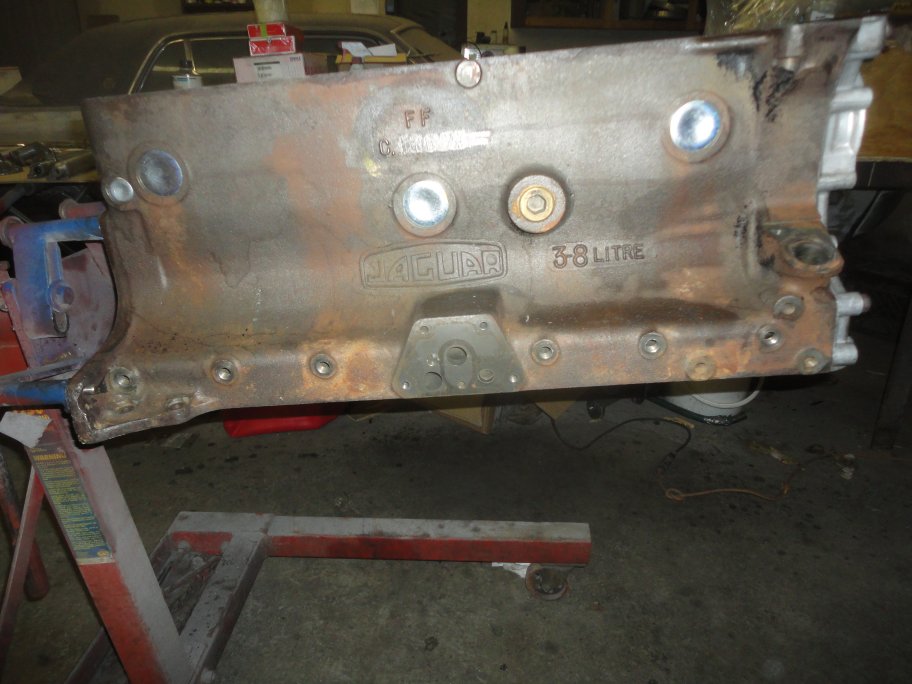 7) With the block issues out of the way, painting came next. The block was not quite ready for paint. You will note that the timing cover is installed.
It needed to be installed for decking the block. If it was not installed for decking, the head would not sit flat.
7) With the block issues out of the way, painting came next. The block was not quite ready for paint. You will note that the timing cover is installed.
It needed to be installed for decking the block. If it was not installed for decking, the head would not sit flat.
|
 8) I first wirewheeled the block to get off the worst of the surface rust. I then scrubbed the block with phoshoric acid and a scuff pad. It was then wiped
down with Wax & Grease Remover.
8) I first wirewheeled the block to get off the worst of the surface rust. I then scrubbed the block with phoshoric acid and a scuff pad. It was then wiped
down with Wax & Grease Remover.
|
 9) Areas of concern were masked off.
|
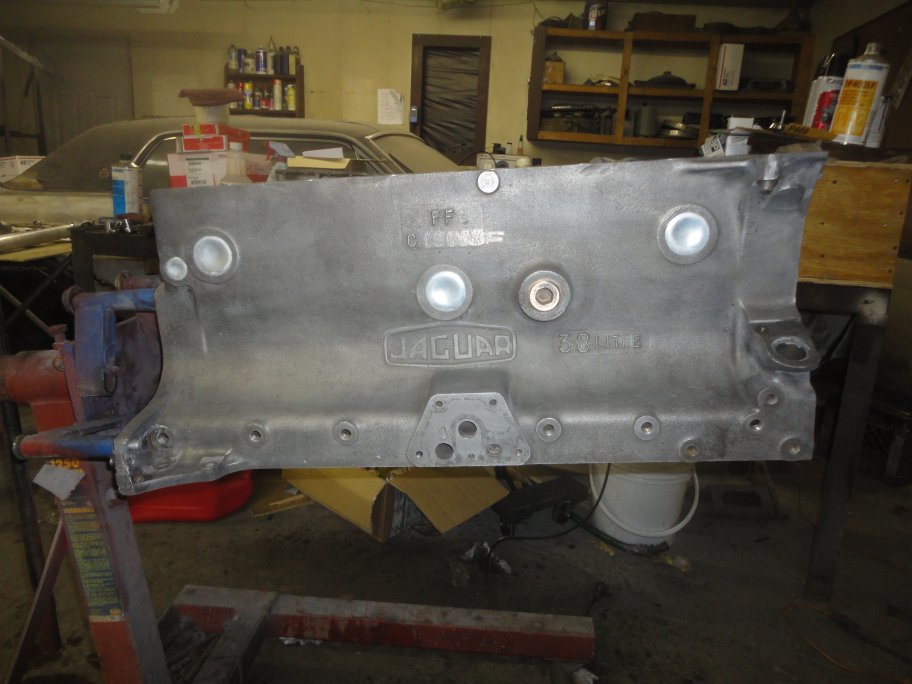
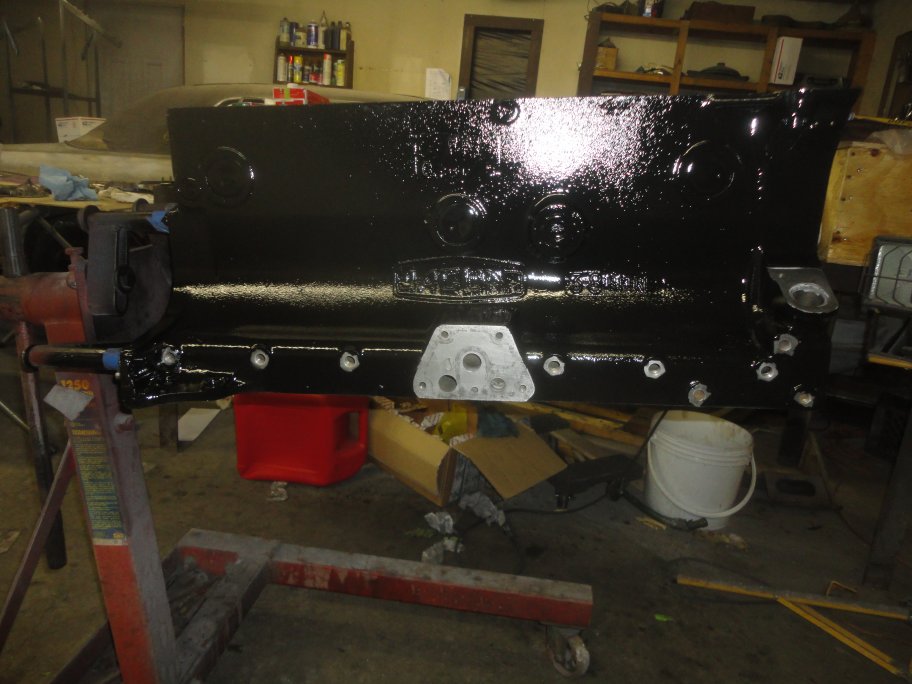 10) The block was painted with Krylon Black engine paint. This is what I looked like a few days later.
|
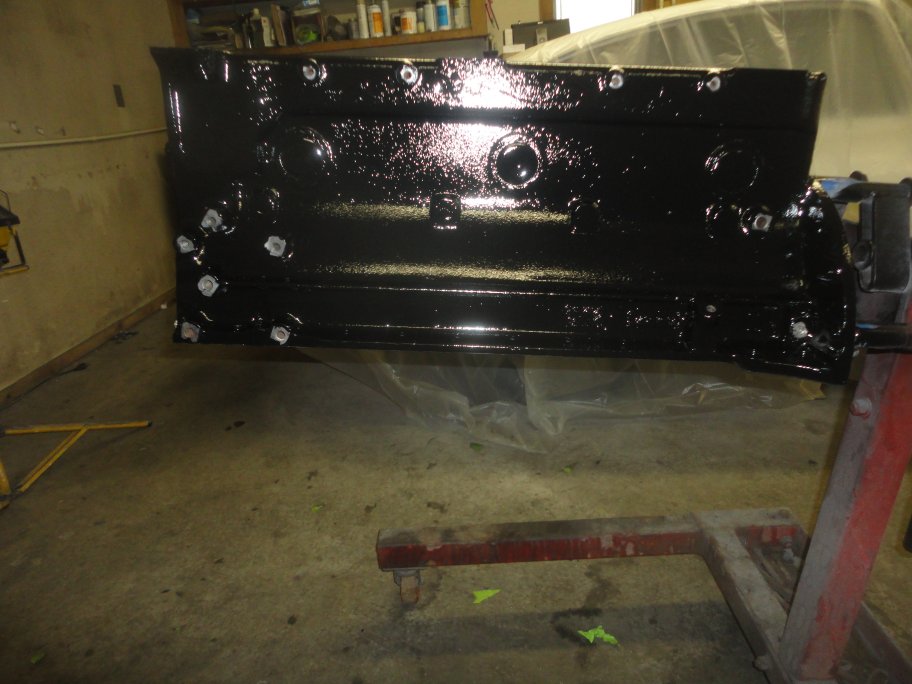 11) On the opposite side you can see that I had masked over the holes for the engine mount, generator mount, oil pipe and coolant plugs. This was done to
keep the treads clean for easier assembly.
11) On the opposite side you can see that I had masked over the holes for the engine mount, generator mount, oil pipe and coolant plugs. This was done to
keep the treads clean for easier assembly.
|
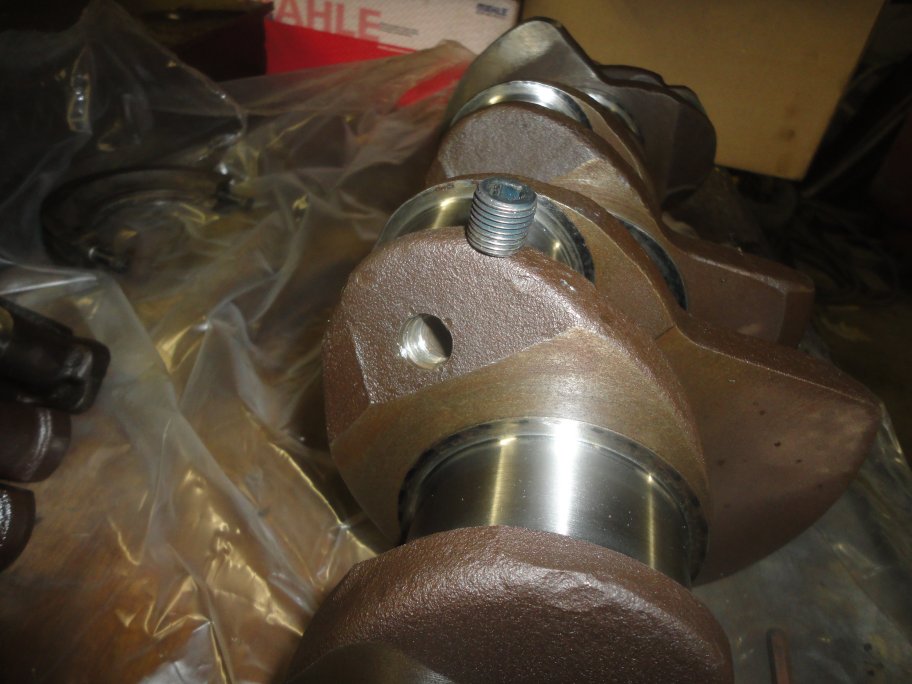 12) The crank had been turned 0.010" and was balanced. I had the plugs pulled out of the crack so that the oil passages could be cleaned out by the machine shop.
Here is a new plug ready to go in.
12) The crank had been turned 0.010" and was balanced. I had the plugs pulled out of the crack so that the oil passages could be cleaned out by the machine shop.
Here is a new plug ready to go in.
|
 13) The plugs have threadlock on them and were difficult to install. The factory had put 4 tick marks on the crank so that the plugs would not back out. I did the same.
|