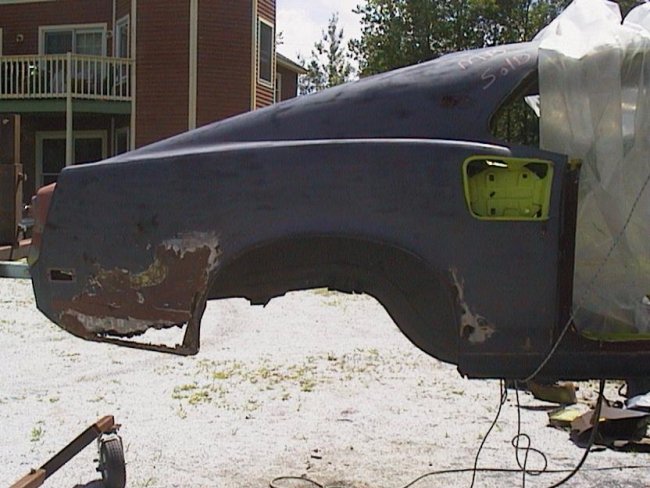
 Here is the right rear quarter panel after I removed all of the filler. You can see from this picture that you can actually see right through the panel.
This panel had been repaired at least twice in its past. The last time the the hole has cover with window screen that was screwed in place and then it was
buried in bondo.
Here is the right rear quarter panel after I removed all of the filler. You can see from this picture that you can actually see right through the panel.
This panel had been repaired at least twice in its past. The last time the the hole has cover with window screen that was screwed in place and then it was
buried in bondo.
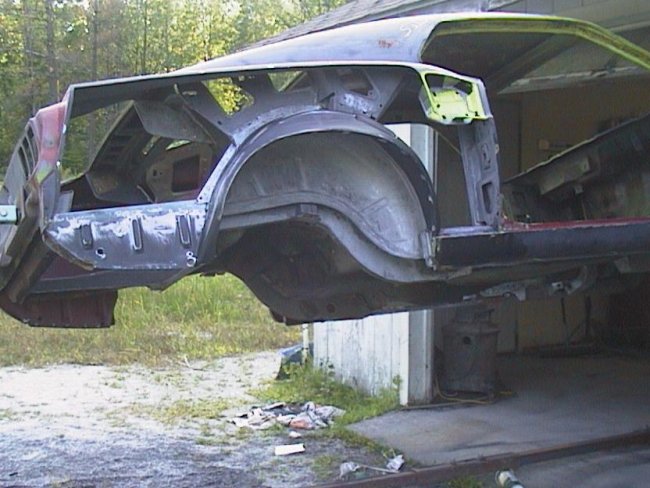
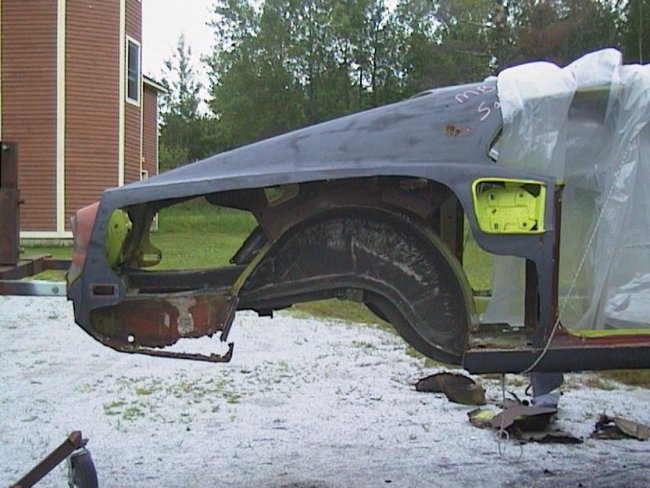 As with the other side, the majority of the panel was cut-out along with the outer wheel well. From this picture you can see that a major portion
of the lower trunk extension was rotted away. This is a good point to begin the process of replacing the lower trunk extension, which you can see
here
As with the other side, the majority of the panel was cut-out along with the outer wheel well. From this picture you can see that a major portion
of the lower trunk extension was rotted away. This is a good point to begin the process of replacing the lower trunk extension, which you can see
here
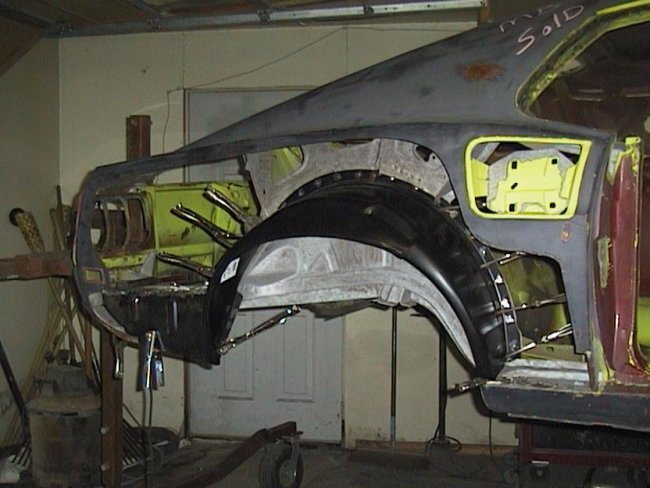
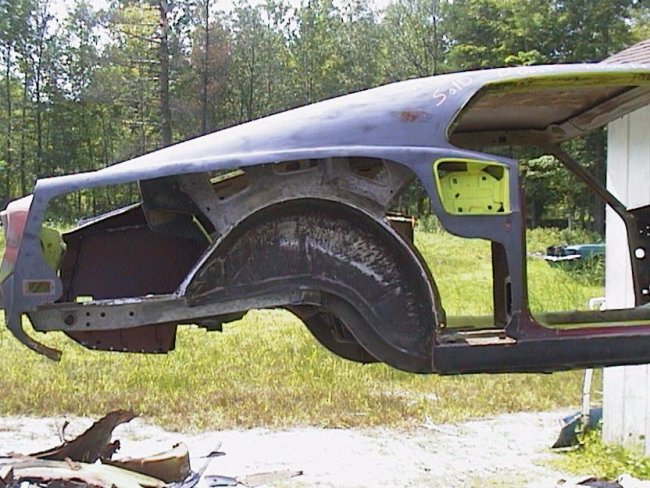 In this picture the remainder of the outer wheel well has been removed and lower trunk extension has been cut off. Prior to sandblasting the wheel well undercoating
should be removed. Depending on how brittle it is, it can either be scraped off or a proprane torch can be used to soften it up first. There are a few chemical products on the market
that can be used to soften it up. I've found that cheap lacquer thinner works pretty good if you wet down the undercoating and let it sit for a few moments.
In this picture the remainder of the outer wheel well has been removed and lower trunk extension has been cut off. Prior to sandblasting the wheel well undercoating
should be removed. Depending on how brittle it is, it can either be scraped off or a proprane torch can be used to soften it up first. There are a few chemical products on the market
that can be used to soften it up. I've found that cheap lacquer thinner works pretty good if you wet down the undercoating and let it sit for a few moments.
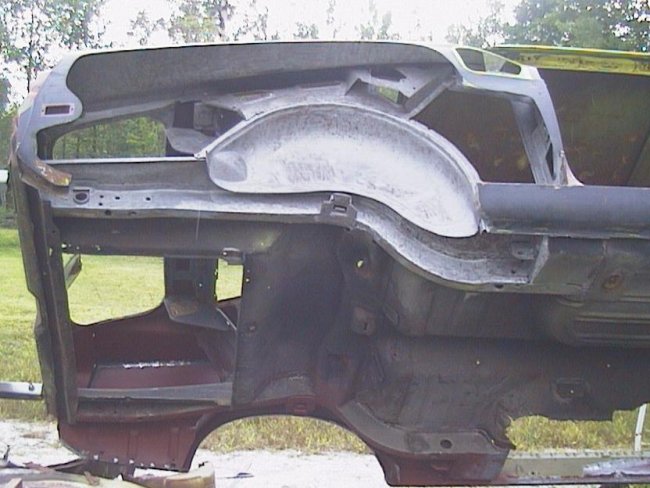 Here the sandblasting has been completed. It is not suprising that sandblasting uncovers rust holes that were hidden by the paint or body filler. In this case
sandblasting uncovered a hole at the bottom of the lower door post. This is a very typical rust area for Mustangs. This must be taken care of prior to replacing
the quarter panel. This repair is describe at the bottom of the page here
Here the sandblasting has been completed. It is not suprising that sandblasting uncovers rust holes that were hidden by the paint or body filler. In this case
sandblasting uncovered a hole at the bottom of the lower door post. This is a very typical rust area for Mustangs. This must be taken care of prior to replacing
the quarter panel. This repair is describe at the bottom of the page here
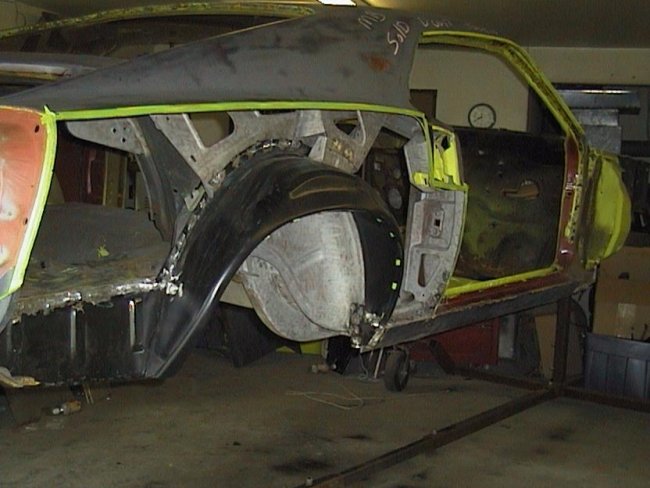
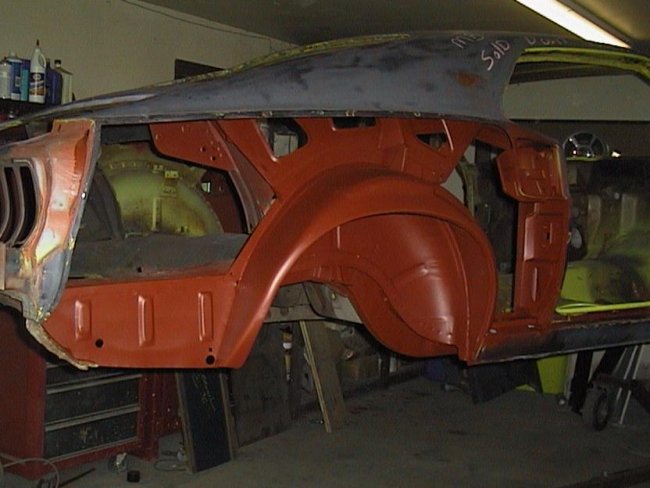
 Here the new lower trunk extension has been butt-welded in place, but not trimmed since it has not been determined where it
should be trimmed. Unlike the other side, the repo lower trunk extension did not have the holes drilled in it for the drain
plug or the reverse light wires. Here the new outer wheel well has just been fitted in place. Again the new quarter skin was used to
adjust the outer wheel well. A lot of twisting and adjustment had to be made to the lower rear portion of it to get it to fit right.
Once satisfied the outer wheel well alignment, it is welded in place. Though not shown here, the brace the attaches to the top of the
wheel well is welded in place.
Here the new lower trunk extension has been butt-welded in place, but not trimmed since it has not been determined where it
should be trimmed. Unlike the other side, the repo lower trunk extension did not have the holes drilled in it for the drain
plug or the reverse light wires. Here the new outer wheel well has just been fitted in place. Again the new quarter skin was used to
adjust the outer wheel well. A lot of twisting and adjustment had to be made to the lower rear portion of it to get it to fit right.
Once satisfied the outer wheel well alignment, it is welded in place. Though not shown here, the brace the attaches to the top of the
wheel well is welded in place.
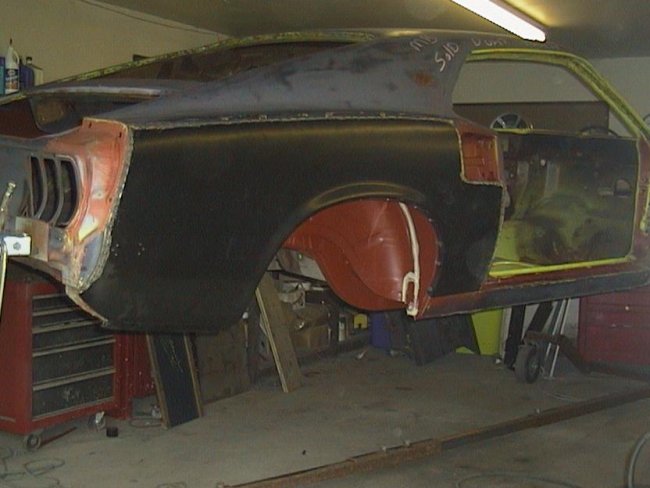
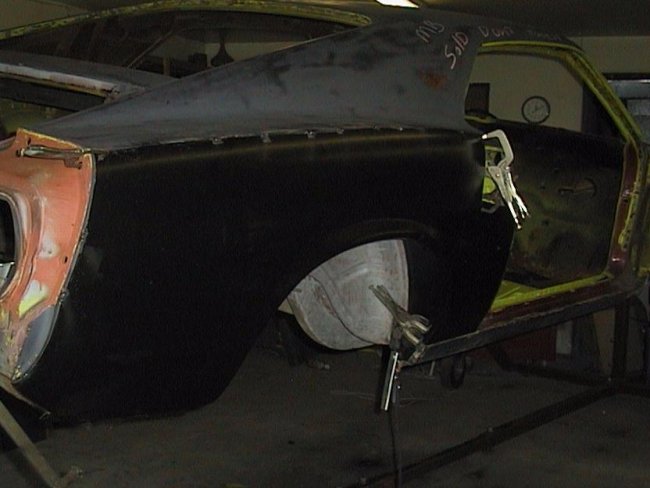 At this point the rust hole at the bottom of the door post has been repaired. With that out of the way the new quarter skin can be
clamped and tack-welded in place. Again, just like the other side, the holes for the side marker light needs to be drilled before
any cutting is done.
At this point the rust hole at the bottom of the door post has been repaired. With that out of the way the new quarter skin can be
clamped and tack-welded in place. Again, just like the other side, the holes for the side marker light needs to be drilled before
any cutting is done.
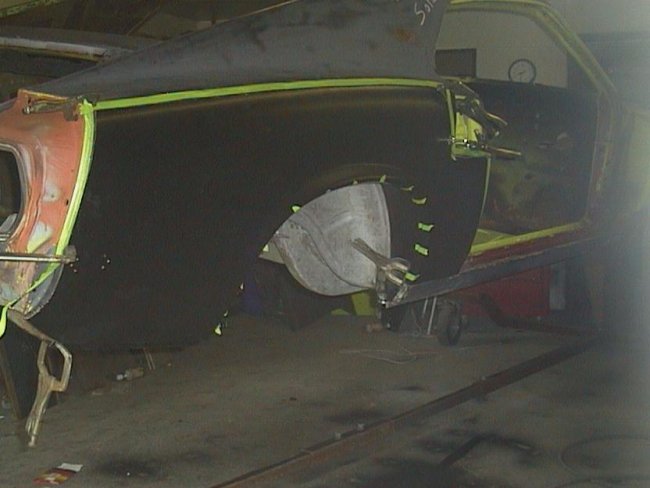 Here the perimeter of the quarter panel has been marked off using masking tape as a guide for the cutting process.
 Here the cutting has been completed and the panel and scrap has been removed.
 The next step is to prepare the inside of the quarter for priming. First the holes on the lower trunk extension are drilled for the
drain plug and the reverse light wires. Then the welds for the new lower quarter extension and the plug welds for the outer wheel well
are filled on both sides using a fine chopped fiberglass filler since this area can not be reached after the new quarter panel is welded in.
A scuff pad and 220 grit sandpaper are used to sand all internal surfaces. The black primer on the new lower trunk extension and the new
outer wheel well need to be sanded down as well.
The next step is to prepare the inside of the quarter for priming. First the holes on the lower trunk extension are drilled for the
drain plug and the reverse light wires. Then the welds for the new lower quarter extension and the plug welds for the outer wheel well
are filled on both sides using a fine chopped fiberglass filler since this area can not be reached after the new quarter panel is welded in.
A scuff pad and 220 grit sandpaper are used to sand all internal surfaces. The black primer on the new lower trunk extension and the new
outer wheel well need to be sanded down as well.
 Red Epoxy primer is applied to all visible surfaces. I use red becuase the factory used red. Prior to priming all surfaces need to be wiped
down using a Wax&Grease Removed (DX330). A tack rag should be used to pick up and residual lint from the wipe down process.
Red Epoxy primer is applied to all visible surfaces. I use red becuase the factory used red. Prior to priming all surfaces need to be wiped
down using a Wax&Grease Removed (DX330). A tack rag should be used to pick up and residual lint from the wipe down process.
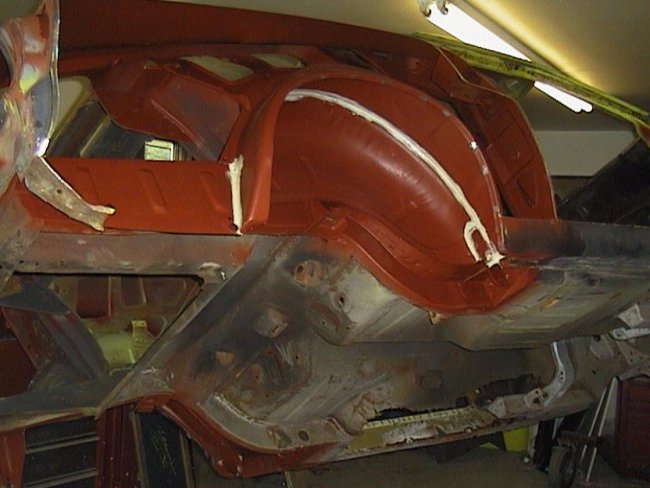 As with the left side, seam sealer (3M 08505 Fast&Firm ) is applied to the internal seams prior to welding the new quarter in place.
 The quarter panel installation begins with the panel being clamped in place. Depending on how well it is clamped, the quarter should be welded
along the lip of the wheel well first. Then the gap should be tacked every inch along the perimeter of the new panel. In this picture the first
round of butt-welding has been completed.
The quarter panel installation begins with the panel being clamped in place. Depending on how well it is clamped, the quarter should be welded
along the lip of the wheel well first. Then the gap should be tacked every inch along the perimeter of the new panel. In this picture the first
round of butt-welding has been completed.
 Here all of the welding has been complete except for the lower rear indentation which needs to be reproduced on this car. If you wish to learn about
this repair it is describe on the next page here.
Here all of the welding has been complete except for the lower rear indentation which needs to be reproduced on this car. If you wish to learn about
this repair it is describe on the next page here.
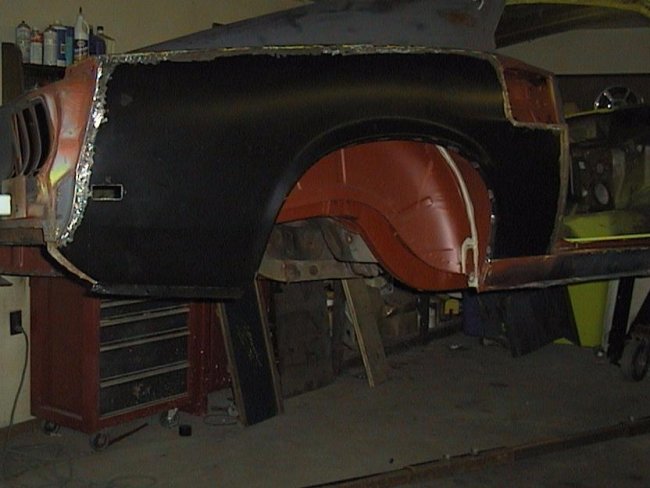
 UPDATE (beginning 9/13/05): Once I completed work on the LH quarter I repeated the process with the Right side. Here the quarter has received a coat of
lead over the entire butt-weld joint. I found that I used a lot less lead doing this side then the other.
UPDATE (beginning 9/13/05): Once I completed work on the LH quarter I repeated the process with the Right side. Here the quarter has received a coat of
lead over the entire butt-weld joint. I found that I used a lot less lead doing this side then the other.
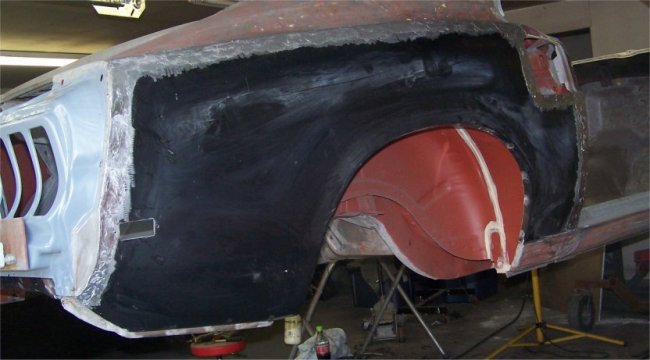
 Here the excess lead has been removed and the whole panel has been hit with an orbital sander.
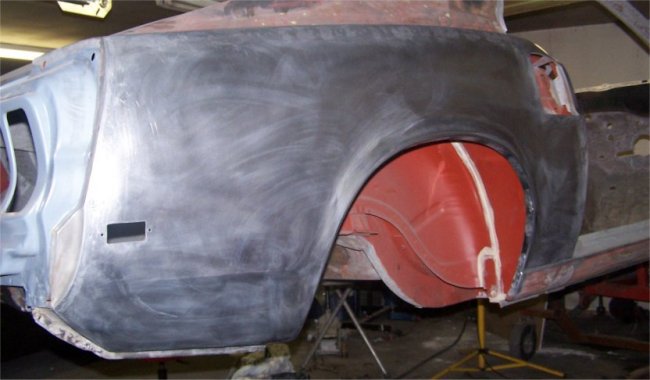
 As with the other side, I used plastic filler to smooth out the imperfections. Again I had to fix the roof seam that the factory did.
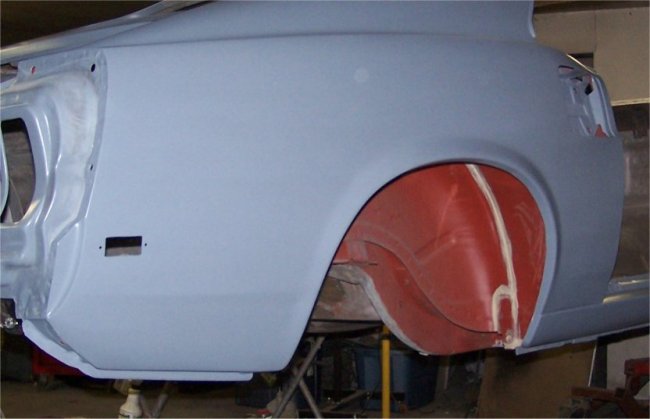 Here is the quarter panel after it has been primed with epoxy primer. Now on to the Floors.....
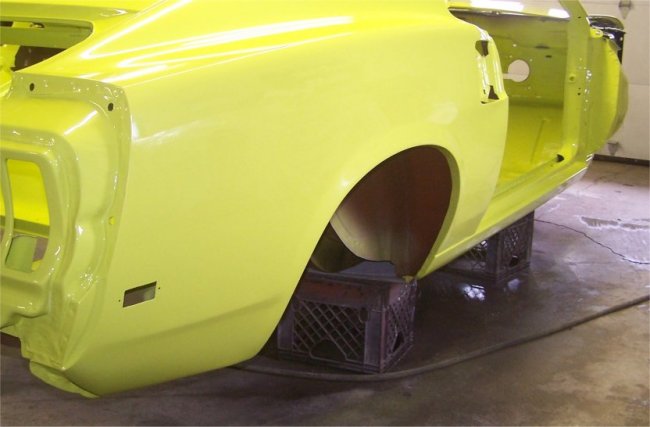 Here is the quarter panel after it has been painted, sanded and buffer.
 A common area for rust is at the lower door post where it meets the rocker panel. This needs to be repaired prior to the quarter panel installation.
The first thing that is done is that the lower 4 or 5 inches of the remaining original quarter panel needs to be removed. This must be done carefully
since the piece needs to be welded back in place. Then the rusted area is cut out and a new piece is fabricated and welded in. In this picutre the new pieces is already
welded in and the weld has been ground down. Sorry, no pictures on how to do this, but as you read deeper into these restoration pages you'll see how to figure it
out for yourself.
A common area for rust is at the lower door post where it meets the rocker panel. This needs to be repaired prior to the quarter panel installation.
The first thing that is done is that the lower 4 or 5 inches of the remaining original quarter panel needs to be removed. This must be done carefully
since the piece needs to be welded back in place. Then the rusted area is cut out and a new piece is fabricated and welded in. In this picutre the new pieces is already
welded in and the weld has been ground down. Sorry, no pictures on how to do this, but as you read deeper into these restoration pages you'll see how to figure it
out for yourself.
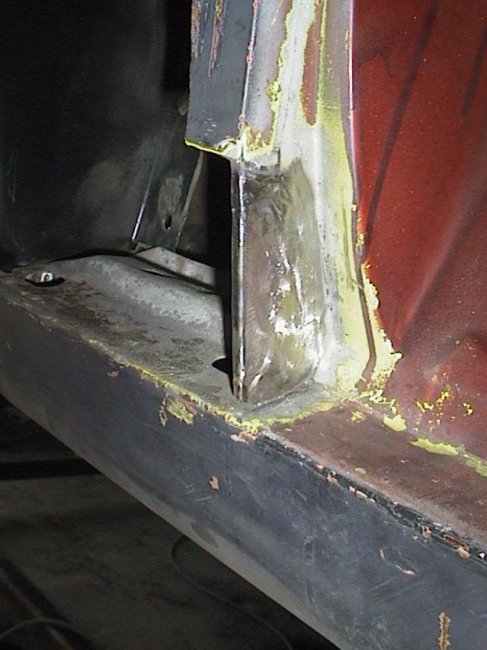
 Once the new piece is installed the origianl piece of quarter panel is welded back in. It may be desirable to spray a coat of zinc weld-thru primer over the new piece before
welding in the quarter panel peice. In this picture the quarter panel piece has been welded back in and the weld has been ground down. It is all ready for the new quarter
panel skin.
Once the new piece is installed the origianl piece of quarter panel is welded back in. It may be desirable to spray a coat of zinc weld-thru primer over the new piece before
welding in the quarter panel peice. In this picture the quarter panel piece has been welded back in and the weld has been ground down. It is all ready for the new quarter
panel skin.
Click here to continue with the RH quarter panel replacement discussion.