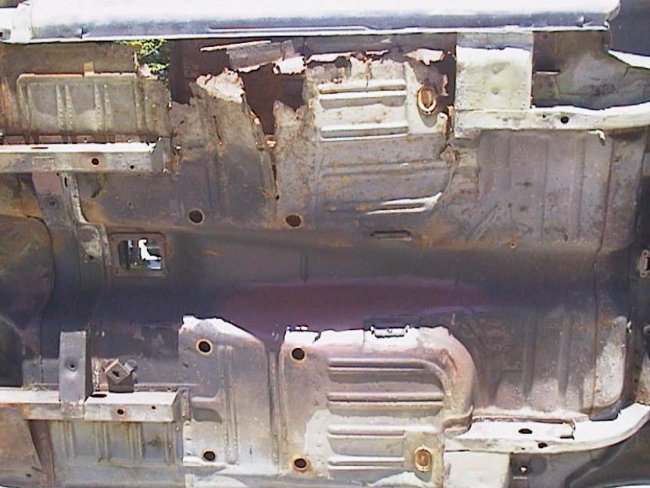
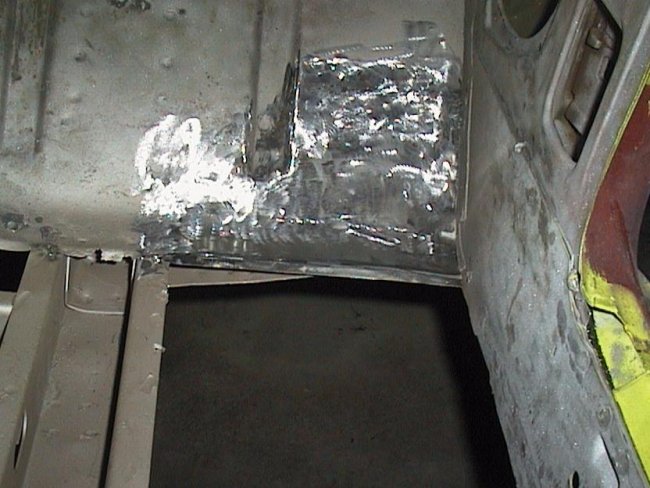
 Here is what I had to start with. Most of the damage was caused by the car being left out in the weather without a driver's window.
Though it looks like just the driver's side was bad, actually the passengers side was full of little pinholes in the grooves. The first thing that was
done was to order new floor pans. They run about $75 per side. The repo pans aren't the correct style for 69/70's. They have extra drain holes and grooves
are different.
Here is what I had to start with. Most of the damage was caused by the car being left out in the weather without a driver's window.
Though it looks like just the driver's side was bad, actually the passengers side was full of little pinholes in the grooves. The first thing that was
done was to order new floor pans. They run about $75 per side. The repo pans aren't the correct style for 69/70's. They have extra drain holes and grooves
are different.The new floor pans need to be trimmed where they meet the base of the firewall. At this point I cut a major portion of the old floorpans away leaving only a couple inches of overlap with the new floorpans.
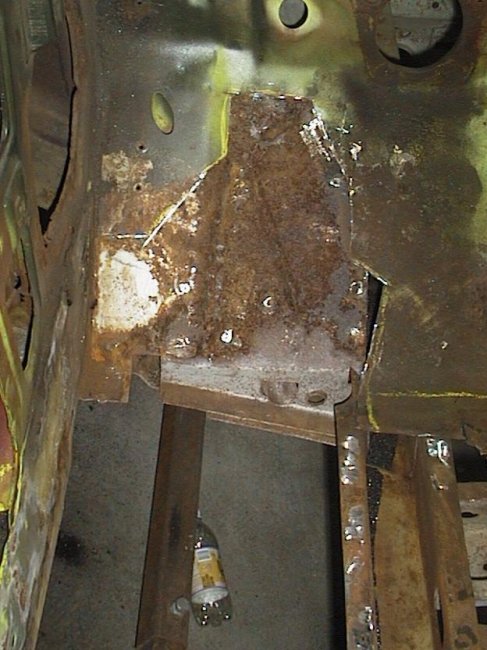 With the old sections of the floorpans removed, which includes the seat risers, the top of the toepan portion of the firewall is exposed. On this car the toepans were
rusted through on both sides. In this picture you can see where I cut away the bad section on the driver's side exposing the top of the notorious torque box..
With the old sections of the floorpans removed, which includes the seat risers, the top of the toepan portion of the firewall is exposed. On this car the toepans were
rusted through on both sides. In this picture you can see where I cut away the bad section on the driver's side exposing the top of the notorious torque box..
 Before making repairs I sandblasted out the entire area and hit it with some primer.
 A patch was easily made by placing the original piece on a repo 1968 toepan and cutting it out. The back side of the patch was then primed before it was butt-welded in.
 The passangers side toepan also needed to be repaired. Here it is with the bad section removed and the sandblasting and priming completed.
 Here it is again after the new piece was butt-welded in and the welds ground down.
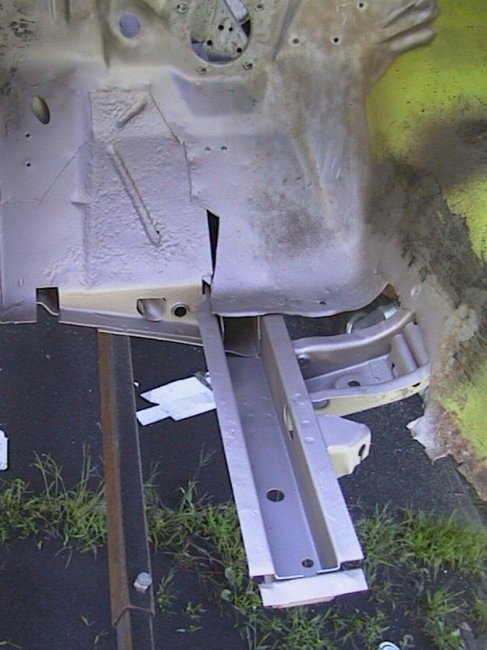
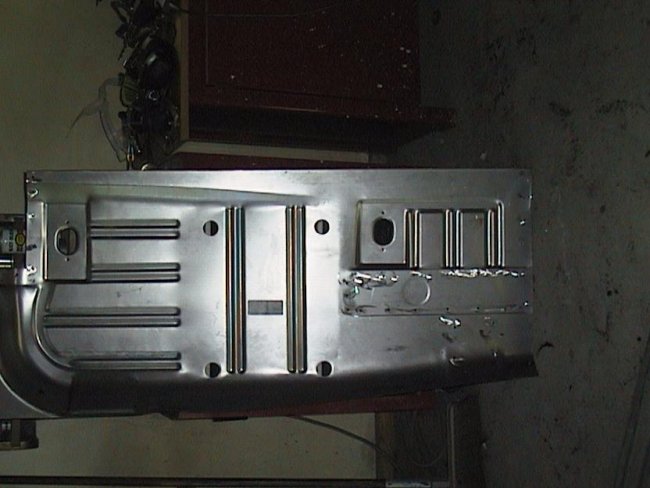 Here is the driver's side floor pan trimmed and ready to install. Notice that the hole that belongs ontop of the frame rail is not drilled out ? I wait until the
floor pan is installed to drill it out so that I get the hole in the correct location. At this point it should be noted that the seatbelt anchor plates and the
emergency brake bracket are welded to the underside of the new floor pans.
Here is the driver's side floor pan trimmed and ready to install. Notice that the hole that belongs ontop of the frame rail is not drilled out ? I wait until the
floor pan is installed to drill it out so that I get the hole in the correct location. At this point it should be noted that the seatbelt anchor plates and the
emergency brake bracket are welded to the underside of the new floor pans.
 The process for cutting welding the floor pans is is very simular to the one I used on the quarter panels. The pans are clamped in place and the edged is welded to the rocker panel.
I then go around the parameter with a saw or a cut-off wheel and cut throught the floor and floor pan where they overlap. The result is that the new floor pans fits the opening perfectly.
During the cutting process I tack weld the floorpan and the original floor together after every 6 inches or so are cut. This way I don't have to worry about the metal moving and not lining
up later.
The process for cutting welding the floor pans is is very simular to the one I used on the quarter panels. The pans are clamped in place and the edged is welded to the rocker panel.
I then go around the parameter with a saw or a cut-off wheel and cut throught the floor and floor pan where they overlap. The result is that the new floor pans fits the opening perfectly.
During the cutting process I tack weld the floorpan and the original floor together after every 6 inches or so are cut. This way I don't have to worry about the metal moving and not lining
up later.
 Once the cutting is done the floor pan gets fully butt-welded in place. After that the floor pan is clamp tightly to the rear torque boxes and the front frame rails. Then the floor pan is welded to them.
In this picture the floor pans are fully welded in place.
Once the cutting is done the floor pan gets fully butt-welded in place. After that the floor pan is clamp tightly to the rear torque boxes and the front frame rails. Then the floor pan is welded to them.
In this picture the floor pans are fully welded in place.
 Next I turned my attention to the other areas of concern in the floors. At some point somebody had put dual exhaust on the car and made these nices holes in the floors to mount the hangers.
 The holes were a little to large to plug-weld and the metal was too stretched anyways. So I just cut out the bad sections.
 It was relatively simple to cut square patches and butt-weld them in.
 With all of the repairs done to the floor, I used a highspeed grinder to clean up the welds. I then sandblasted the entire interior clean. Its a mess working with sandblast. I used compressed air to clean out
all of the cracks and crevises and then I used a shop vac. After that was done I welded in the seat risers. The underside of the seat risers and the top side of the floorpan that are covered with the seat risers
were primed with epoxy primer before the risers were welded in. I had to buy only one new seat riser, which was for the driver's side.
With all of the repairs done to the floor, I used a highspeed grinder to clean up the welds. I then sandblasted the entire interior clean. Its a mess working with sandblast. I used compressed air to clean out
all of the cracks and crevises and then I used a shop vac. After that was done I welded in the seat risers. The underside of the seat risers and the top side of the floorpan that are covered with the seat risers
were primed with epoxy primer before the risers were welded in. I had to buy only one new seat riser, which was for the driver's side.
 I started to dress-up all of my welds by using lead, but found that it didn't work very well trying to do both sides at the same time. I ended up doing the final finish work using evercoat waterproof fiberglass filler.
I then took and orbital sander with 100 grit disks and went over the entire underside. In this picture the undercarriage was ready for several coats of read epoxy primer.
I started to dress-up all of my welds by using lead, but found that it didn't work very well trying to do both sides at the same time. I ended up doing the final finish work using evercoat waterproof fiberglass filler.
I then took and orbital sander with 100 grit disks and went over the entire underside. In this picture the undercarriage was ready for several coats of read epoxy primer.
 Here is undercarriage after it was primer. It wasn't my intention of leaving this as the final finish. The undercarriage was to be sanded again and reprimed later. The idea was to get the undercarriage to look as nice
as possible.
Here is undercarriage after it was primer. It wasn't my intention of leaving this as the final finish. The undercarriage was to be sanded again and reprimed later. The idea was to get the undercarriage to look as nice
as possible.
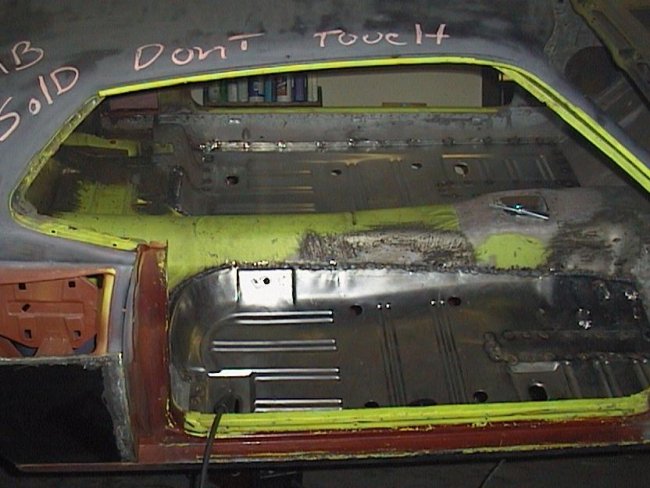
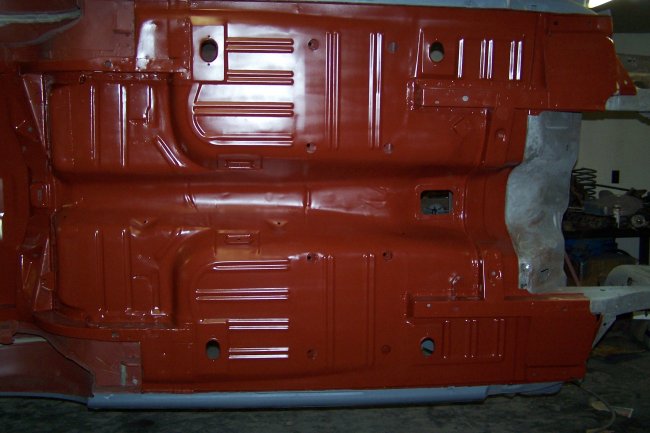
 I primed the interior next. I didn't do the firewall since I had some engine compartment repairs to do.
 Here is the interior looking towards the rear. I didn't do the trunk at this time since I had to replace the tail panel.