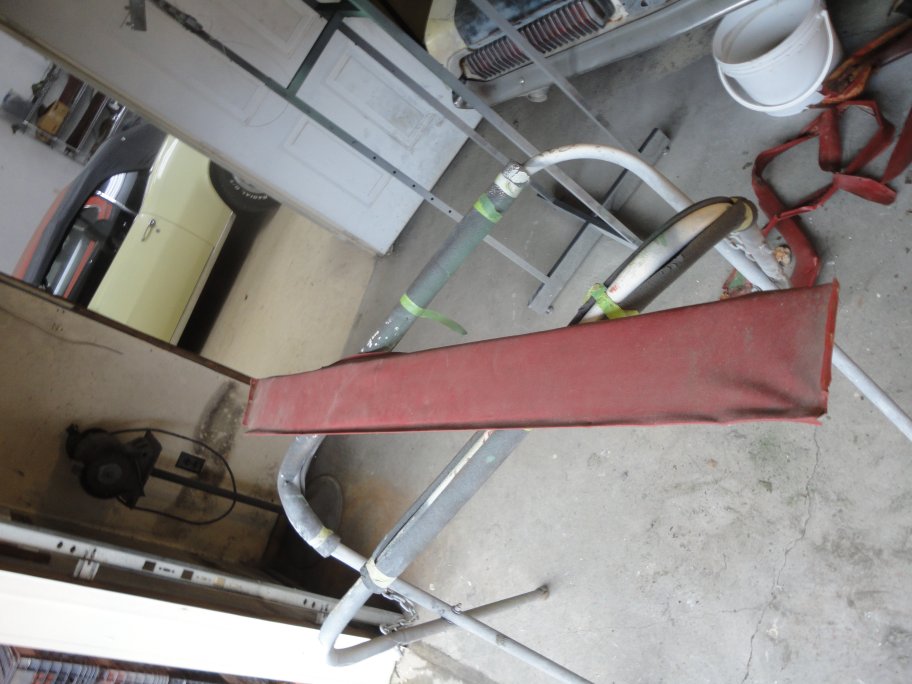
 10) The cubby support is a pretty simple piece to restore.
 |
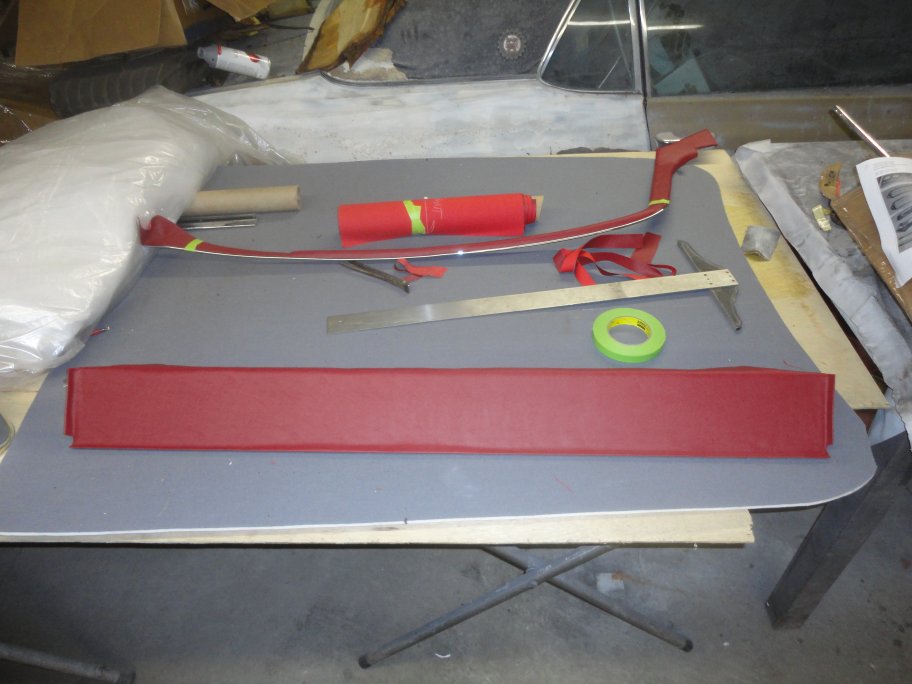
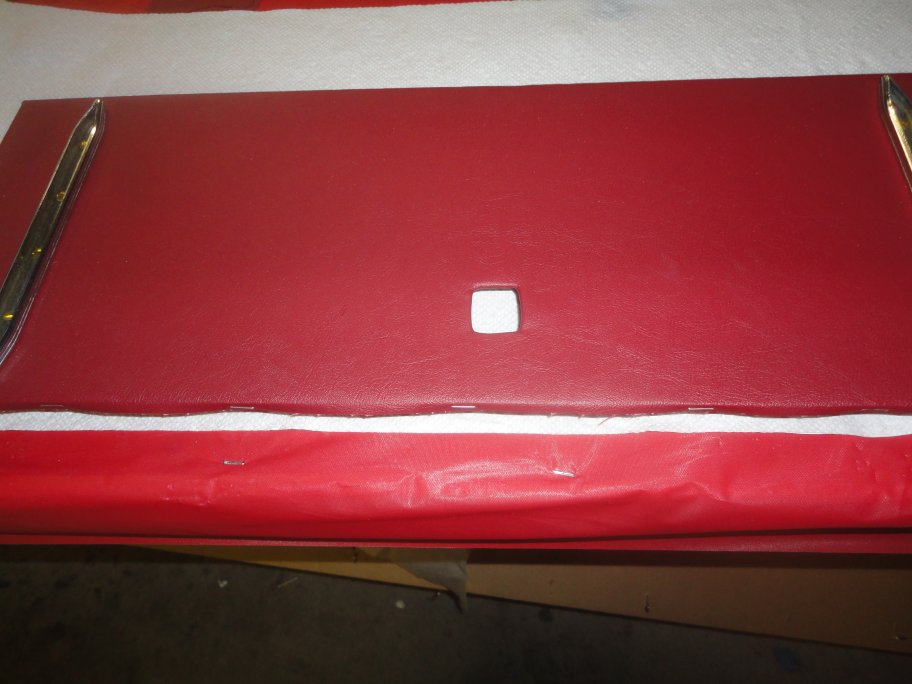
 11) Detail pictures where taken prior to removing the vinyl. Vinyl wraps around the tabs so that no metal is showing when the support is installed.
Also holes are just poked through the vinyl by the pins on the cubby door. You should let the cubby door poke the holes in the vinyl instead attempting
to do them by hand.
11) Detail pictures where taken prior to removing the vinyl. Vinyl wraps around the tabs so that no metal is showing when the support is installed.
Also holes are just poked through the vinyl by the pins on the cubby door. You should let the cubby door poke the holes in the vinyl instead attempting
to do them by hand. |
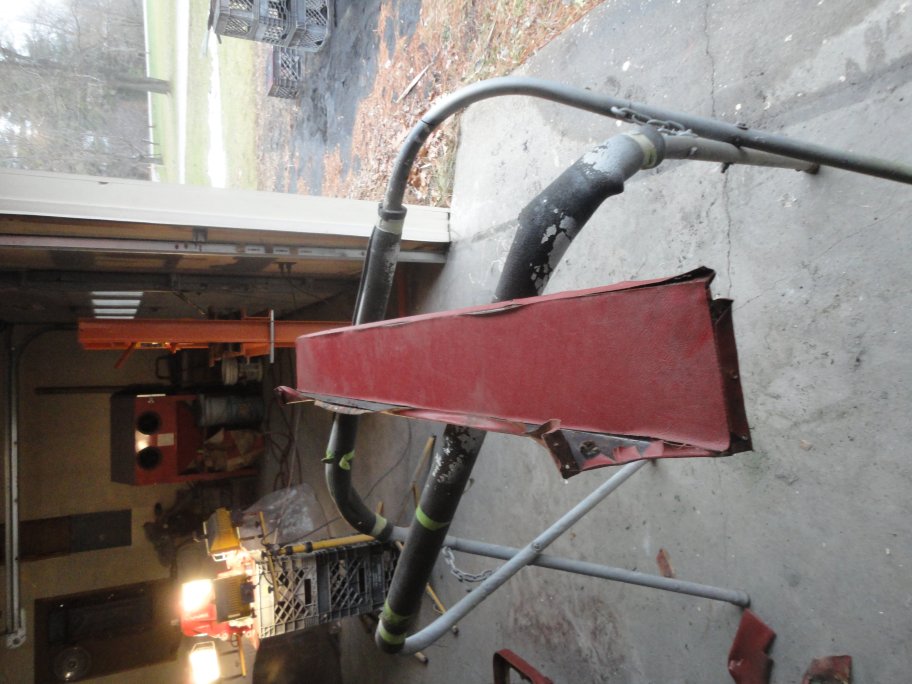 12) Even the back side (inside) of the cubby support is covered with vinyl.
 |
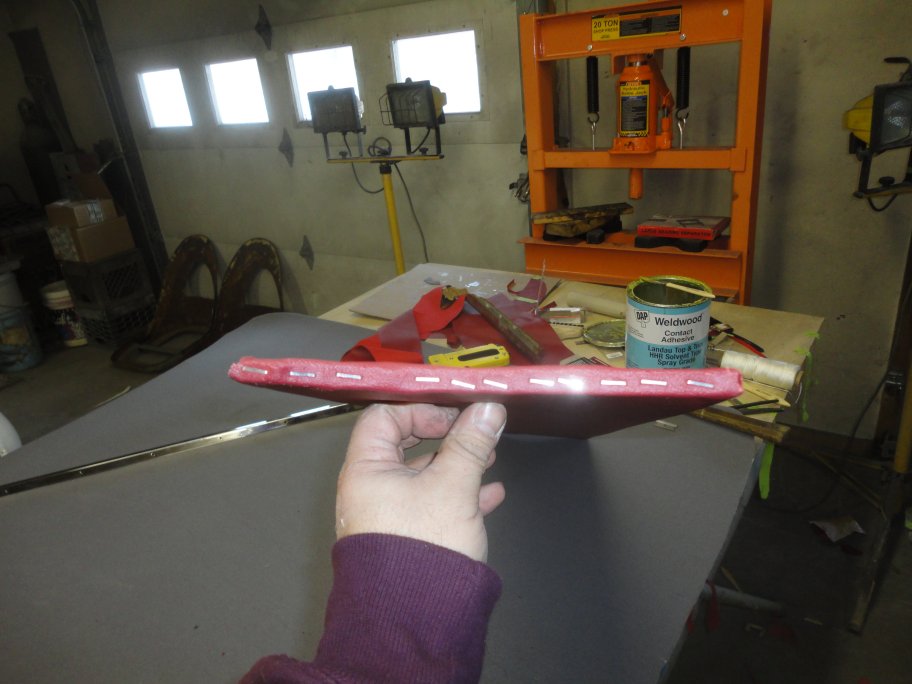
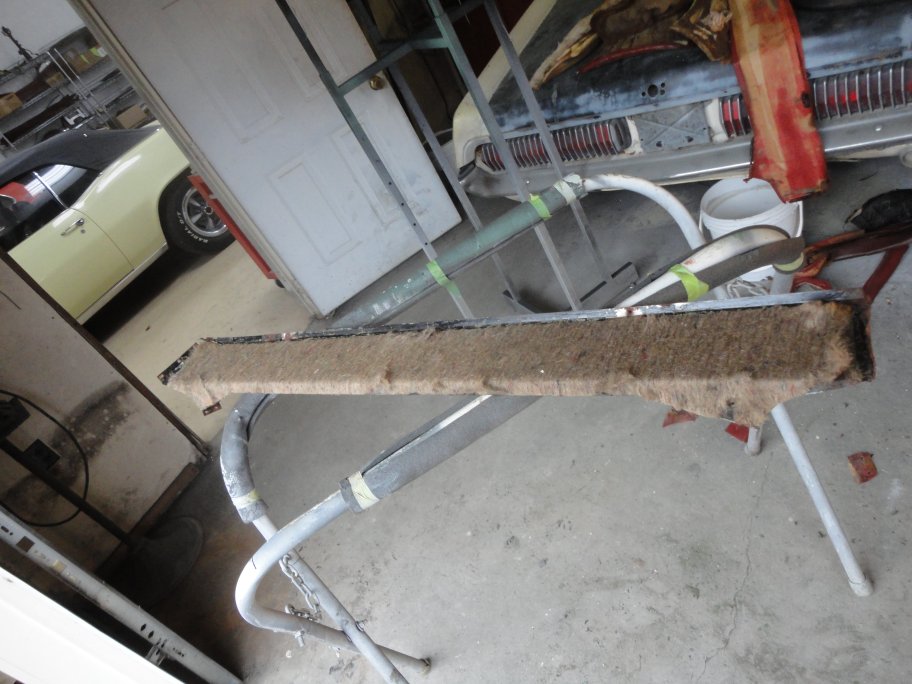 13) However, only the front face and top edge receive padding.
 |
 14) As with everything else, the vinyl is not glued to the foam. It is only glued around the perimeter. This is the only way to ensure that the vinyl does not turn out lump, either
immediately or over time when/if the glue starts to fail.
14) As with everything else, the vinyl is not glued to the foam. It is only glued around the perimeter. This is the only way to ensure that the vinyl does not turn out lump, either
immediately or over time when/if the glue starts to fail. |
 15) The vinyl on the back side (inside) is glued directly to the metal.
 |
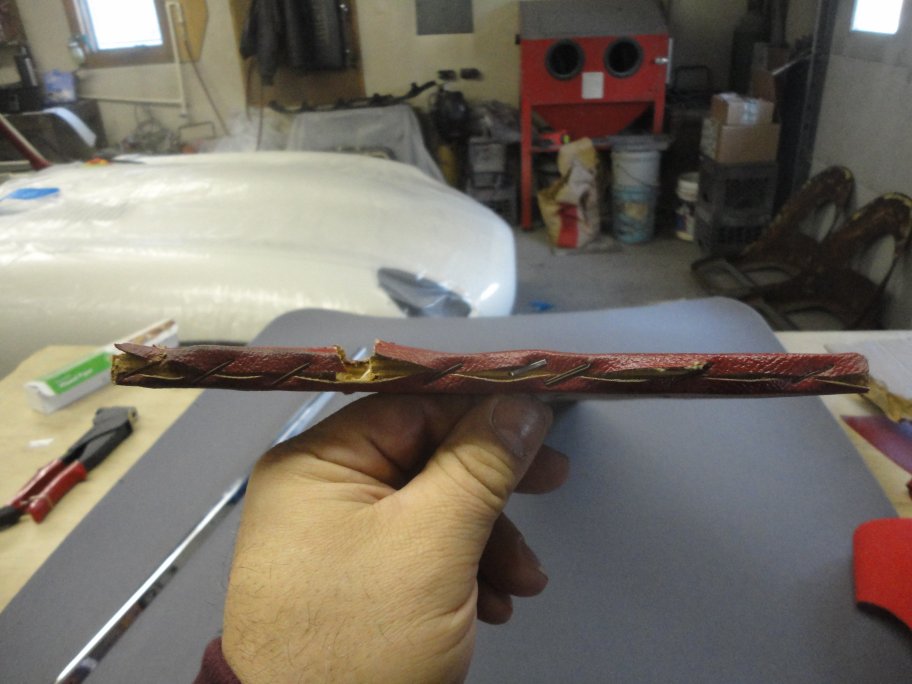 16) The cubby door comes appart rather easily. In my case I had to send a lot of pieces out for chroming (do not trust repo pieces). The cubby door is vinyl wrapped plywood.
The vinyl is not glued, it is stappled. In this picture you can see the staples on the side of the cubby door. They aren't covered. They actual show!
16) The cubby door comes appart rather easily. In my case I had to send a lot of pieces out for chroming (do not trust repo pieces). The cubby door is vinyl wrapped plywood.
The vinyl is not glued, it is stappled. In this picture you can see the staples on the side of the cubby door. They aren't covered. They actual show! |
 17) Here is the plywood piece. The cut outs are for chrome luggage stops that fold out. One curious this was that in eash corner of the cutouts were little pieces of vinyl. I have no
idea what they are for since everything is covered, but I glued them back in place anyways.
17) Here is the plywood piece. The cut outs are for chrome luggage stops that fold out. One curious this was that in eash corner of the cutouts were little pieces of vinyl. I have no
idea what they are for since everything is covered, but I glued them back in place anyways. |
 18) In this picture the vinyl has been stapled in place.
 |
 19) Here is a view of the staples along the edge. I overlapped the vinyl so that the wood is completely hidden.
 |
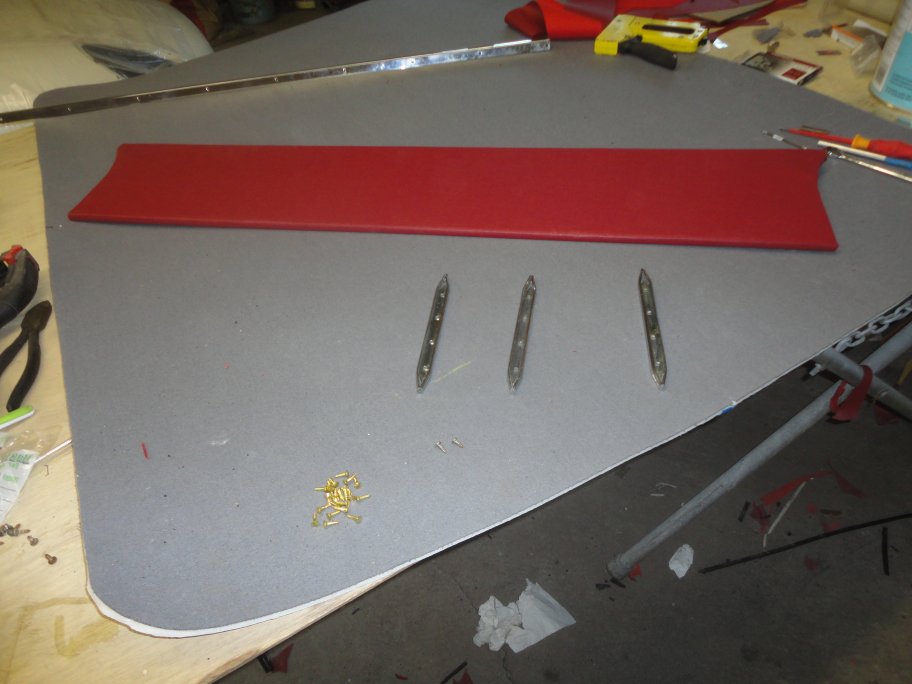
 20) Three luggage rails with rubber inserts are attached to the cubby door. This protects the vinyl from getting chewed up. The guides are screwed down and the rubber is trimmed
and inserted into the guides.
20) Three luggage rails with rubber inserts are attached to the cubby door. This protects the vinyl from getting chewed up. The guides are screwed down and the rubber is trimmed
and inserted into the guides. |
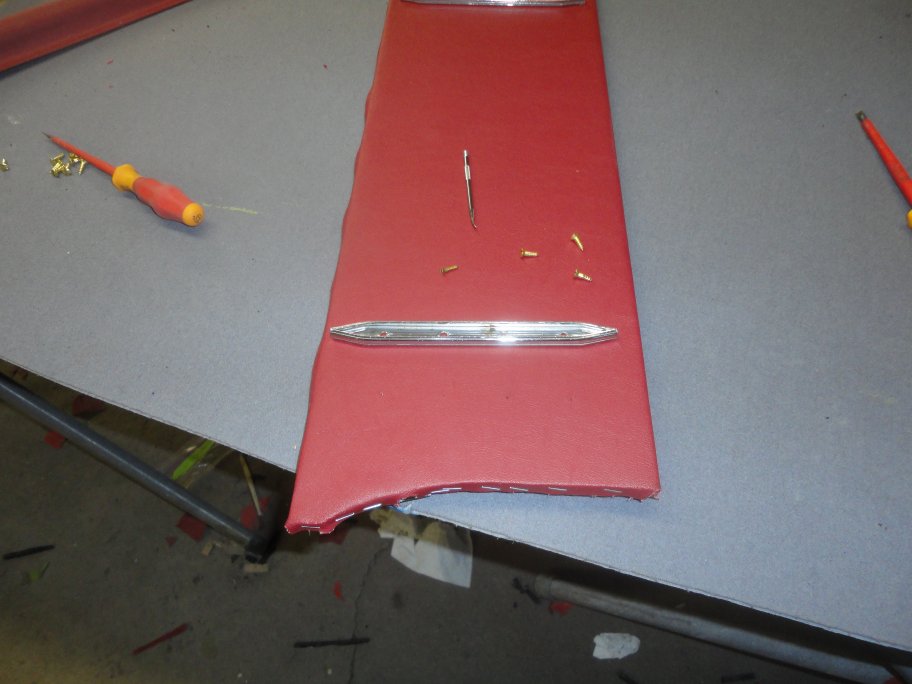
 21) The holes for the pop-up rails need to be trimmed carefully so as to not allow wood to show once the rails are installed. In this picture you can
see the details on where the vinyl needs to be trimmed and glued.
21) The holes for the pop-up rails need to be trimmed carefully so as to not allow wood to show once the rails are installed. In this picture you can
see the details on where the vinyl needs to be trimmed and glued. |
 22) The hole for the pop-up luggage rails should look clean like this with no wrinkles.
 |
 23) Assembly is pretty simple. The only trick is to not have the fabric wrinkle when the hardware is screwed in. Carving away some vinyl at each
screw location instead of just poking holes in it the vinyl helps with this.
23) Assembly is pretty simple. The only trick is to not have the fabric wrinkle when the hardware is screwed in. Carving away some vinyl at each
screw location instead of just poking holes in it the vinyl helps with this. |
 24) The stops for the cubby door are pop-riveted to the inner wheel arches. The repos of these parts are not very good, since they don't folow the
curve of the arch. So I recommend rechroming the originals. Also the rubber bumpers do not appear to be reproduced. So be careful taking them appart.
24) The stops for the cubby door are pop-riveted to the inner wheel arches. The repos of these parts are not very good, since they don't folow the
curve of the arch. So I recommend rechroming the originals. Also the rubber bumpers do not appear to be reproduced. So be careful taking them appart. |