 Here is what was left of the Right Trunk Dropoff once the quarter panel and windowscreen bondo job was removed. It is definitely
not savable.
Here is what was left of the Right Trunk Dropoff once the quarter panel and windowscreen bondo job was removed. It is definitely
not savable.
 The first thing to do is to trim the top off the new repo dropoff and fit it behind the original using vice-grips to hold it in place.
Then draw a line across the top where the new pieces will be cut. Do not get any closer than an inch from the top or it will be very difficult
to grind the welds down on the back side. This is also a good time to figure out where the bottom of the new dropoff will be trimmed. The repo
dropoff that I used for this job did not have any holes drilled for the drain plug or the reverse light wires. I guess that not only can you not
count on them putting the holes in the right place, you can't even count on them to put the hoels in at all.
The first thing to do is to trim the top off the new repo dropoff and fit it behind the original using vice-grips to hold it in place.
Then draw a line across the top where the new pieces will be cut. Do not get any closer than an inch from the top or it will be very difficult
to grind the welds down on the back side. This is also a good time to figure out where the bottom of the new dropoff will be trimmed. The repo
dropoff that I used for this job did not have any holes drilled for the drain plug or the reverse light wires. I guess that not only can you not
count on them putting the holes in the right place, you can't even count on them to put the hoels in at all.
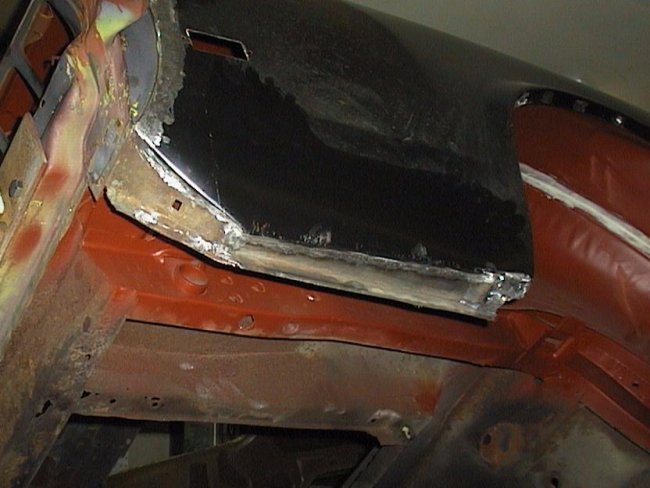
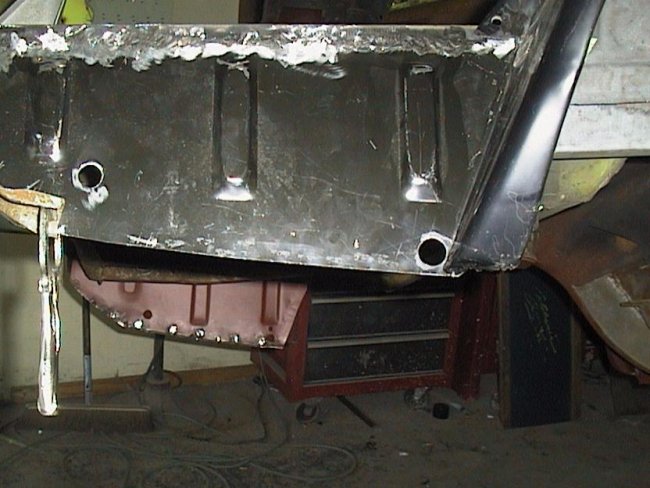 In this picture the new dropoff is already welded in place and the holes for the drain plug and backup light wires has been drilled. Only the small
rectangular hole for the drain plug needs to me made. This is made by using a 1/4 drill bit to start the hole, a dremmel tool to make the hole square and
a small flat file to even up the sides.
In this picture the new dropoff is already welded in place and the holes for the drain plug and backup light wires has been drilled. Only the small
rectangular hole for the drain plug needs to me made. This is made by using a 1/4 drill bit to start the hole, a dremmel tool to make the hole square and
a small flat file to even up the sides.
Click here to go back to the previous discussion about RH Quarter Panel Installation.
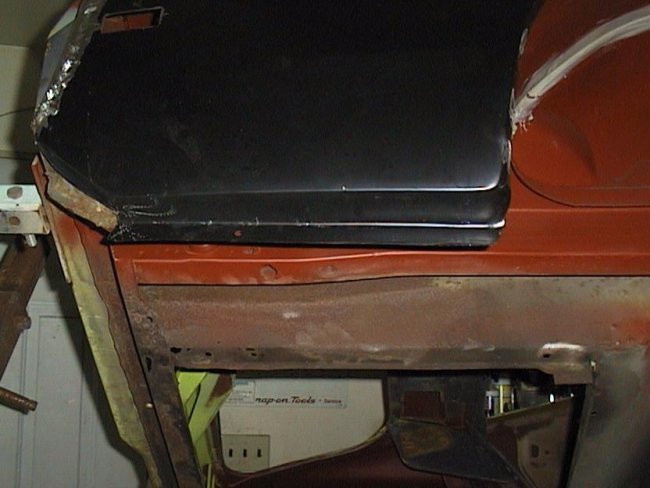 On the reproduction quarter panels the indentation by the drop off is not reproduced. To maintain the original look the restore must fabricate their own.
In this picture you can see that the bottom of the repo panel. See how flat it is ? That's a dead give away that the quarters have been changed or repaired.
On the reproduction quarter panels the indentation by the drop off is not reproduced. To maintain the original look the restore must fabricate their own.
In this picture you can see that the bottom of the repo panel. See how flat it is ? That's a dead give away that the quarters have been changed or repaired.
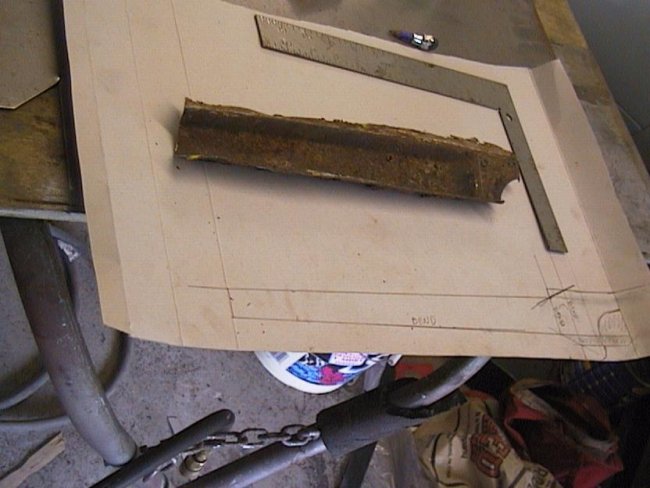 Before the repo quarter is trimmed at the bottom a new piece needs to be fabricated. This is done by first making a cardboard template. Luckily there was enough of the
original piece left to use. In this picture you can see the original piece being used to make the template.
Before the repo quarter is trimmed at the bottom a new piece needs to be fabricated. This is done by first making a cardboard template. Luckily there was enough of the
original piece left to use. In this picture you can see the original piece being used to make the template.
 Here is the completed template cut-out and folded to imitate the original piece. At this point the template is fitted to the car. This is when its time to trim the quarter.
On the underside of the quarter panel the flat portion is trimmed off an inch from the lower seam. This leaves an inch of metal that needs to be folded up into the drop-off area
at about a 45 degree angle. This recreates the recessed slope that was on the original panel. The template is then fitted in the hole where the template and sheetmetal are adjusted
to each other.
Here is the completed template cut-out and folded to imitate the original piece. At this point the template is fitted to the car. This is when its time to trim the quarter.
On the underside of the quarter panel the flat portion is trimmed off an inch from the lower seam. This leaves an inch of metal that needs to be folded up into the drop-off area
at about a 45 degree angle. This recreates the recessed slope that was on the original panel. The template is then fitted in the hole where the template and sheetmetal are adjusted
to each other.
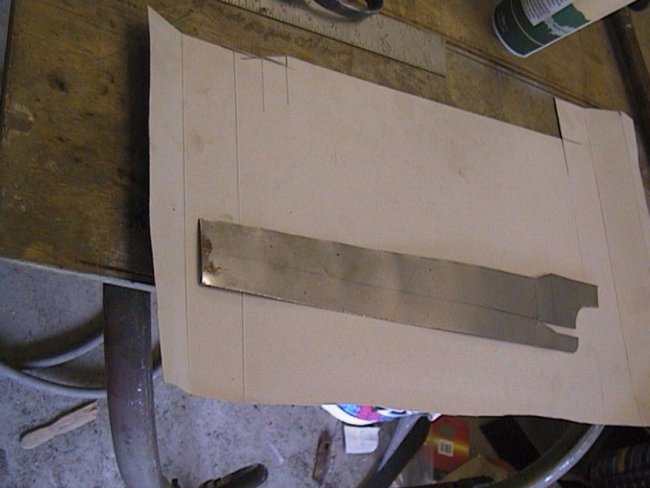 Then its time to create a duplicate of the final template using sheetmetal. The new pieces is cut-out trimmed and folded to match the origianal piece. One trick is to stack the new
piece on top of the old one and use vise-grips and a hammer to adjust the new sheetmetal piece to fit the contours of the original.
Then its time to create a duplicate of the final template using sheetmetal. The new pieces is cut-out trimmed and folded to match the origianal piece. One trick is to stack the new
piece on top of the old one and use vise-grips and a hammer to adjust the new sheetmetal piece to fit the contours of the original.
 Then the new piece is butt-welded in place. It should be noted that the new piece drops below the lower drop-off by about a quarter of an inch. This extra 1/4 inch is bent back towards
the inside of the car a little bit. This creates a little channel on the back that is filled with seam sealer. In this picture the welding has been completed and the welds have been
ground down.
Then the new piece is butt-welded in place. It should be noted that the new piece drops below the lower drop-off by about a quarter of an inch. This extra 1/4 inch is bent back towards
the inside of the car a little bit. This creates a little channel on the back that is filled with seam sealer. In this picture the welding has been completed and the welds have been
ground down. Click here to go back to the previous discussion about RH Quarter Panel Installation.