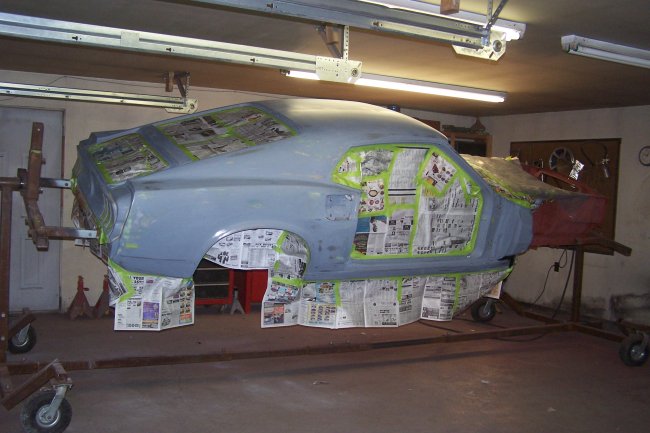
 Here is shell after it has been block sanded and prepared for final primer. I blocked sanded the car with rigid rubber blocks and 220 grit paper, wet. Some areas
had to be reprimed and blocked. The first coat of epoxy primer was allowed to cure for a month prior to block sanding. The epoxy primer I used for the touched up areas
was allowed to cure for a week. The final coat of epoxy primer was reduced 4:1:1.
Here is shell after it has been block sanded and prepared for final primer. I blocked sanded the car with rigid rubber blocks and 220 grit paper, wet. Some areas
had to be reprimed and blocked. The first coat of epoxy primer was allowed to cure for a month prior to block sanding. The epoxy primer I used for the touched up areas
was allowed to cure for a week. The final coat of epoxy primer was reduced 4:1:1.
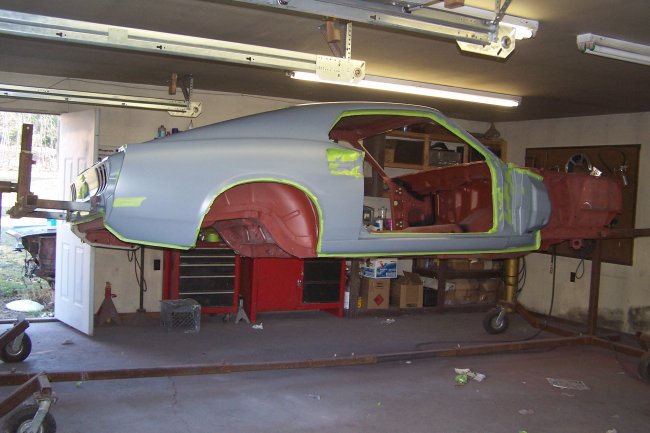 After allowng the epoxty primer to cure for a week, I only do the big jobs on the weekends anyways, I masked off the outside of the shell. The idea is to protect all areas on the outside
of the car that will be painted body color later. The first step was to cover all openings with masking tape as seen here. The next step was to cover the rest with newspaper.
After allowng the epoxty primer to cure for a week, I only do the big jobs on the weekends anyways, I masked off the outside of the shell. The idea is to protect all areas on the outside
of the car that will be painted body color later. The first step was to cover all openings with masking tape as seen here. The next step was to cover the rest with newspaper.
 The next step was to sand, seam seal and undercoat the interior. I use 3M 08505 Fast&Firm seam sealer and 3M rubberized undercoating. I first seal all the joints that were sealed by the factory
with the seam sealer. Then after allowing it to cure for a day, I sprayed undercoating over the rest. The undercoating gives these areas an original factory look. The job takes 2 tubes of seam sealer and 2 cans of undercoating.
In this picture you see the areas from the seat platforms forward.
The next step was to sand, seam seal and undercoat the interior. I use 3M 08505 Fast&Firm seam sealer and 3M rubberized undercoating. I first seal all the joints that were sealed by the factory
with the seam sealer. Then after allowing it to cure for a day, I sprayed undercoating over the rest. The undercoating gives these areas an original factory look. The job takes 2 tubes of seam sealer and 2 cans of undercoating.
In this picture you see the areas from the seat platforms forward.
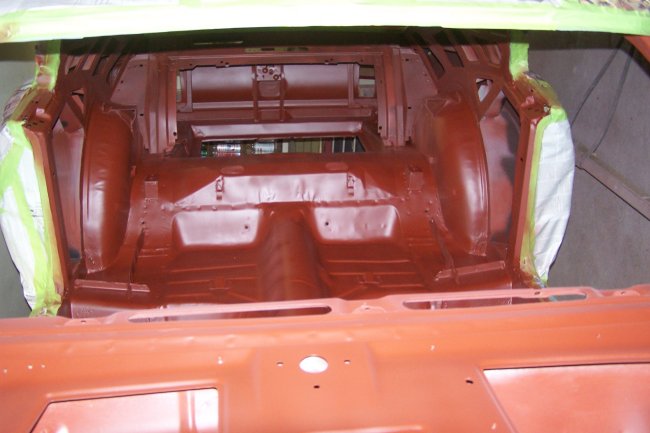
 This view is of the rear interior. Notice that I undercoat the entire inside surface of the rear quarter panel ?
 Here is a view of the undercoating from within the trunk.
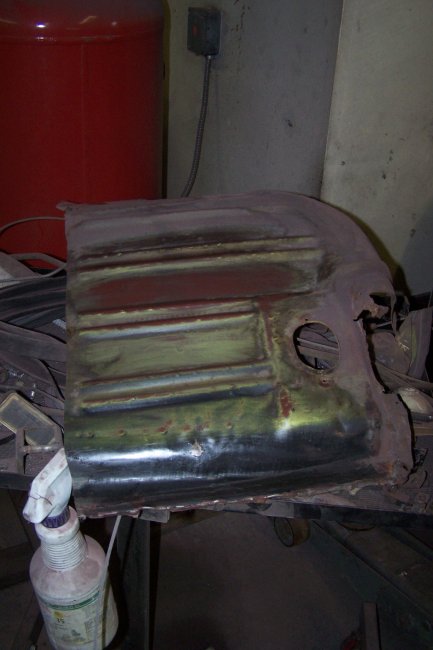
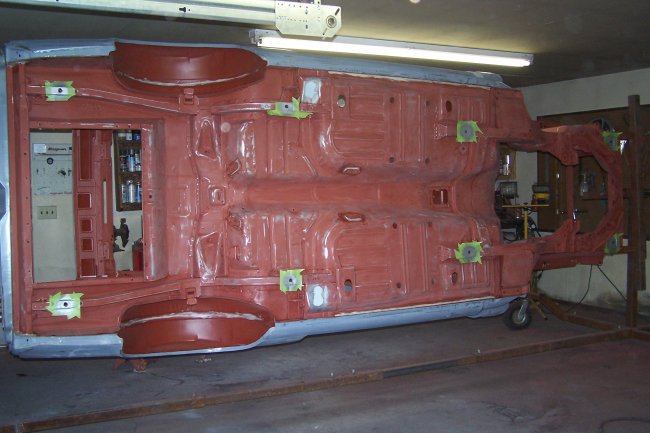 As discussed earlier, when Mustangs were being manufactured they were mounted on a dolly when they went down the assembly line. The mounting points, 8 in all, did not received any paint or primer because of this. To simulate the
original appearance without risking future rust problems, I painted these areas with a Rustoleum Matte Nickle to simulate bare metal. You can see this in the picture to the left. You may also notice two spots that
I had put filler on to clean up two spots where the car had been jacked up and dented the rear torque boxes. Once the Rustoleum cured, takes at least a day, I masked over the mounting point areas with wide masking tape
that was cut into big circles, which were the same size as the original dolly marks.
As discussed earlier, when Mustangs were being manufactured they were mounted on a dolly when they went down the assembly line. The mounting points, 8 in all, did not received any paint or primer because of this. To simulate the
original appearance without risking future rust problems, I painted these areas with a Rustoleum Matte Nickle to simulate bare metal. You can see this in the picture to the left. You may also notice two spots that
I had put filler on to clean up two spots where the car had been jacked up and dented the rear torque boxes. Once the Rustoleum cured, takes at least a day, I masked over the mounting point areas with wide masking tape
that was cut into big circles, which were the same size as the original dolly marks.
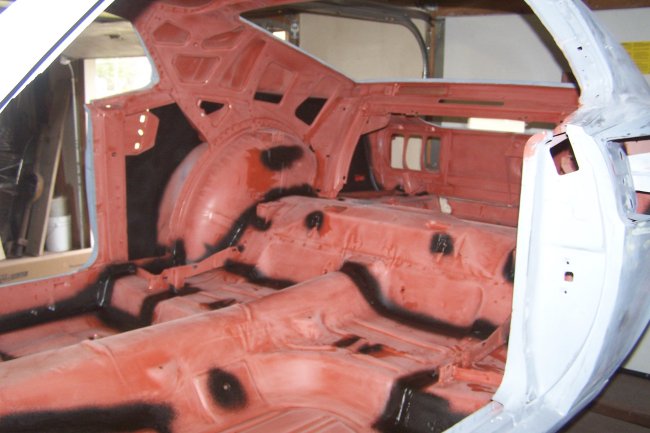
 The primer used by Ford is actually a mixture of primer and waste paint from the previous vehicles that came down the line. So its not too unusual to see strange colored primer. In my case the color was a browninsh red.
Having kept a piece of the old floorpan, I tinted some red epoxy primer with black to get a shade that matched the floorpan. Once mixed I sprayed the entire interior, undercarriage and engine compartment all at the same
time.
The primer used by Ford is actually a mixture of primer and waste paint from the previous vehicles that came down the line. So its not too unusual to see strange colored primer. In my case the color was a browninsh red.
Having kept a piece of the old floorpan, I tinted some red epoxy primer with black to get a shade that matched the floorpan. Once mixed I sprayed the entire interior, undercarriage and engine compartment all at the same
time. In this picture you can see the interior rear section after priming has completed and the dust had settled.
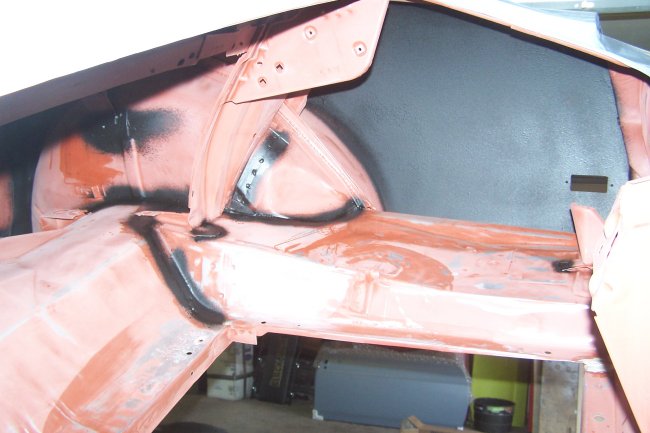
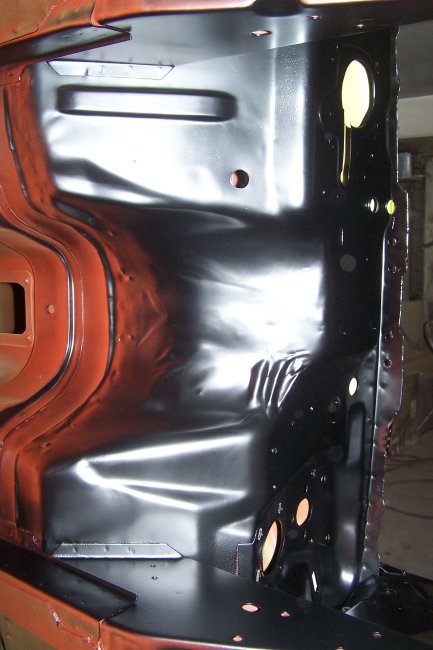
 Here is view from the rear looking at the firewall.
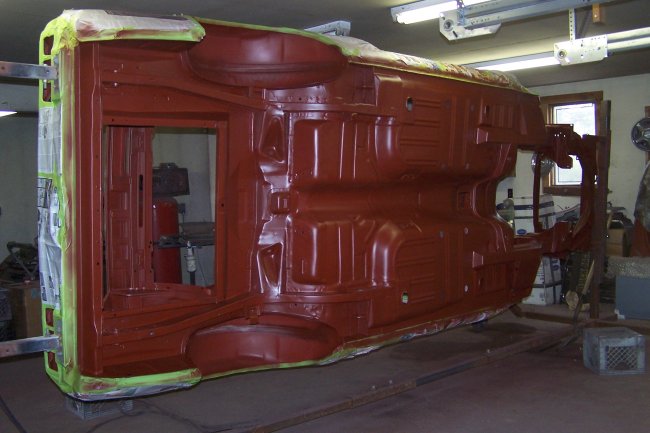 And here is the undercarriage. Using a rotisserie makes this job very easy.
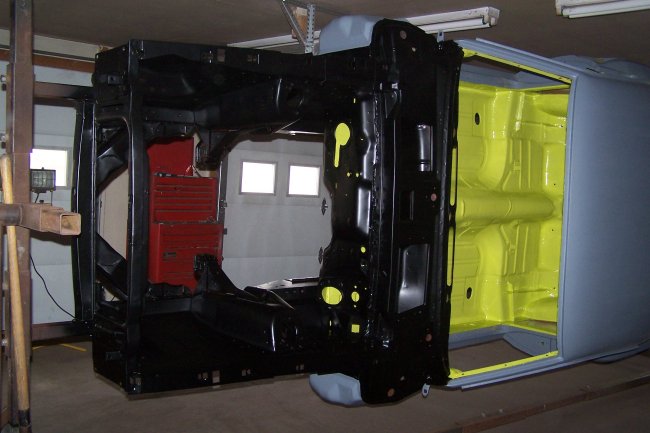
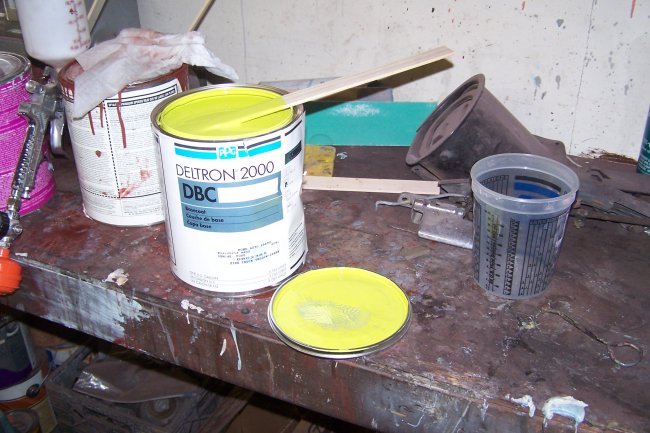 Now its time to paint. Here is a gallon of Groovy Green paint. Today Ford calls the color Ford Firetruck Yellow Green. Paint is not cheap it cost me $275 for the gallon plus another $150 for the clear, reducer and hardener.
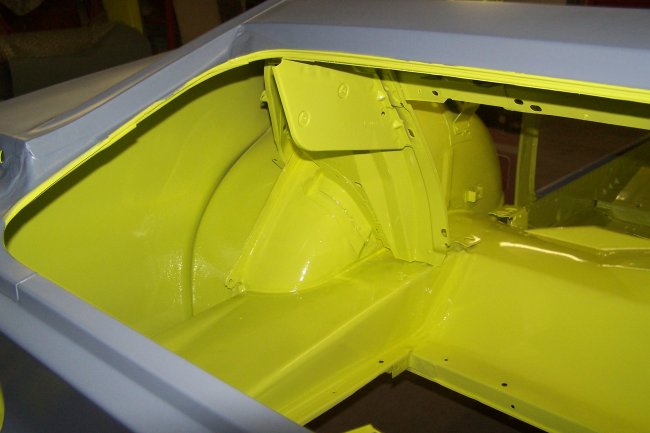
 Prior to painting the interior of the car I masked off all of the holes that go through the firewall into the engine compartment since any overspray into the engine compartment may react with the paint I was using in the
engine compartment. Here is a view of the firewall from the inside after all of the painting was completed.
Prior to painting the interior of the car I masked off all of the holes that go through the firewall into the engine compartment since any overspray into the engine compartment may react with the paint I was using in the
engine compartment. Here is a view of the firewall from the inside after all of the painting was completed.
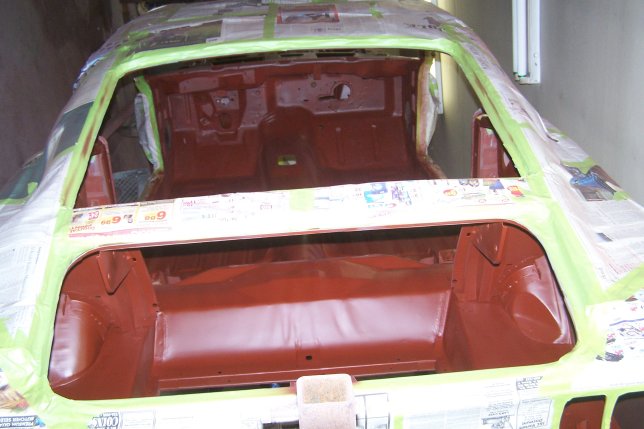
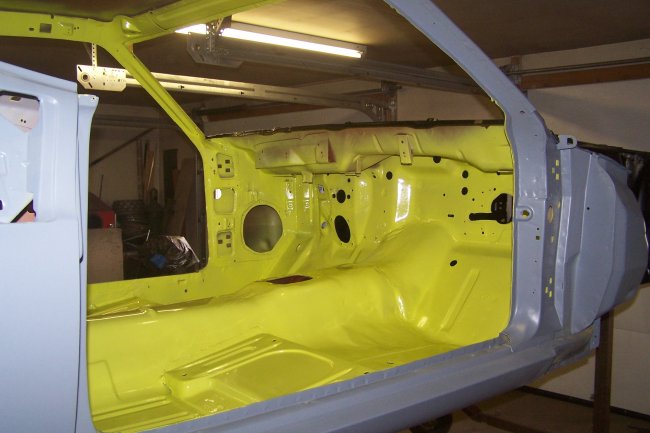
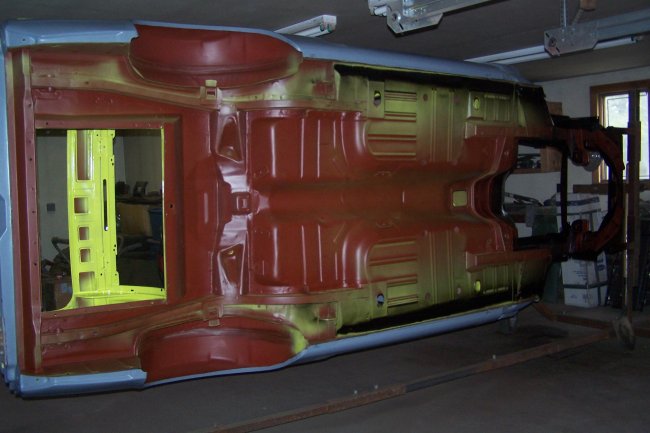
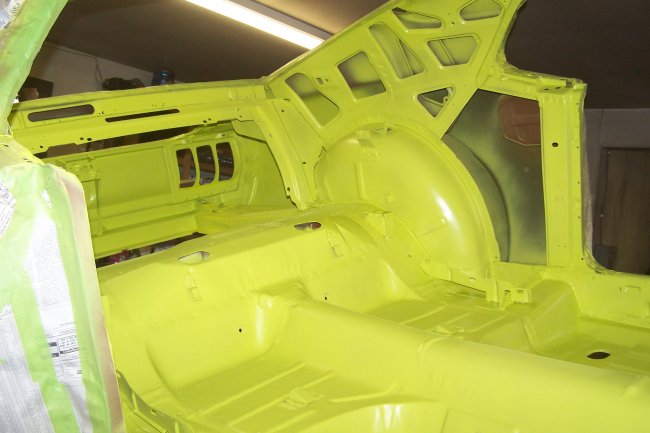 Here is view of the interior looking towards the trunk.
 And here is the trunk. Got to love that Groovy Green.
 I allowed 24 hours for the paint to dry before masking off and painting the engine compertment. Overspray likes to blow into the car through the cowl vents so extra care had to be taken to block these areas off.
In this picture you can see the finished product. Ford painted the engine compartment with a semi-gloss black paint, on the glossy side of semi-flat. You have to mix the paint to get it just right. Some people use Krylon 1613 which I find too flat. Others use a Rustoleum 7777, which isn't quite right either and its highly reactive with other paints. The correct paint is DDL9423, which is getting harder and harder to get. For this car I used DAR9000 Black Acrylic Enamel with 25% DX265 Flattener.
You may notice that the upper cowl area is painted black. On cars with a blacked-out hood treatment, Ford blacked-out most of the upper cowl. This would be standard on a Mach I. The strange thing is that sometimes this area was blacked-out even when there was no blacked-hood treatment. It seams to be random. On my Dark Jade 1969 Fastback the upper cowl was not blacked out, see my 1969 Mustang Sportsroof project page. This particular car was blacked-out by the factory so I did the same. I actually painted a little more of the upper cowl then the factory. The factory stopped several inches from the sides. Just beyond the limits of the upper valance panel. I stopped at the seams since this detail will never be seen.
 When the factory painted the engine compartment they did it from the top down. If you looked from the underside of the car you would see factory primer. In this picture you can see this in the transmission tunnel.
 Here is the section of the original floorpan that I was refering to earlier. You can see the original primer color along with the factory overspray. A good restoration should involve reproducing this overspray even though it is not pretty.
You may notice that not only is there body color overspray on the primer, there is also black paint. This is because after the factory painted the car they blacked-out the pinchwell along the rocker panel
and lower rear quarter panel if the car was to receive a light body color. Sometimes Ford made mistakes and never blacked out the pinch welds. Of course judges will knock off points if its not there, so make sure you can prove your car was
not blacked-out or be prepared to lose points. In this case the floor section proved that the pinch weld was blacked-out on this car.
Here is the section of the original floorpan that I was refering to earlier. You can see the original primer color along with the factory overspray. A good restoration should involve reproducing this overspray even though it is not pretty.
You may notice that not only is there body color overspray on the primer, there is also black paint. This is because after the factory painted the car they blacked-out the pinchwell along the rocker panel
and lower rear quarter panel if the car was to receive a light body color. Sometimes Ford made mistakes and never blacked out the pinch welds. Of course judges will knock off points if its not there, so make sure you can prove your car was
not blacked-out or be prepared to lose points. In this case the floor section proved that the pinch weld was blacked-out on this car.The way I reproduced this overspray, was to pretty much follow the factory process. When I finished painting the interior I sprayed body color over the rocker panel and along the rear quarter, which was actually masked. By pretending to paint these areas overspray landed on the undercarriage. Then on the next day after I have painted the engine compartment. I shot some black paint only the masked pinch welds as if I was painting them for real. Note: it was my intention to black-out the actual pinch welds after the outside of the shell was painted. The blackout paint should be ontop of the body color.
 Here is the finished undercarriage with the overspray. How did I do ?
 In this picture I removed the masking tape covering the areas of natural paint at the factory dolly mounting positions. Technically there were two more bare areas in the trunk and two more on the floorpan in the front, however I decided not to paint
them natural since I did not want to risk having the natural paint react with the green paint.
In this picture I removed the masking tape covering the areas of natural paint at the factory dolly mounting positions. Technically there were two more bare areas in the trunk and two more on the floorpan in the front, however I decided not to paint
them natural since I did not want to risk having the natural paint react with the green paint.