 The next thing to do is to remove the bulk of the outer wheel well. This is done just with the pnuematic reciprocating saw. One thing to keep in mind
when cutting out the outer wheel well is to avoid cutting off the line-up tab that is part of the inner wheel well that wraps around the back of the outer
wheel well. It is shown here on the center right of the picture.
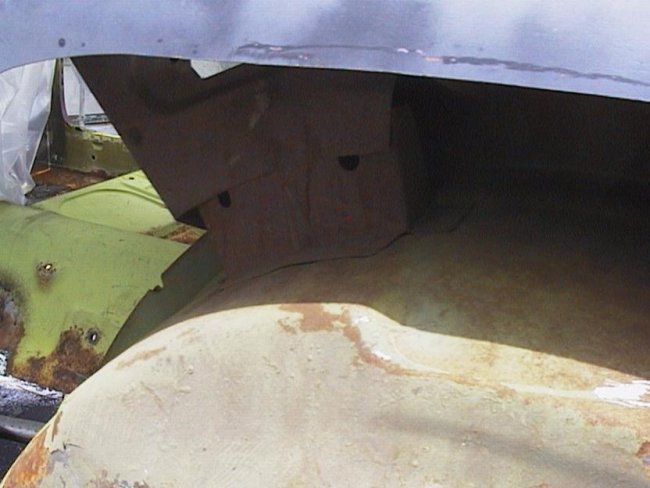
The next thing to do is to remove the bulk of the outer wheel well. This is done just with the pnuematic reciprocating saw. One thing to keep in mind
when cutting out the outer wheel well is to avoid cutting off the line-up tab that is part of the inner wheel well that wraps around the back of the outer
wheel well. It is shown here on the center right of the picture.
 The upper and lower braces need to be seperated to replace the outer wheel well. This can be done by drilling out the 4 or 5 spot welds that hold them together.
 Once the bulk of the outer wheel well is removed, the lower brace can be removed by drilling out the spot welds that holds the brace to the outer wheel well. In this picture
the brace has been sandblasted prior to removal, which makes it easier to locate the spotwelds.
Once the bulk of the outer wheel well is removed, the lower brace can be removed by drilling out the spot welds that holds the brace to the outer wheel well. In this picture
the brace has been sandblasted prior to removal, which makes it easier to locate the spotwelds.
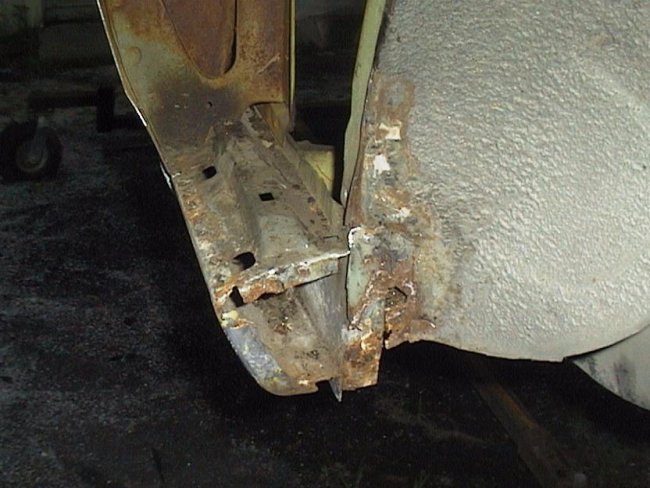 When the outer wheel well is removed from the rocker panel it is not uncommon to uncover a rust hole. This hole can usually be seen from inside the car in the back seat area before the outer wheel well
is even removed.
When the outer wheel well is removed from the rocker panel it is not uncommon to uncover a rust hole. This hole can usually be seen from inside the car in the back seat area before the outer wheel well
is even removed.
 This can be easily repaired by cutting out the rust and butt-welding in a new piece. It should be noted that no only is the new piece butt-welded in, it is also plug-welded to the inner rocker panel and to
the lip on the edge of the rear seat floor pan.
This can be easily repaired by cutting out the rust and butt-welding in a new piece. It should be noted that no only is the new piece butt-welded in, it is also plug-welded to the inner rocker panel and to
the lip on the edge of the rear seat floor pan.
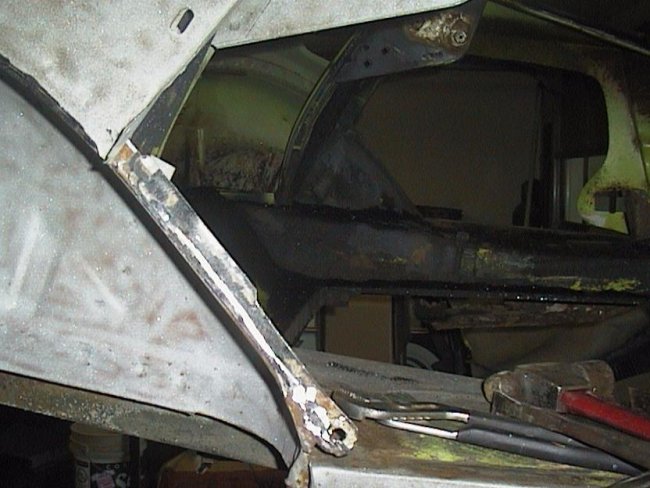
 The outer wheel well is pinch-welded to the inner along the entire length of the standing seam. The best way to deal with this is used the pneumatic reciprocating saw to cut off as much off the outer wheel
well as possible without cutting into the inner. Unfortunately the center 1/3 of the seam is buried underneath a roof brace. It is very difficult to get this brace free and remove all of the outer wheel well. The best
way to do this is to leave the center 1/3 in place and remove the pieces that can be reached.
The outer wheel well is pinch-welded to the inner along the entire length of the standing seam. The best way to deal with this is used the pneumatic reciprocating saw to cut off as much off the outer wheel
well as possible without cutting into the inner. Unfortunately the center 1/3 of the seam is buried underneath a roof brace. It is very difficult to get this brace free and remove all of the outer wheel well. The best
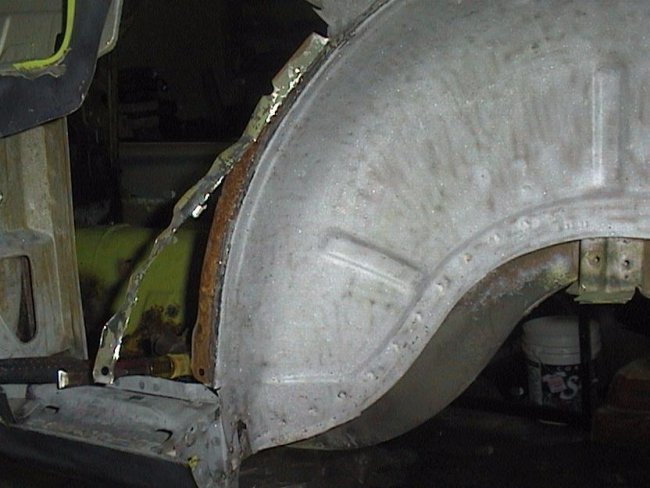
way to do this is to leave the center 1/3 in place and remove the pieces that can be reached.For the front 3rd , a stone grinder can be used to grind down the weld along the pinch welded seam. Only the edge of the stone on the grinder is used. It is important not to grind too deep or you will be cutting into the inner wheel well, which needs to be kept.In this picture half of the process has been completed.
 Here all of the front 3rd has been removed. All that is left is to grind away that surface rust on the seam.
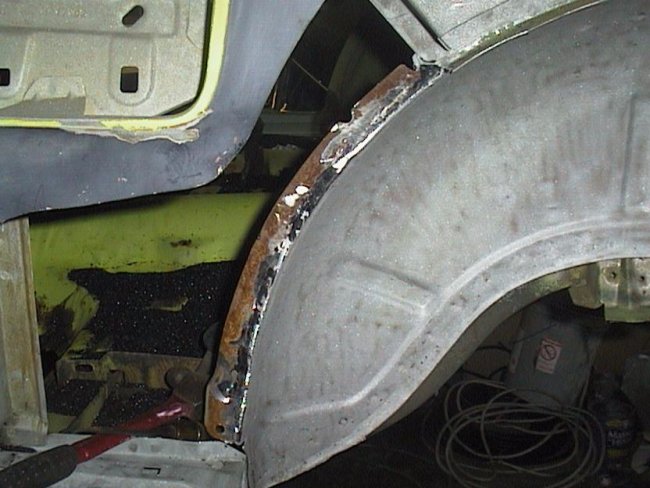
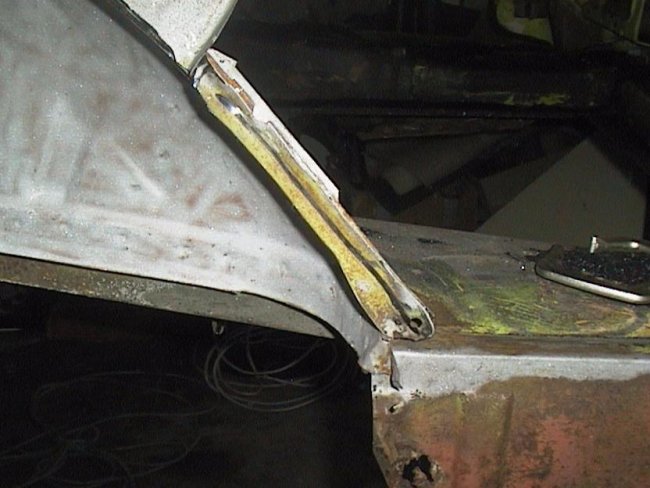 The rear third is done in the same manner accept that the rear trunk brace needs to be seperated from the seam for at least the last inch. This is so that a portion of the new outer wheel well can be slipped behind
the brace to achieve an original appearance from within the trunk (see below). Here a first pass has been made with the stone grinder to grind down the pinch weld. Then the piece of the outer wheel well is pried away from
the inner. The weld is ground down until the outer piece can be broken free by hand.
The rear third is done in the same manner accept that the rear trunk brace needs to be seperated from the seam for at least the last inch. This is so that a portion of the new outer wheel well can be slipped behind
the brace to achieve an original appearance from within the trunk (see below). Here a first pass has been made with the stone grinder to grind down the pinch weld. Then the piece of the outer wheel well is pried away from
the inner. The weld is ground down until the outer piece can be broken free by hand.
 Once the major portion of the standing seam has cleared the remaining portion is ground flat as shown here.
 With all of the outer wheel well cleared away, a couple slits are cut in the new outer wheel well before it is trial fitted to the car. As shown here, the rear slit that is cut in the outer is actuall cut a half inch or more forward of the
end of the trunk brace. This is so that it can be slipped inbetween the trunk brace and the inner wheel well's standing seam to achieve the original factory look as mentioned above.
With all of the outer wheel well cleared away, a couple slits are cut in the new outer wheel well before it is trial fitted to the car. As shown here, the rear slit that is cut in the outer is actuall cut a half inch or more forward of the
end of the trunk brace. This is so that it can be slipped inbetween the trunk brace and the inner wheel well's standing seam to achieve the original factory look as mentioned above.
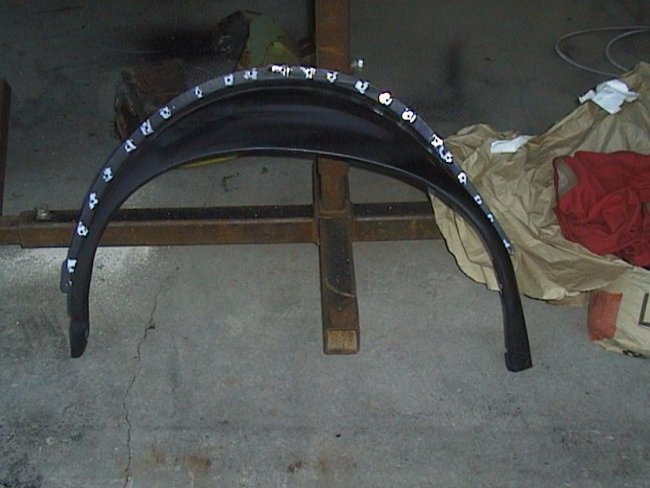 Once the outer wheel well has been trial fitted and adjusted (and believe me, "adjusted" is understated) a couple dozen holes must be drilled along the parameter of the outer wheel well's standing seam. The locations of the hoels should be
marked-off with the outer wheel well clamped in place so that the locations can be picked that are easy to access with the MIG welder and a grinder.
Once the outer wheel well has been trial fitted and adjusted (and believe me, "adjusted" is understated) a couple dozen holes must be drilled along the parameter of the outer wheel well's standing seam. The locations of the hoels should be
marked-off with the outer wheel well clamped in place so that the locations can be picked that are easy to access with the MIG welder and a grinder.