|
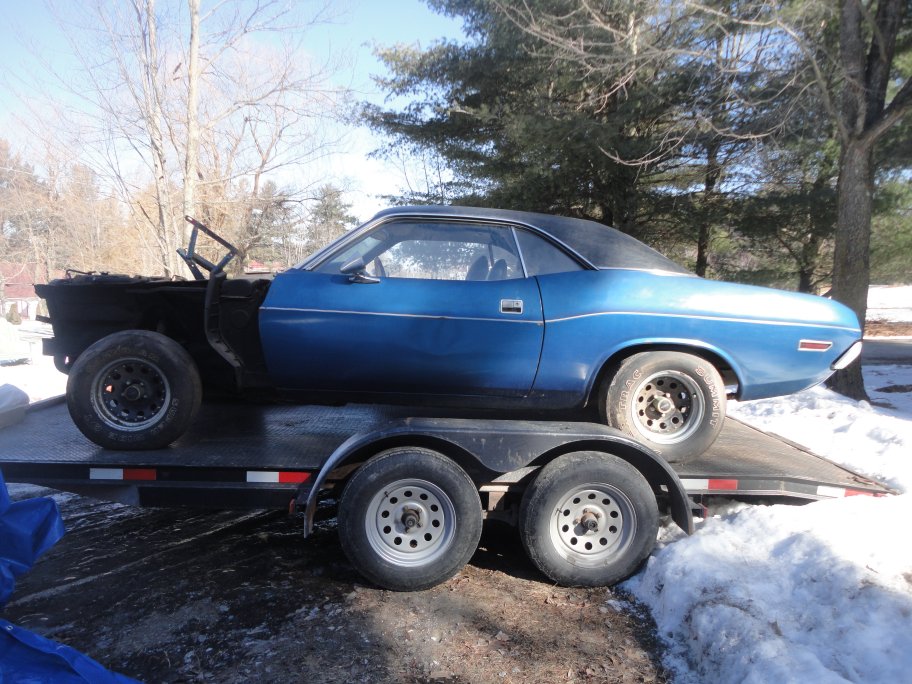
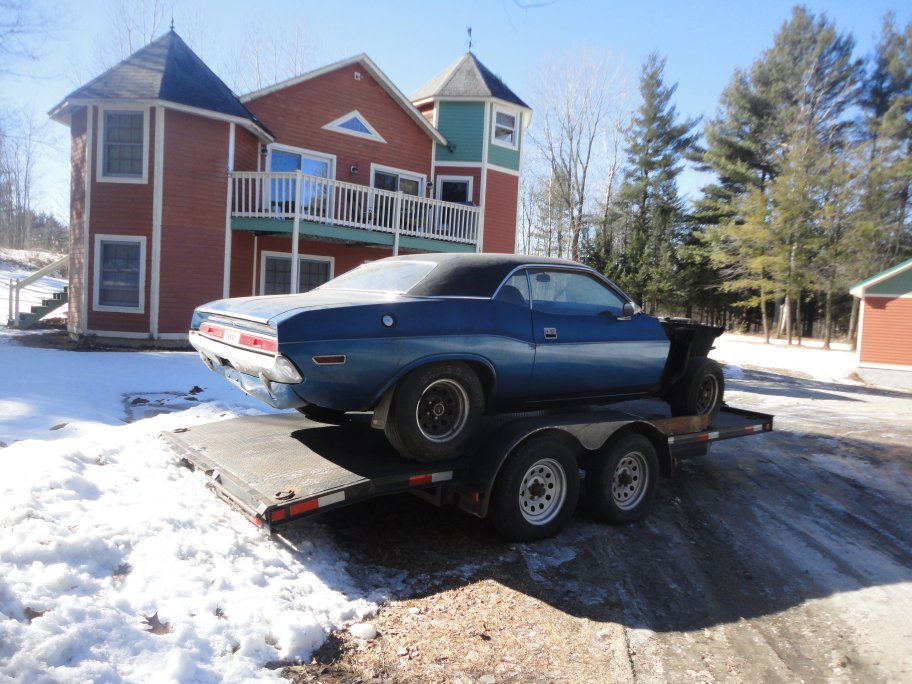
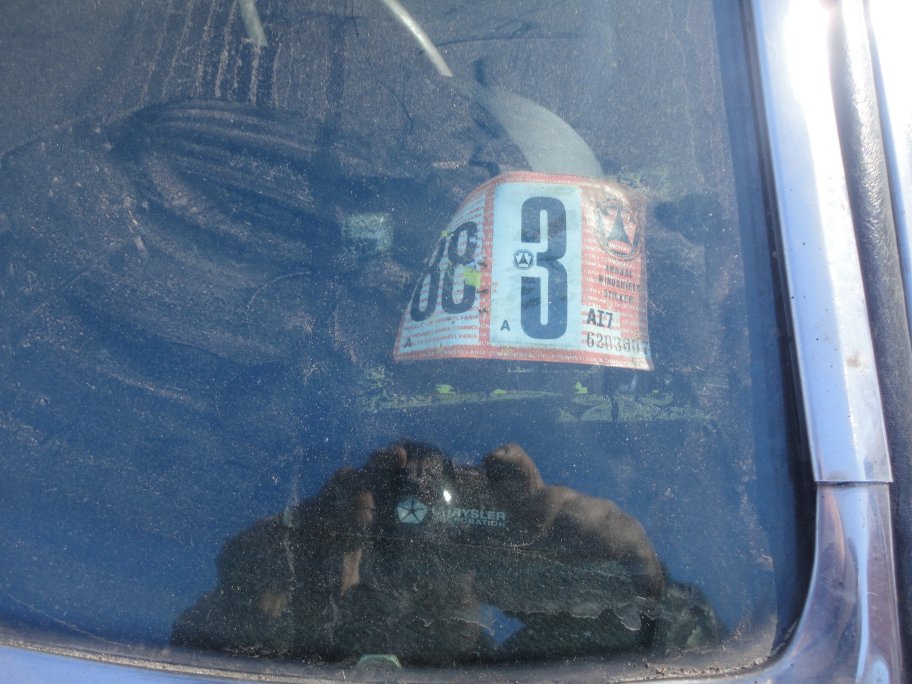
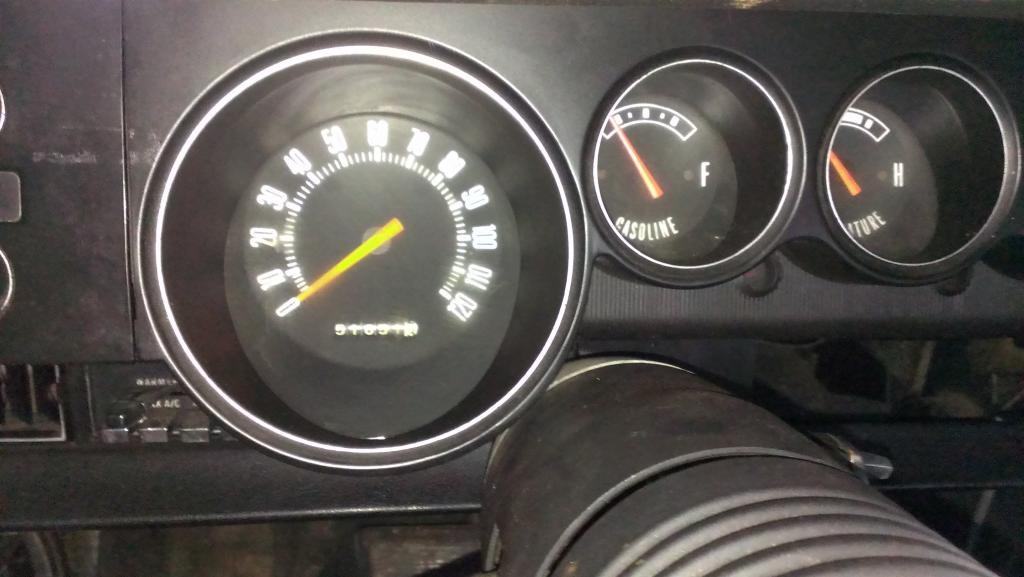
Here are a few of the pictures I took the day after I trailered it home (February 2013). You may notice that the car has the wrong vinyl top on it. The inspection sticker expires on March 1988, which is after the time that the car took on some accident damage. The odometer reads 51,651 miles, which may be accurate. I will be able to tell for sure once the engine comes apart. There will be a noticable ridge at the top of the cylinders at 151K miles.
|

|
Before I got started doing any work I located some rust free front fenders. I was able to locate a pair from a 1971 that were originally painted Sublime. They cost me $1200 for the pair even though they weren't perfect, but I guarantee that they will fit better than any repo on the market.
The car actually sat all spring, summer and fall before I started to work on it. I had a lot of things to finish up on the 63 Jaguar before I could start a new project. I also remodeled the interior of my shop which was long overdue. Finally, with winter setting in and some free time on my hands I decided to dismantle the Challenger and put it on the rotisserie (December 2014). I am not going to bother going into detail on how I took the car apart. Though I did take about 900 digital pictures and recorded about a half dozen videos during the taredown process.
|
|
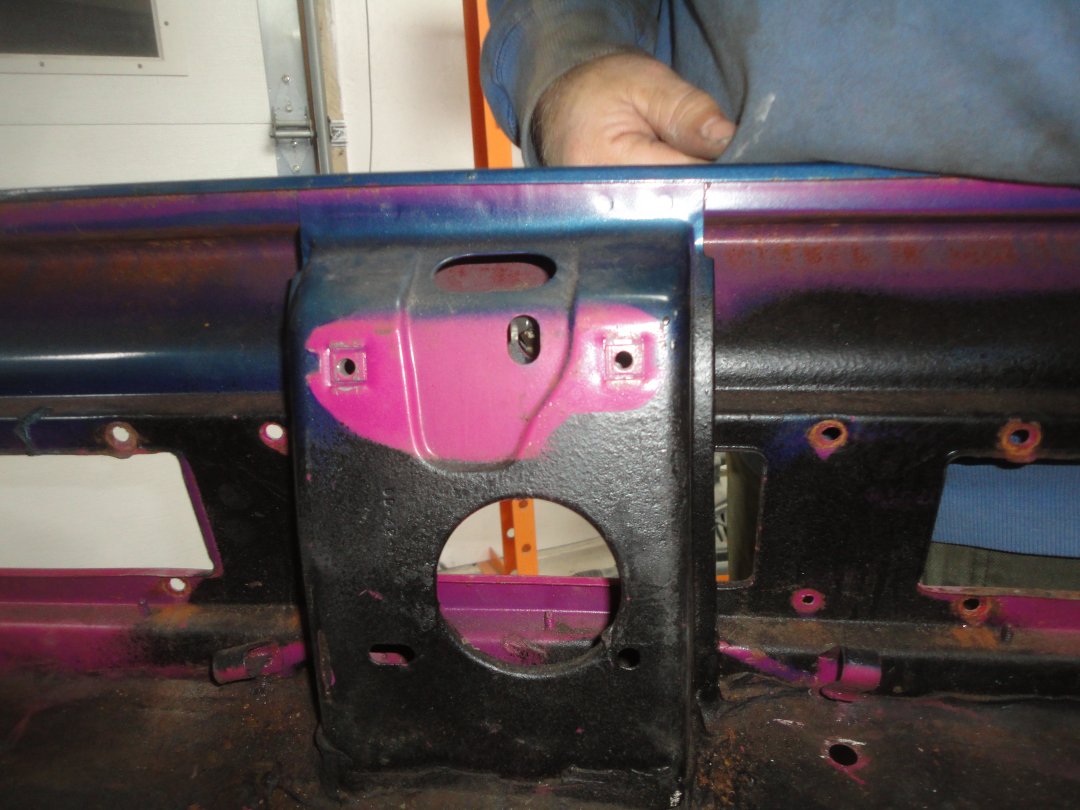
Here are a few pictures of some interesting things I noticed during the taredown. The first picture shows how poor the quality of the workmanship was at the factory. The leadwork was atrocious. There was a big blister on the rockers and the lead just kind of hung down and was not leveled off. The bottom door gaps were also a massive 1/2". Normally you would expect 3/16".
The second picture shows that the rear filler panel (between the bumper and tail panel) was attached to the car prior to painting and the seam was filled with seam sealer.
The third picture shows where the factory stapled the vinyl top in place at the upper corners of the windshield. They used 4 staples per side. Staples were also found by the rear window. I only noticed this when removing the vinyl top that had obviously been replaced. The top was definitely not a correct Challenger vinyl top. The seams were in the wrong location. The seams were across the roof instead of more down the sides of the roof and quater pillars. Now that I know this, I've been seeing the wrong tops on high dollar cars that have been "totally restored". Perhaps they used Barracuda tops instead?
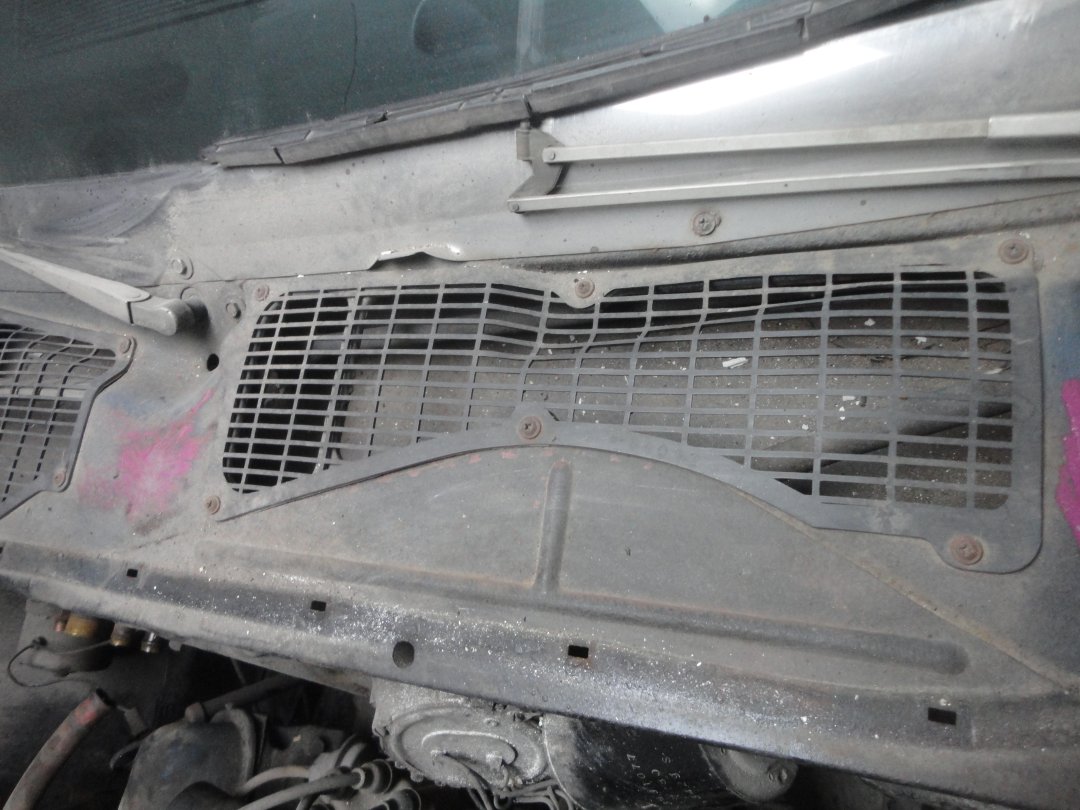
The fourth picture is there to show that this car (built Feb 24,1970) uses the screw-in style cowl vents. The factory had also used philip screws instead of a hex head screw that I been seeing on other cars. This is one of the details that you shold pay attention to when restoring a car.
|

|
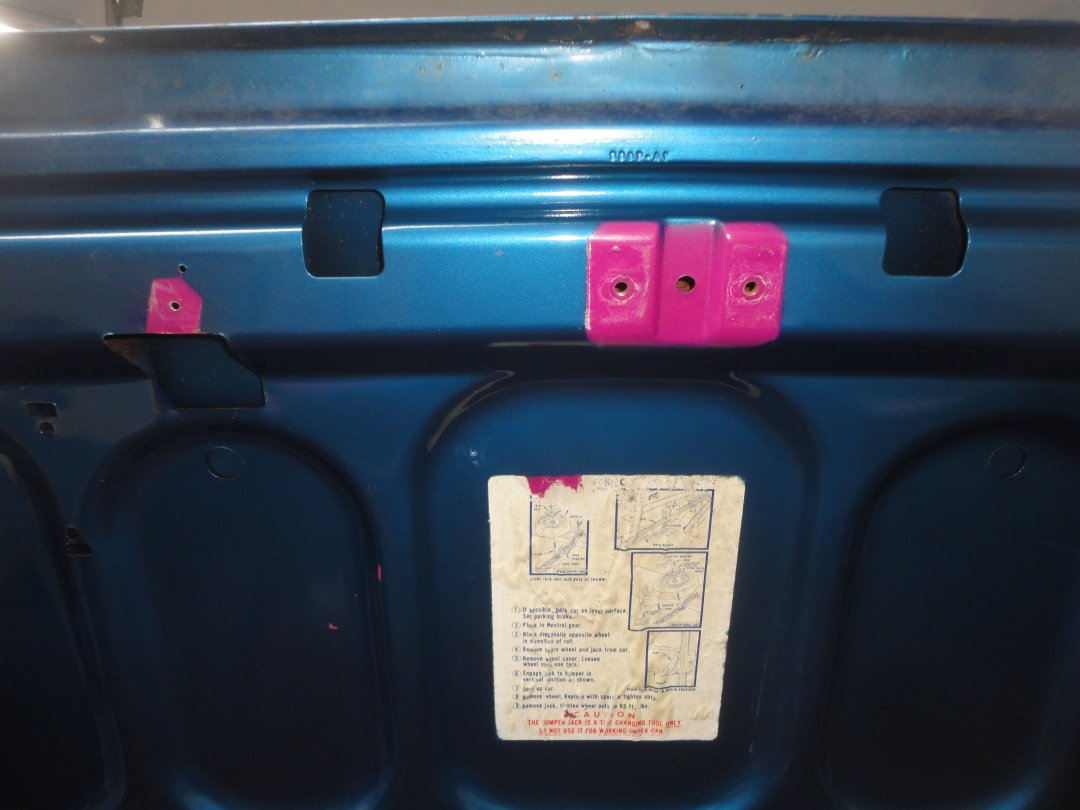
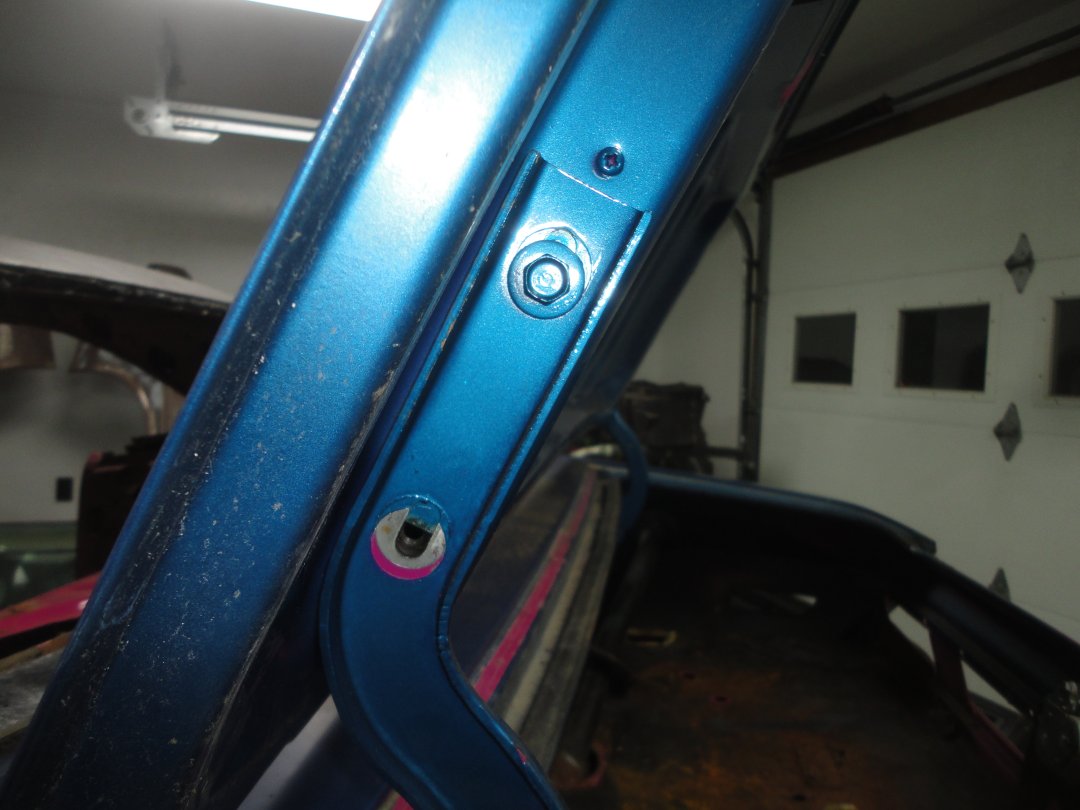
When the trunk latch and catch were removed it was obivious that they were not installed when the car was painted. Some cars have these items installed prior to paint. I'm glad this one didn't since I think it makes a car look sloppy when the latches are painted over.
The trunk lid appeared to have been readjusted after paint. Not simply because you can see the pink color under the bolt head, but because the gap was so bad on the lid that the lid would have hit the quarter panel if the factory had not readjusted it. Note: It is not uncommon for the factory to have readjusted the panel fit after paint.
The last picture shows all of the change I found when taking the car apart. $1.03 is better than nothing. I also found an earing, comb and three empty boxes of Dynamints. Are there any collectors out there?
|
|
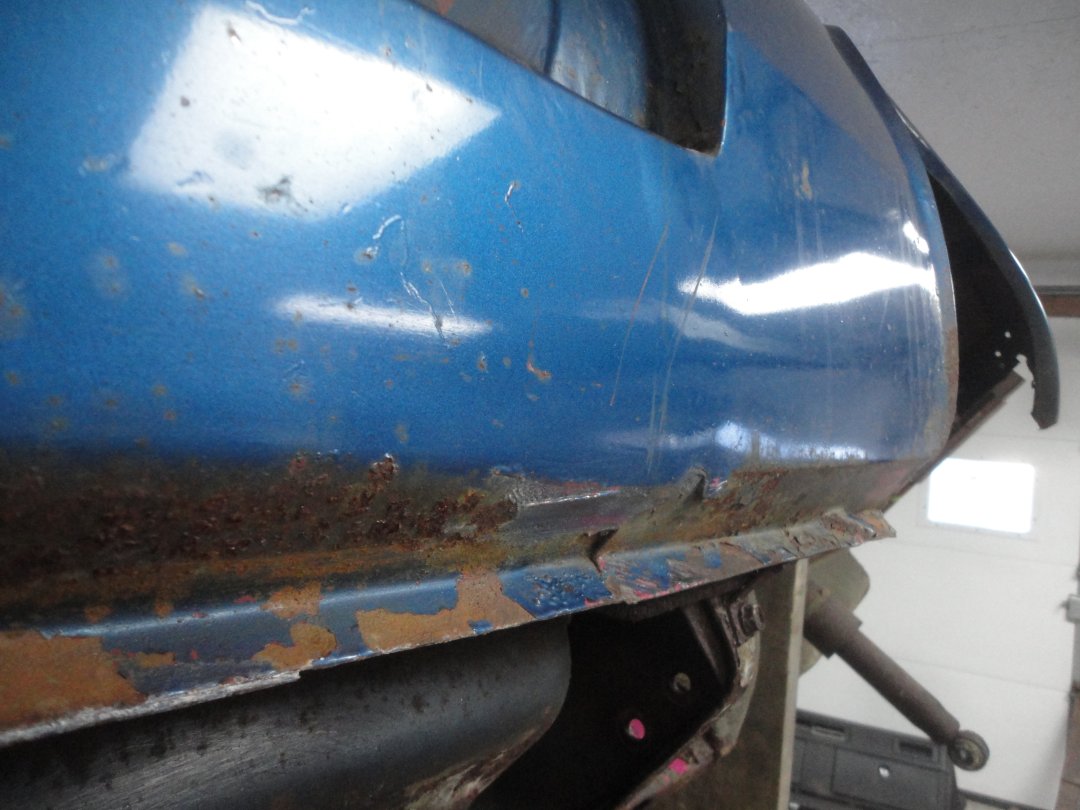
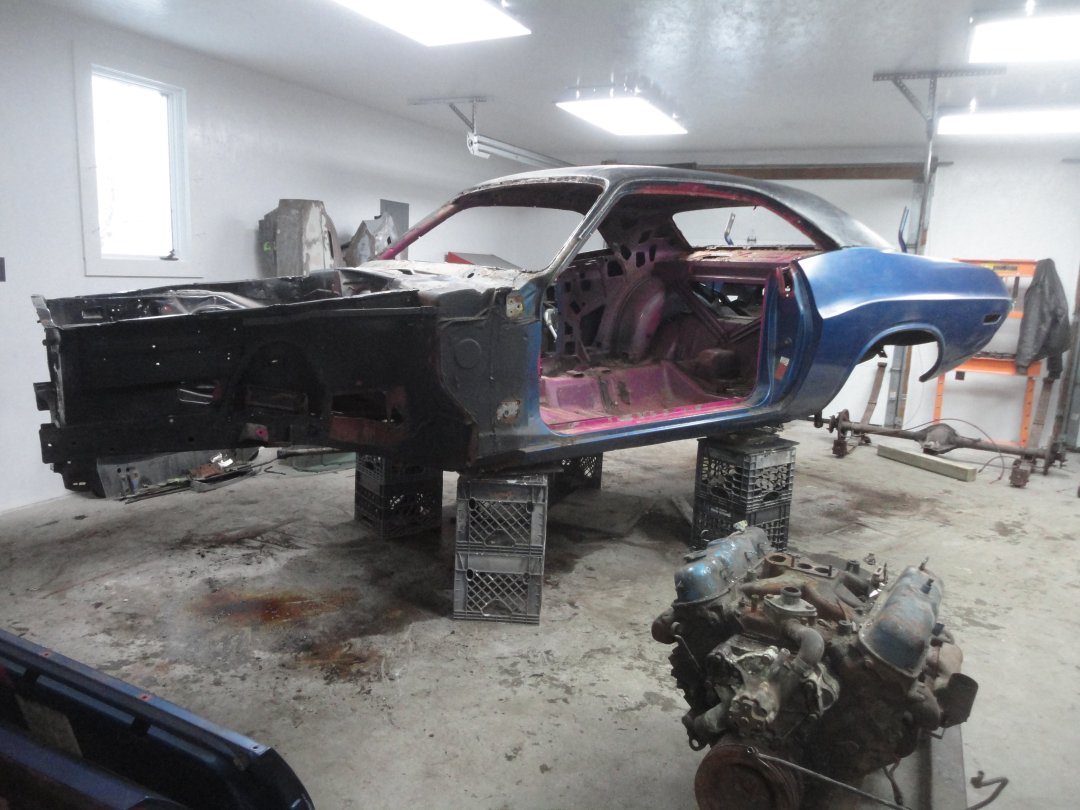
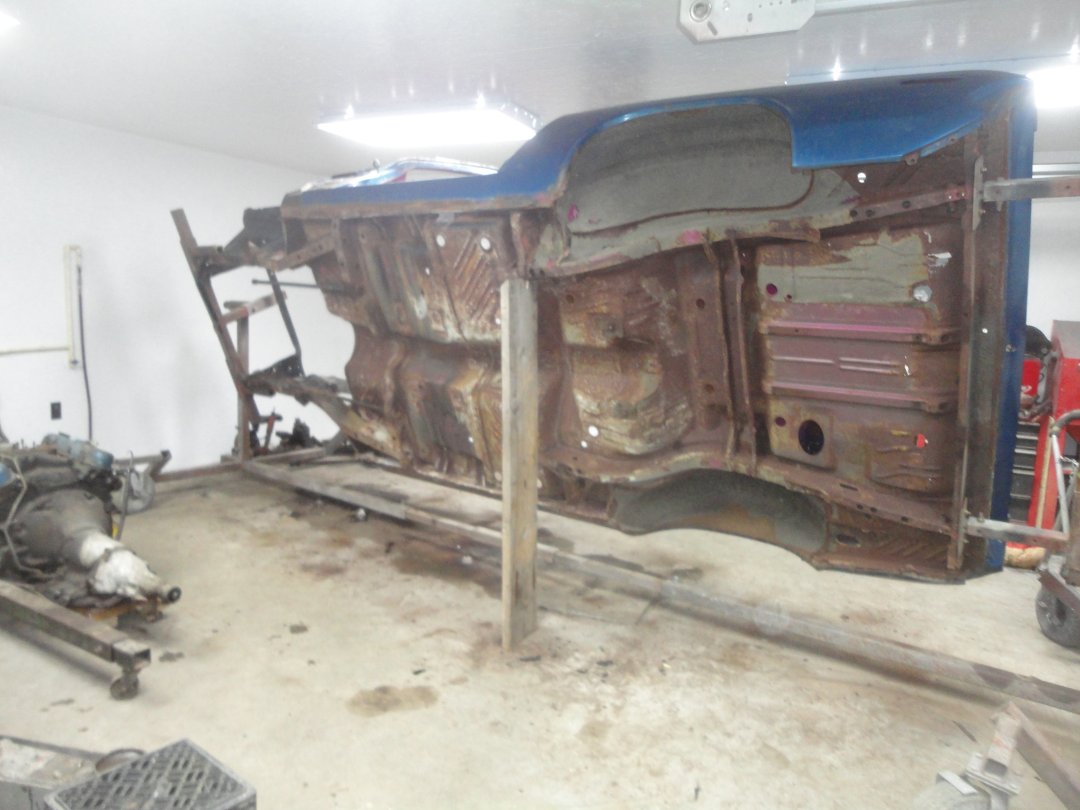
Here are couple pictures of it after being stripped down. From the top, the car was in pretty good shape. The doors and trunklid had no rust damage. The bottoms of the rear quarters had rust breaking through at the very bottoms on either side of the wheelwells. This is not suprising. It's the rare car that doesn't need at least a little quarter panel work.
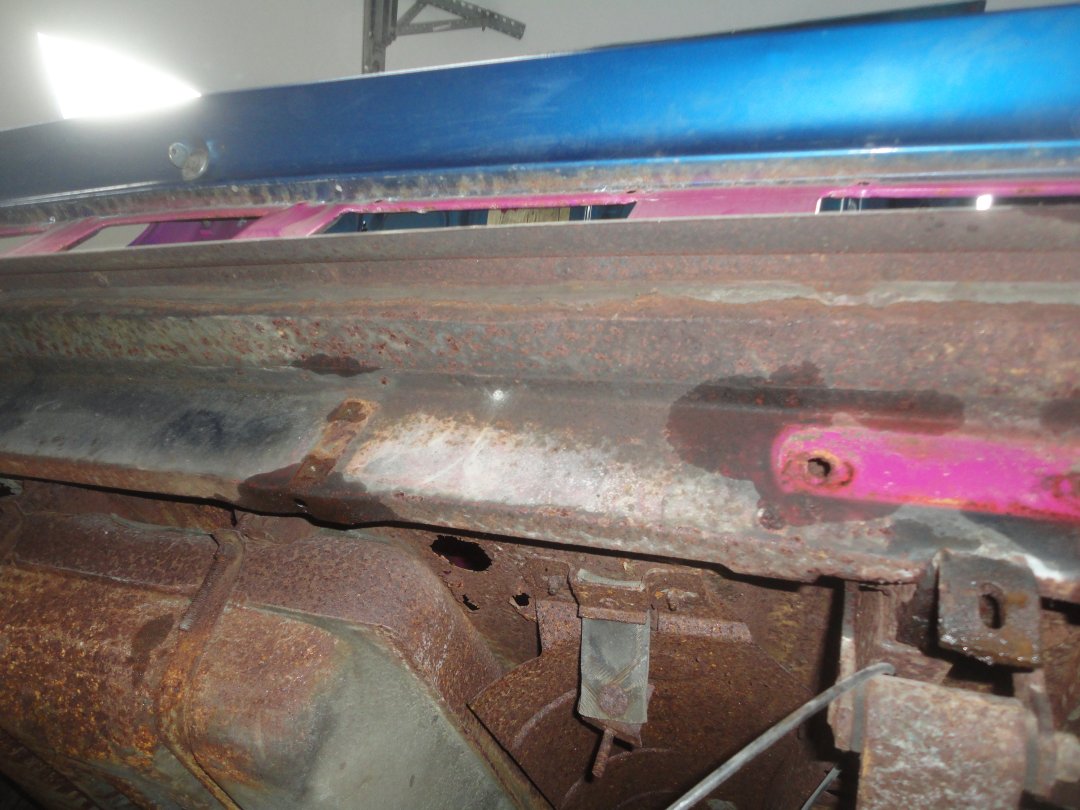
From the inside the trunk pan and the trunk floor extensions were pretty shot. There were plent of rust holes on the driver's side floor pan, front and rear. The passenger side looked pretty decent, but once you hit things with a sandblaster, those nasty rust holes would probably make an appearance just like they always do.
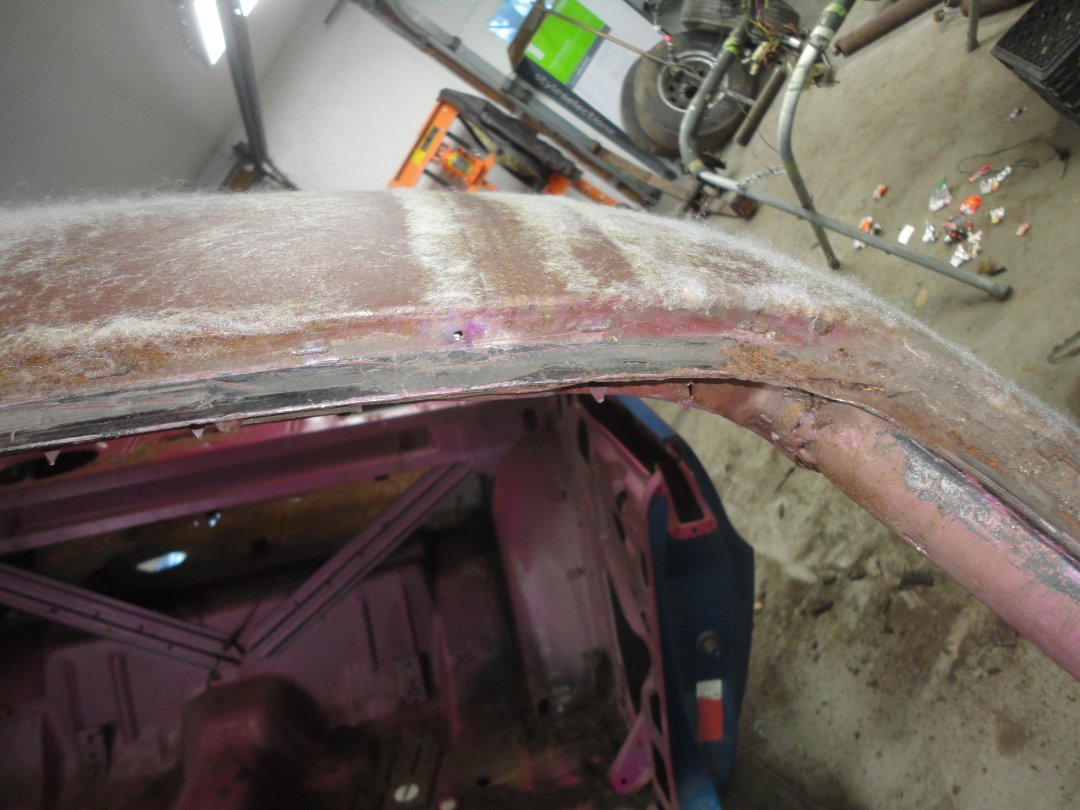
The firewall and windshield opening had the typical rusted through areas. The area where the upper and lower cowl meet, to the left of the windshield wiper motor is the typical place to find severe rust on these cars. On this one, the hole was so large that a previous repair was made by stuffing paper towels in the hole from the inside and smoothing it over with fiberglass body filler. Yup, all sins are revealed when you tare a car down to bare metal. I probably have to replace the upper cowl panel....
The last picture shows how rusty the undercarriage got from just sitting in a damp garage for 25 years. I'm sure the floors would have in much better shape if the factory had used more than a sneeze of primer on them. There were many areas that would be very difficult, if not impossible, to hit with a sandblaster. Since I was going to have to replace a big section of the floorpan and trunkpan, I decided to go ahead and replace all of the floors from the firewall back. This would give me the opertunity to sandblast and prime the inside of the frame rails.
|


|
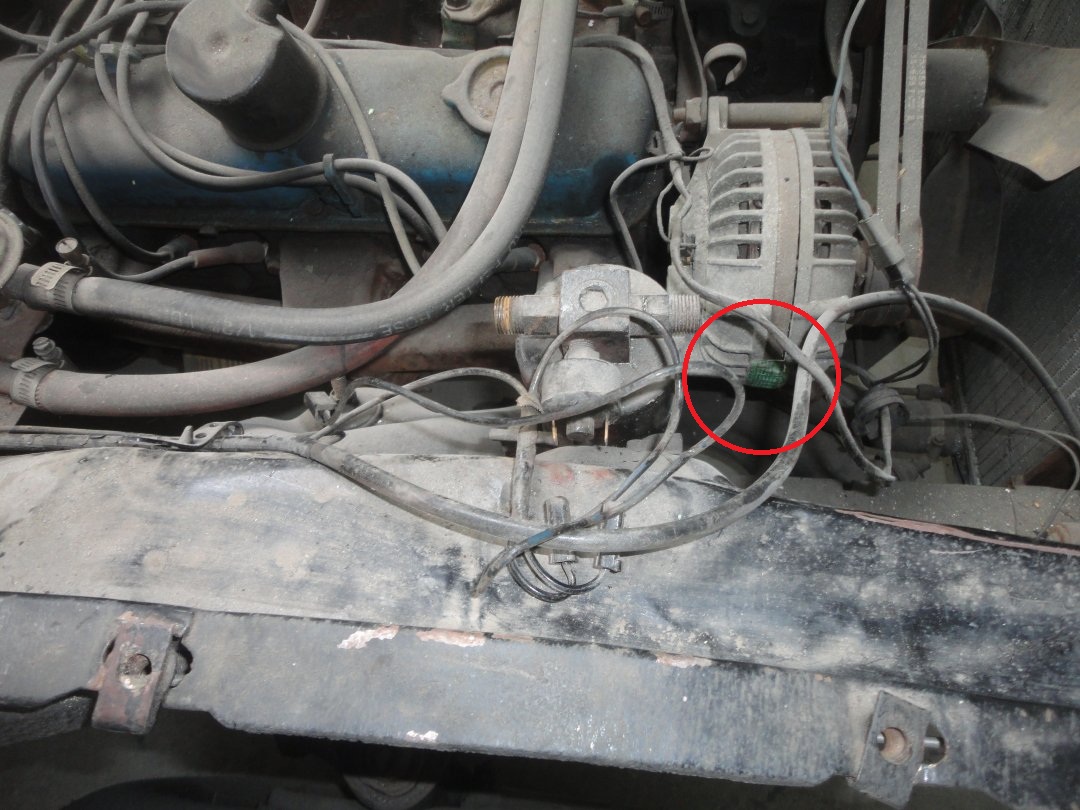
Here are a few more details I uncovered prior to the tare down. Circled in red in the first picture is the date code tag on the A/C expansion valve.
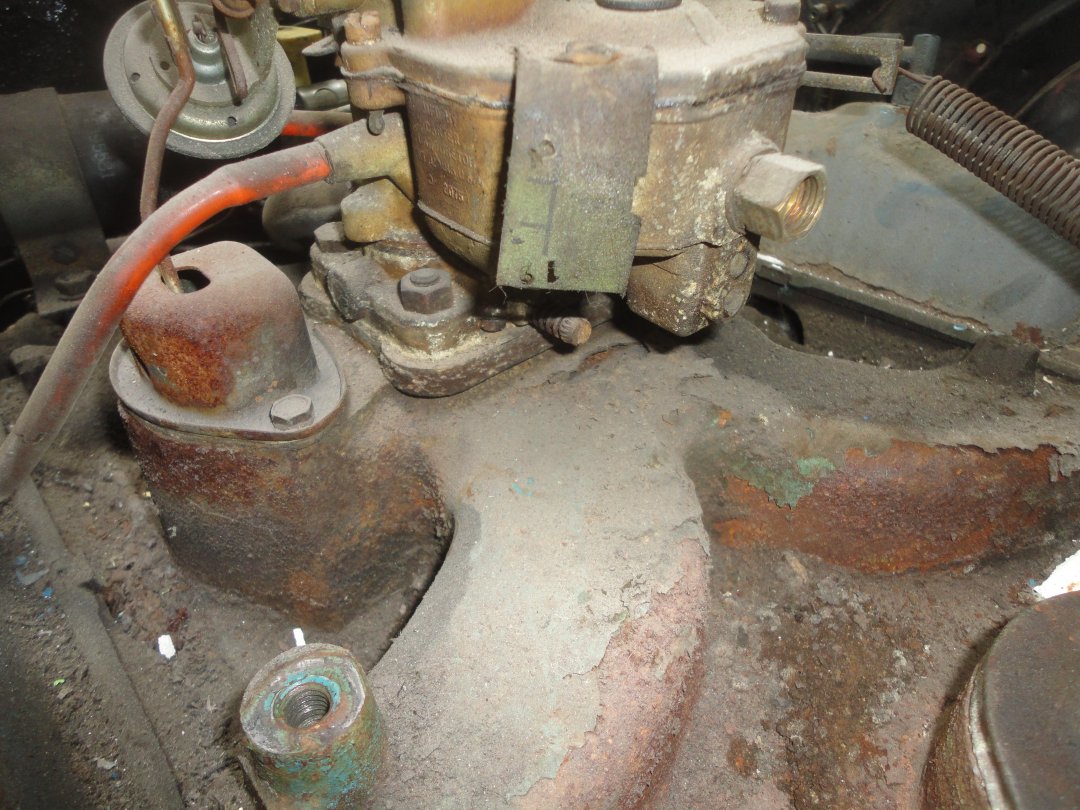
There was a paper tag attached to the carburetor which leads me to believe that it is a replacement carb. I'll know more once I look at the date codes stamped on the carb.
The label on the side of the alternator is surely a sign that the alternator was changed.
The factory gas tank sending unit paper tag was still attached to the sending unit. However the tag is illegible. Also interesting to note is the factory fuel line strap, which is partially still in place.
|
|
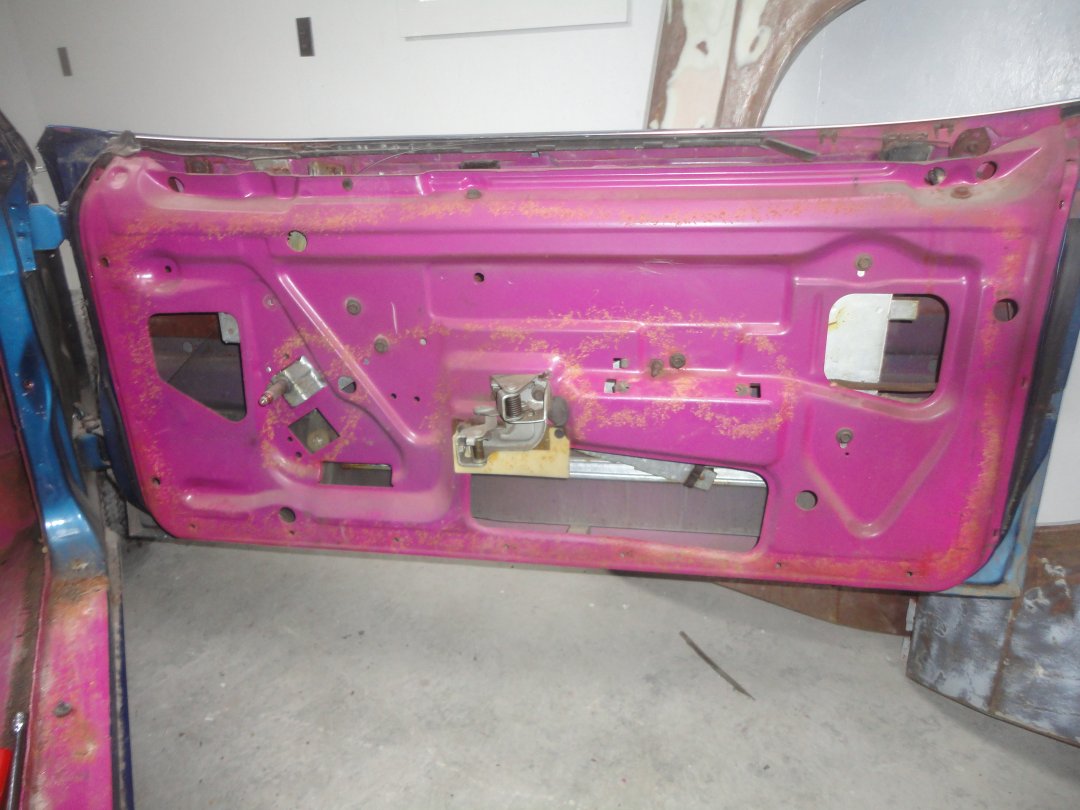
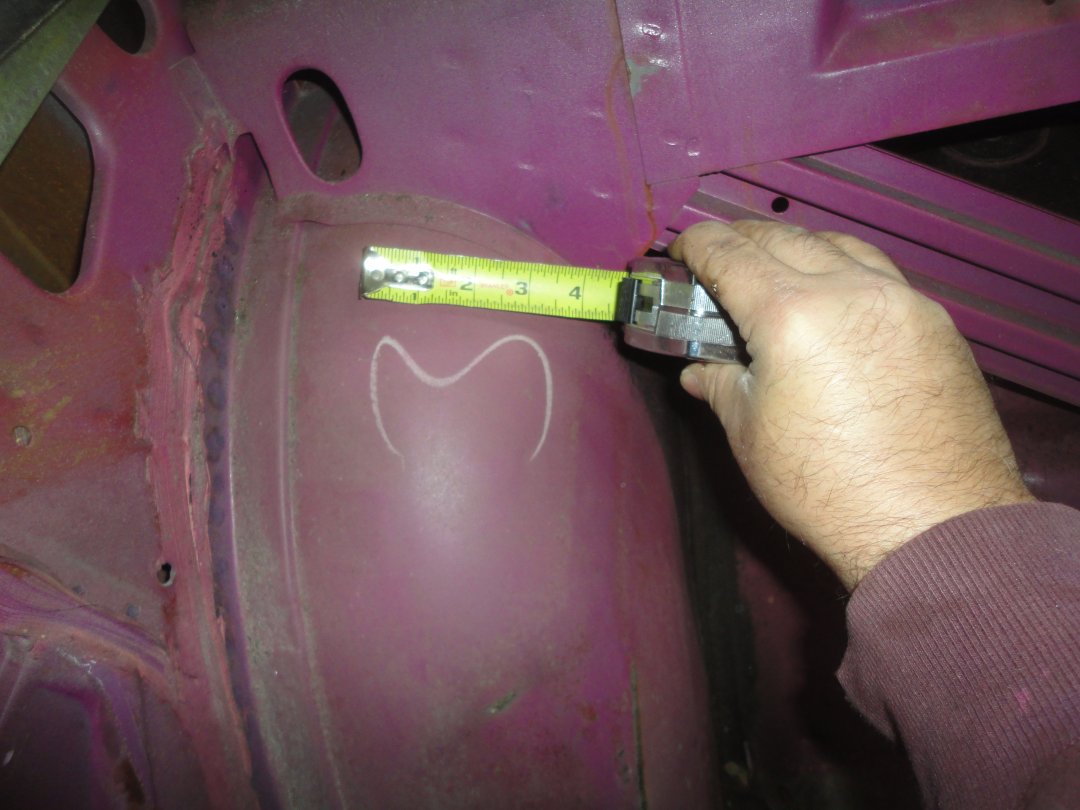
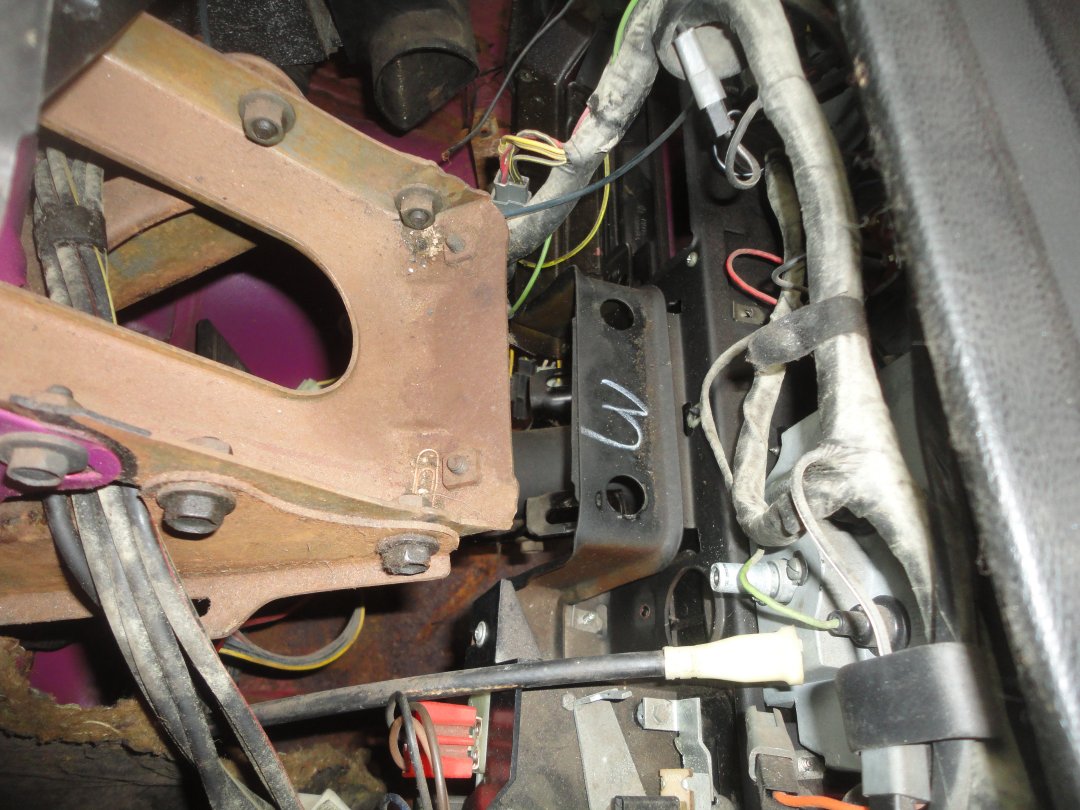
A factory crayon marking of "1" appeared was found on the passenger's door. No idea what this ment, though I have seen similar numbers on other cars.
Though the infamous "Rock" did not sign this car, the number "3" was found on the inside of the RH inner wheel well.
The number "3" also appeared on the dash assembly, which was obscured by the steering column support. I'm sure that the number "3" had some meaning during the assembly process.
|
|
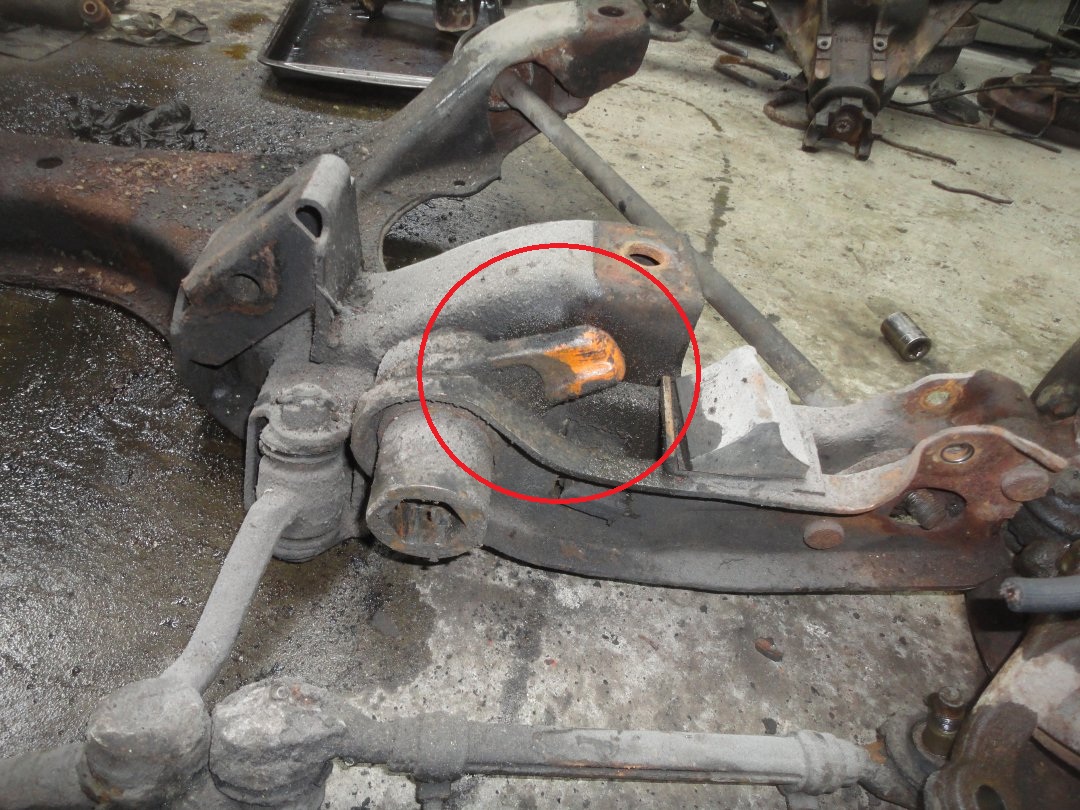
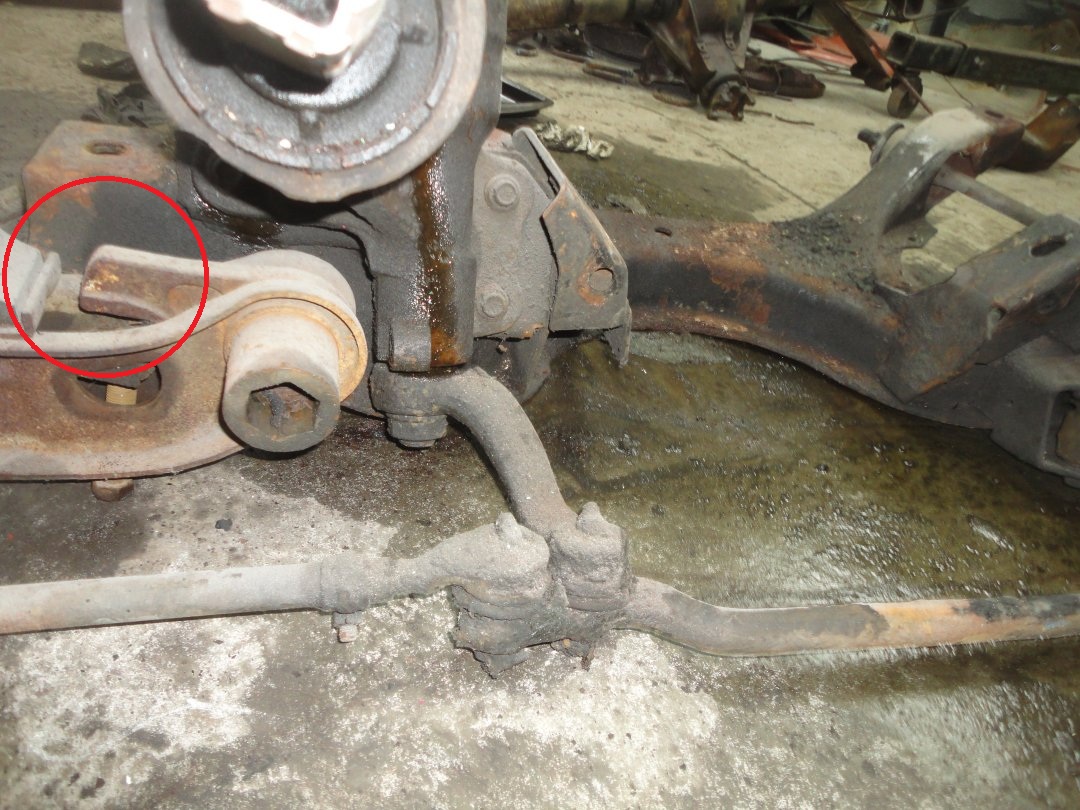
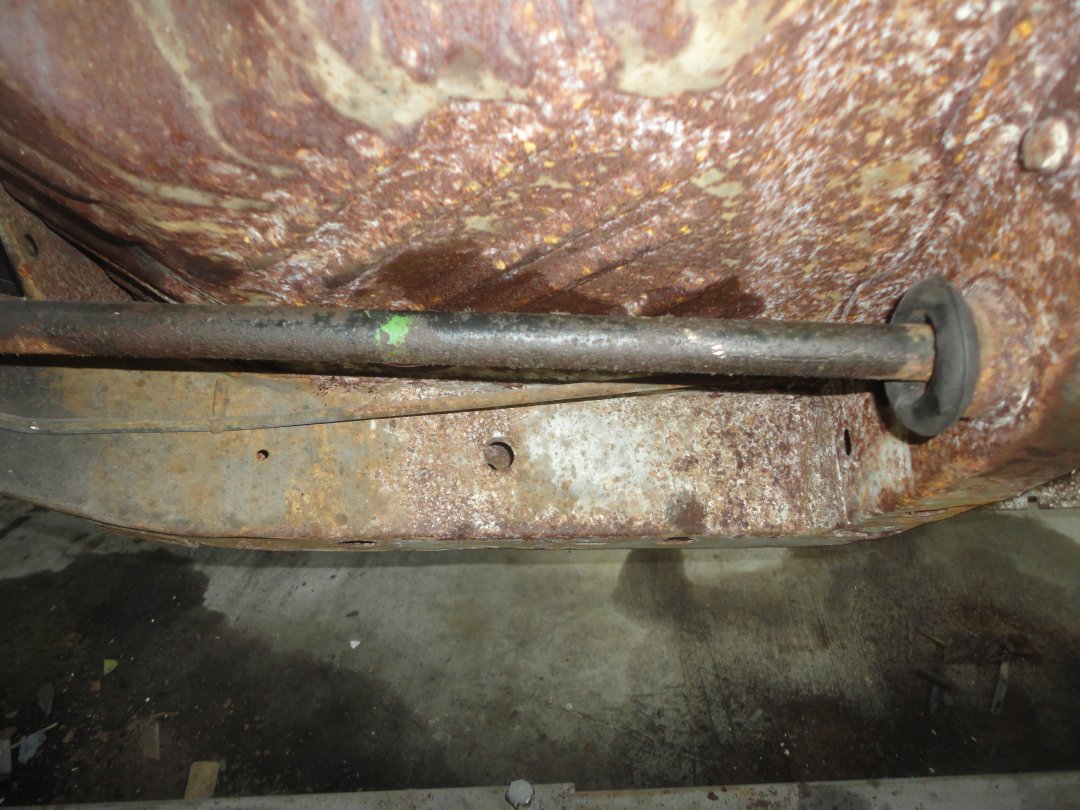
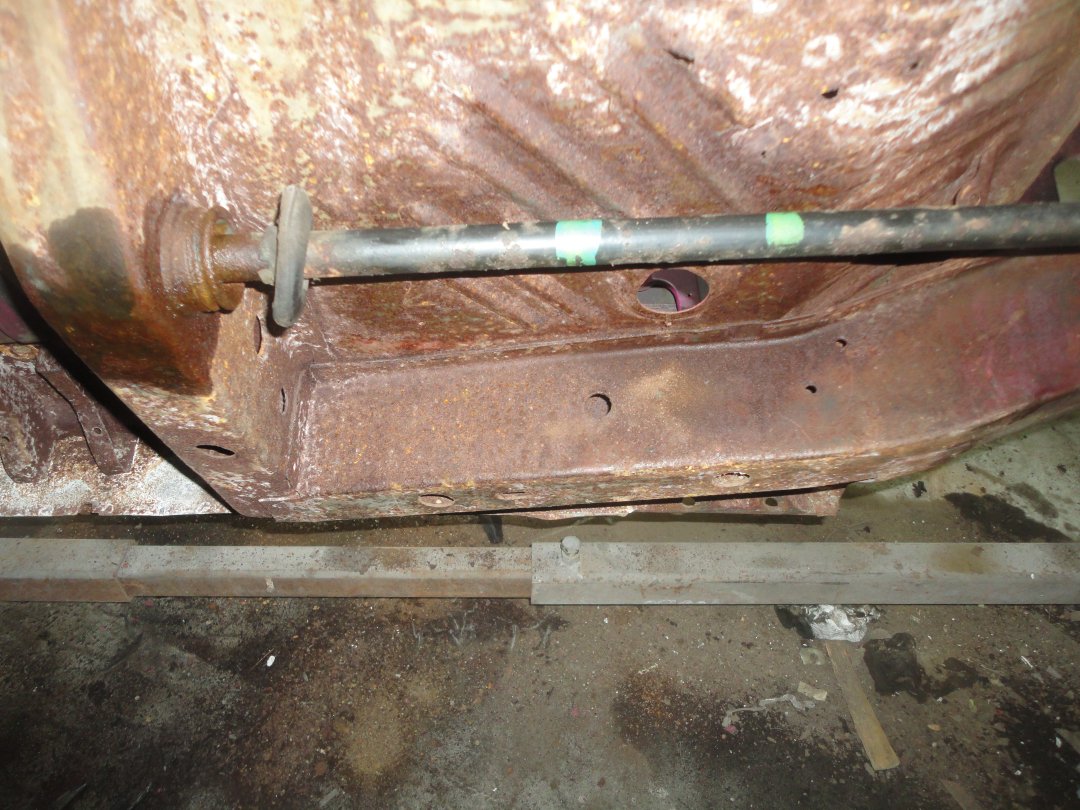
A lot of factory markings were uncovered when the front suspension was torn down. The RH lower control arm had and orange paint marking and the LH lower control arm had a white paint mark.
The RH torsion bar had one light blue mark and the LH torsion bar had two light blue marks. The marks were a quick way for the assembly line worker to differentiate between left and right parts. Usually there is a red inspection mark on each of the rubber torsion bar boots, but there were no sign of red markings on this car.
|
|
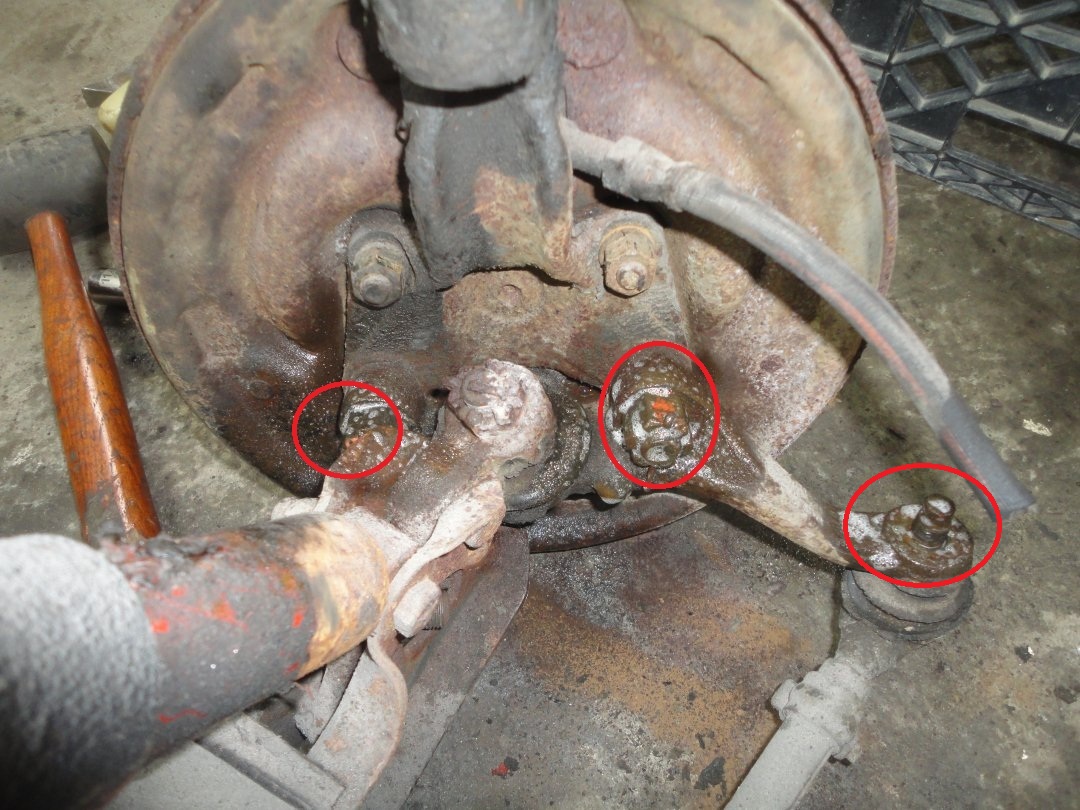
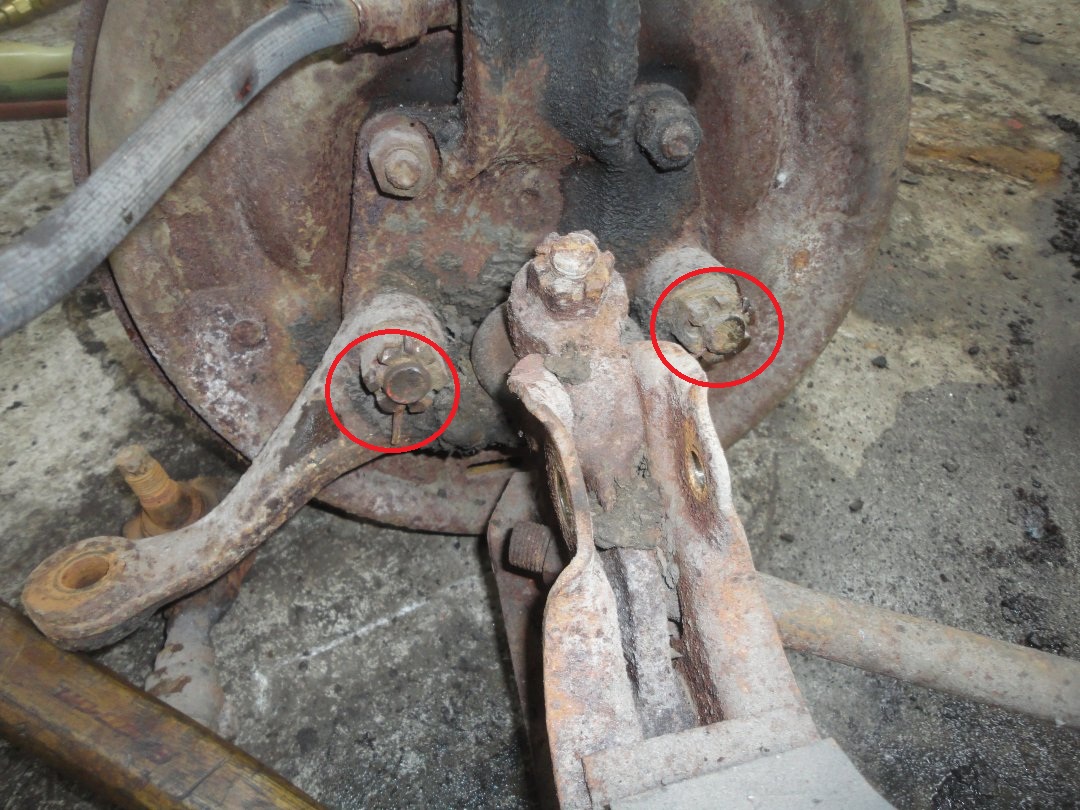
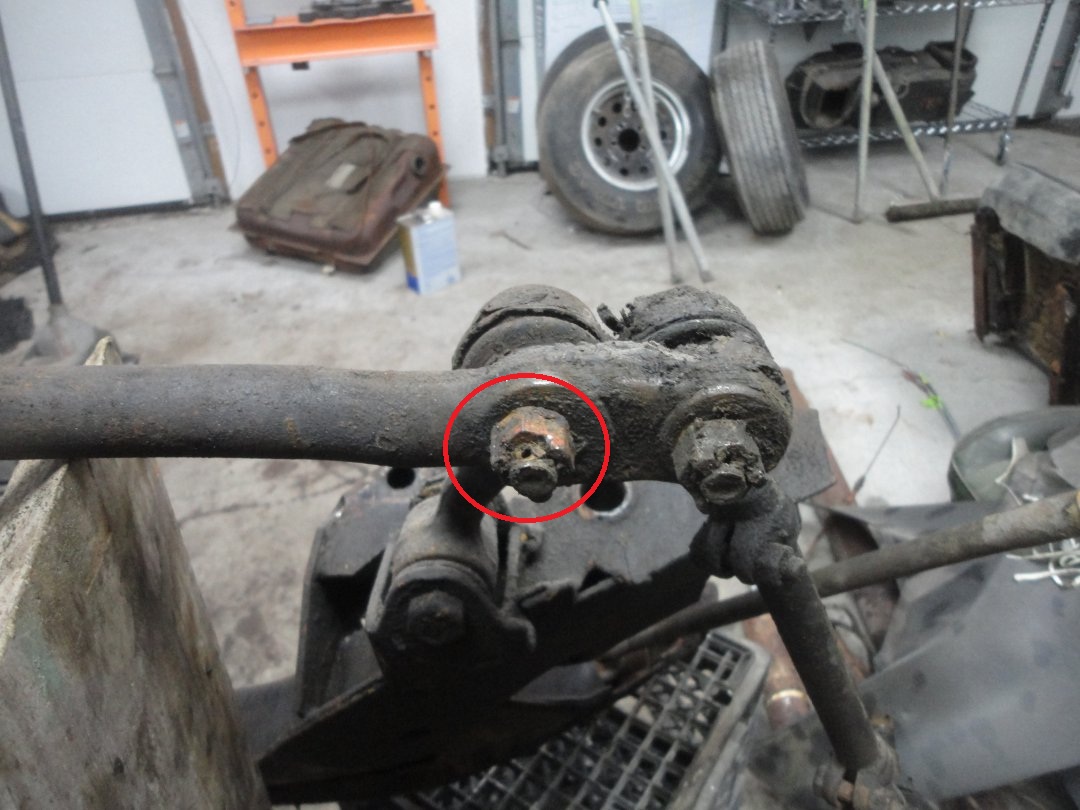
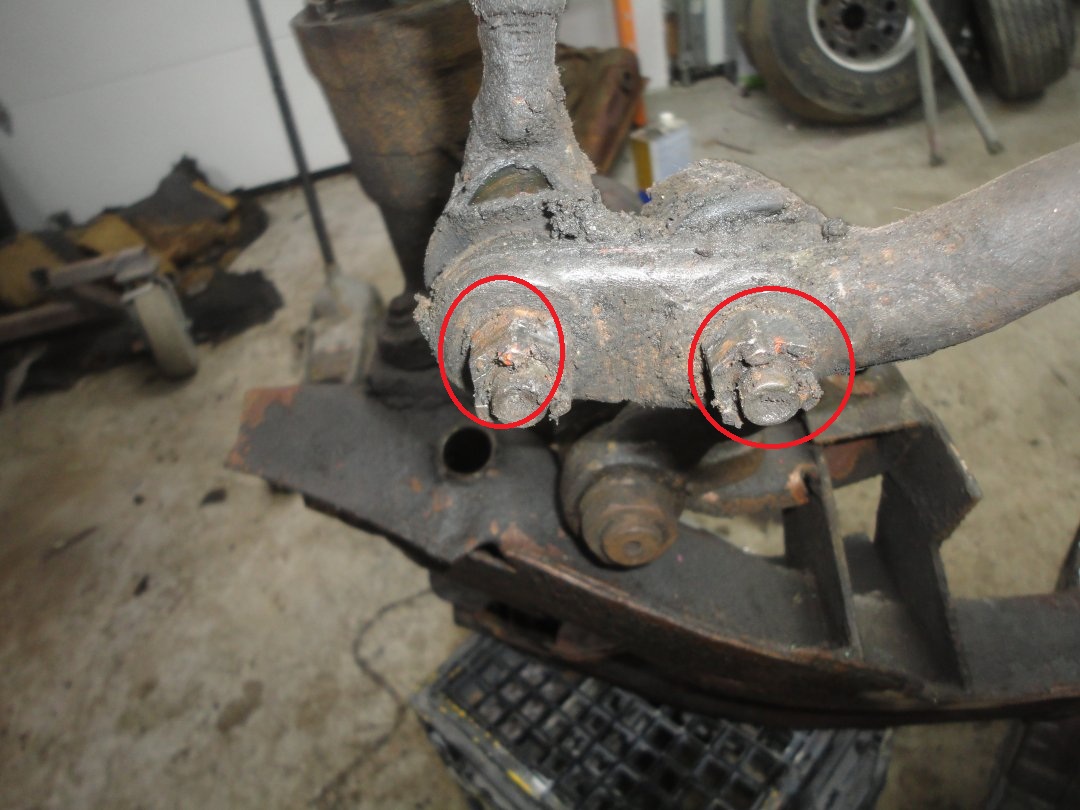
Orange inspection marks were found on all of the ball joint nuts on both spindles. Basically anything with a cotter pin was found to have an orange inspection mark.
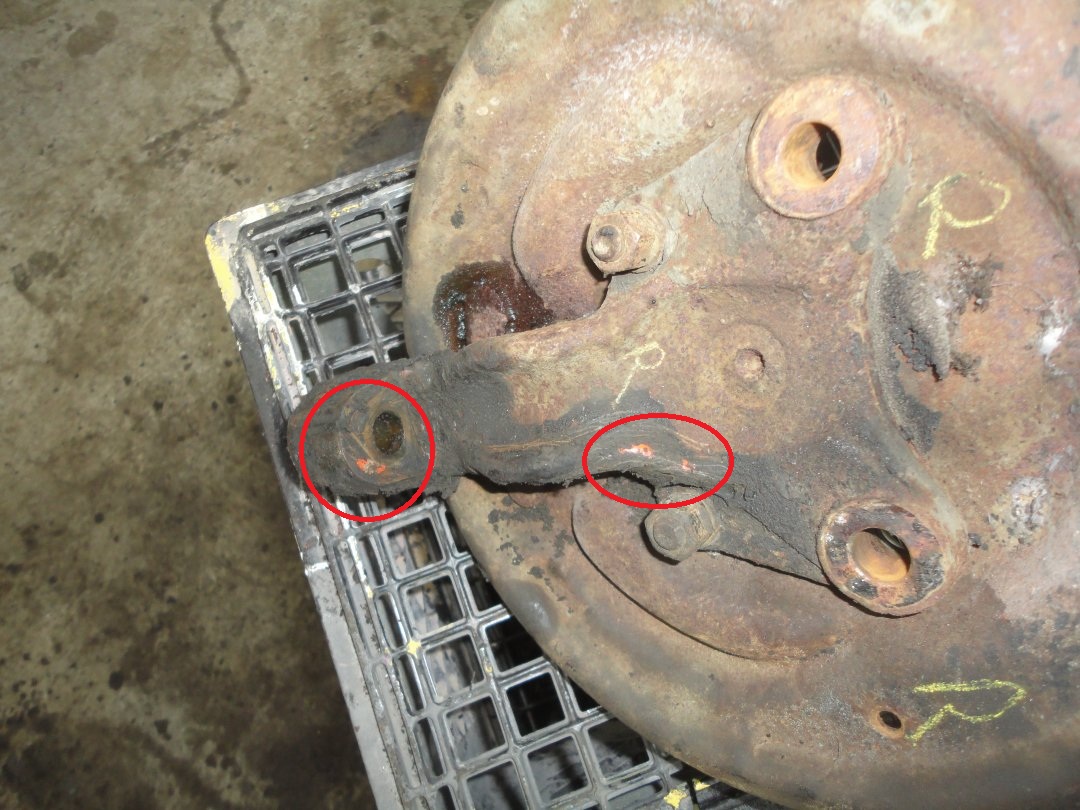
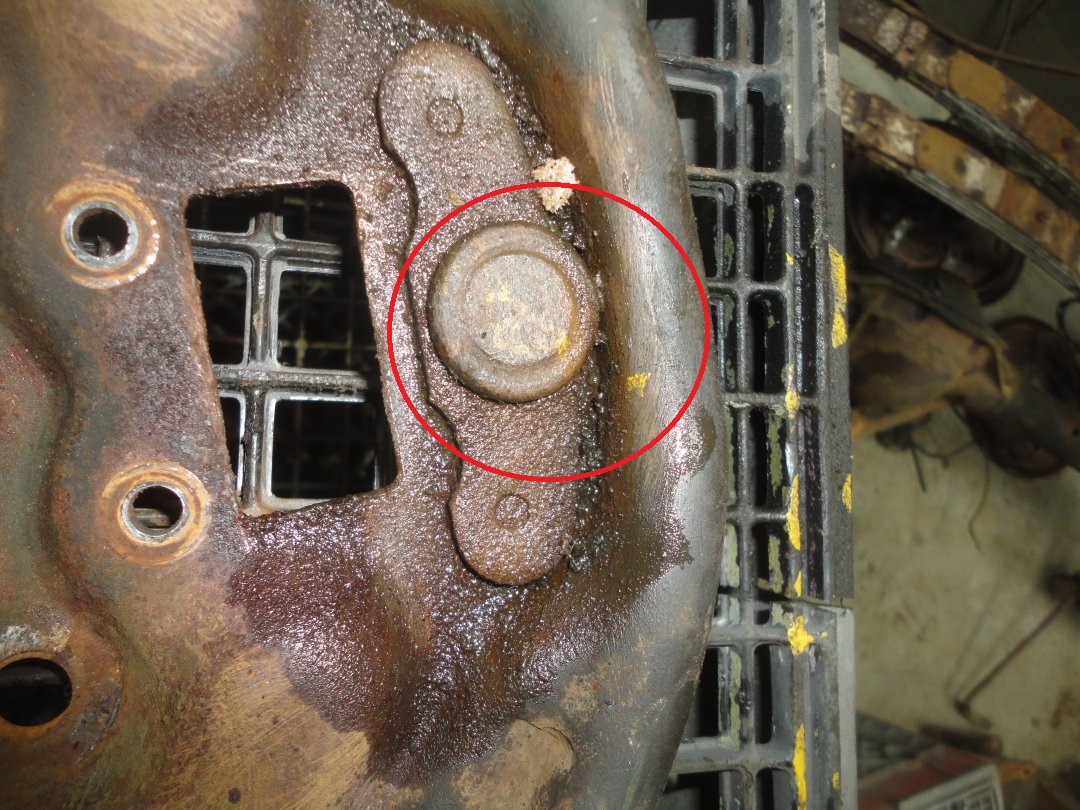
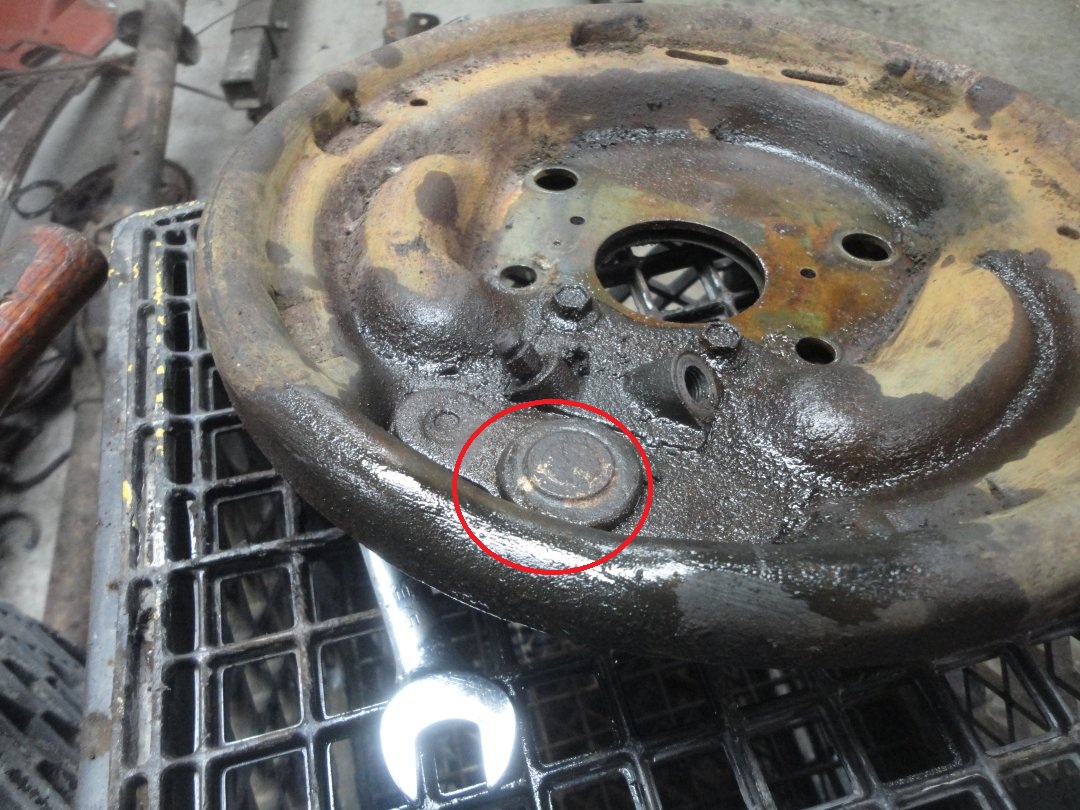
When the spindles were removed from the front backing plates, paint markings were uncovered. Yellow on the right and white on the left. These markings were probably there to help differentiate right from left brake assemblies. I will reproduce the markings during the restoration, though it will be very difficult for anyone to ever see the marks once the spindles are installed.
|
|
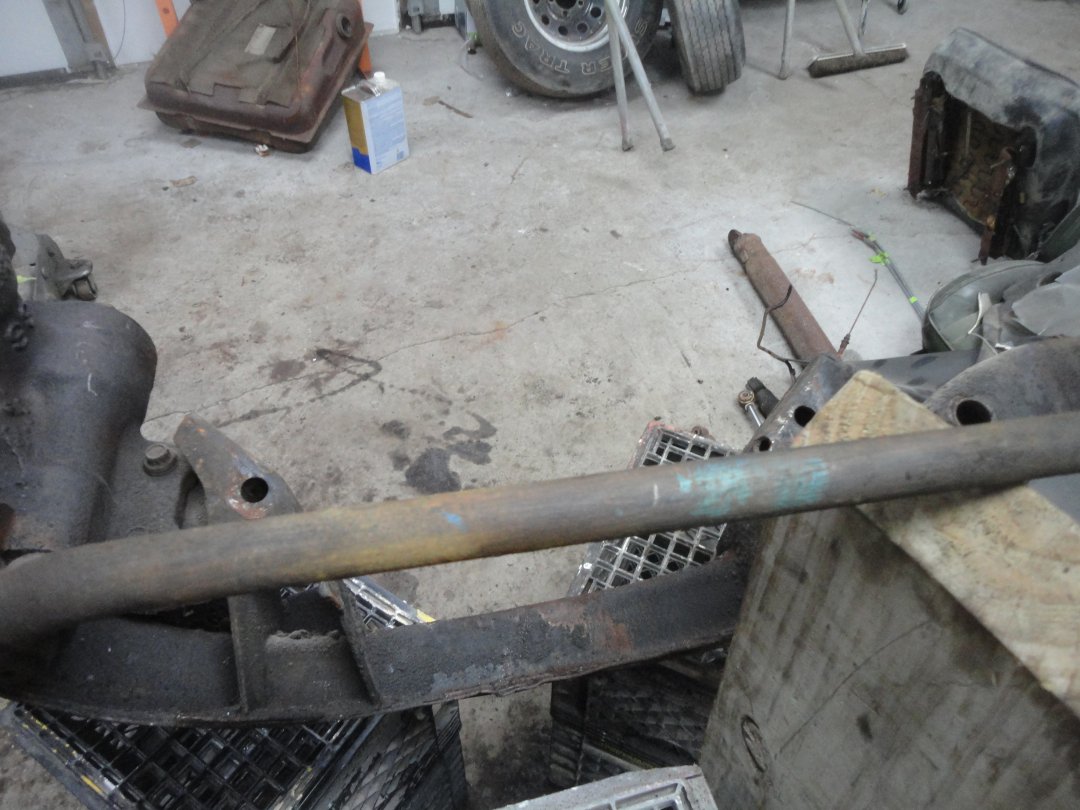
The center link had a big blue mark in the middle (I believe to identify it as an E-body part). Orange inspection mark paint was also found on the center link tie rod end connections. Again if it had a cotter pin it had an orange inspection mark.
|

|
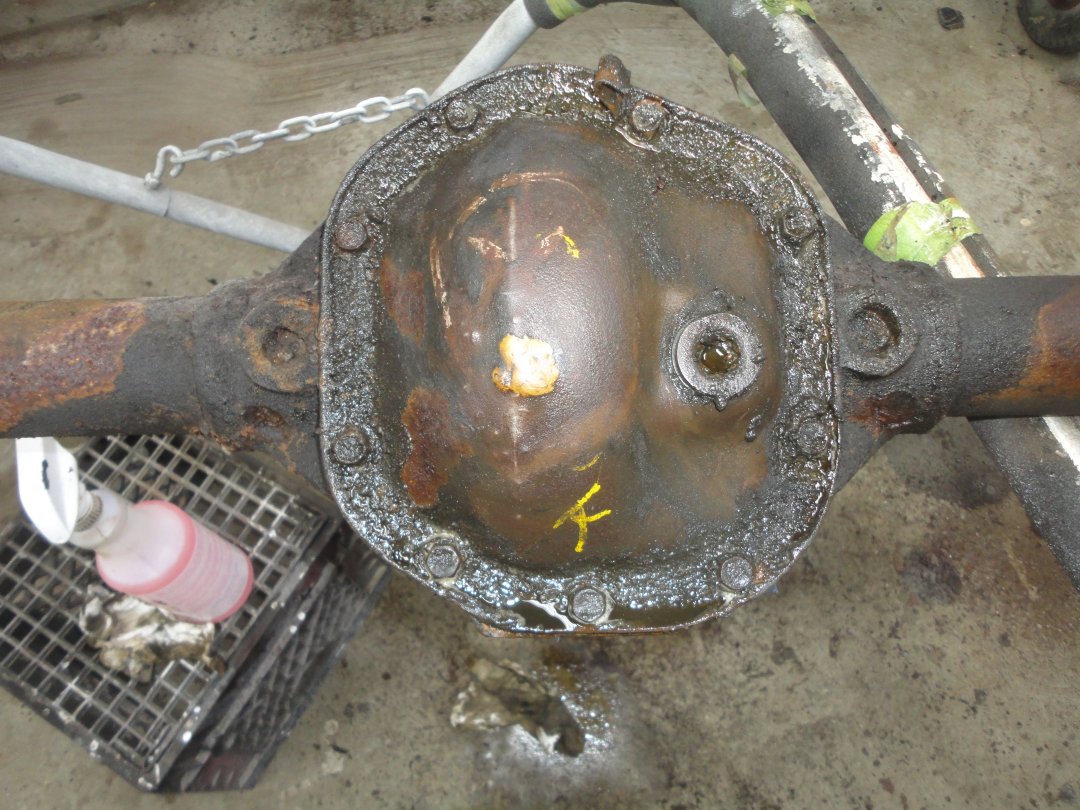
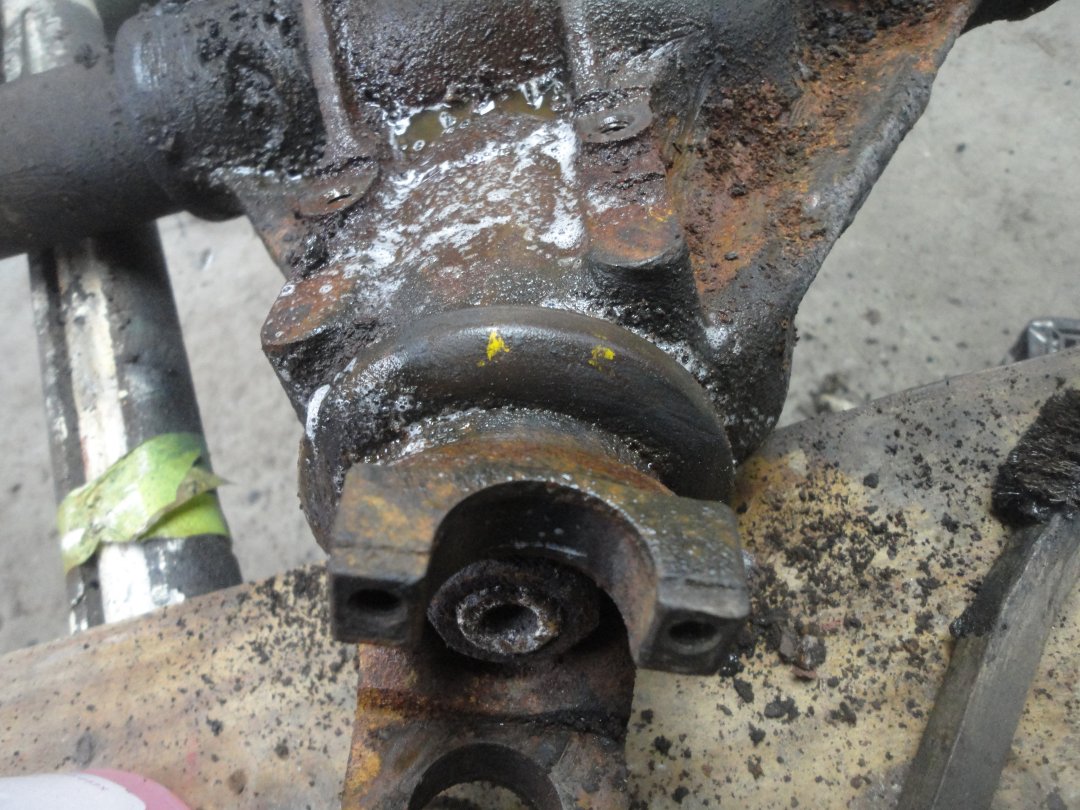
There are always lots of different markings on the rear axle. The differntial cover was repaired on this car, so one of the major markings was obliterated. All that could be identified is the circled "X" in white and the letter "K" in yellow.
In the second picture you can see a big yellow marking with the axle ratio "2.76" stamped in it. Larger axles would have received a metal tag.
There were a number of markings on top of the differential "8", "BUR" and another "8". Not sure what they mean, though the 8's were probably inspection check marks.
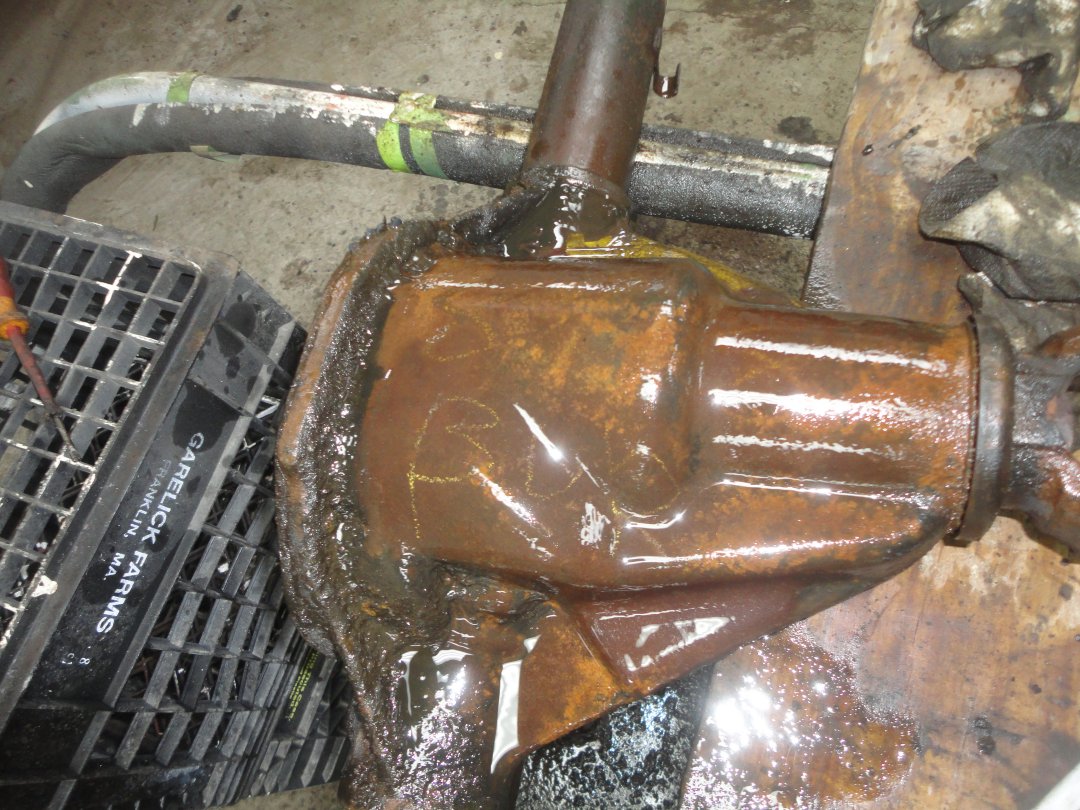
A yellow mark was found on one side of the pinion as seen in the forth picture.
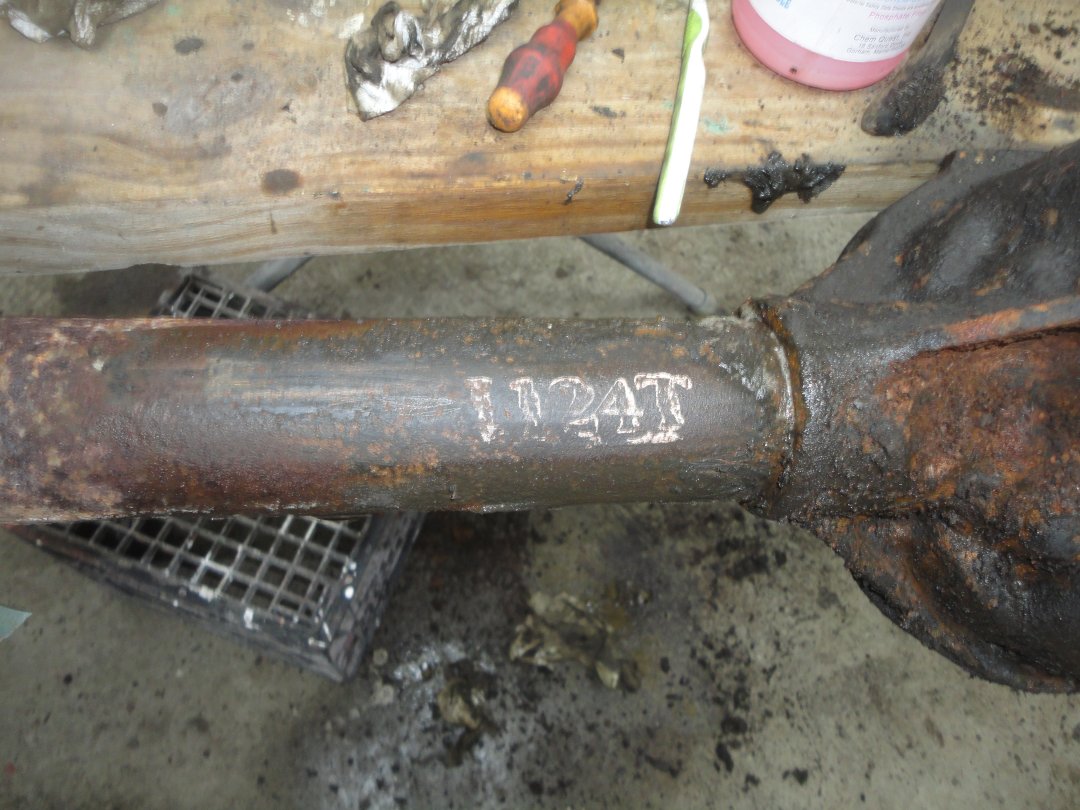
On the right axle tube was a "1124T" stamping in white. This is the build date for the axle assembly (November 24th). I am not sure what the "T" stands for. One funnying thing to note is the first "1" was upside down.
|
|
I'm sure more factory markings will be uncovered as I clean and sandblast the suspension components......
|