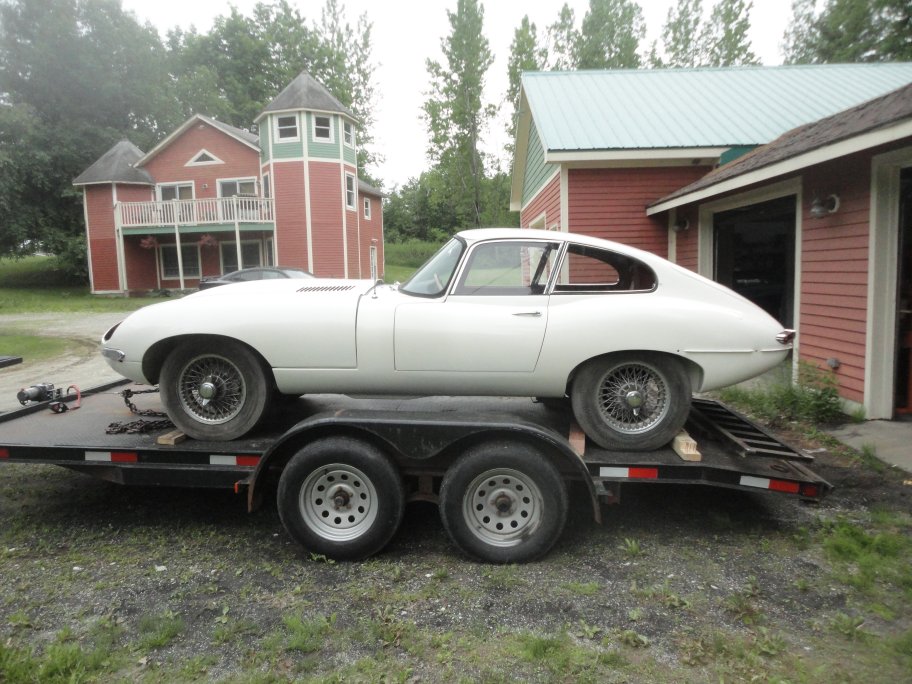
 1) Like many restorers I prefer to save the restoration of the drivetrain until the end of the project. There is no sense going through the trouble
of rebuilding the engine, only to have it lying around for a year or more. Especially when the money can be spent on the thousand other things that
need restoration/replacement. In my case I was down to getting the bumpers rechromed and was not quite ready to buy the tires and wheels.
From the beginning I planned to install the engine using the bottom-up method. I was planning on using a lift which is the least riskiest way to install
the engine and the rest of the car could be assembled without the engine. My only problem was that I didn't have a lift. Luckily my father had one next door, so all I had to
do was move everything. The car was winched on a trailer and trailered next door. This is the first time it has been outside since it was painted 2 1/2 years prior.
|
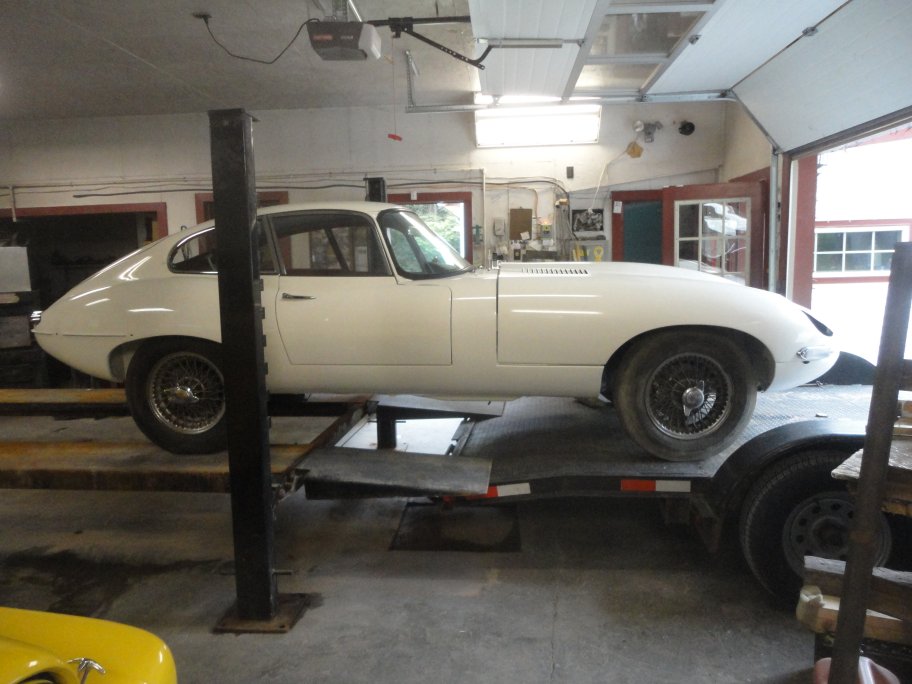 2) The lift was lowered onto the trailer and the car was simply pushed onto the lift. Couldn't be easlier.
|
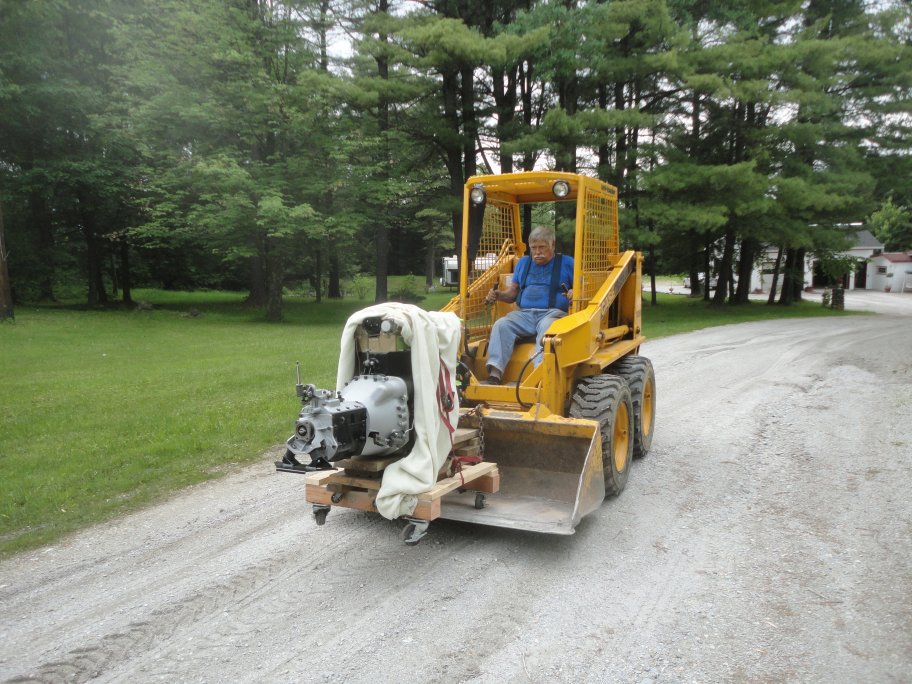 3) The engine was strapped down to a wooden dolley that I made specifically for installing the engine using a lift. It was then chained to the bucket of a skidsteer and was
slooooowly driven next door. I bet no one has ever done this with a Jaguar engine before. I'm sure there is a reason for that. This picture shows my father in a
rare internet appearance.
|
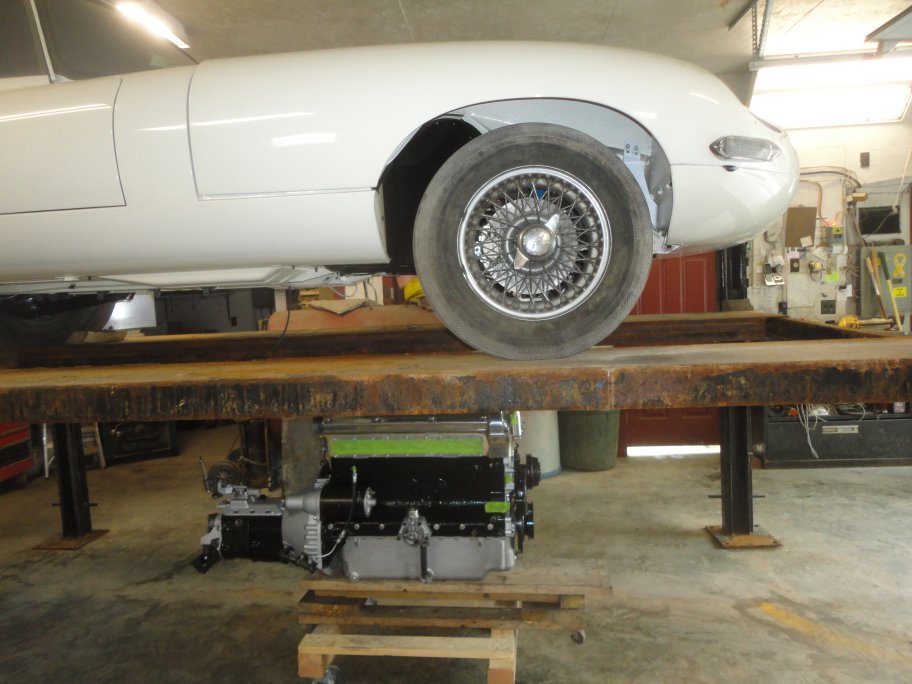 4) The engine was positioned in place below its home. Not very evident in this picture is the early style transmission mount. The early style mounts had two
rubber shocks absorbers that were bolted to the transmision. Not long after the production of this car, Jaguar changed to a single spring mounting scheme.
|
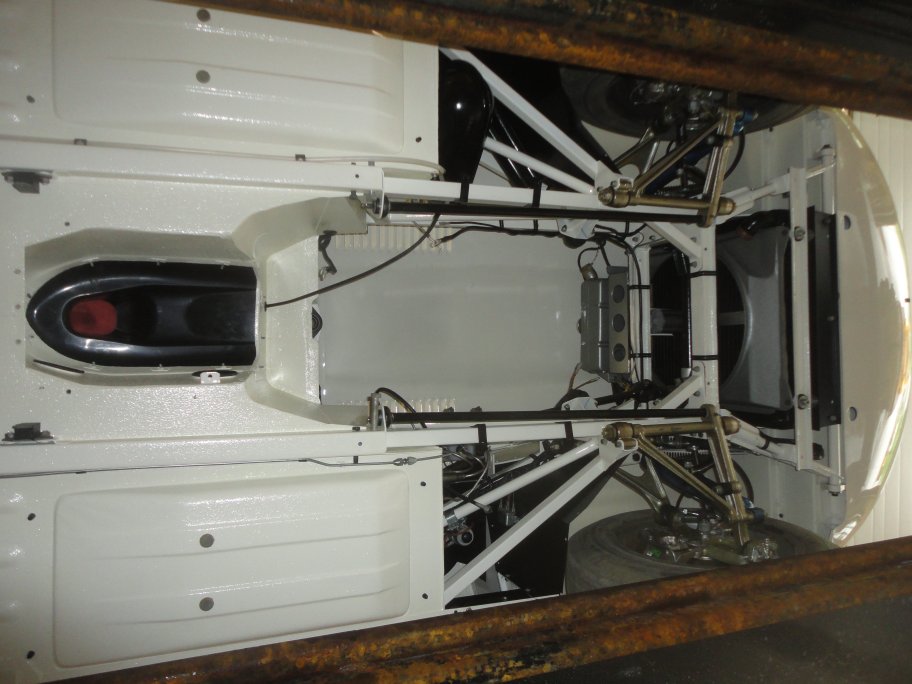 5) Here is its home. I like this picture. You just don't get to see this view without an engine. You may notice that the console cover is in place. It had
to be removed to connect the driveshaft (propeller shaft). In fact you have to either have to removed the engine or removed the IRS plus remove the seats and
console to remove the driveshaft from these cars. Not a plus of the design....
|
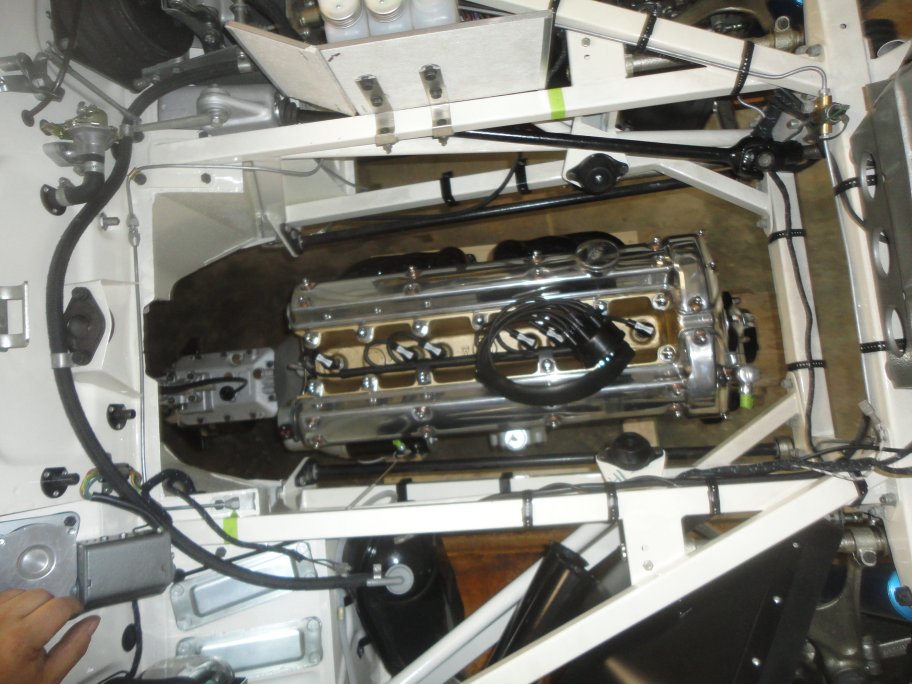 6) Here is the engine properly positioned and ready for the car to be lowered onto it. The process is simple. Lower the car a little. Shift the engine. Repeat.
For the engine installation, the starter was installed, the exhaust manifolds were installed, the distributor and coil were removed, the engine mount brackets were removed from the block and of
course the intake was not installed for this process.
|
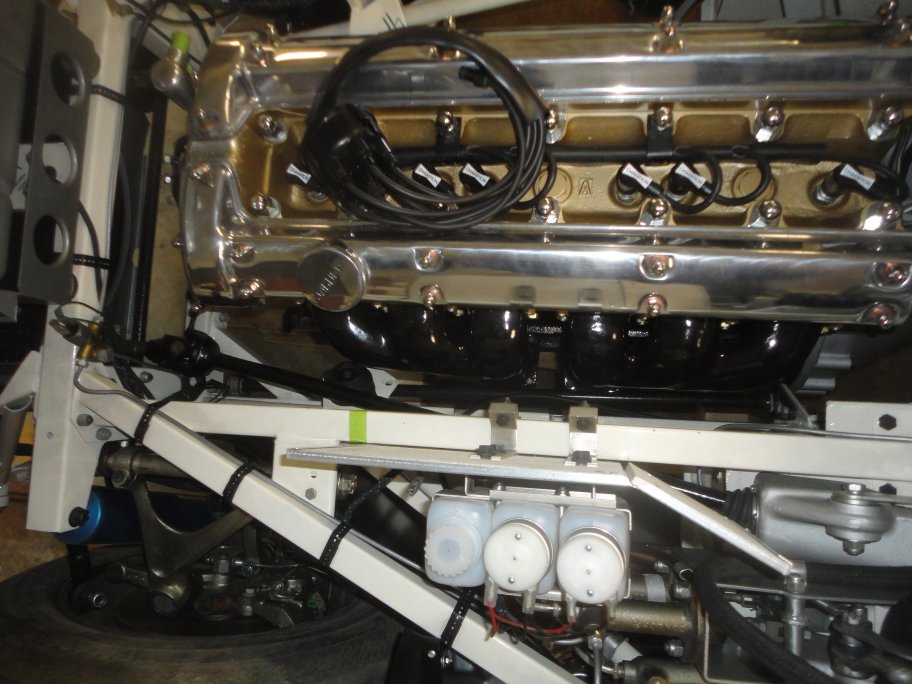 7) If I had to do it over again, I would have left the exhaust manifolds off simply because things were really tight at the left engine mount and left torsion bar.
I had to undo the left motor mount to get the front exhaust manifold to clear the mount which was installed on the engine frame.
|
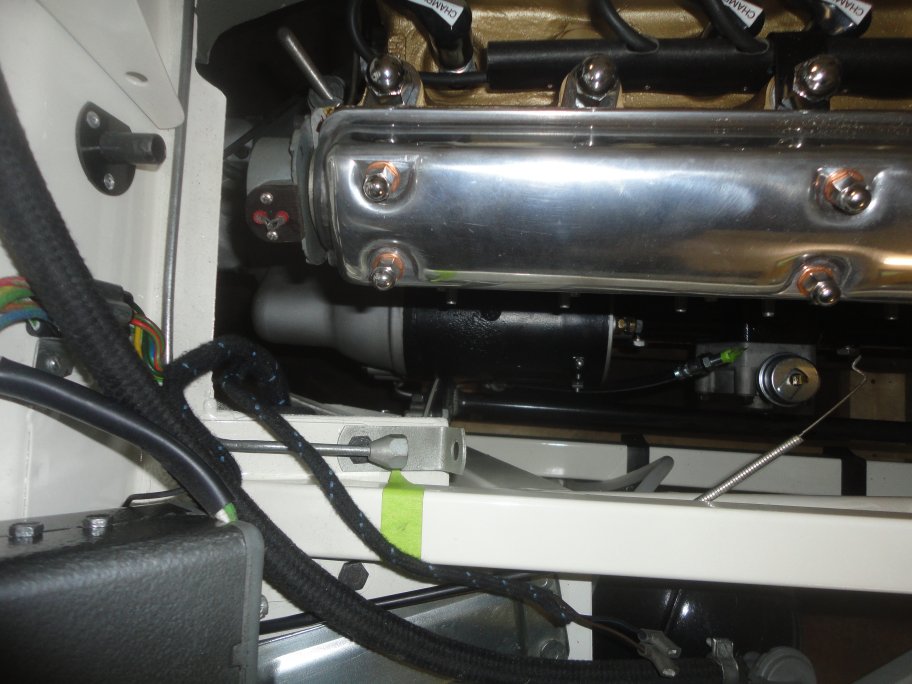 8) The right torsion bar mount at the rear of the engine frame came very close to the starter. It would have cleared by a lot if the exhaust manifolds weren't present, but
I was still able to clear the starter. Barely.
|
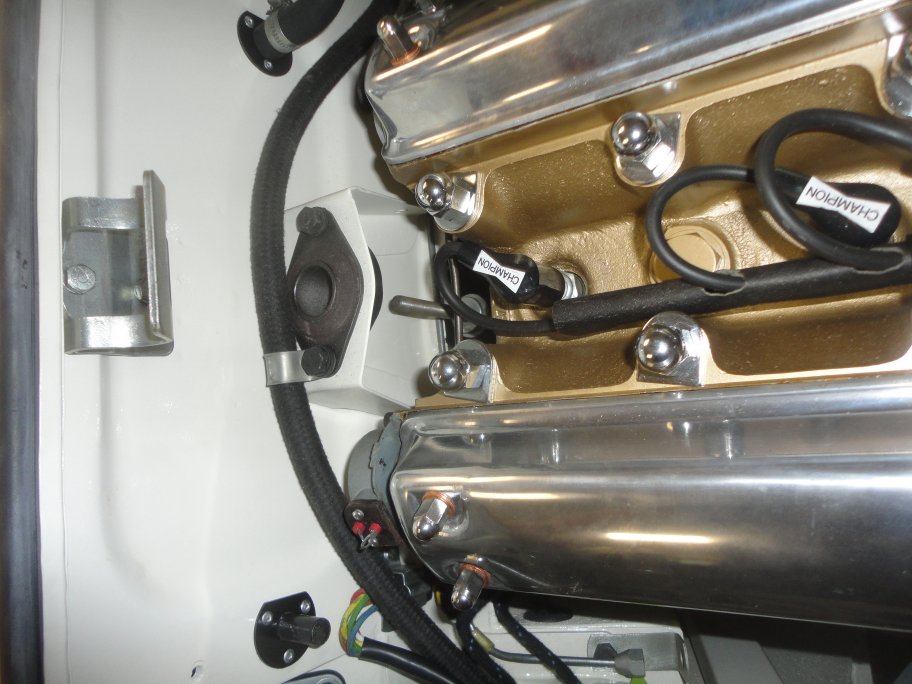 9) As the car is lowered, the mid engine mount needs to be aligned. It's not possible to do this after the fact. It is not recommended that the mid engine mount be bolted
at this time. There is a risk of the rubber mount pulling a part. Especially if the mount is a new repo part.
The dolley cart that I made to hold the engine had a small tilt to it, about an inch rise at the front. When the car was lowered,
the front motor mount locations are just high enough so that I could install the brackets without the transmision mount hitting the floorplan.
|
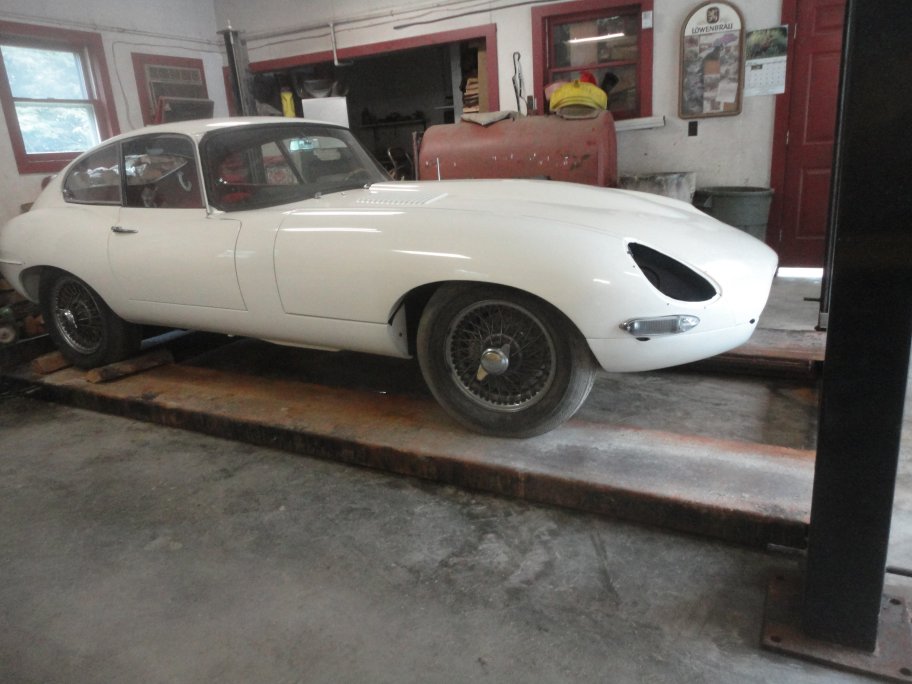 10) Here she is with the motor installed. This is the first time since February 2008 that its had an engine in it. It took me only 45 minutes to
install the engine from the time I wheeled the engine under the car to the point where all of the mounts were bolted. Absolutely no paint was
scraped or chipped during the install. Some people perform the bottom up install with the bonnet off and an engine hoist to raise the front. That method
seems risky to me since there is a good chance of hitting the firewall and chipping the paint at the lower front sections of the engine frames, simply
because the car is lowered in an arc instead of straight down.
|
|
|
|
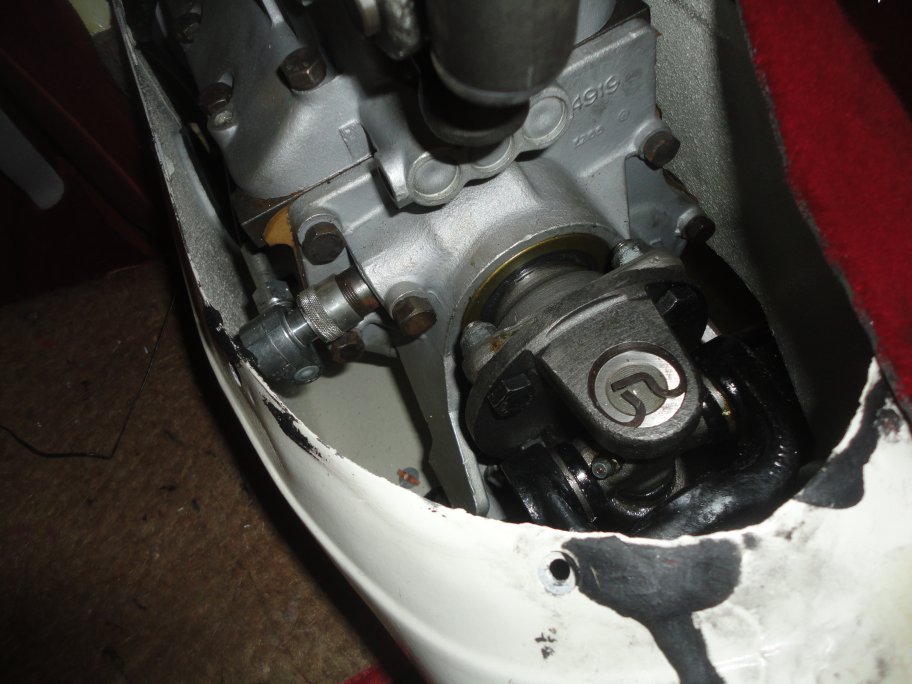 11) The driveshaft must be bolted from the inside of the car. This means the seats, console, radio console and transmission tunnel cover must be removed to reach the bolts. Since I
had installed the console several months earlier, I had to removed it. TIP: It is a lot easlier to remove the console if the emergency brake lever is unbolted from
the transmission tunnel (removed all bolts but the bottom right). The terrible thing about this design is you also have to remove the IRS if you need to change a
universal joint on the driveshaft.
The speedometer cable also gets attached to the transmission from inside the car. There isn't any slack in the speedometer cable to connect it when installing
the engine from below.
|
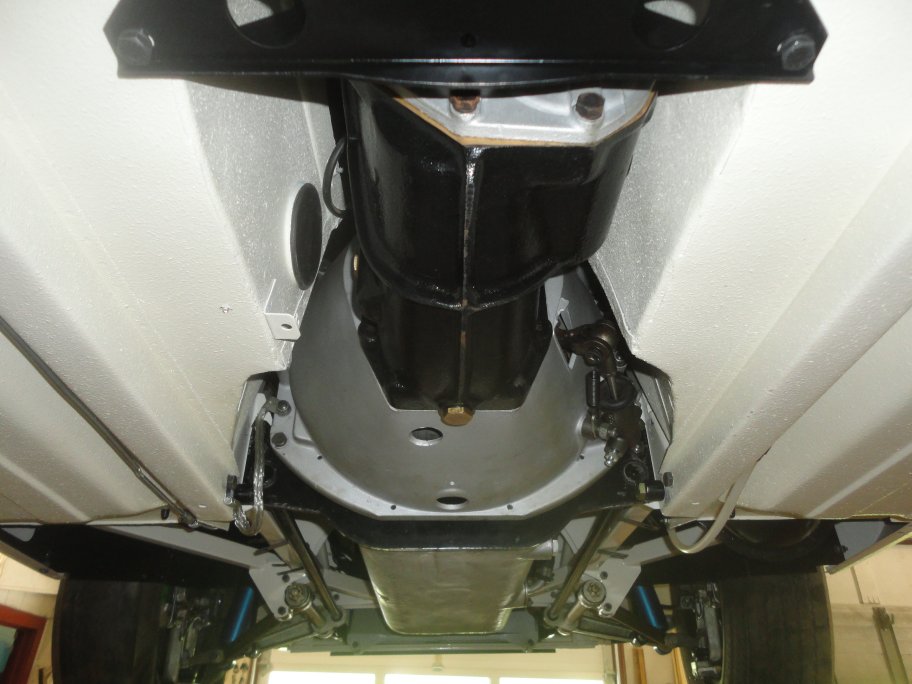 12) Now comes the real difficult part. The REACTION PLATE. This is a reinforcement that ties the torsion bars together. It is used to balance the torsion forces between
the torsion bars. The engine frames are not strong enough by themselves. The problem is, is that the reaction plate is installed after the engine goes in.
In this picture you can see it installed, just ahead of the transmission bellhousing.
|
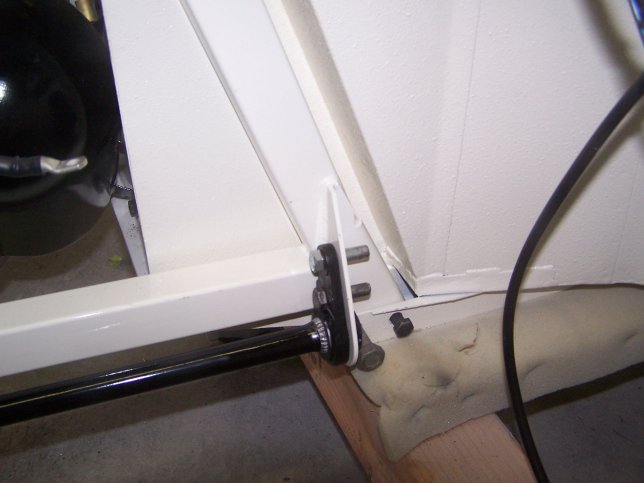 13) I opted to assemble my front suspension, including setting the torsion bars to their original setting long before the engine went in. In order to do this
I had to insert these bolt cut-offs, recommended by the service manual, into the toggles at the ends of the torsion bars. This meant that the torsion bars
were loaded when the engine went in. The only way to install the reation plate was to removed the load by dismanlting the front suspension. So I had to jack the front end
up, pop the upper ball joints, remove the lower shock bolts and unbolt the sway bar. (The tierod ends were already unbolted). Even with the loading removed it was still
a battle and I do mean "battle" to get the reaction plate in. A lot of it had to do with the fact that I had installed new floors and the channels where the engine
frames went were sloppier than the original ones. Meaning the engine frames could be moved inboard to outboard.
I used lineup punches and a lot of prying and cursing to get the bolts to go in. Sorry no pics. I was too busy trying to get it together to take pictures of the battle. It took me
3 hours to go through the entire process of pulling the frontend apart, installing the reaction plate and bolting the frontend back together.
|
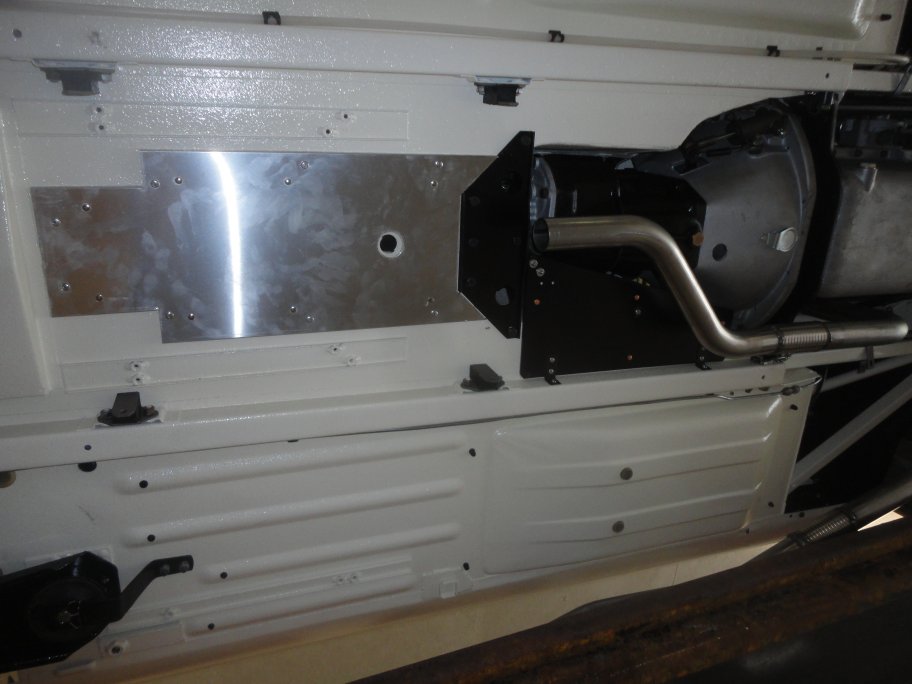 14) Before the exhaust went in, it was necessary to install the heat shields. I believe the original ones were made from asbestos. One of the heat shields (the silver one)
is rivetted to the floor with 3/16" rivets. The underseat harduras need to be removed before drilling the holes for the rivets. The repo heat shield did not come with
the large hole that can be seen in the picture. I had to add it to get the look of originality. I'm not sure what the hole is there for.
The second heatshield (black) bolts between the frame rail (2 self-tapping sheeetmetal screws) and the transmisison mounting bracket (single bolt) there is also supposed
to be a small hole in the middle for a sheetmetal screw to screw into a bracket with a J-clip in the transmission tunnel. Again I had to drill the hole in the heatshield
to get the original look and of course to install the original hardware. Since I had to modify both heatshields I assume that later models did not have the holes and therefore
the parts weren't reproduced with them.
|
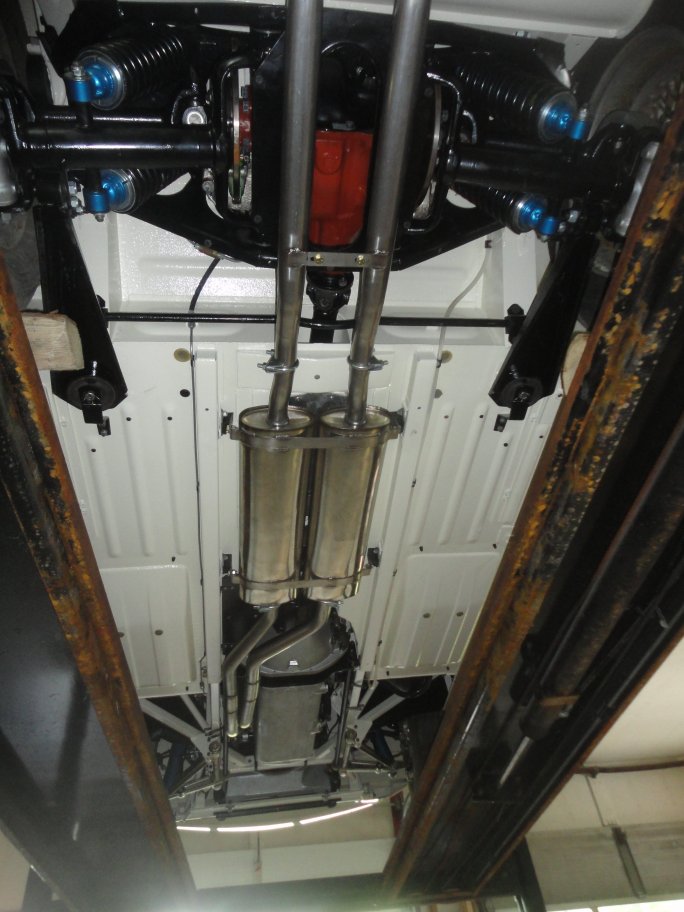 15) The exhaust system that I chose to install was a stainless steel system made by Bell in England. It installed pretty smoothly. The original system was missing when I got the
car so I did not have a single piece of original hardware to install it. I bought all #8 fine threaded hardware to install it. The #8 comes with a yellow chromate coating which
will give it a little extra life before things start to corode.
The exhaust was installed using the standard clamps that came with system. At some point I'll switch over to the correct original style clamps when I can get my hands on them.
|
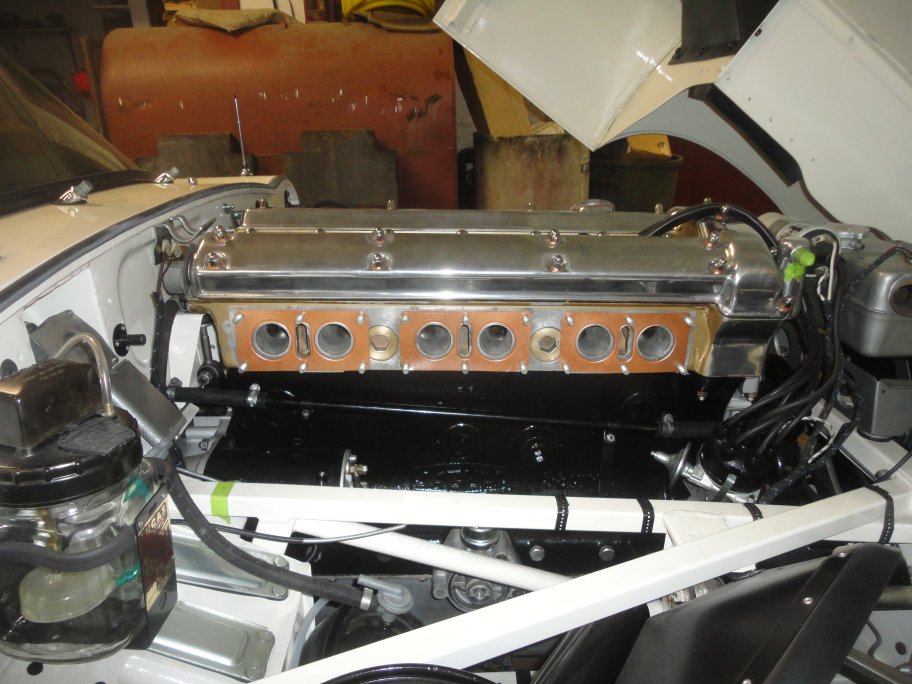 16) With the undercarriage work done, I installed the intake. Being a little untrusting of the metal type gaskets I first coated both sides with permatex high temp copper gasket
sealer.
Before the carbs went on, the heater pipe that goes between the rear of the water pump and the firewall needed to be installed. The heater pipe has 2 hangers on it that share
mounting studs with the intake. So the heater pipe must be installed at this point.
|
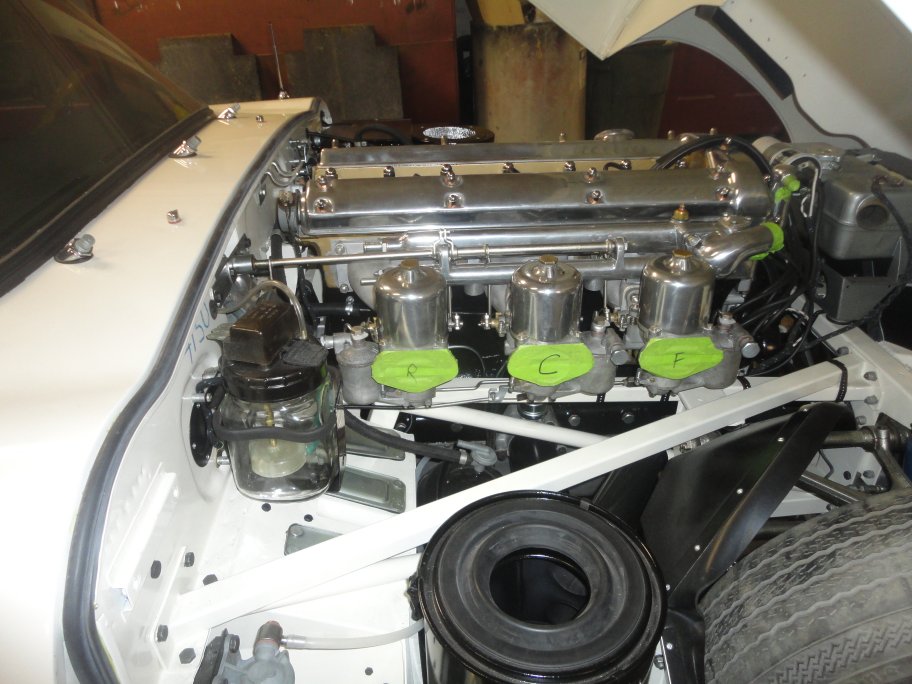 17) The carbs went in without drama. Though not visible in this picture, each carb has an overflow pipe that are joined together in a bracket that is bolted to the oil filter housing. (I did not
know this at first until I recently saw a picture on the web. Over 5 years of work and studying early E-Types and I am still learning things!) My pipes had been cut back by a previous owner. At least I still had the original bracket and the overflow pipes are still being produced.
|
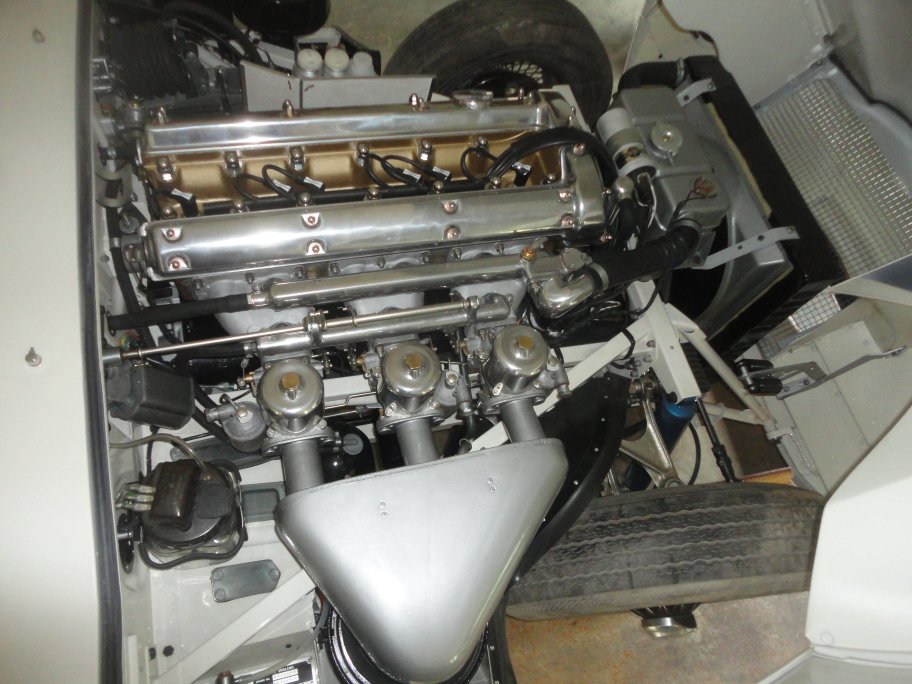 18) Here is the virtually completed engine compartment. The only thing missing in this photo is the hose clamps for the upper heater hose, the hose clamps for the timing cover vent hose,
the metal fuel line to the carbs and the long accelerator linkage rod. All of those items are just waiting for me to plate them.
She's almost ready to start. All I need to do is install the fuel tank. But the left rear bumper has to go in first --- because it's an early E-type. grrrr.
|
|