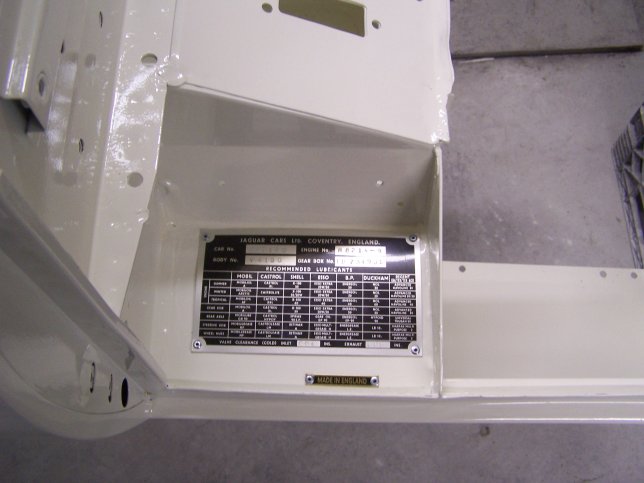
 1) Assembly begins with the installation of the Data Plate and "Made in England" tag. They are
installed using 1/8" aluminum rivetes. Since the inner rocker panels were replaced, new holes had
to be drilled in order to rivet them in place. This job is easier to perform prior to installing
the engine frames.
1) Assembly begins with the installation of the Data Plate and "Made in England" tag. They are
installed using 1/8" aluminum rivetes. Since the inner rocker panels were replaced, new holes had
to be drilled in order to rivet them in place. This job is easier to perform prior to installing
the engine frames.The Data Plate in this picture is a reproduction that was purchased pre-stamped from Classic Jaguar. The price was $25 for the data plate and an additional $25 for the stamping. A picture of the original data plate is required. |
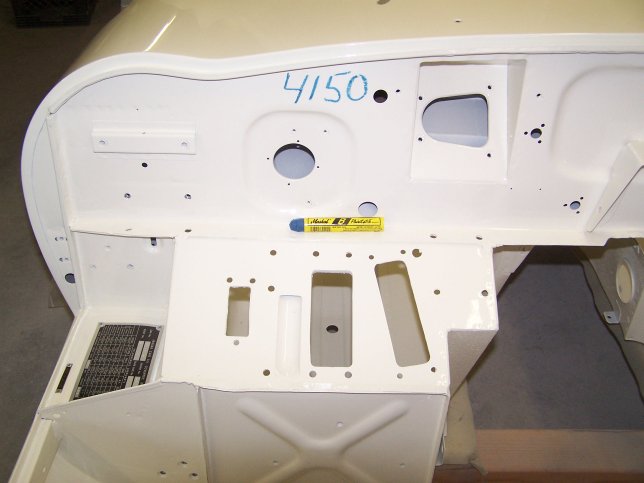 2) The body number (from the Data Plate) was written on the bulkead (firewall) during manufacture to help
the production worker quickly identify the car. This was neccessary since many components where built seperately and where
labeled with the body number of the car that the assembly was intended to be installed on. During dissassembly of this car
the body number was found written on the right engine frame, the picture frame, the rear hatch, the instrument cluster and
on most of the interior trim pieces.
2) The body number (from the Data Plate) was written on the bulkead (firewall) during manufacture to help
the production worker quickly identify the car. This was neccessary since many components where built seperately and where
labeled with the body number of the car that the assembly was intended to be installed on. During dissassembly of this car
the body number was found written on the right engine frame, the picture frame, the rear hatch, the instrument cluster and
on most of the interior trim pieces.On this particular car the body number was written using a blue paint stick on many parts that were painted body color. Yellow and White Markal Paint sticks (type B) are easy to come by in many part stores, but the blue one (part number 80225) had to be ordered. When using Markal Paintstiks, you sharpen the tip with a knife and write the body number just like using a crayon. The great thing about the Markal Paintstiks is that if you make a mistake you can wipe it off with a paper towel and try again. |
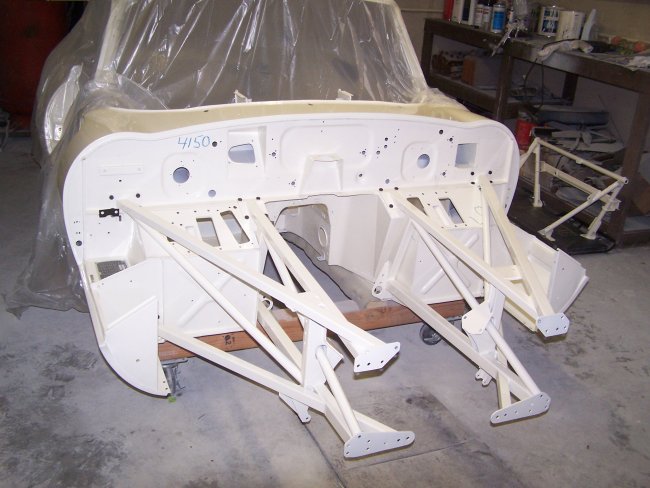
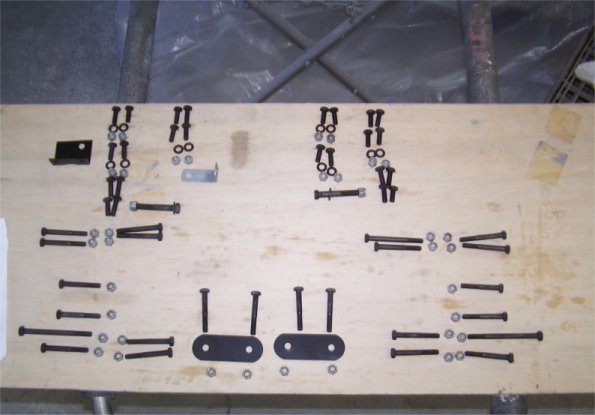 3) Before assembling the engine frames, picture frame and bonnet support the best thing to do is to layout and identify the hardware
required to put everything together. The bolts have many different lengths and are used not only to hold the frames together, but
are also used for mounting of other components like hoses, brake lines and wiring.
3) Before assembling the engine frames, picture frame and bonnet support the best thing to do is to layout and identify the hardware
required to put everything together. The bolts have many different lengths and are used not only to hold the frames together, but
are also used for mounting of other components like hoses, brake lines and wiring. In the top left corner of this picture you can see the fuel filter mounting bracket and the clutch hose mounting bracket. It is easier to install these brackets now then it is to later on. Some items like the clutch line hold downs, vacuum tank hose hold down and wiring loom hold downs are attached with the engine frame hardware. It's better to idenifty the which bolts are used and install these items later, since they will get in the way of the engine frame assembly. |
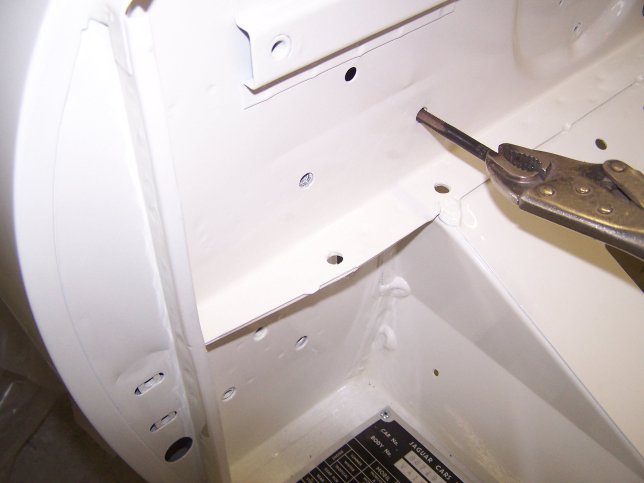 4) A 5/16-24 tap should be used to clean out all of the threads on the bulkhead for the engine frame mounting locations. This will
help the assembly go easier and lessen the chances of cross threading the bolts.
4) A 5/16-24 tap should be used to clean out all of the threads on the bulkhead for the engine frame mounting locations. This will
help the assembly go easier and lessen the chances of cross threading the bolts. |
 5) The engine frames need to be installed loosely so that everything can be fitted. All of the bulk head bolts should be installed first. It should not be suprising to find
that the holes at the sills do not light up very well. A line-up punch should be all you need to pull the frames into place. Just be careful not
to damage the threads with the punch.
5) The engine frames need to be installed loosely so that everything can be fitted. All of the bulk head bolts should be installed first. It should not be suprising to find
that the holes at the sills do not light up very well. A line-up punch should be all you need to pull the frames into place. Just be careful not
to damage the threads with the punch. |
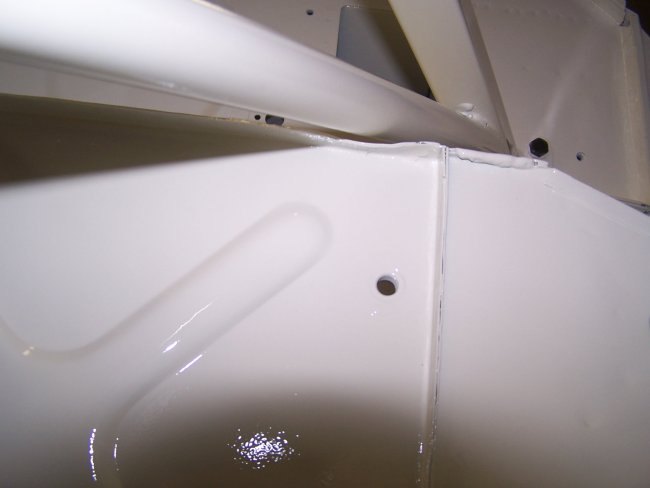 6) The top of both lower bulkhead panels are normally adjusted (bent) in this location prior to painting so that the frame rails do not rub against the welded seem.
If you replaced the bulkhead panel and didn't make the adjustment or you made the mistake of straightening the bend, the engine frames will hit the seam and will
set too high (not to mention will scrape your nice paint job).
6) The top of both lower bulkhead panels are normally adjusted (bent) in this location prior to painting so that the frame rails do not rub against the welded seem.
If you replaced the bulkhead panel and didn't make the adjustment or you made the mistake of straightening the bend, the engine frames will hit the seam and will
set too high (not to mention will scrape your nice paint job). |
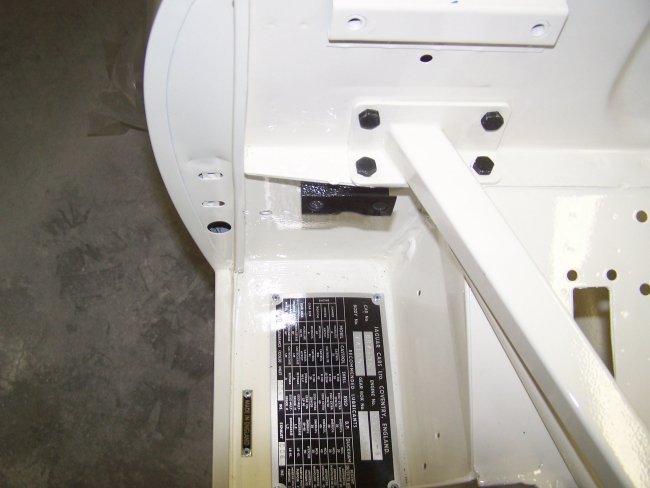 7) The fuel filter mouting bracket is held in place with only one bolt. The bracket was not always black on all cars. There is usually a flat washer on the
underside, which is the same as the ones used on the inside of the bulkhead for attaching the engine frames.
7) The fuel filter mouting bracket is held in place with only one bolt. The bracket was not always black on all cars. There is usually a flat washer on the
underside, which is the same as the ones used on the inside of the bulkhead for attaching the engine frames. |
 8) The bolts that attach the engine frames to the lower channels in the floor should just be inserted in place. They need to be removed to install the reaction
plate after the engine is installed and the torsion bars are adjusted.
8) The bolts that attach the engine frames to the lower channels in the floor should just be inserted in place. They need to be removed to install the reaction
plate after the engine is installed and the torsion bars are adjusted.
|