|
This section describes how to replace a LH lower trunk extension that has the hole for the backup light wires in the wrong location.
|
|
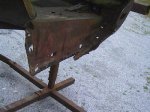
 Here is the original trunk lower dropoff before any work was done to it. It was almost salvageable.
|
|
 Here is the new dropoff welded in place. From the earlier pictures you can see that the rear hole, which is were the reverse light
wires are routed through, is in the wrong location. The hole will needed to be moved to achieve the correct look. The first thing to
do is remove the primer from around the hole.
|
|
 A new circular patch is created and is clamped in place. It should be note that the patch is a little smaller than the hole that
it is being used to fill. A gap of about 0.025" - 0.030" should be visible around the patch. This gap will filled with the weld.
|
|
 The patch is welded in 4 or 5 places around the perimeter and then the clamp is removed.
|
|
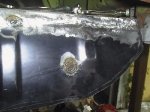
 Then the remaining gap is filled with weld. Here is the inside after welding has been completed.
|
|
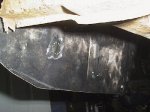
 The weld is then ground flush on both sides. If light can be seen through the gap in any location the weld should be touched up. Here is a view
of the back after the weld has need ground down. All that is needed is a skim coat of filler to make the surface smooth before priming.
|
|
 With that done its just a matter of drilling the new hole using the original dropoff to used as a guide to put the hole in the correct location.
|
 Here is the original trunk lower dropoff before any work was done to it. It was almost salvageable.
 Here is the new dropoff welded in place. From the earlier pictures you can see that the rear hole, which is were the reverse light
wires are routed through, is in the wrong location. The hole will needed to be moved to achieve the correct look. The first thing to
do is remove the primer from around the hole.
 A new circular patch is created and is clamped in place. It should be note that the patch is a little smaller than the hole that
it is being used to fill. A gap of about 0.025" - 0.030" should be visible around the patch. This gap will filled with the weld.
 The patch is welded in 4 or 5 places around the perimeter and then the clamp is removed.
 Then the remaining gap is filled with weld. Here is the inside after welding has been completed.
 The weld is then ground flush on both sides. If light can be seen through the gap in any location the weld should be touched up. Here is a view
of the back after the weld has need ground down. All that is needed is a skim coat of filler to make the surface smooth before priming.
 With that done its just a matter of drilling the new hole using the original dropoff to used as a guide to put the hole in the correct location.